Hoppy Birthday Card - Step by Step Tutorial
0
Posted on 17th April 2016 by Angela Dodson
Filed under All Papercraft Tutorials, Card Making Ideas, Projects And Cards By Occasion

Hello it’s Angela here again to share a step by step Birthday card make with you.

This week I’m using a stamp & matching die set with spring coloured papermilldirect cardstocks to create a fun ‘Hoppy Birthday’ card.

Start by stamping a Lily Pad onto Papermilldirect Apple Green card using black Memento ink. Then stamp the frog image onto PMD White Hammered card.

Colour the frog using a selection of First Edition marker pens, blending colours and adding some extra details with a white gel pen.
Carefully line up the matching die over the Lily Pad and Frog and cut out using your die cutter machine. (I find it easier to first cut a mask from scrap card and position this over the image so it is lined up, attach with washi tape and then secure die in place with washi tape to prevent it slipping).

Cut PMD White Hammered card approx. 4” x 5 ¼” and stamp ‘Hoppy’ in black ink towards the top left. Stamp ‘birthday’ onto a strip of White Hammered card approx. ¾” wide.
Mat ‘Hoppy’ panel onto slightly larger piece of PMD Daffodil Yellow card using double sided tape. Add 2 strips of washi tape across lower section and secure ends on the back. (I used a gold & white dotty pattern tape).
Score & fold PMD White Hammered card and trim down to create a 4 ½” x 5 ¾”card blank with fold across the top.
Stamp the flies using black ink to front panel then mount the panel onto the card base using double sided tape. Cut ‘birthday’ strip into a fishtail end and adhere onto washi tape border. Add the Lily Pad using 3D foam pads to give height.
Add the frog to card front using 3D foam pads so he looks to be hopping off to catch the flies. Add a little pale colour to flies using marker pens and add extra details using a black fine liner pen. Add 3 small green adhesive pearls to ‘birthday’ wording to complete the design.
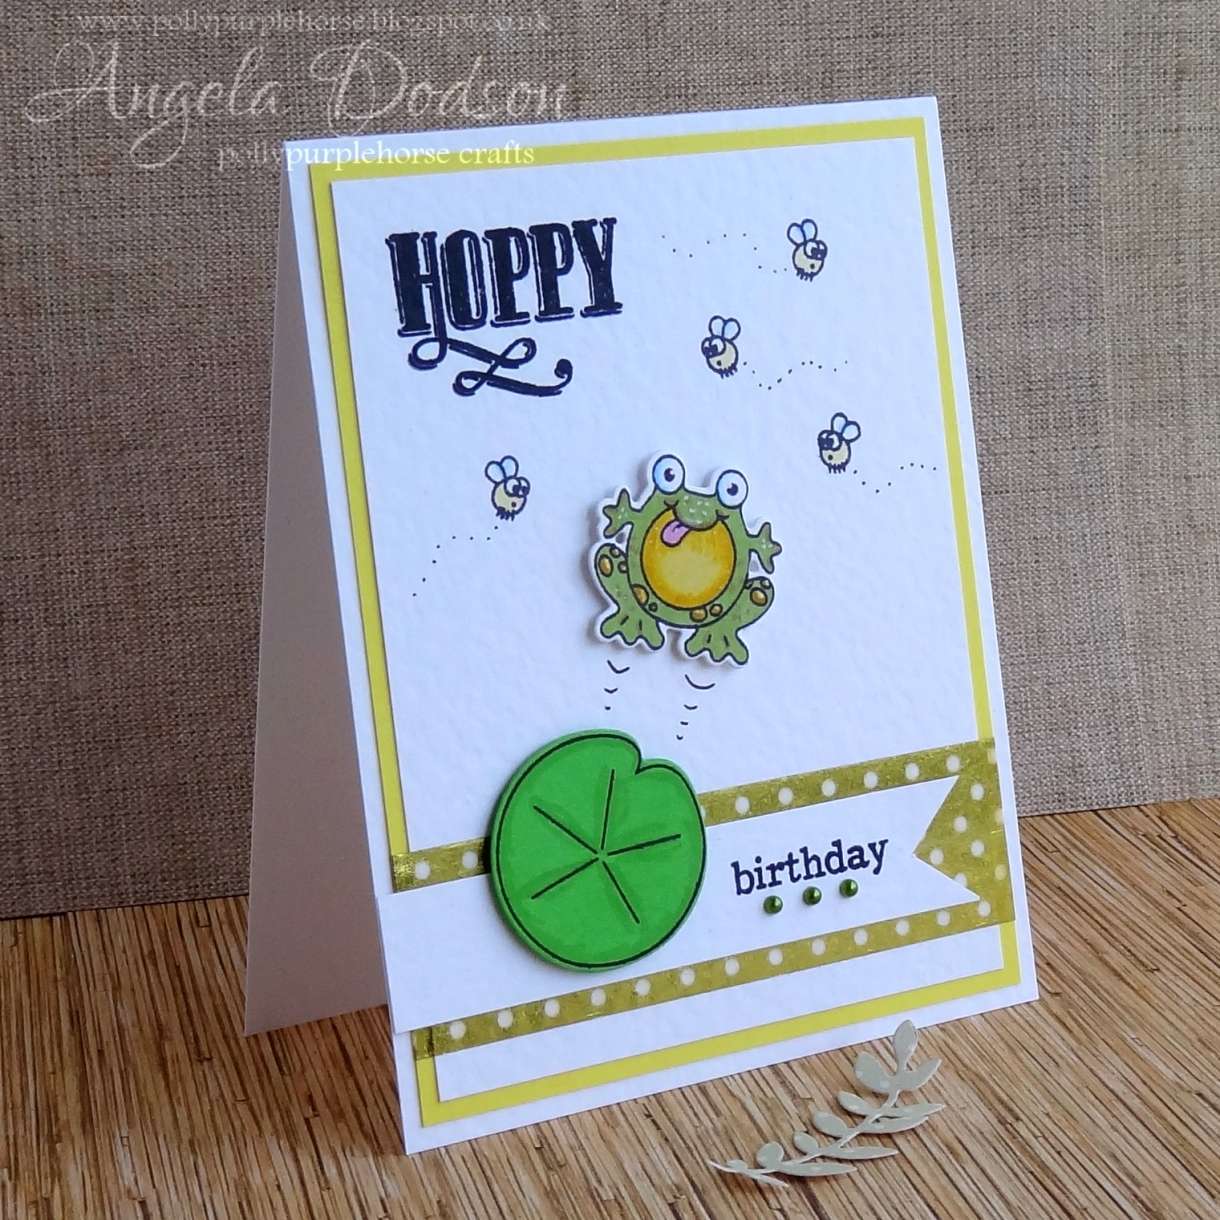
I had fun making this little card and by stamping the lily pad onto an already coloured card stock it cut down on colouring time, although I did add a little shading using a green marker pen. The frog is an easy design to colour. I used marker colours of ‘Pistachio’ green, ‘Primrose’ and ‘Warm Yellow’ for the body. The tongue is ‘Sorbet’ pink and a little ‘baby blue’ to the eyes of the frog and wings of the flies.
I really like this stamp set as it allows you to create your own little scenes along with some alternative sentiments. The matching die set is nice to have but you could also cut out the shapes using scissors if you prefer.
Materials Used:
White Hammered Card – Papermilldirect
Daffodil Yellow Card – Papermilldirect
Apple Green Card – Papermilldirect
Hoppy Birthday II – stamp set – Clearly Besotted
Hoppy Birthday – die set – Clearly Besotted
Alcohol Craft Markers – First Edition
Tuxedo Black ink pad – Memento
Gold washi tape, green adhesive pearls
White Gel Pen, Black Fine Liner pen
Double Sided Tape, 3D Foam Pads
Lots more ideas for using Papermilldirect cardstocks can be found over on my Blog: Pollypurplehorse is Crafty


Nobody has commented yet
Be the first to comment on this article by using the form below.