Easter Bunny Box
0
Posted on 31st March 2026 by Papermill Direct
Filed under

Spring is in the air, and what better way to celebrate Easter than by crafting a box adorned with a bunny cutout? This project is not just fun and creative; it’s also a fantastic way to personalize your gifts for friends and family. Whether you choose to fill it with delectable chocolates, sweet candies, or even a little cash to brighten someone’s day,

We've chosen Lakes Craft Card 240gsm in soft pastel colours for those cheerful spring vibes, but you can use whatever colours you think would suit these boxes best! That's the best part about craft, you can personalise it as you go!
I saw this image by Starline on Freepik and thought the concept would look brilliant on a box filled with goodies!
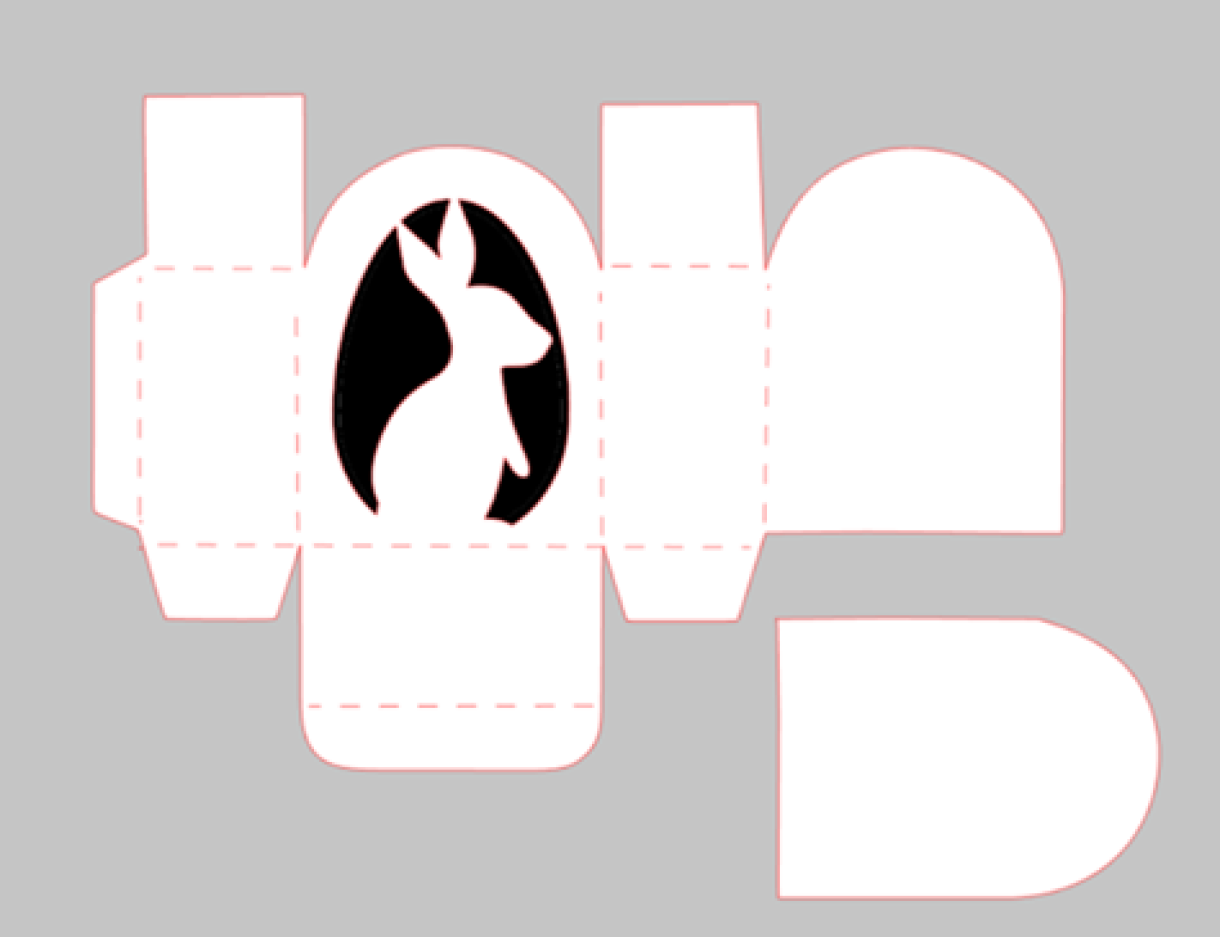
I edited the file using Adobe Illustrator to flatten it and remove the clouds. I also enlarged the bunny so that it would not be too flimsy when cut into card.
Image by starline

I then used a box template that I had previously used with my Ghosts & Spiders Boxes and added the edited image so that it sat nicely on my box template.
The original template was made by RisaRocksit.
I also created a backing piece to go behind the bunny box.
In this tutorial, we will leave the backing piece blank, but if you wanted to emboss the backing card or add a touch of glitter/ shimmer, I think this might really elevate the box.
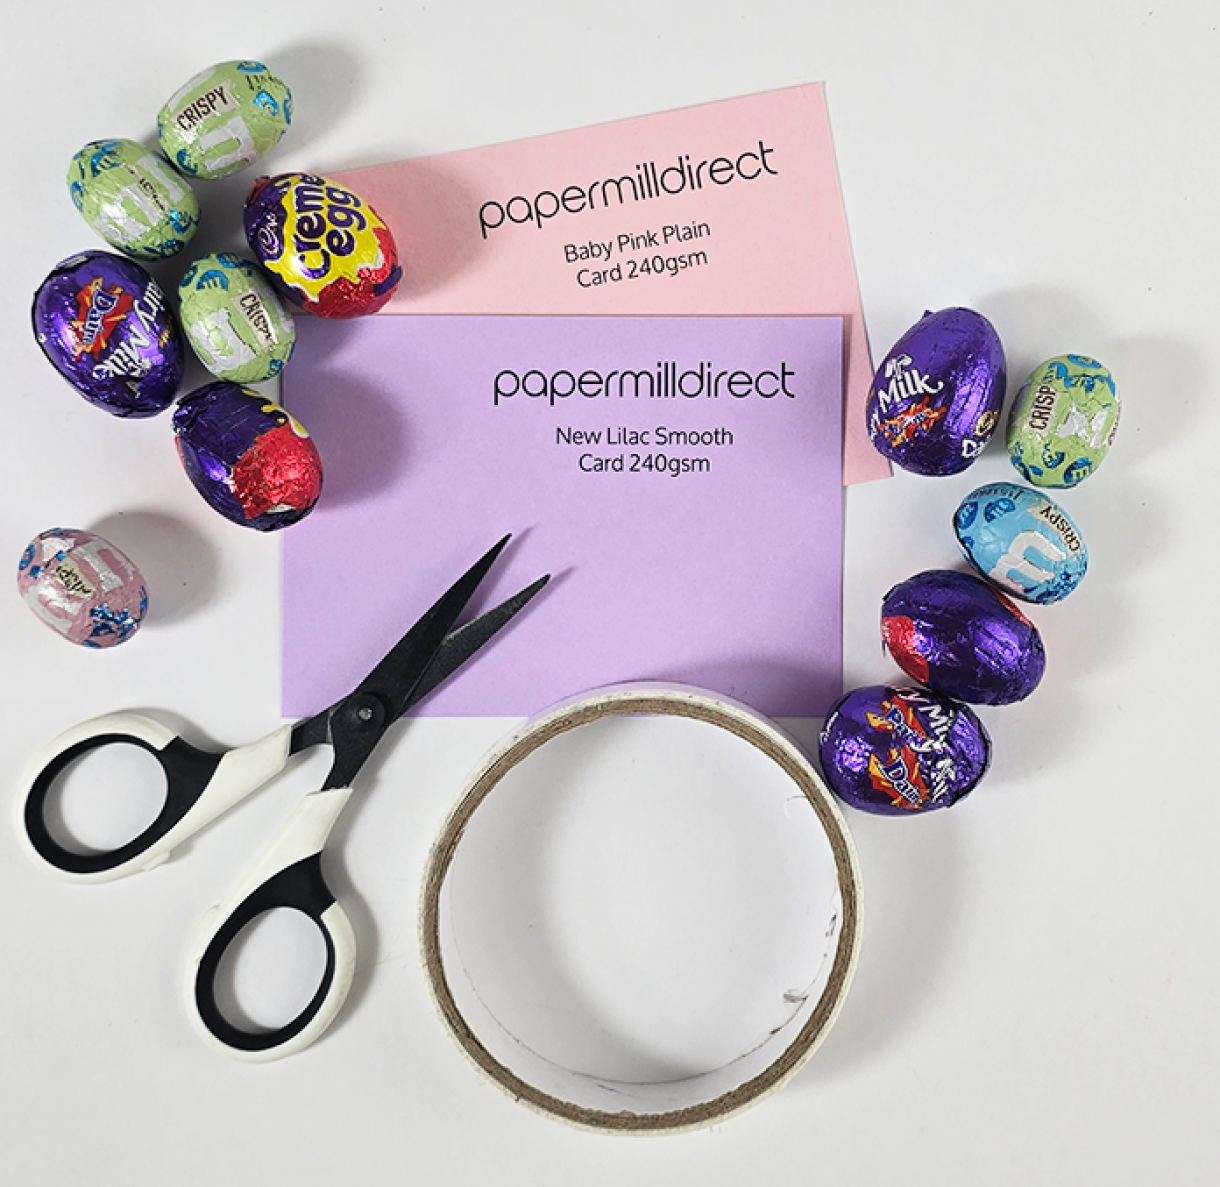
What you'll need to make x2 Bunny Boxes:
x2 A4 Sheets of Card
Adhesive - Double Sided Tape / Glue,
A Cutting Machine - If you wanted, you could print out the template above and then cut out the box template. You would need a cutting knife and a steady hand to cut out the bunny.
What we used:
- New Lilac Plain Card 240gsm - 1 A4 Sheet
- Baby Pink Plain Card 240gsm - 1 A4 Sheet
- Double-Sided Tape
- Cutting Machine (I have a Silhouette Cameo 4)
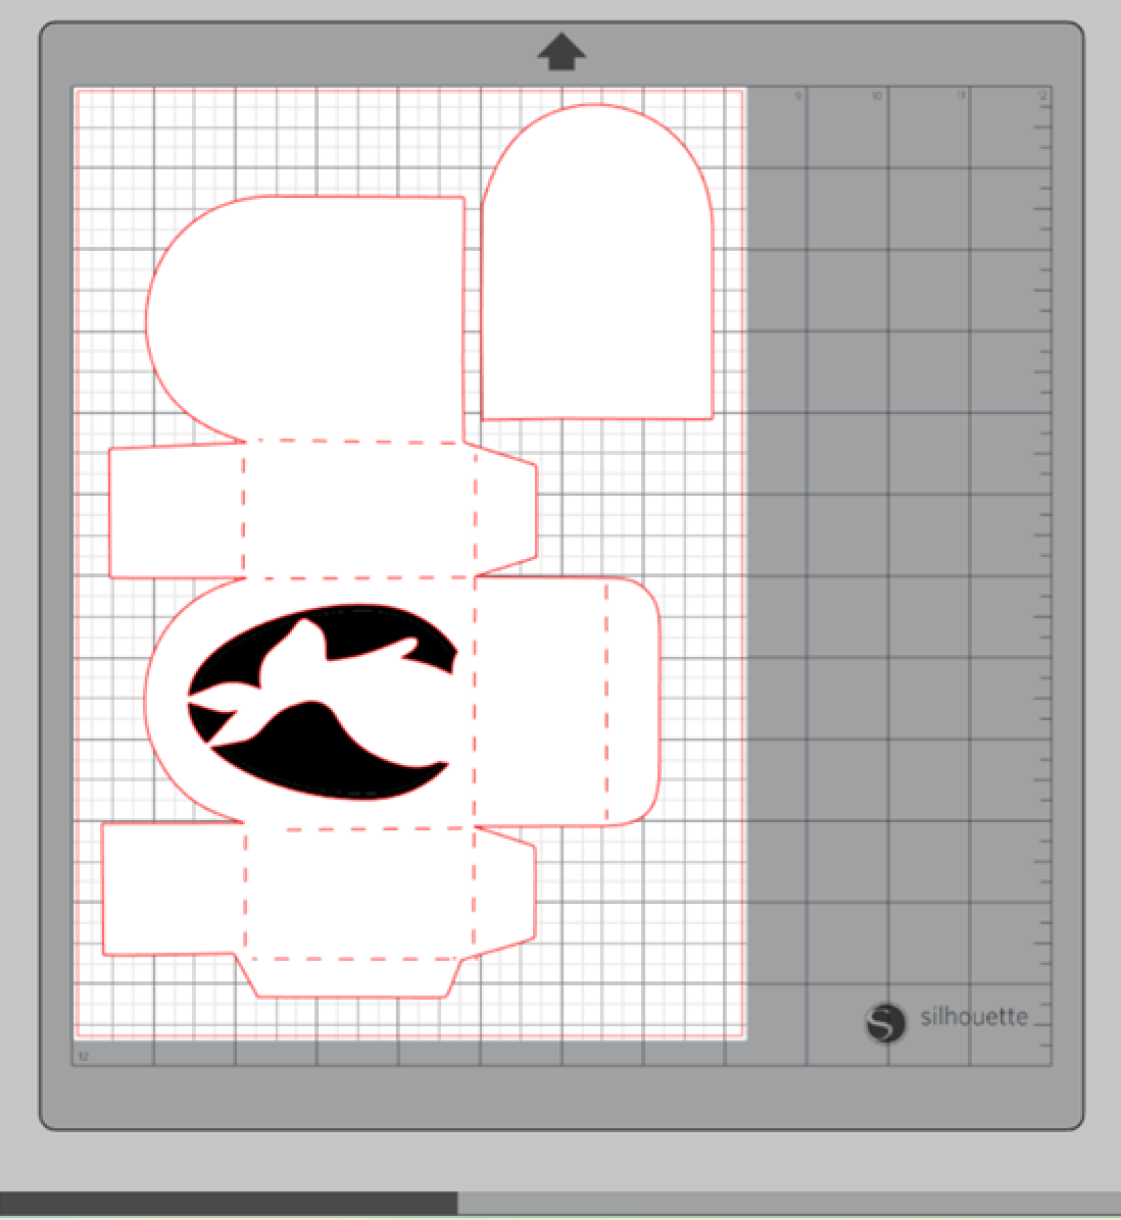
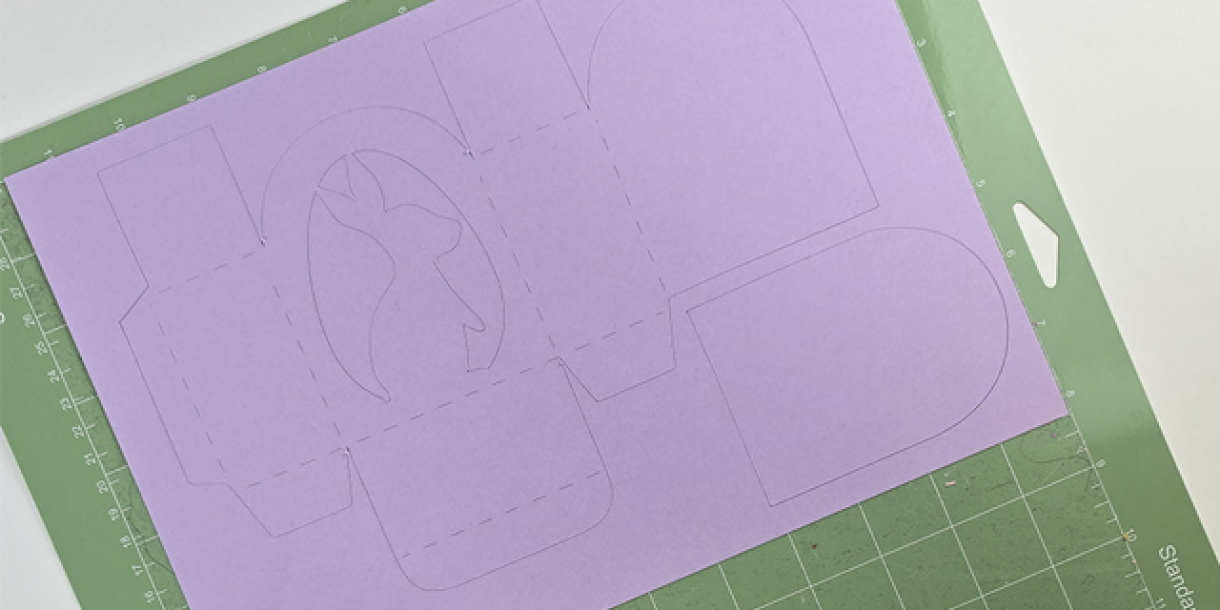
I set up my cutting file in Silhouette Studio.
Because I already had the box file and had edited the bunny file in Adobe, all I needed to do was make sure the bunny file was placed centrally on top of one of the large panels of the box.
If you're using a Silhouette Cameo, then you can save the image above and use the trace tool to create a cutting file for your box. I believe Cricut has a similar feature, but I am not as familiar with that software.
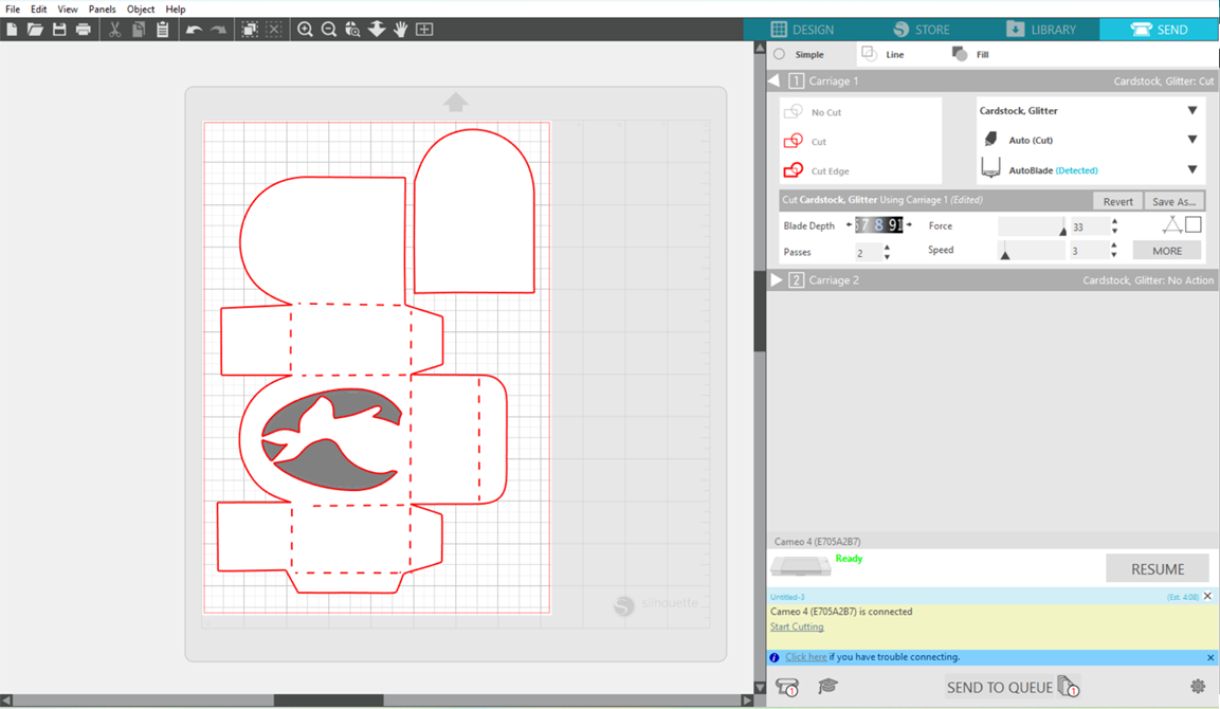
The setting you use to cut the card will depend on your machine, the card you use, and the knife you are using with your machine.
Below are the settings I have used with my machine but we always recommend doing a test cut beforehand. We offer x10 small samples, so if you want to purchase samples of card and test them with your machine before committing to a larger order, we can help with that too!
The settings I used to cut the 240gsm card were:
Blade Depth - 8
Force - 33
Passes - 2
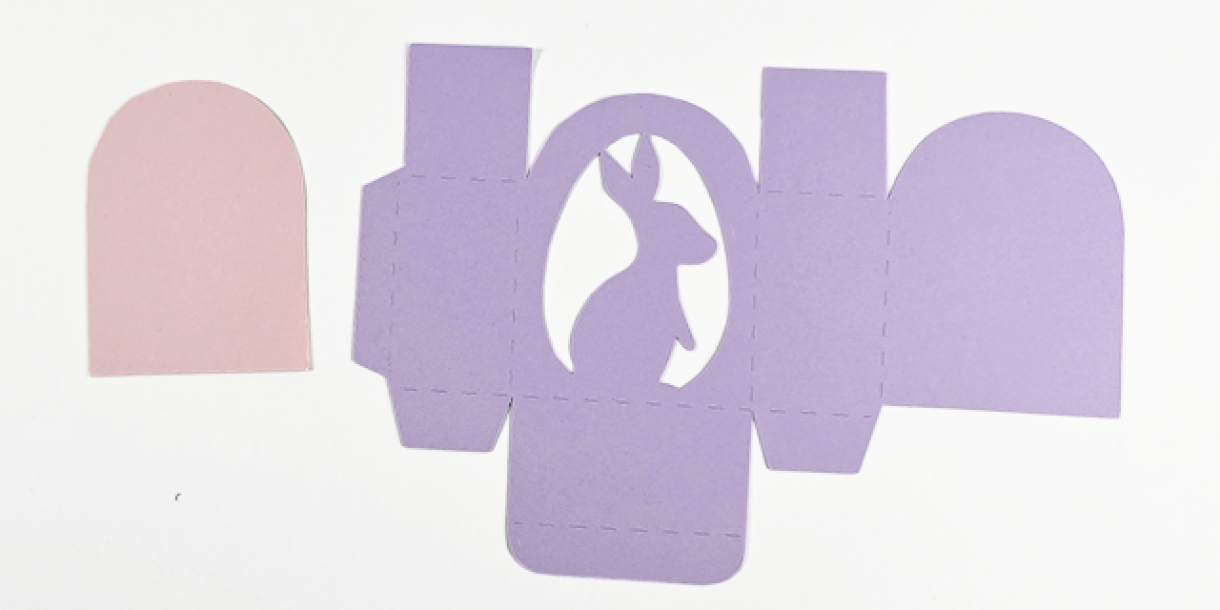
Speed - 3
Once I had cut the purple box, I then cut a second box in pink. If you're only creating one box, then you could use an A6 sheet to cut the backing card in a different colour.
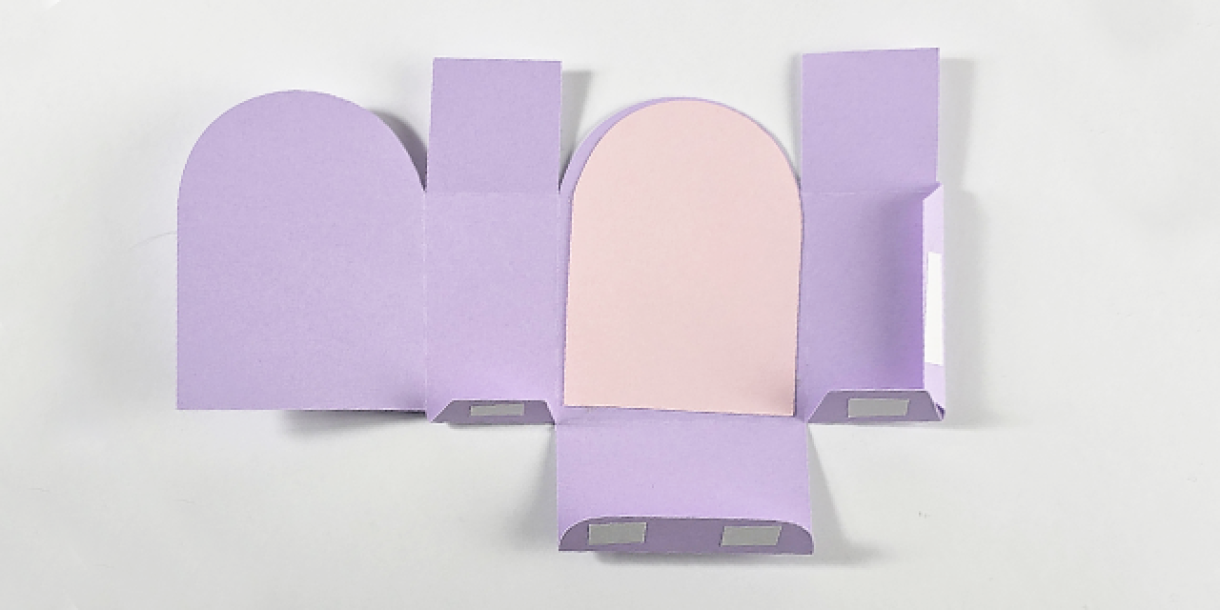
I added double-sided tape to the back of the bunny box. I then added the backing piece behind the bunny.
If you're planning on decorating the backing piece, then you will need to do this before adding the backing piece to the box.

Once the backing piece was attached, I creased the box and added tape to the wings.
I then built the box and put some chocolate eggs inside it, ready for Easter Sunday!
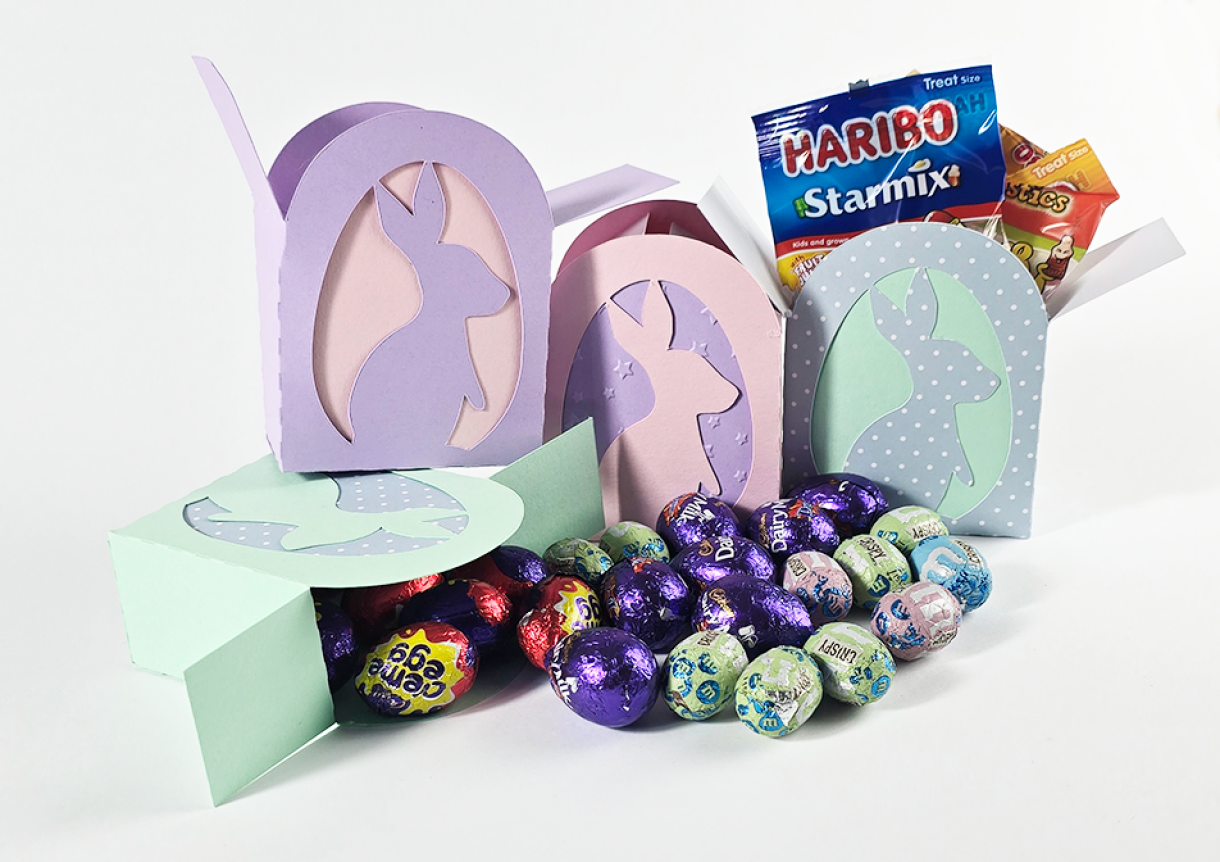
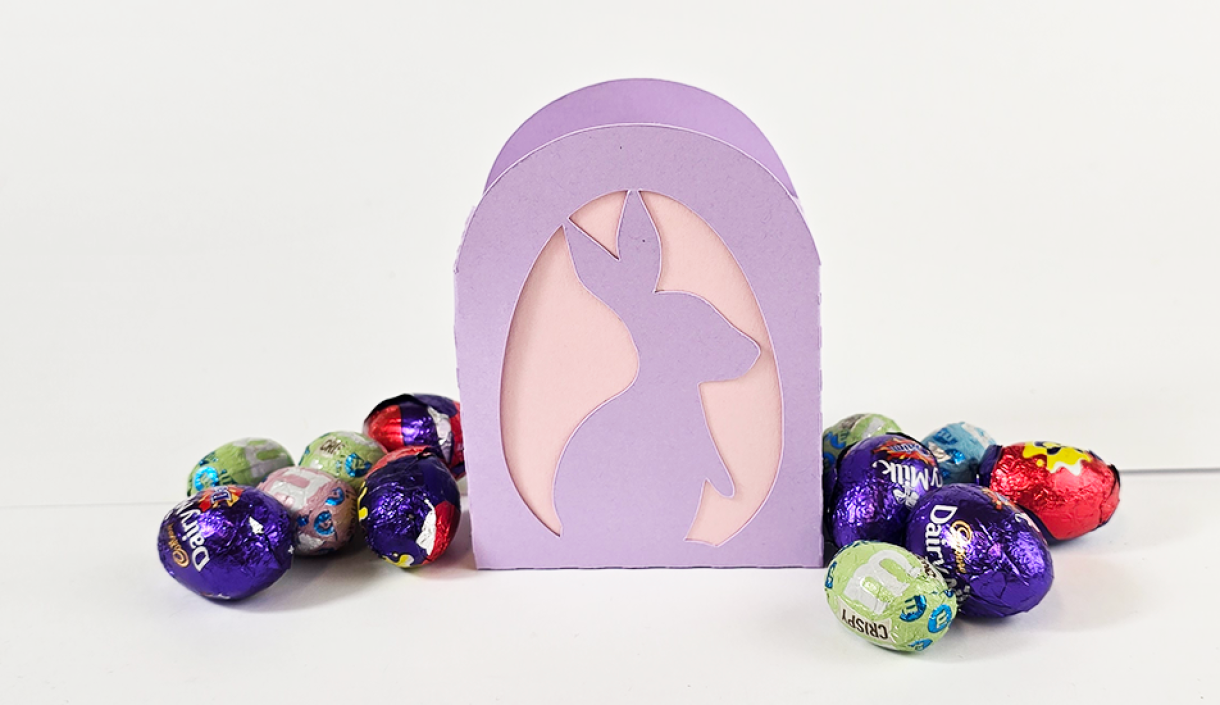
Box: New Lilac Plain Card 240gsm
Backing Card: Baby Pink Plain Card 240gsm

Box: Baby Pink Plain Card 240gsm
Backing Card: New Lilac Plain Card 240gsm - Embossed
I really like how the embossed card looks and contrasts with the plain card of the box.
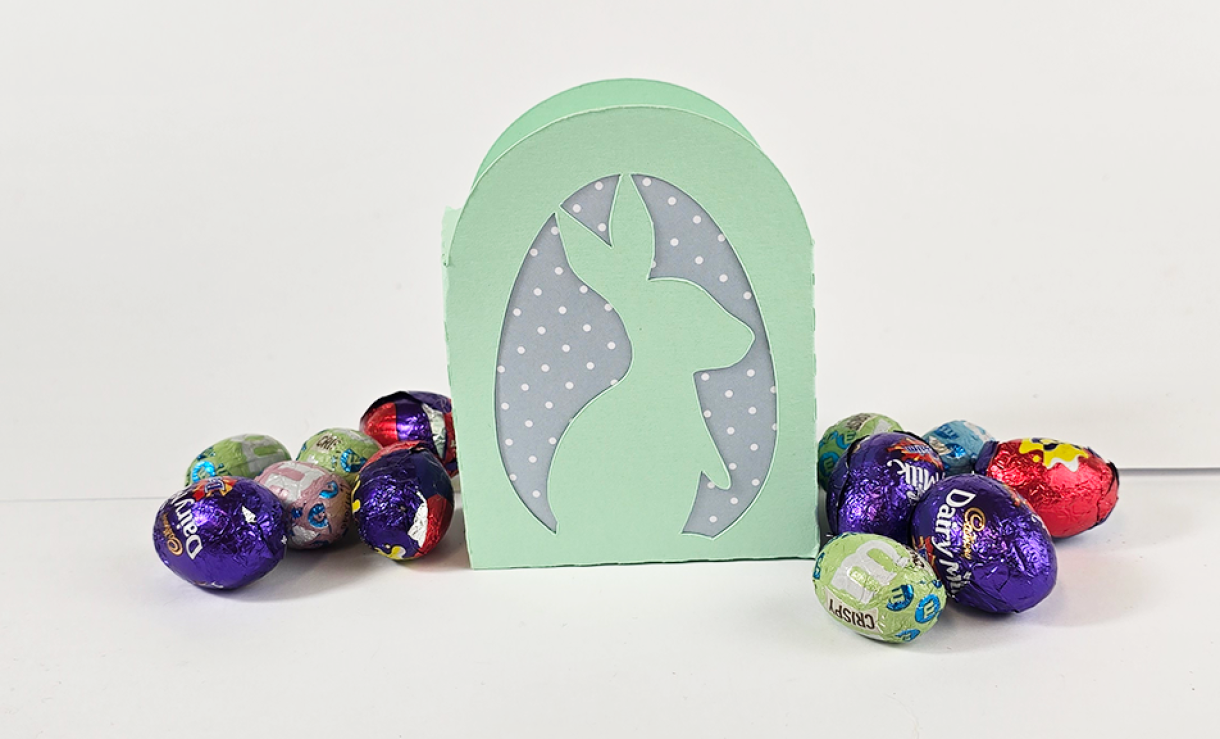
Box: Spring Green Plain Card 240gsm
Backing Card: Polka Dot Patterned Card - Light Blue Sheet
I LOVE how the polka dot backing card contrasts with the Spring Green Plain Card used for the box; similar to how the embossed card does above. I think the polka dot card would work really well if you were making up a large amount of these for a class or group, as it takes away an extra step without compromising on that lovely contrasting look.
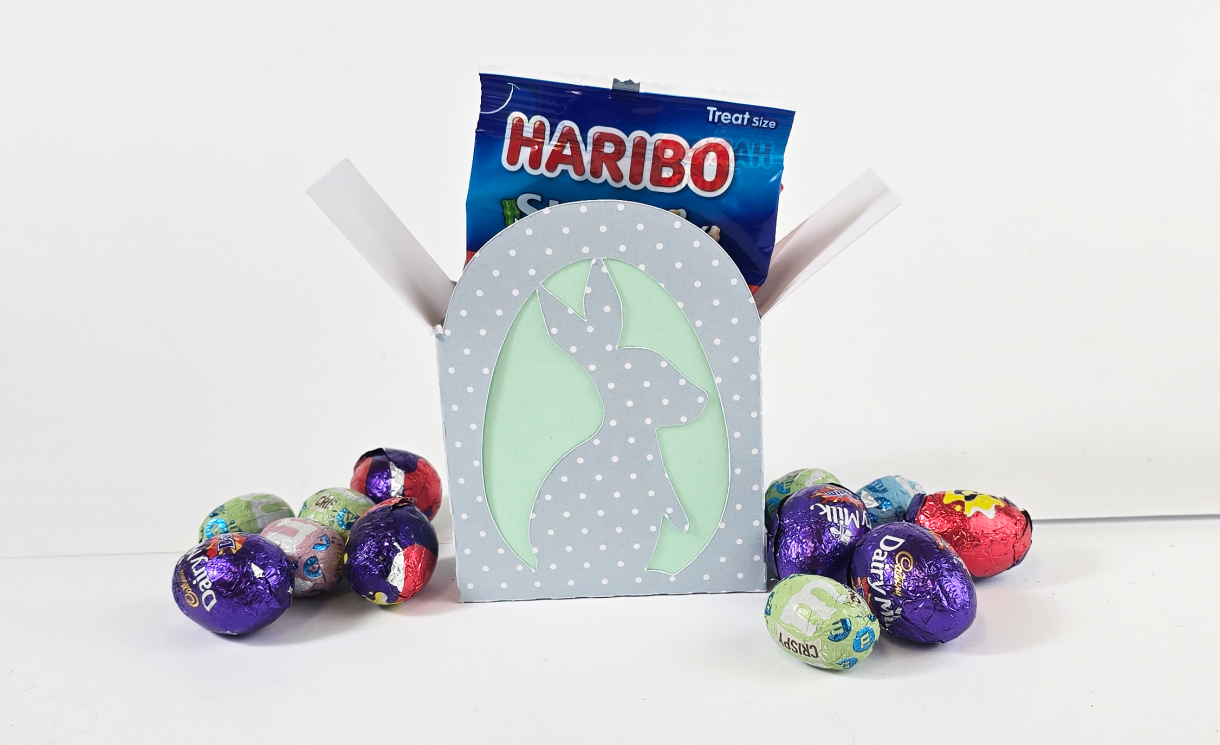
Box: Polka Dot Patterned Card - Light Blue Sheet
Backing Card: Spring Green Plain Card 240gsm
I'm not sure if the polka dot box works as well as a plain card box. I love the polka dot cards, but I think they work much better as a backing card than as the box. What do you think?
Comment below which box you like best, or let us know what colours you think would suit.
Are there any extra steps you would add to really make the box pop!


Nobody has commented yet
Be the first to comment on this article by using the form below.