Autumn Crafts for Kids or Adults!
0
Posted on 27th August 2025 by Papermill Direct
Filed under Kids Craft Ideas, Projects And Cards By Occasion, Seasonal Crafts, Autumn
As the leaves turn vibrant shades of orange, gold, and crimson, and the crisp air fills our lungs, autumn beckons us to slow down and reconnect with our creative selves. This season offers abundant inspiration for crafting, and there are countless reasons why engaging in autumn-inspired crafts is both fun and fulfilling. Here’s why you should grab your supplies and embrace the beauty of fall through your creativity!
Whether you’re crafting solo or with family, you can tailor your projects to engage everyone’s creativity because who doesn’t love a good crafting session?
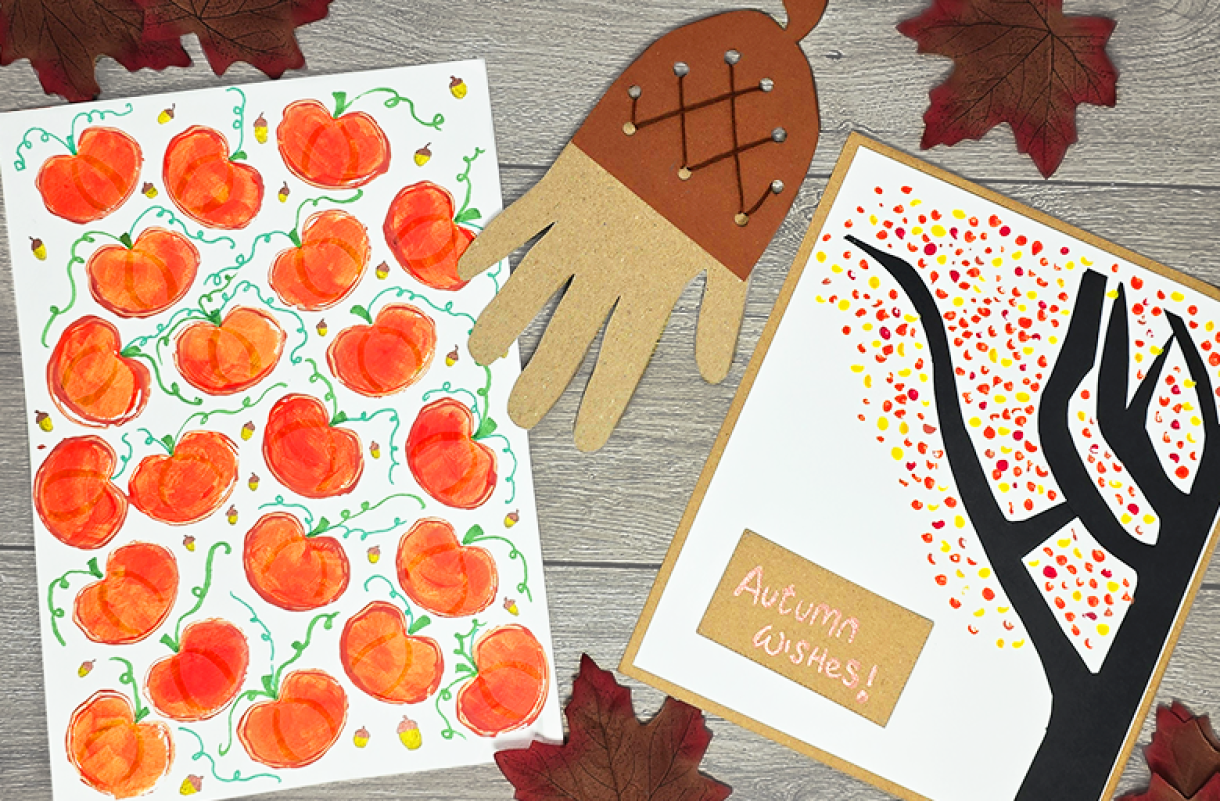
Pumpkin Prints
Let's start with a craft that even the youngest crafters can get on board with!
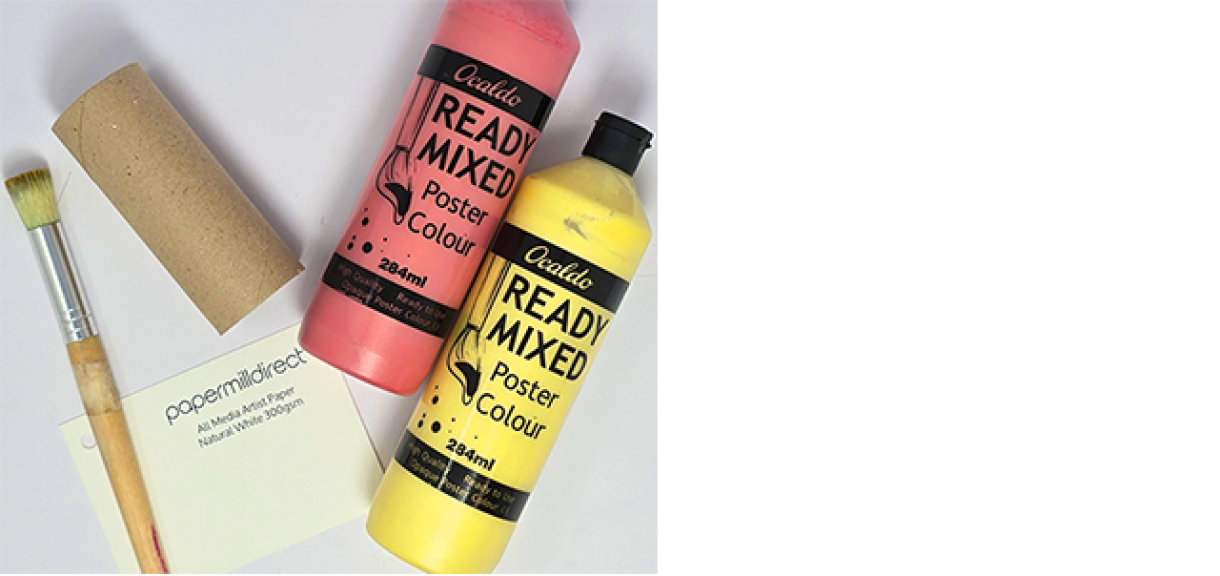
You'll need:
Orange Paint - You could also add some browns and yellows if you wanted to include more colours, if you have red and yellow paints this is a great opportunity to teach young crafters about mixing primary colours!
Green Pen
Inside of a Toilet Roll / Kitchen Roll
White Card - We used All Media Artist Paper
To Start:
You'll need to shape your toilet roll so that it dips in at the top.
We want it as close to a pumpkin shape as we can make it.
Set out your paint so you can dip the toilet roll into the paint to cover the rim of it.
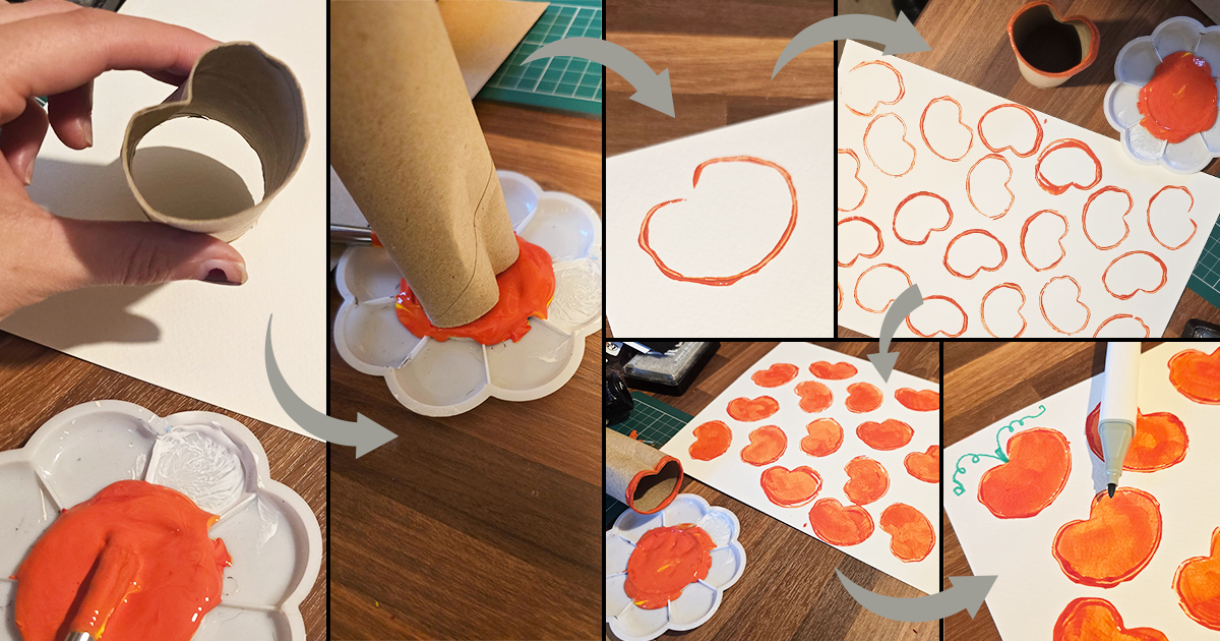
Using the toilet roll stamp the card to create several outlines of pumpkins on your paper.
If you're crafting by yourself you might leave the pumpkin outlines to dry before trying out a different medium, if you're crafting with kids they may want to paint the inside of the pumpkins whilst the outlines are still wet.
You're the artist - you decide!
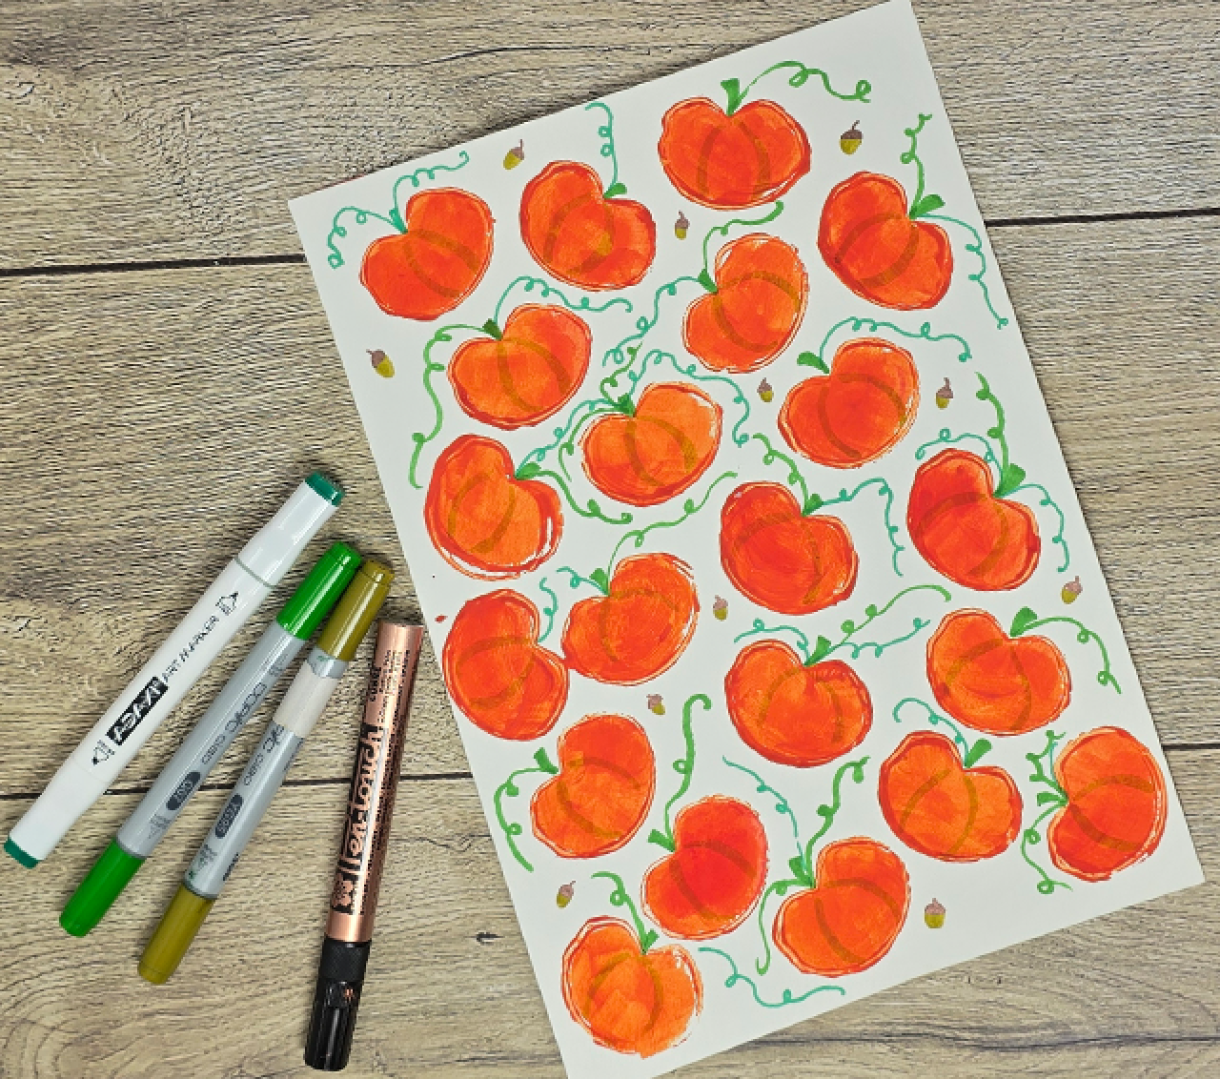
Once the inside of the pumpkins are dry, go over your image with a green pen to add vines and leaves, you could add little acorns to the background too! I also added curved lines to the pumpkins using a light brown pen.
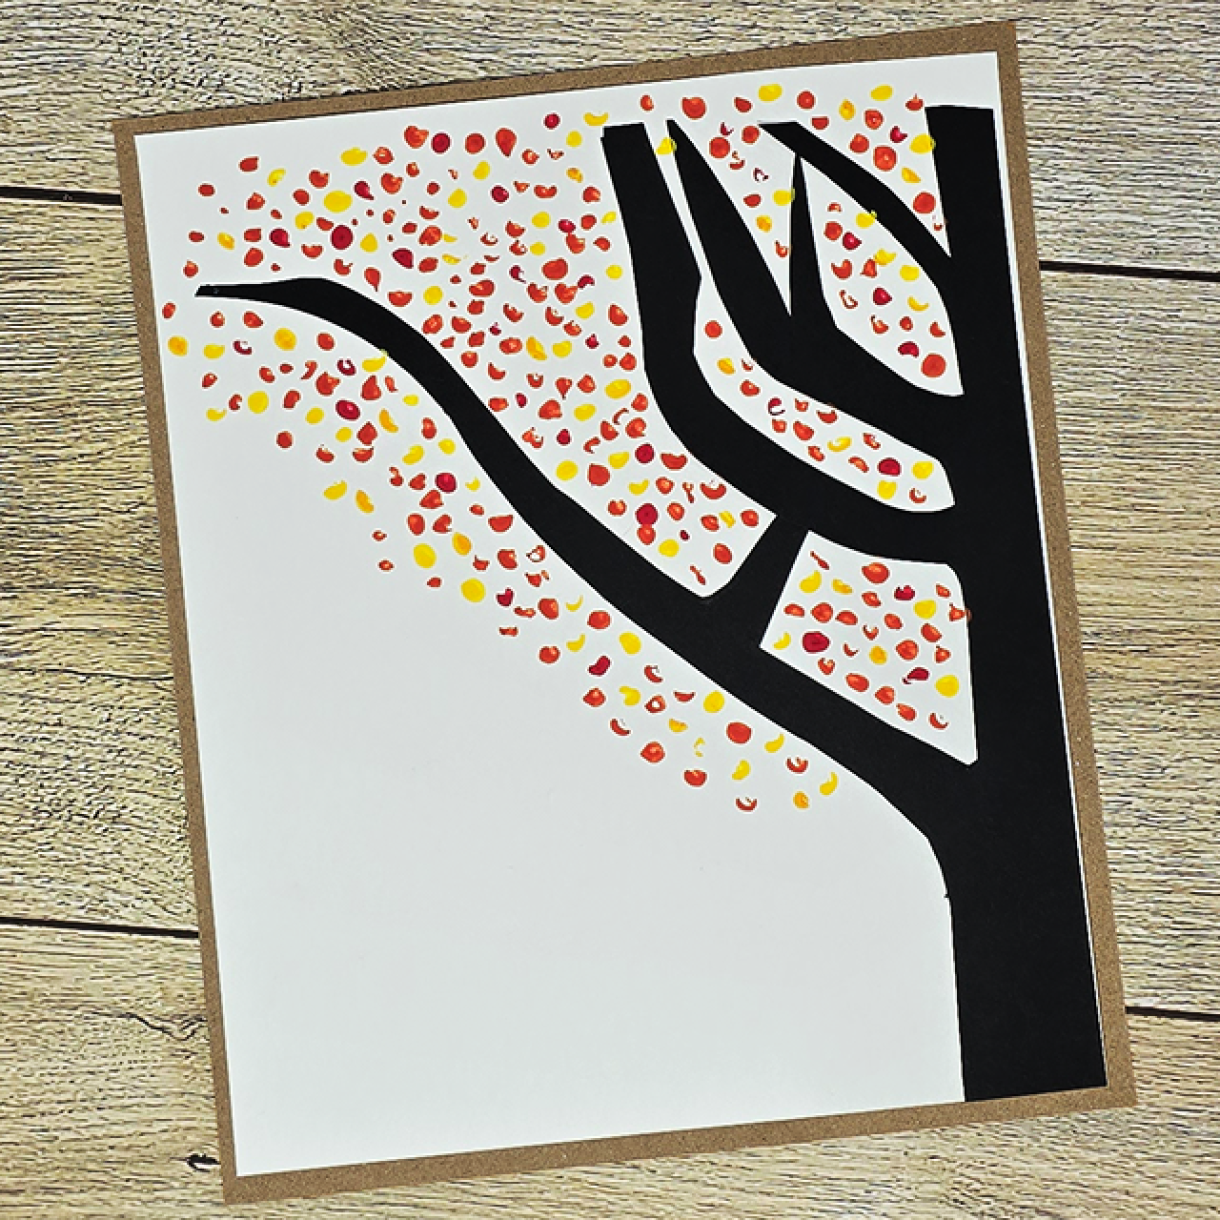
Autumnal Tree
Autumn is a classic symbol of change, making it a perfect opportunity to discuss the importance of transitions with kids. Crafting is a gentle and engaging way to explain the concept of seasons changing, not just in nature but also in life. With the next project we're going to do, you can start a conversation with younger crafters about the seasons and even create x4 tree images for each season.
This project is great for any kids that could benefit from practicing their fine motor skills as it involves painting individual dots to give the impression of leaves.
What you'll need:
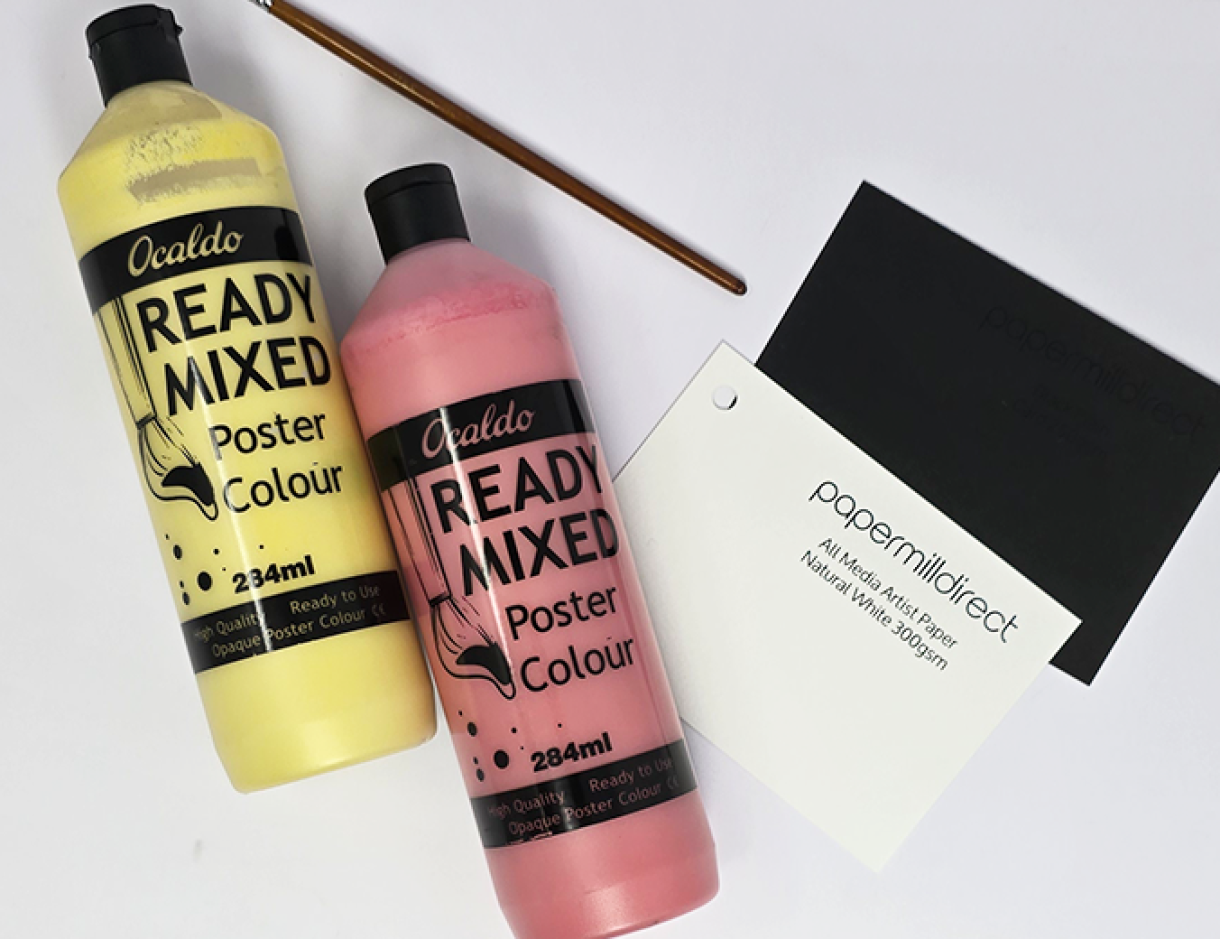
Paints - Oranges, Yellows, Reds and Browns for an Autumnal tree, (If you're doing all four seasons you'll also need greens for Spring and Summer)
Black Card - We used Black Plain Card 240gsm
White Card - We used All Media Artist Paper
Double Sided Tape or a PrickStick
Start by cutting out a tree silhouette in black card, if you have a cutting machine, you could use it to cut this out, but we just cut ours out by hand, and it worked just as well. Use double-sided tape to stick down the tree.
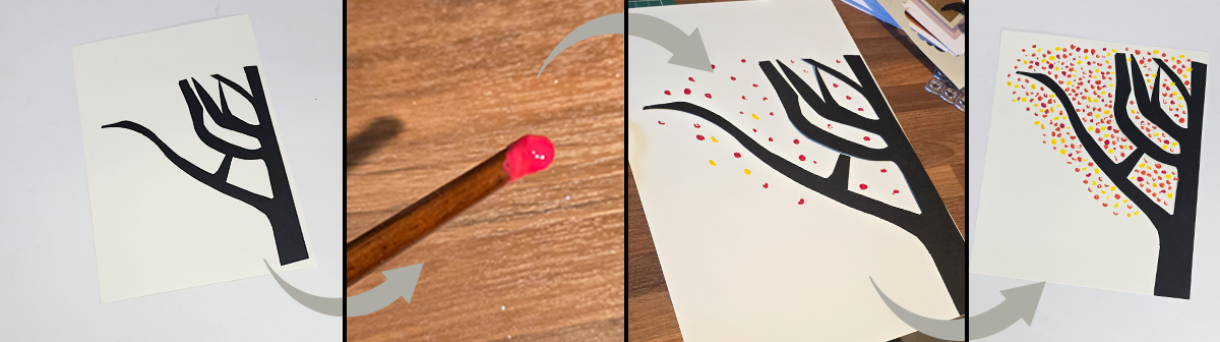
Using the wooden end of a paintbrush, add spots all around the branches in one colour, then clean the end of the paintbrush and start with another colour.
Depending on the age of the crafters you're creating with, you might want to see if they can add the dots without them overlapping - this will help hand-eye coordination and other fine motor skills.
This kind of painting is called pointillism, which is a recommended pastime for anyone wanting to include more mindful hobbies in their lives. The repetitive but engrossing act can induce a meditative state that encourages patience and focus. Engaging in crafts—especially those inspired by the changing seasons—offers a unique opportunity to ground yourself. As you focus on each step of your crafting process, you become absorbed in the present moment.

Once you've finished painting and everything has dried, then you can trim it and add a piece of card to the back to create a nice border.
We used Rustic Fleck Kraft Card 220gsm for our backing.
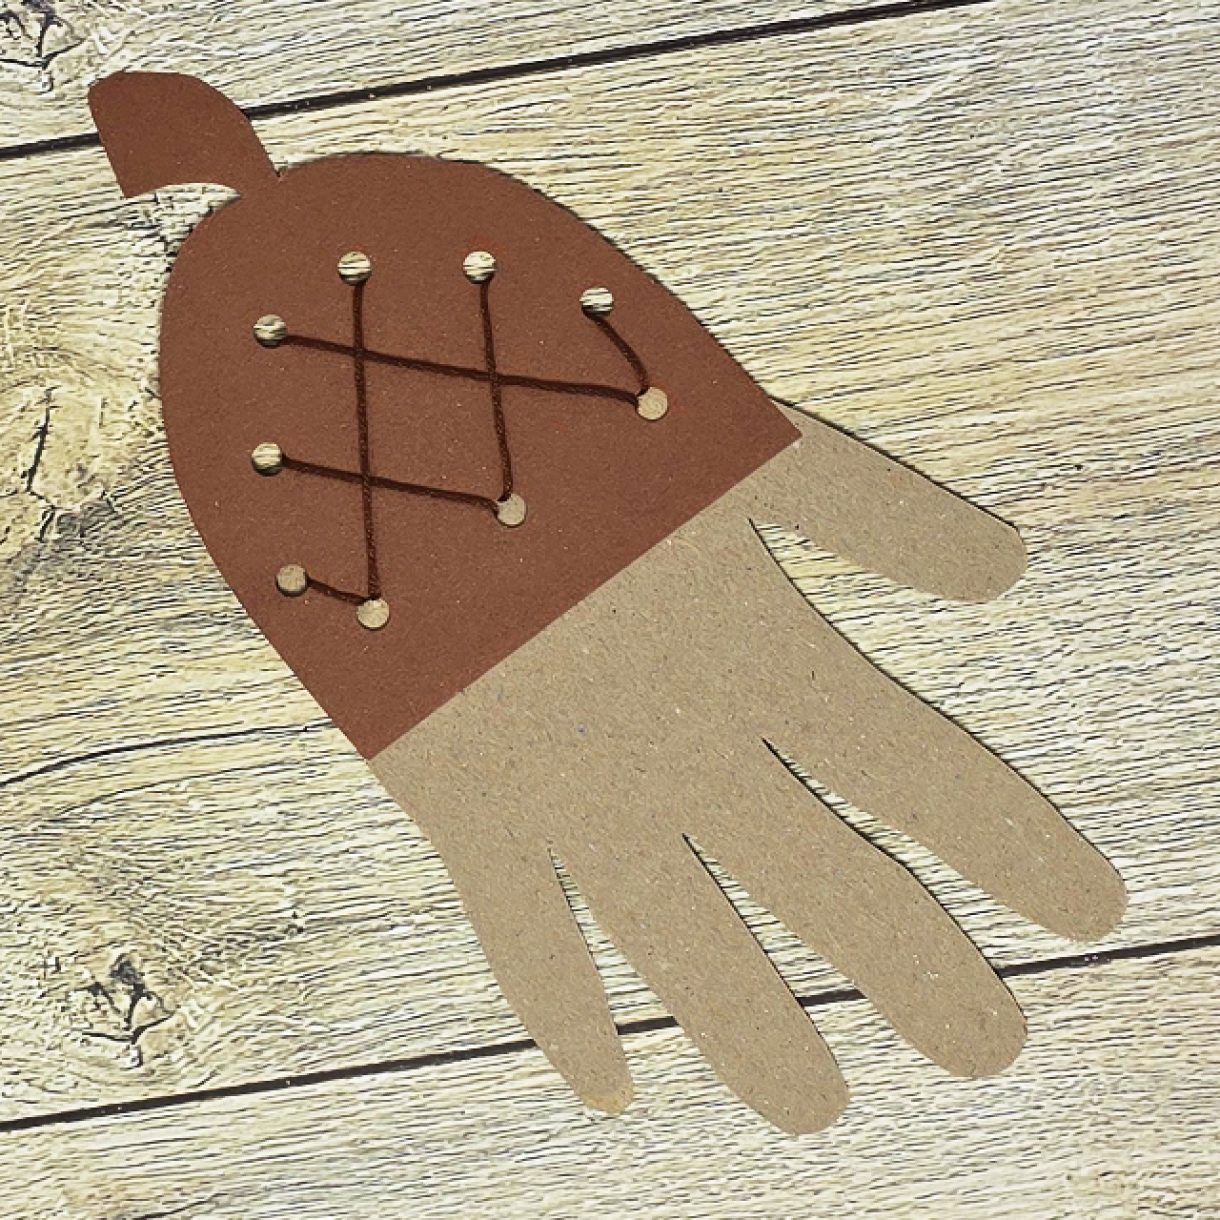
Acorn Handprints
For our final craft we're going to create Acorn Handprints!
What you'll need:
x1 A4 Sheet of card in Dark Brown - We used Terracotta Brown Materica Card 250gsm but you could use Mocha Brown Plain Card 240gsm if you're buying your card in a Classic Pick & Mix Box
x1 A4 Sheet of card in Light Brown - We used used Rustic Fleck Kraft Card 220gsm
Whole Punch
Brown String / Thread
Double-Sided Tape or Prickstick
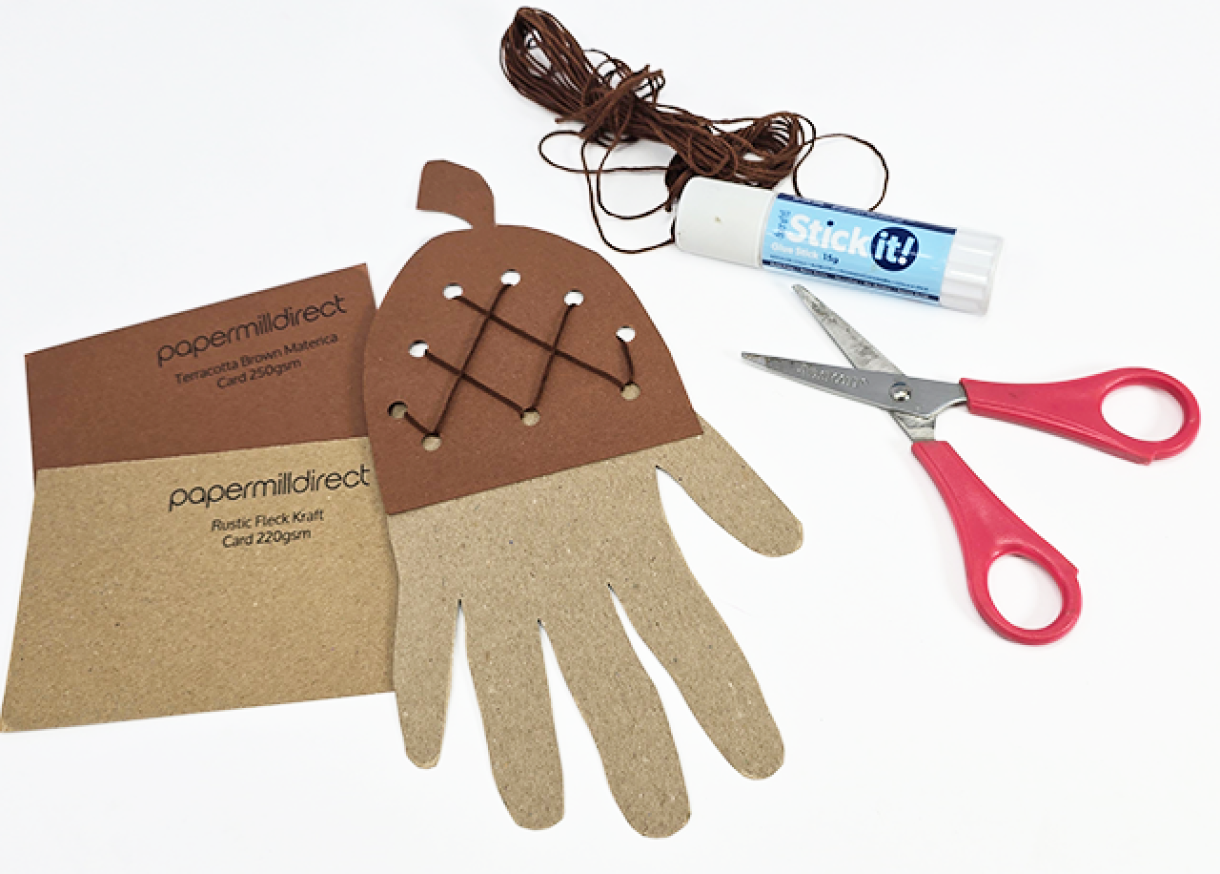
1. Start by laying the palm of your hand on the light brown card - keep your fingers close together but not touching - trace around your hand then cut it out.
2. You will have to freehand draw the acorn cap on the dark brown card. Use the palm cutout to ensure the base of the cap is the same width as the palm cutout.
3. Using the whole punch, create evenly spaced wholes along the edge of the Acorn cap.
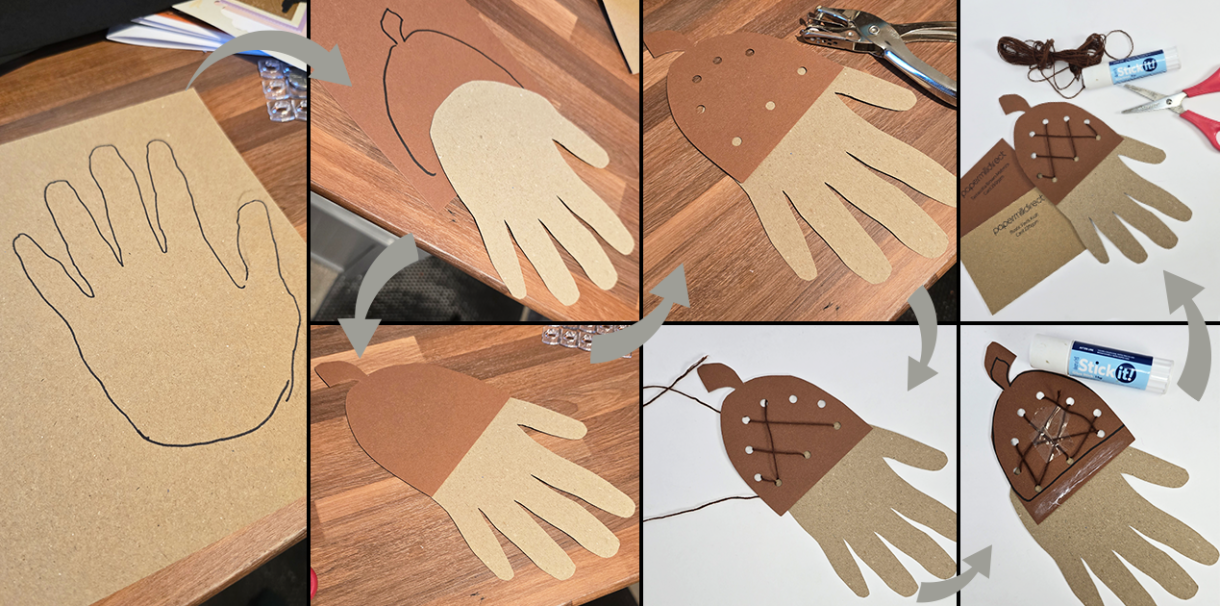
Then thread the string through the holes and create a crisscross pattern on the acorn cap.
Once complete, tape down the string so that it does not move.
Adhere the hand-cut out and the acorn top together to complete your craft!


Nobody has commented yet
Be the first to comment on this article by using the form below.