Pumpkin Card
0
Posted on 27th August 2025 by Papermill Direct
Filed under Seasonal Crafts, Autumn
Autumn is upon us, and it's the perfect time to get crafty with some delightful fall-themed projects! Today, we're excited to guide you through making a pumpkin card that’s sure to brighten anyone's day.
We snagged the Cutting File from Creative Fabrica, so all you’ll need is your trusty cutting machine and some lovely cardstock.
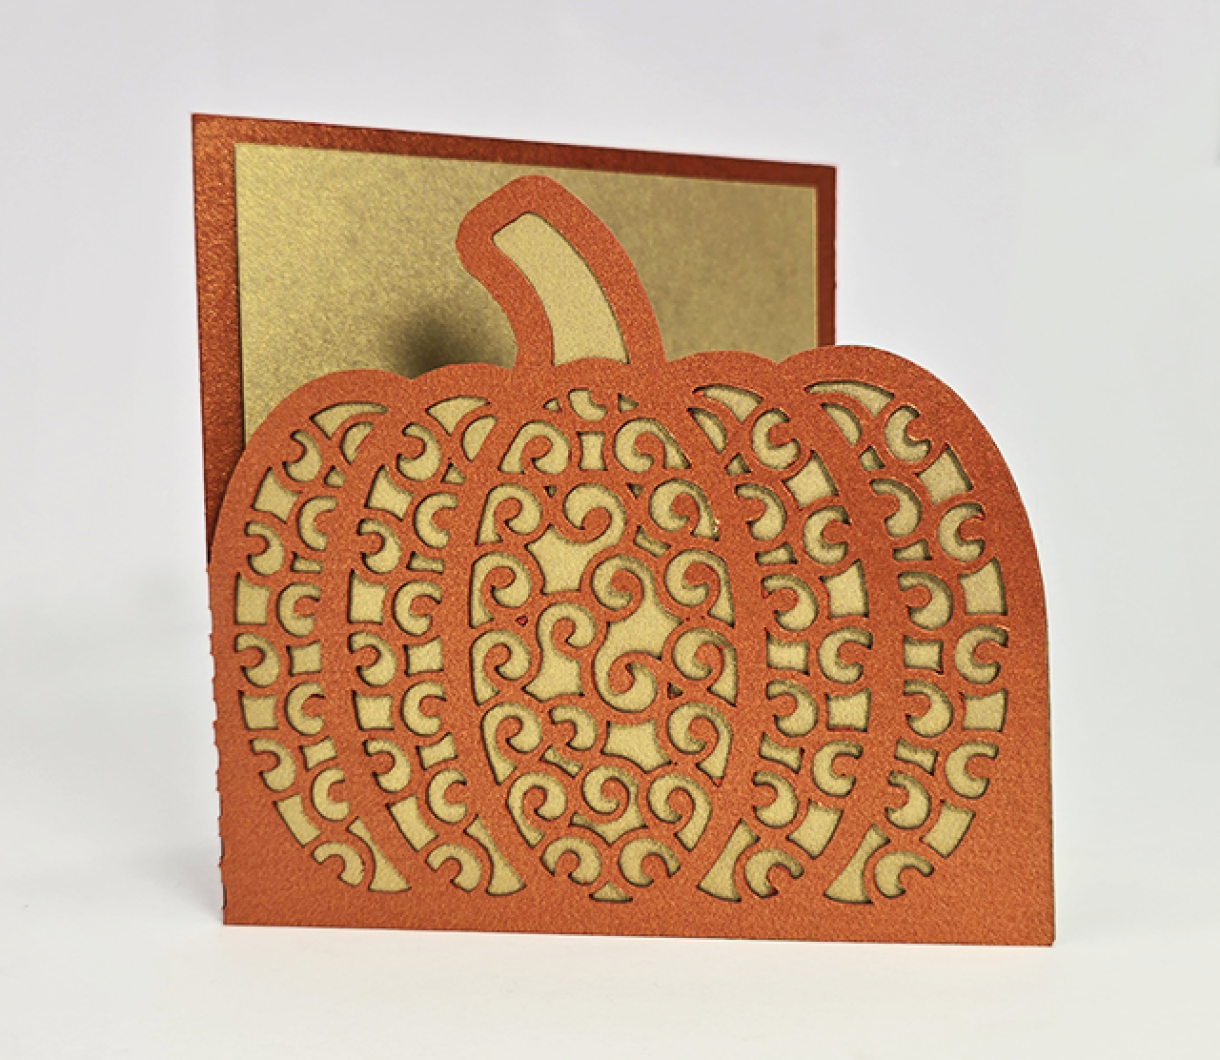
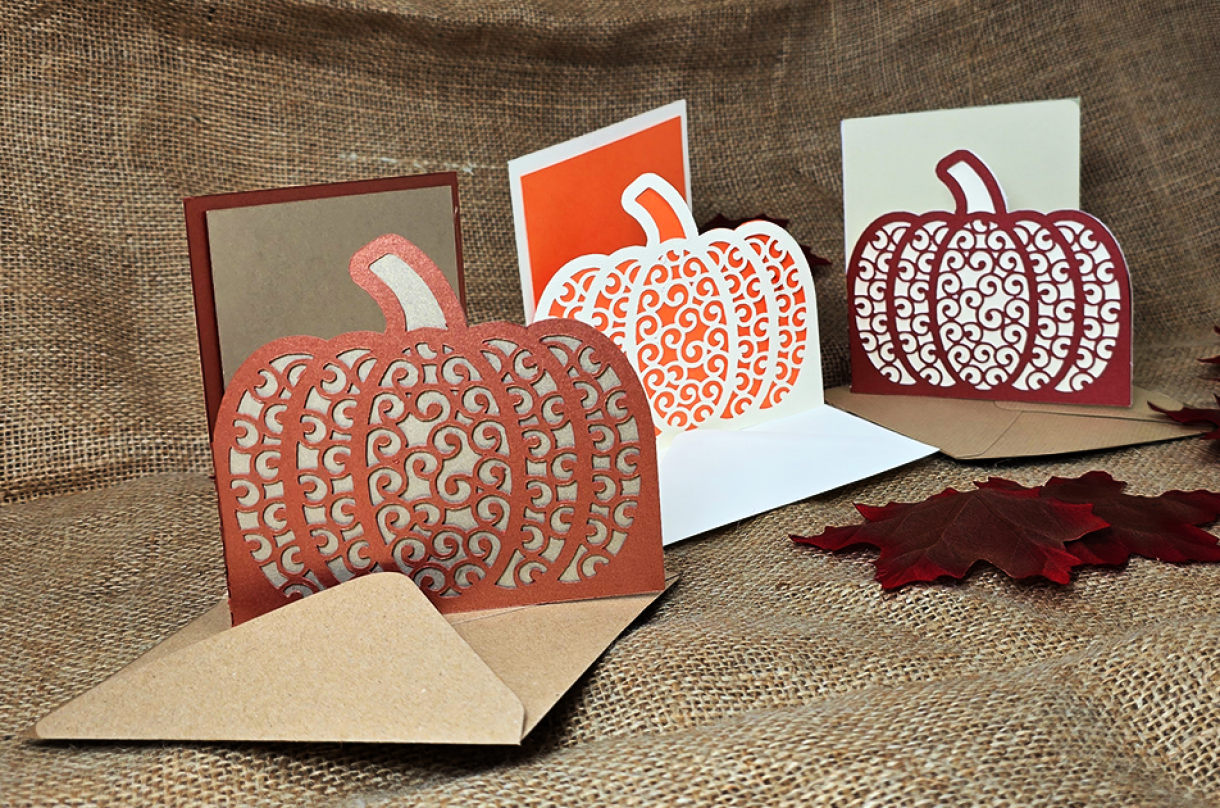
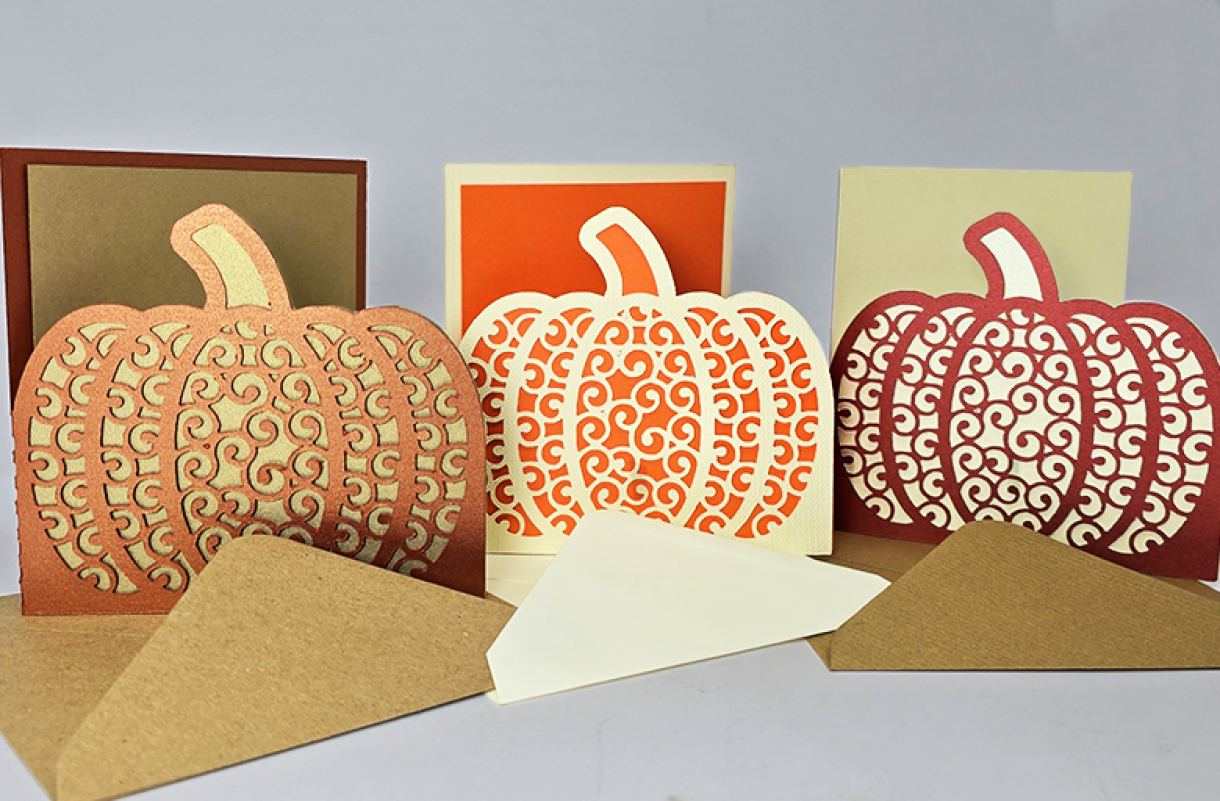
For our first card, we chose a cheerful Copperplate Sirio Pearl Double Sided Card 300gsm paired with a rich Gold Sirio Pearl Double Sided Card 300gsm. The combination is nothing short of stunning, perfectly embodying the warmth and vibrancy of the fall season.

You might be wondering: why should you invest your time in making fall cards? Because Autumn is truly a beautiful and inspiring season, bursting with colors and cozy vibes—so why not celebrate it to the fullest?
Create the cards as invitations! Imagine crafting invites for a fun pumpkin-picking day with the kids or gathering your friends around for warmth with hot chocolate and some engaging autumn films.
Surprise a loved one whom you may not see this season with a heartfelt card that captures the essence of fall. Sending an autumn-themed card can be a great way to brighten the season for them and could spark interesting conversations about different autumnal traditions or activities that have changed over the years.
What you'll need to make 1 Card:
A Cutting Machine
The cutting file from Creative Fabrica - Click here for the link!
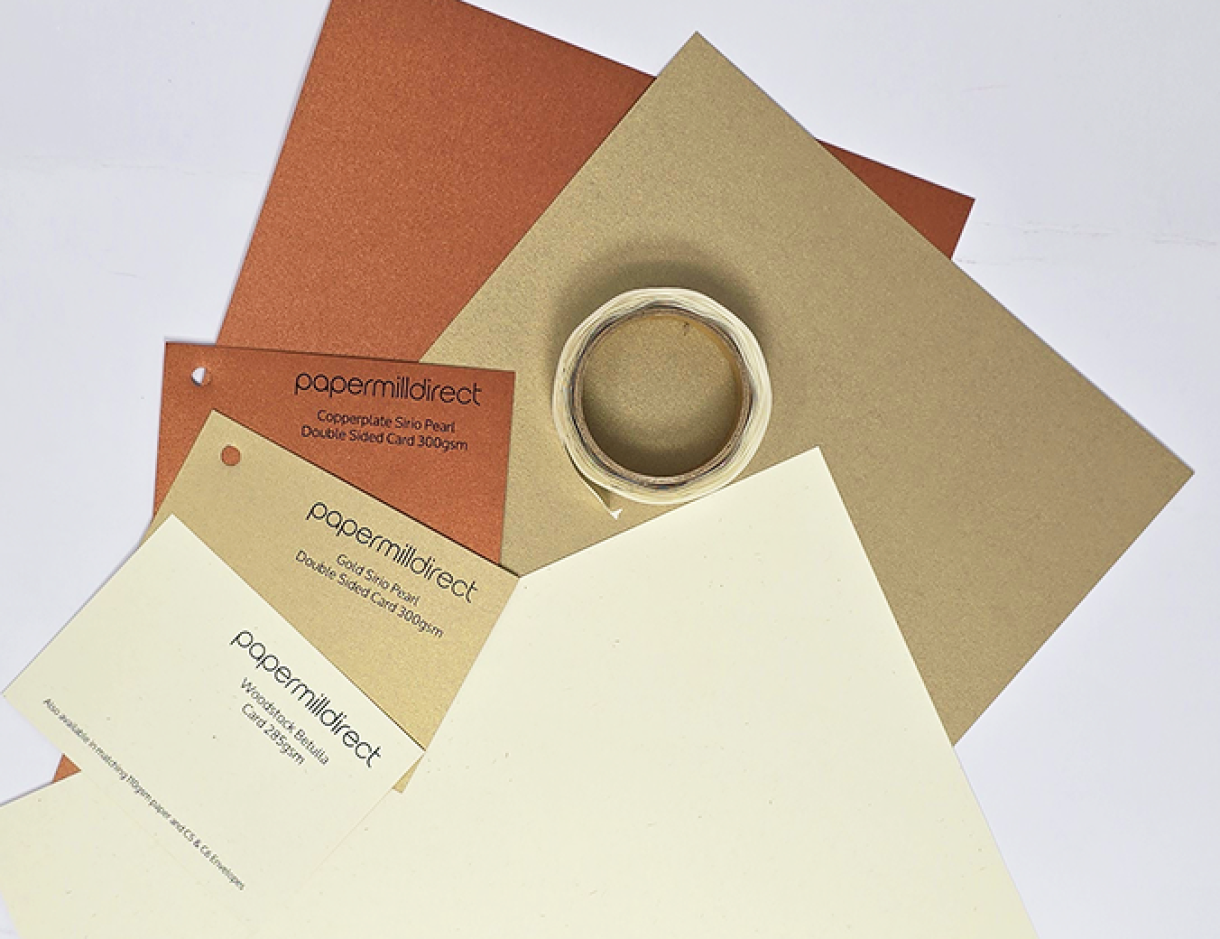
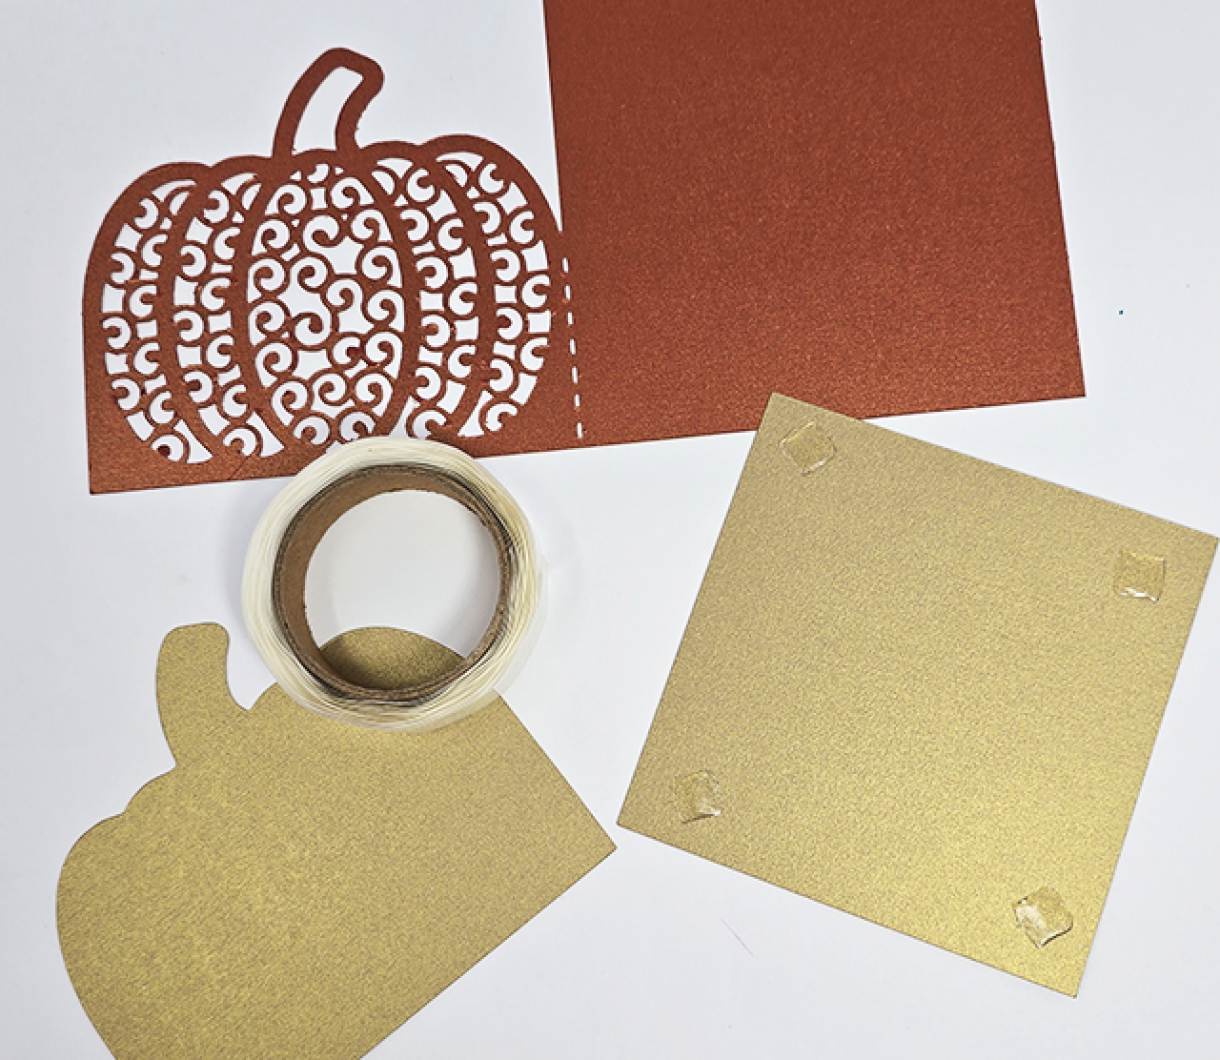
x1 A4 of Card for the Pumpkin card blank - Copperplate Sirio Pearl Double Sided Card 300gsm
x1 A4 Sheet of card for the backing square and backing pumpkin - Gold Sirio Pearl Double Sided Card 300gsm
Adhesives - I used glue squares
What you'll need to make the sentiment:
x1 A5 Sheet of Card for the sentiment - Woodstock Betulla Card 285gsm
x1 Pen tool for your cutting machine
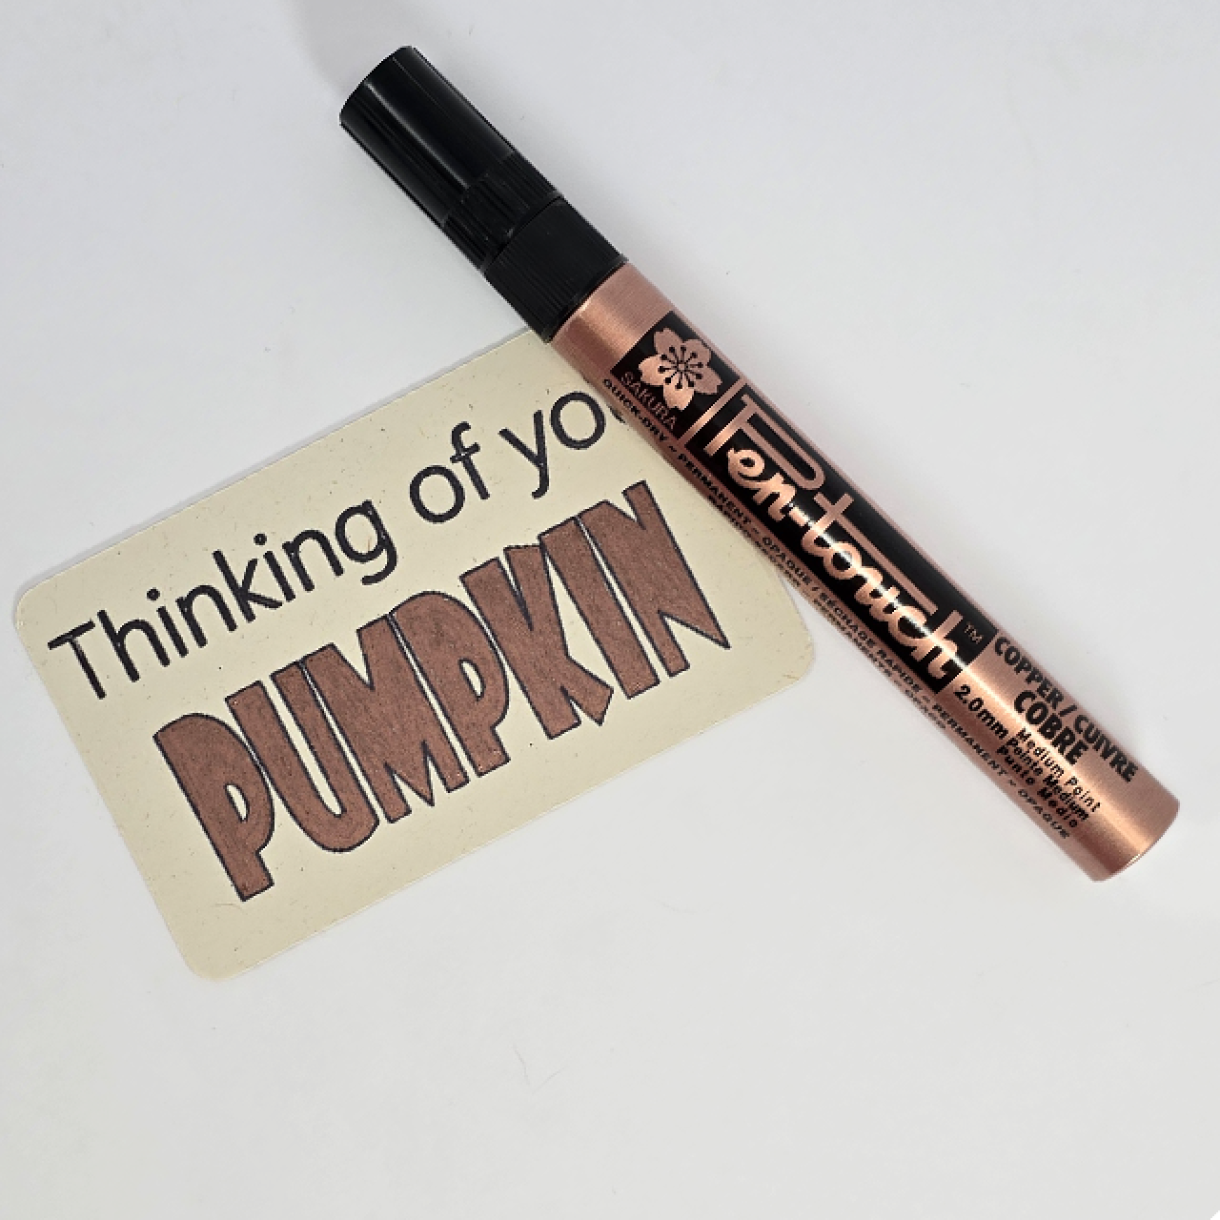
x1 Black Pen
x1 Coloured pen - I used Sakura Pen Touch Copper to colour in the PUMPKIN part of my sentiment.
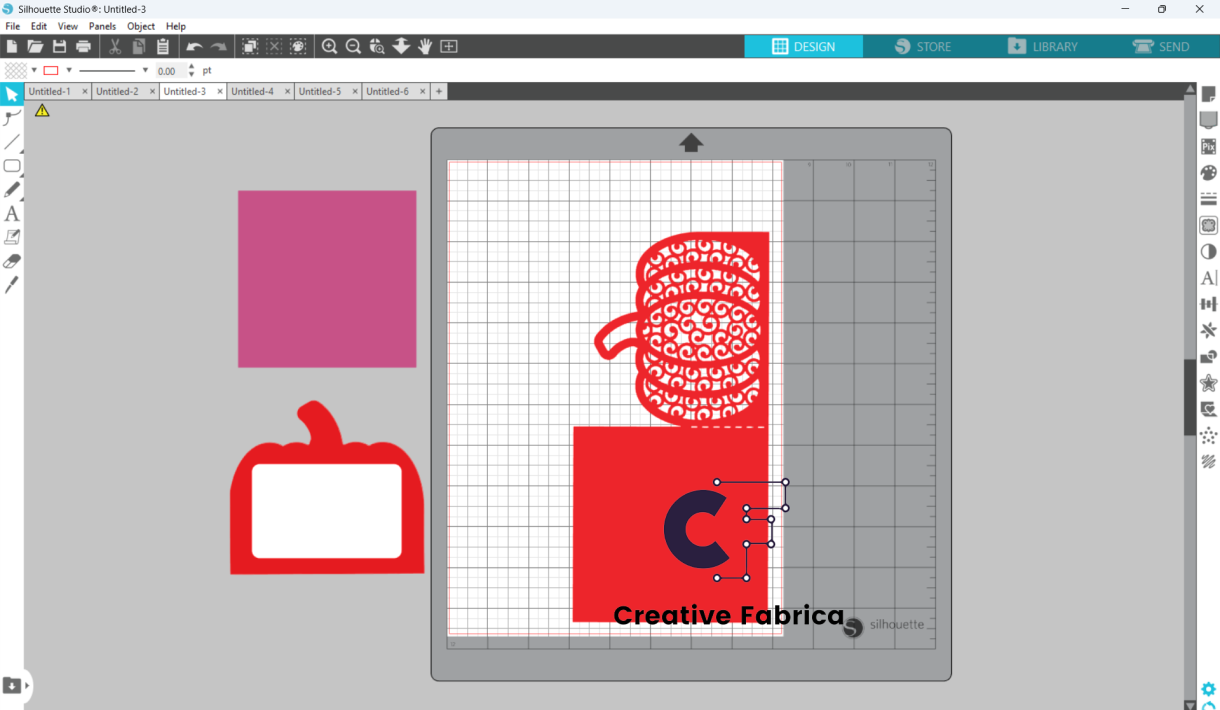
Once we had downloaded the file from Creative Fabrica, we set it up so that it was the same size as our Small Square Card blanks (122x122mm)
I also cut a square measuring 118x118mm to be cut out of the second sheet of A4 Card with the backing for the pumpkin.
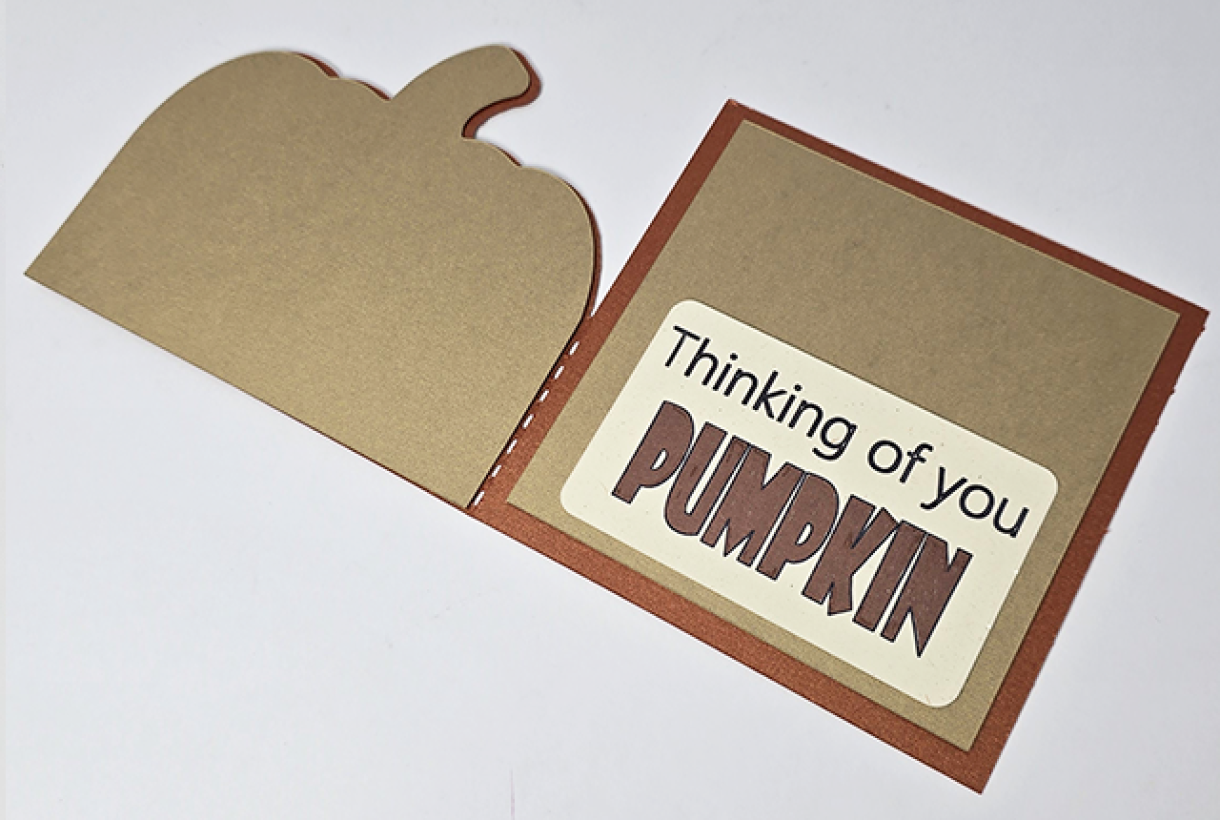
For the sentiment, I created a square that would be hidden behind the pumpkin when the card was closed.
Then we let the machine do the hard work!
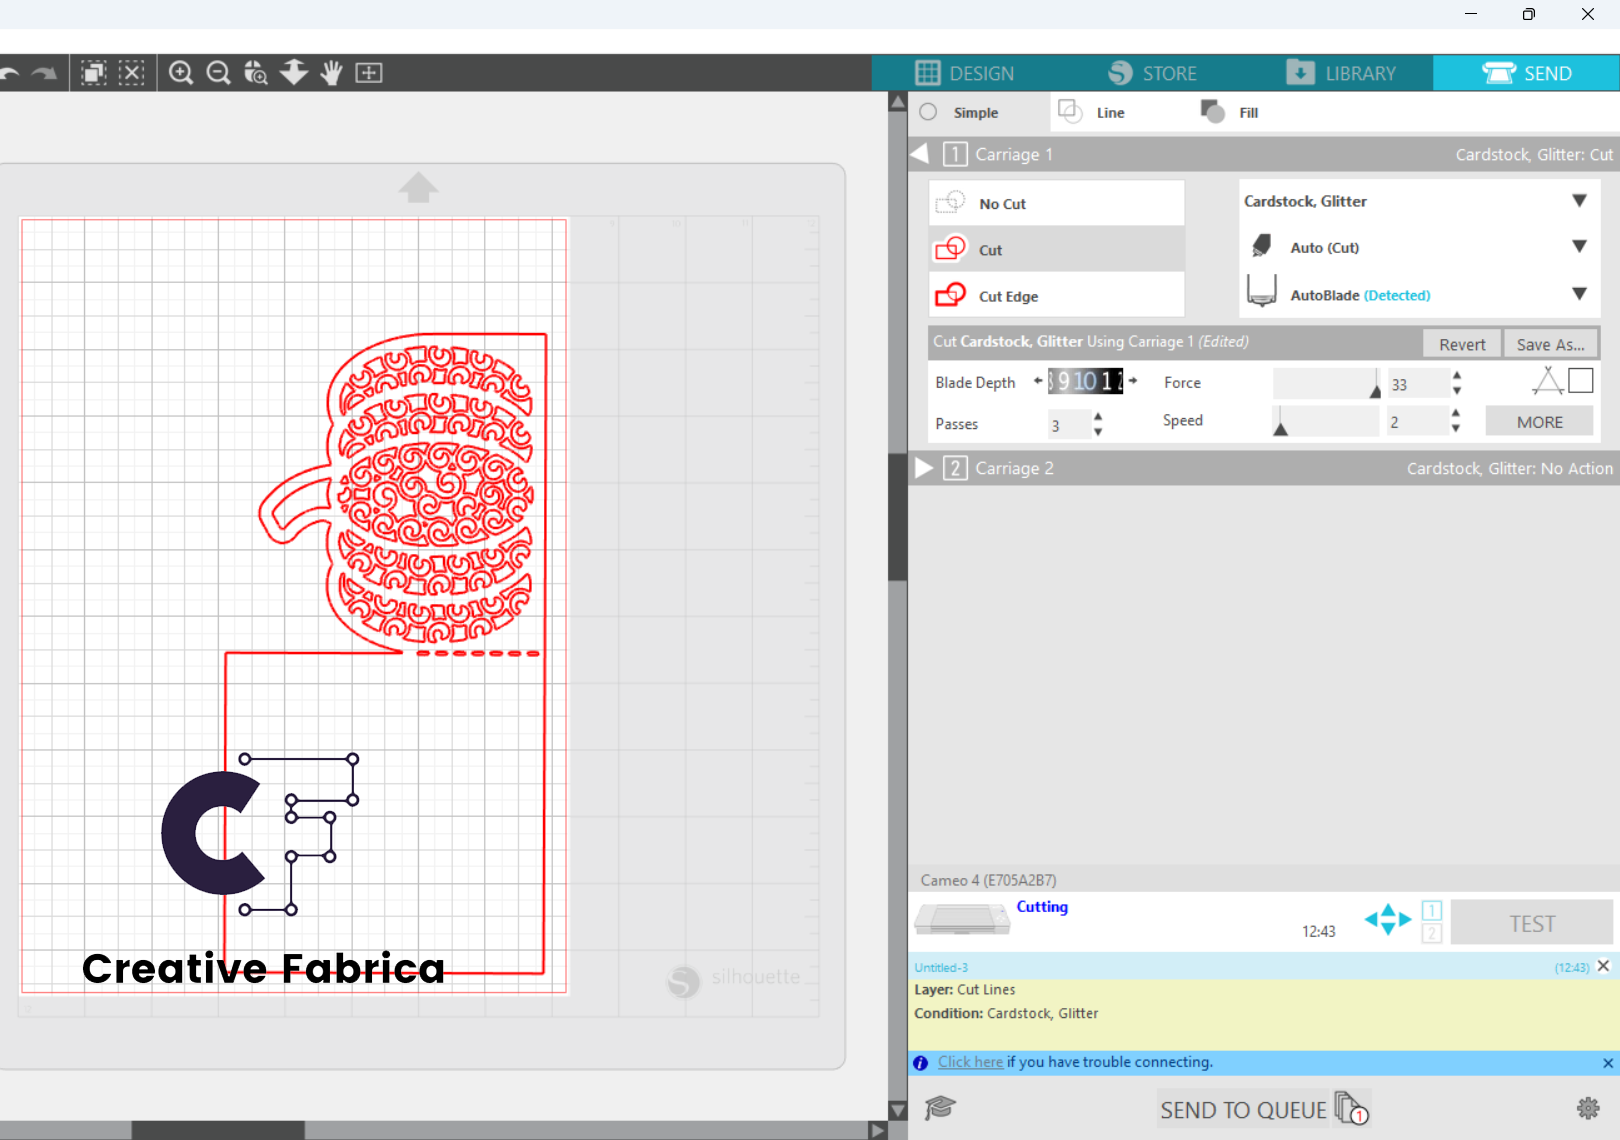
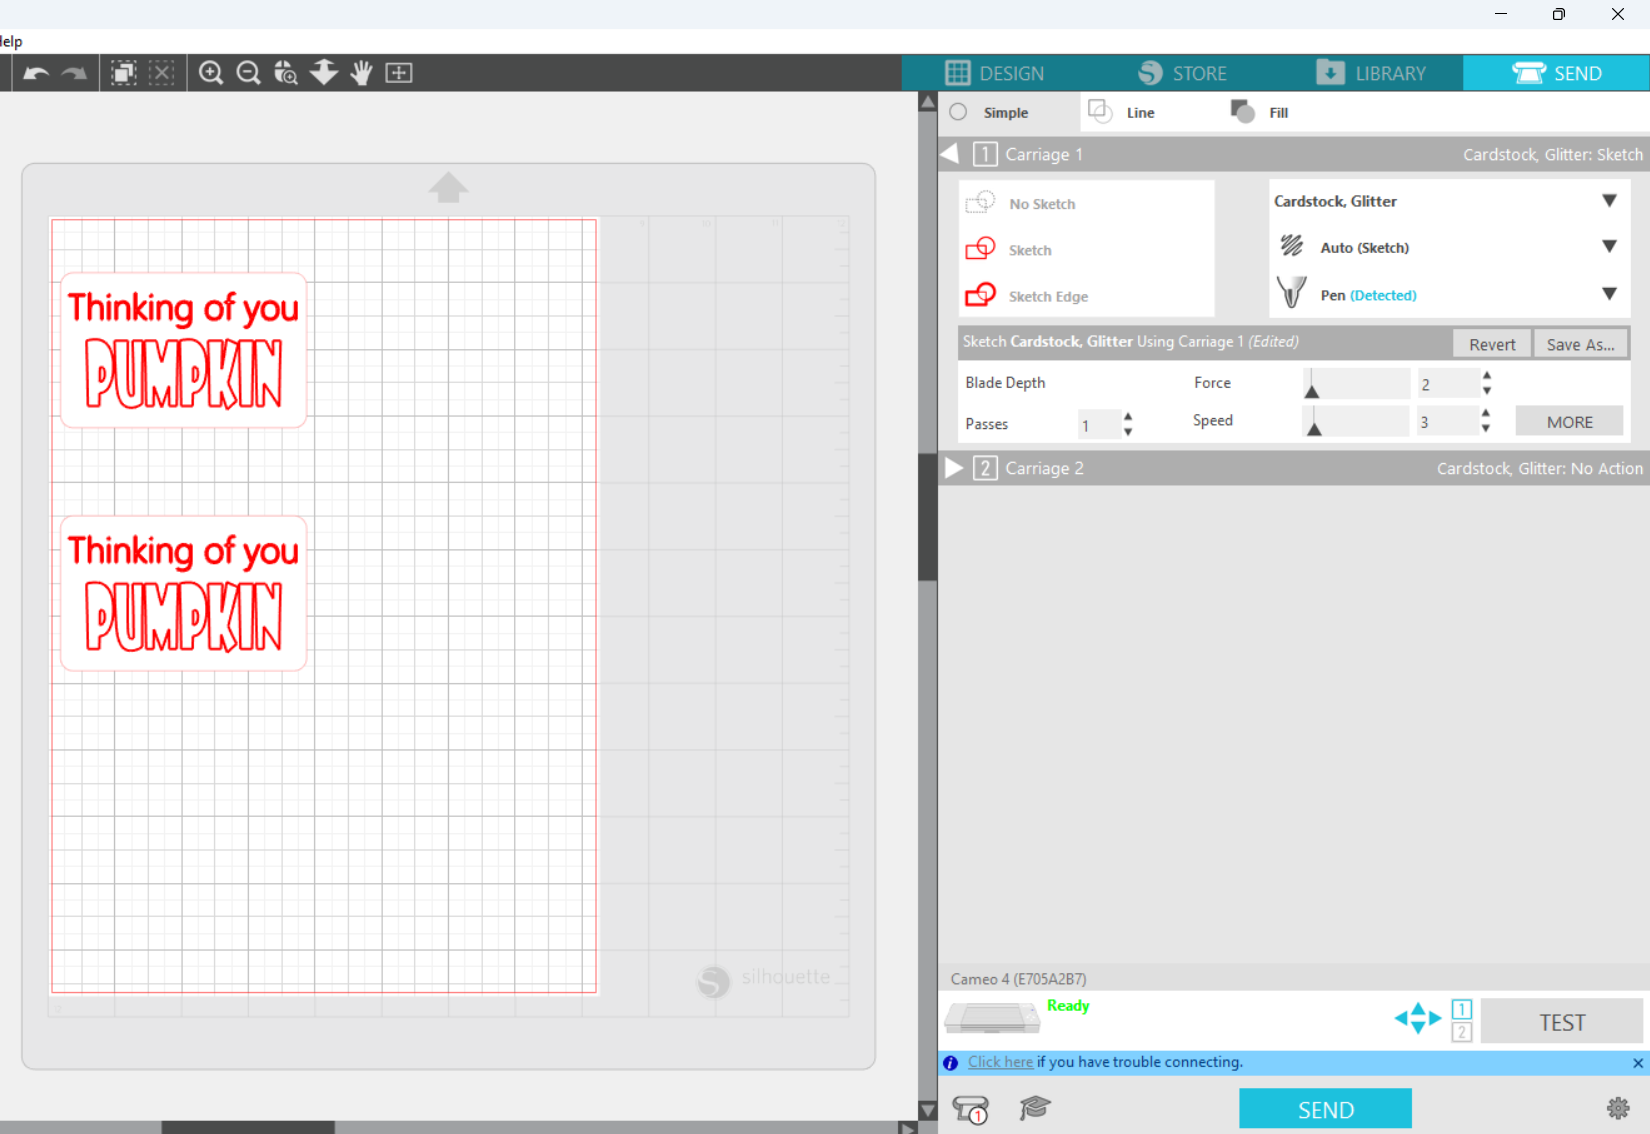
The settings we used with the Silhouette Cameo 4 was:
Cardstock - Glitter
Blade - AutoBlade
Blade Depth - 10
Force - 33
Passes - 3
Speed - 2
I used these settings due to how intricate the cut file was and the GSM of the card I was cutting. I had the Blade depth and Force at the highest setting to cut through the high GSM card. I set the passes to x3 to help with the cutting too and then set the speed to 2, the lower the speed the better it is for cutting intricate patterns.
Click on the image to make it larger and view the settings we used.
For the sentiment, I created a square that would be hidden behind the pumpkin when the card was closed in Betulla.
I made the square using the shape tool on the left-hand side of the page.
I then used the type tool to make my sentiment.
Once the file was set up, I changed from using the Autoblade tool to the pen tool and highlighted only the writing to be 'sketched' by my machine and set it off
(I made two because I'm prone to messing up my first attempt!)
Once the sentiment was written, it left the cutting mat in place - DO NOT REMOVE IT FROM THE MACHINE - and changed from the pen tool back to the autoblade.
I then only highlighted the outside of the box to be cut.
This meant the machine would not try to cut out the letters that it had just sketched; it would only cut out the box surrounding the sentiments.
Once the sentiments have been cut I then removed them from the machine and went over any lines that needed it and coloured in the PUMPKIN.
Once the machine has cut out the card, I used Glue Dots to attach the 118 square to the card, the sentiment, and the backing pumpkin.
If you wanted to add a stamp or write a thoughtful message instead of doing it with your cutting machine, then it may be easier to do this before attaching the 118mm square to the card blank. My stamping skills still need some work so I choose used the cutting mahcine to make mine, but it's up to you how you want to add your sentiment!
Then you're done! If you have sized the card to the same size as our Small Cards Blanks then you can pair your card blank with any of our Small Square Envelopes (130x130mm)
Not sure about our colour choices?
We made more cards!
Here’s what we used:
Second Card – All card available in our Classic Pick & Mix Boxes
Rich Cream Card Hopsack 255gsm
Mandarin Orange Plain Card 240gsm
Final Card – All card available in our Pearl Pick & Mix Boxes
Maroon Red Pure Pearl Single Sided Card 300gsm
Ivory White Pure Pearl Double Sided Card 300gsm
For the pearl card, we cut the backing square to 120x120mm rather than 118mmx118mm as the Maroon Red Pure Pearl card is single-sided and I didn’t want the white on the reverse of the card blank to show. You could use a double-sided pure pearl card to make your pumpkin card blank. Did you know you can choose between double-sided and single-sided cards in our Pearl Pick & Mix Boxes for no additional cost!


Nobody has commented yet
Be the first to comment on this article by using the form below.