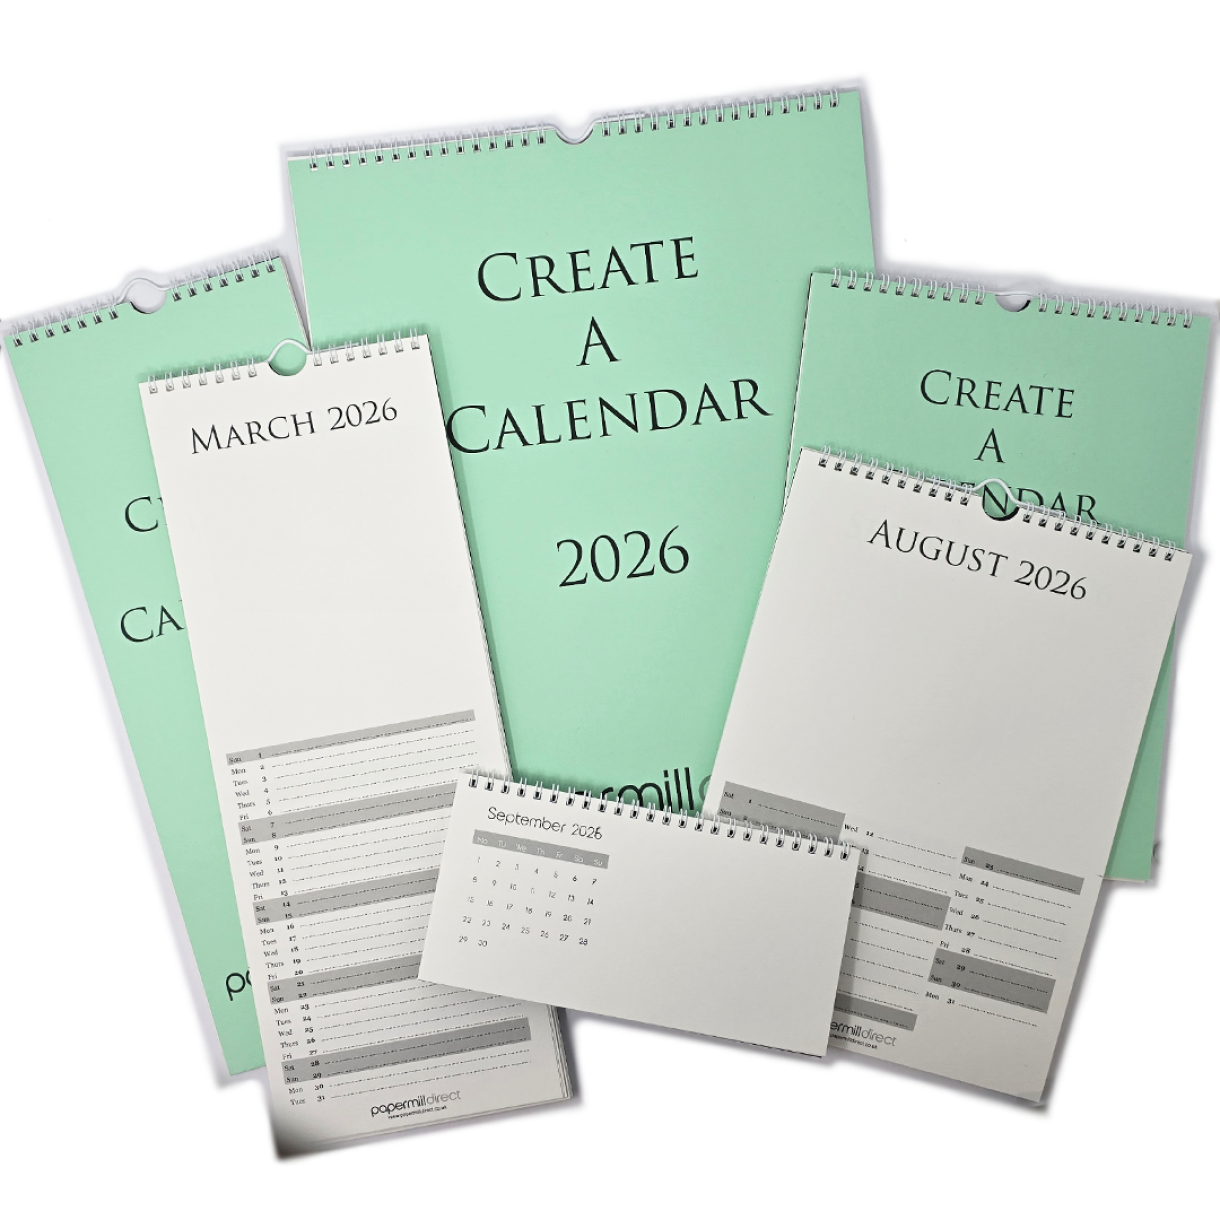
Use our Create-A-Calendar as your Monthly Planner
0
Posted on 8th January 2026 by Papermill Direct
Filed under
Use our Create-A-Calendar as your Monthly Planner
Looking for a tool to keep you organised but want to add your own creative twist?
Do your brilliant ideas get forgotten as soon as you close your planner?
We might have the perfect solution for you!
Our Create-A-Calendars are a brilliant way to keep all your plans, checklists, or goals on your wall where you can see them every day, helping you to stay organised.
The beauty of our Create-A-Calendars lies in the blank spaces waiting for your unique touch. You can transform every month into a masterpiece filled with your personal ‘to-do’ lists, monthly goals, or ideas for exciting projects.
Keep your aspirations in sight, whilst also exploring your creativity and designing your Create-A-Calendar whichever way works best for you.
We've put together some ideas to inspire you on how you could turn your Create-A-Calendar into the perfect planner!
We used a 2026 A4 Create-A-Calendar, but there are three other sizes available. If you prefer something smaller and more discreet, consider our Desk Create-A-Calendar or Slimline Create-A-Calendar. If you need more space to fit in more activities, ideas, or goals then check out our A3 Create-A-Calendar.
SETTING UP YOUR PAGE
Let's get started with ideas for how you might set up your page!
We have three suggestions below on how you could set up your Create-A-Calendar.
Track Everything with a Table
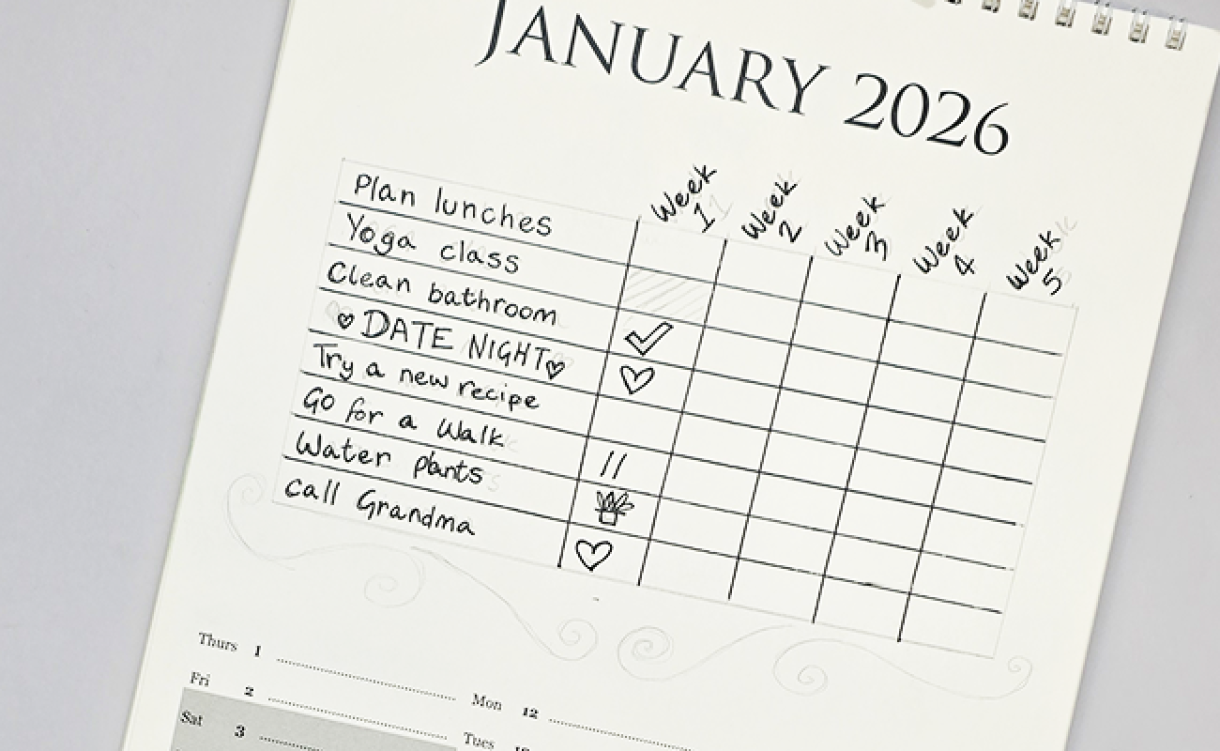
Create a dedicated table on your calendar for habit tracking. Outline objectives across various categories like fitness, work, or personal development. As you complete each task or achieve a goal, mark it off with a fun stamp or vibrant color! This visual progress boosts motivation and makes every tick feel rewarding. For January, we created a table with a section for each week in January, then chose 8 things we would like to achieve each week of January. As the weeks pass by, I can mark whether I achieved the completed the task or not.
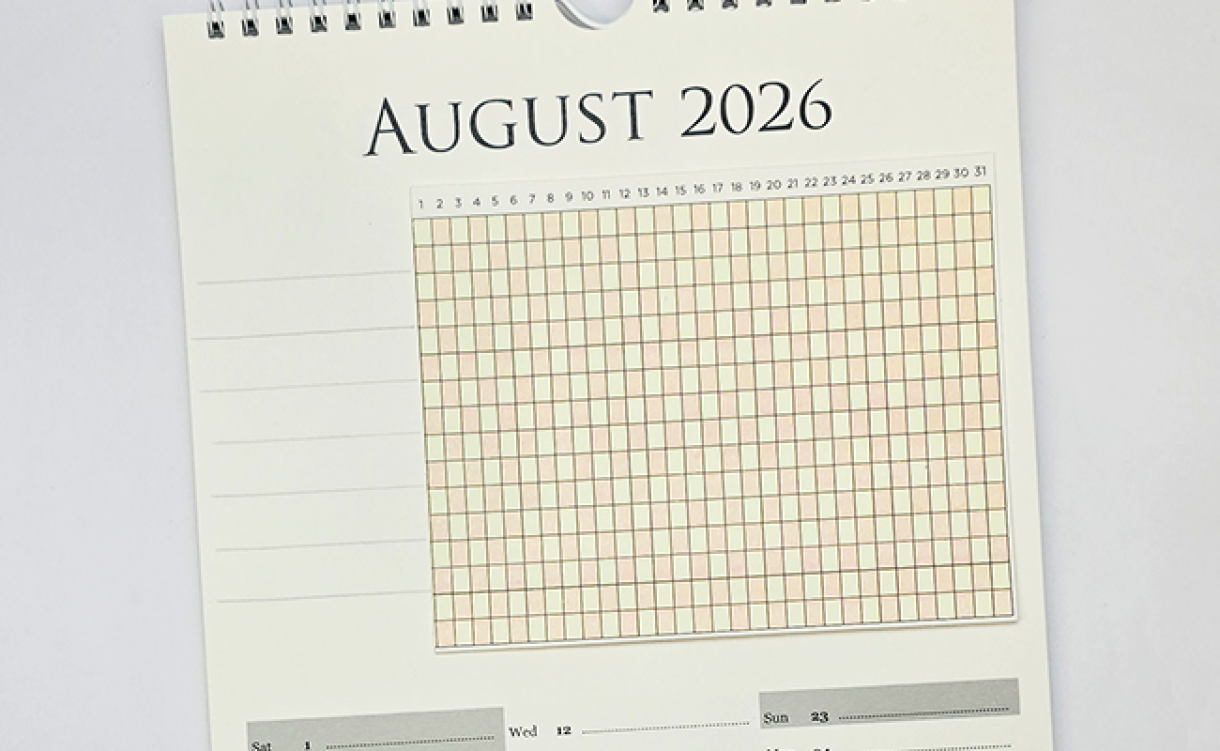
If you're not up for drawing x12 tables on each page, why not print them?
Canva have a selection of free options for creating Habit Trackers, or you could use Microsoft Publisher/ Excel to create a table and adhere it to the Create-A-Calendar using double-sided sticky tape.
Here's an example below of a table we printed from Canva.
Categorized Lists
Avoid feeling overwhelmed by dividing your blank calendar space into sections for jobs that fit into specific categories. Allocate tasks and activities accordingly; this way, you can prioritize more effectively and enjoy a balanced approach to your month.
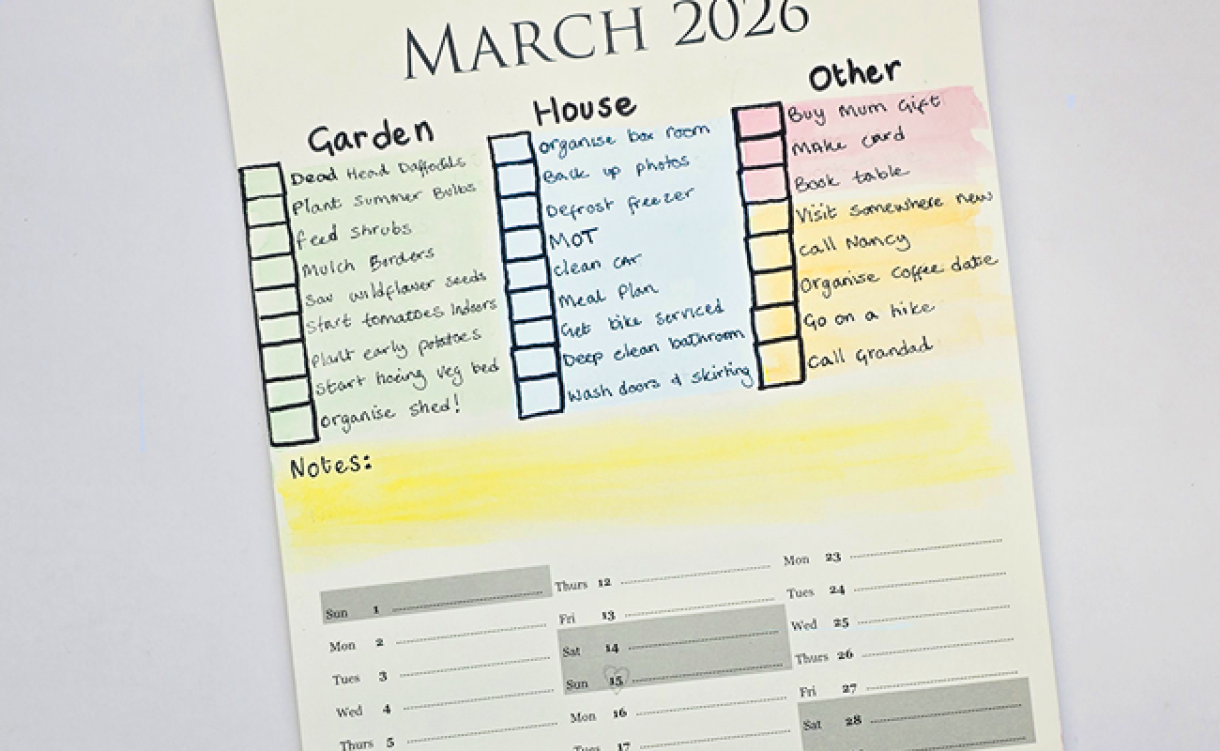
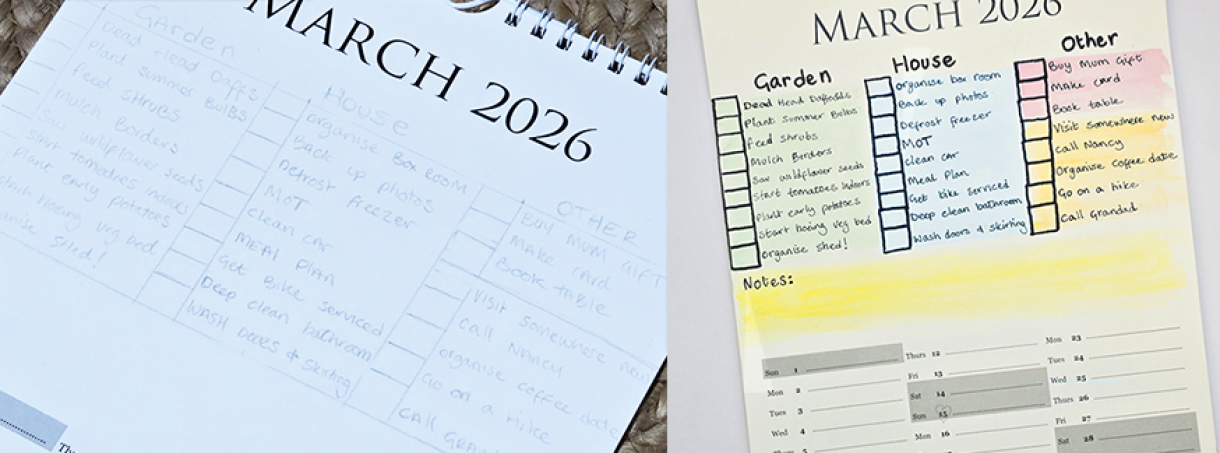
For March we choose x3 main categories: Garden, House, Other, then listed jobs that fell under the categories that I wanted to compete in March.
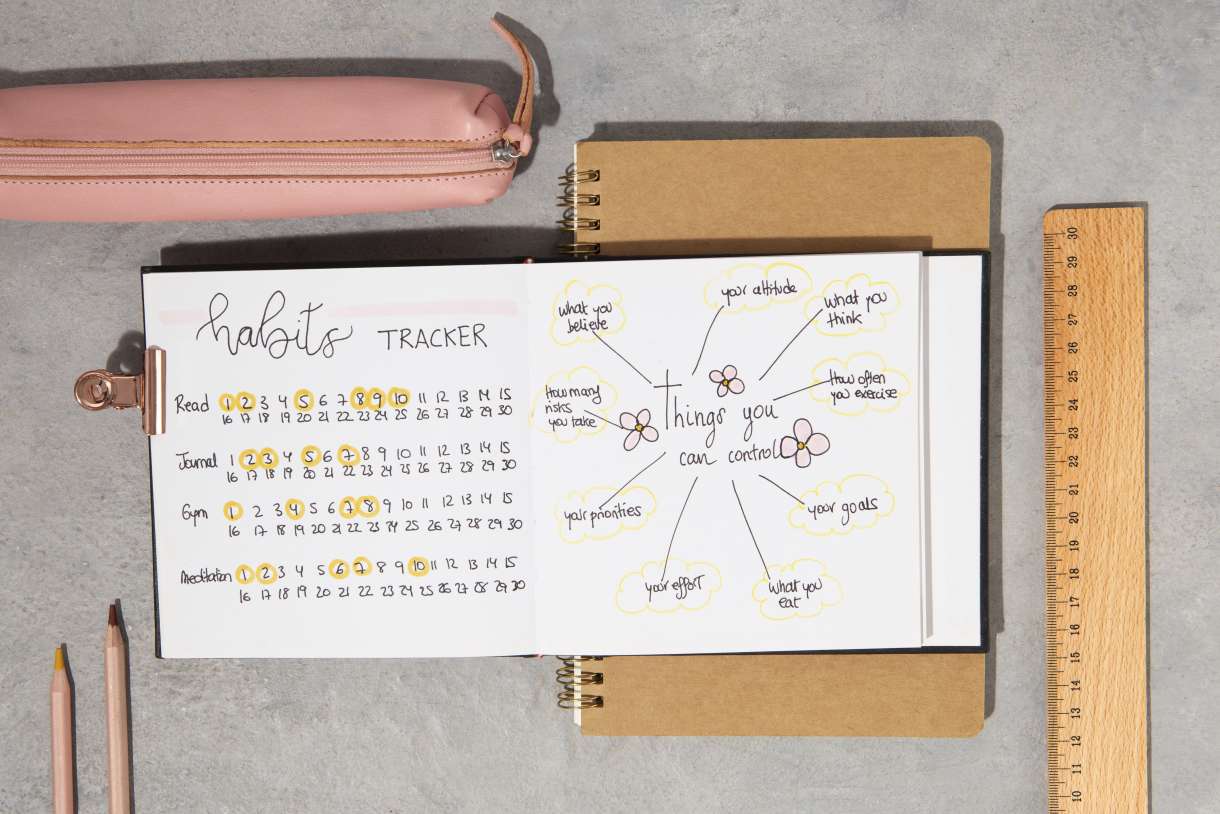
Mind Maps / Brainstorms
If you're not a fan of a normal list, why not start in the middle and branch your way out?
Sometimes we think best when putting pen to paper, and a Spider Diagram can get the ideas going, plus it can be added to more easily than a typical list. You could use a selection of brightly coloured markers to categorise and identify which tasks can be done together.

Go Wild
Combine a bit of this with a bit of that to suit your needs! That's the joy of our Create-A-Calendar; there isn't a set way to decorate it, we've left the whole space blank so you can plan it the way you want it.
CALENDAR THEMES
Goals
What better way to keep track of your goals than to have them hung up on your wall, waiting for you to come and cross them off!
Adding your goals to our Create-A-Calendar keeps them at the forefront of your mind, and it keeps a record of what you can achieve across the year.
If you have something big in mind that can't be completed in a single month, then break it down to make it feel more managable.
For example, if you were learning to drive the first month might be to book lessons and start studying Driving Theory, then the next month could be practicing a manoeuvre you're unsure of.
House & Home Jobs
Do you start January with grand plans of becoming a domestic goddess/ god, only for it to be May and you can't remember when you last defrosted the fridge or hoovered under the sofa?
Use our Create-a-Calendar to stay on top of those odd jobs that can often be forgotten. Plan out which month will be best to clear out the shed or repaint the hallway, write a checklist of everything you'll need before starting and mark the date you plan to do it
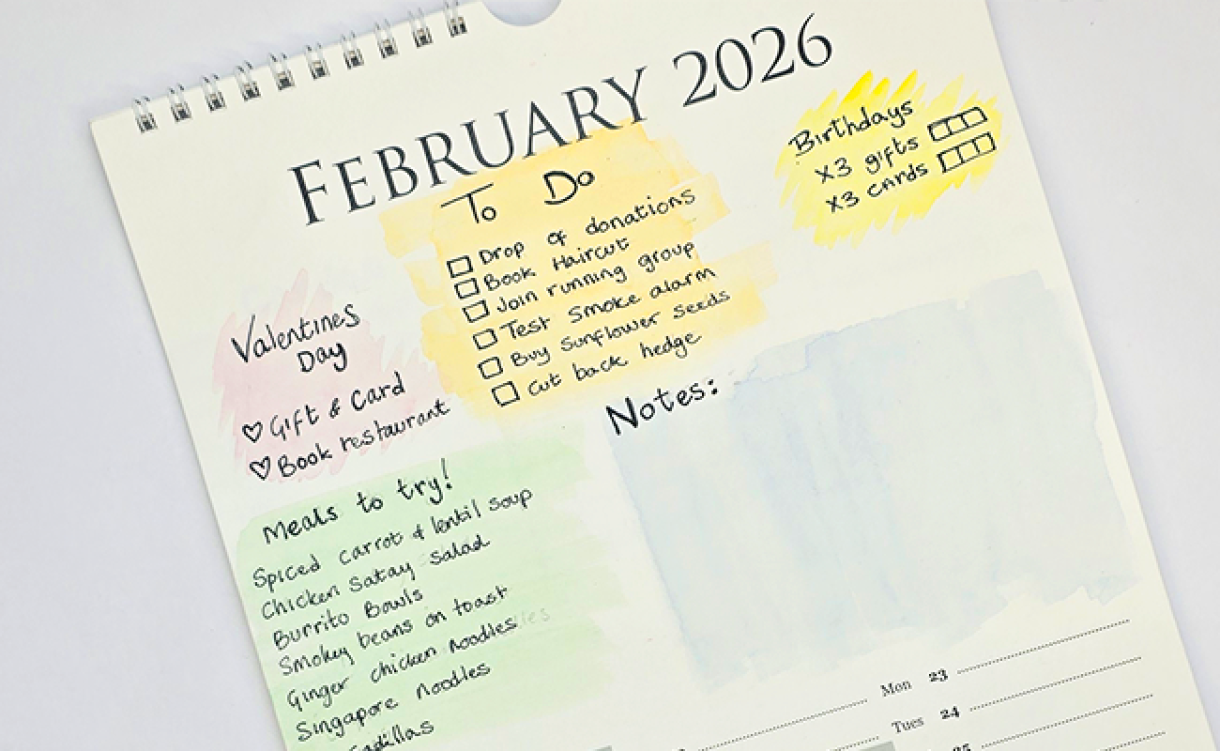
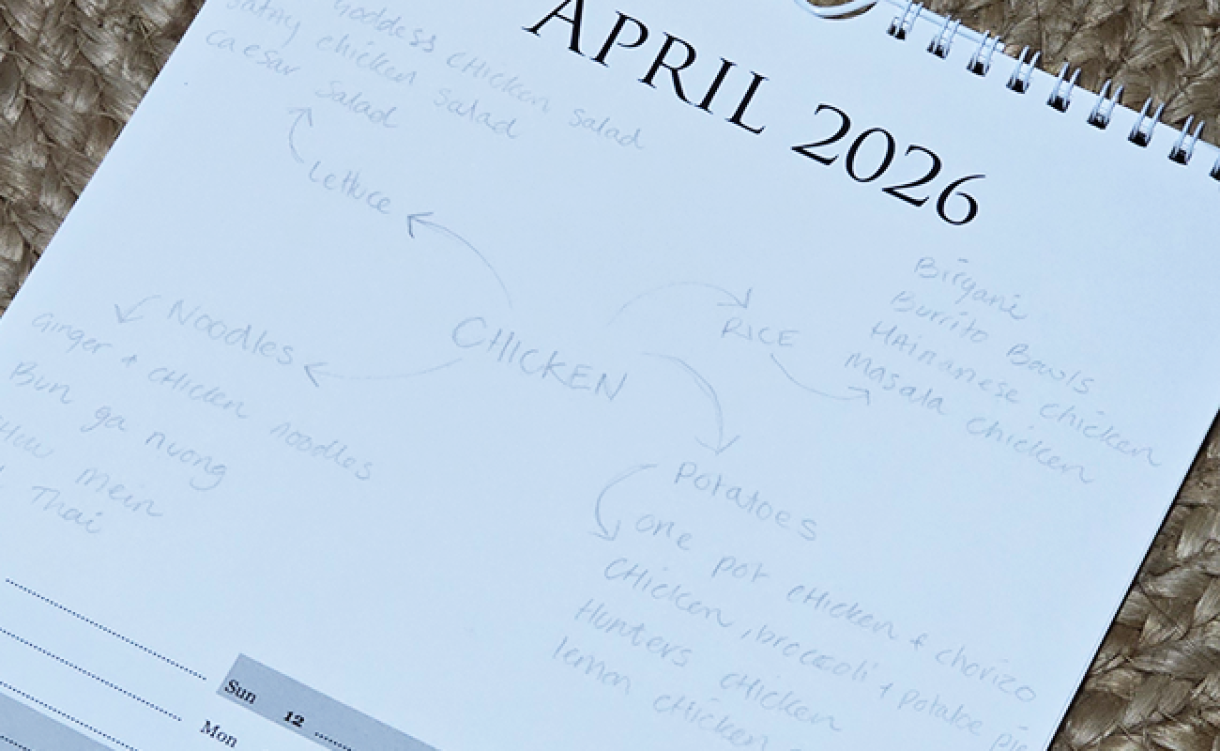
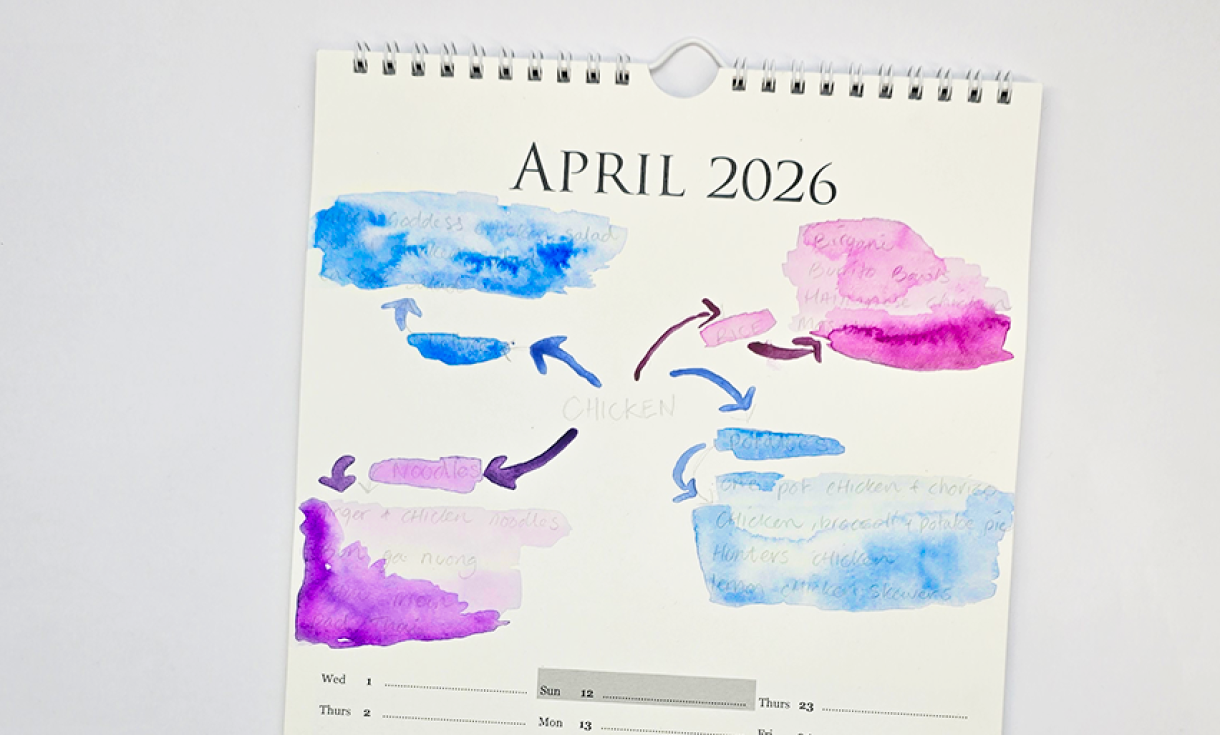
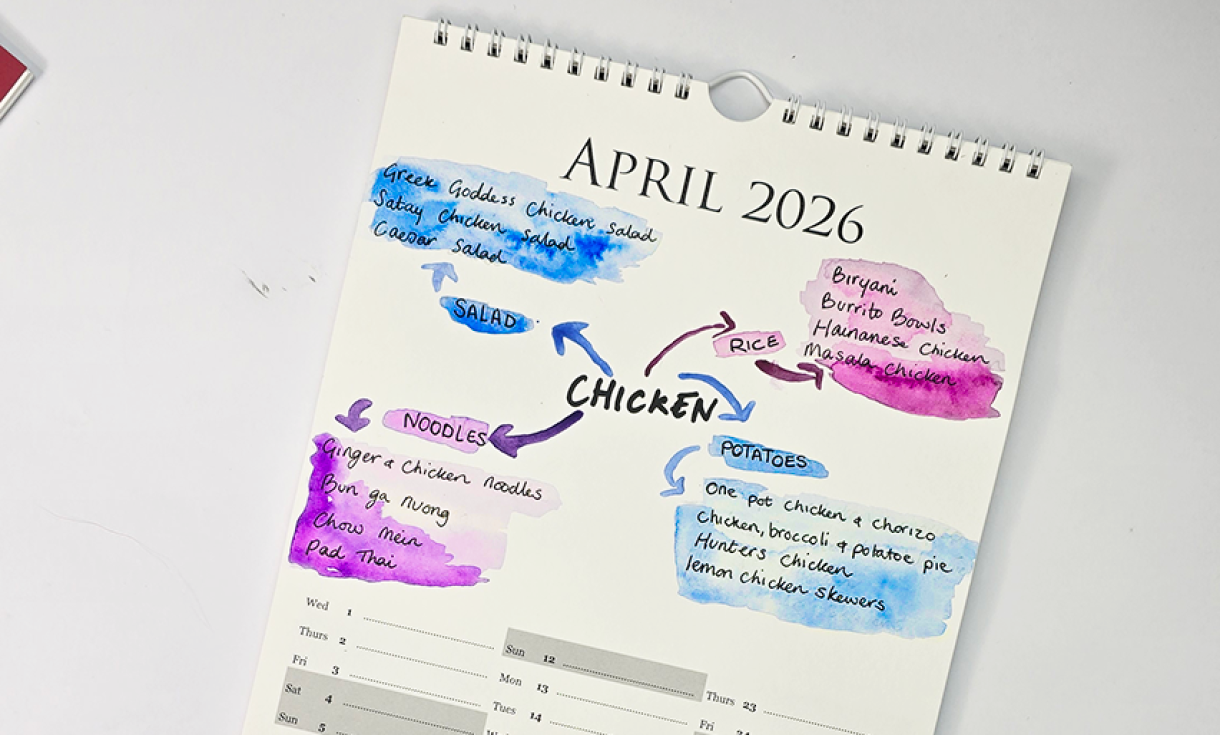
Meal Ideas
Do you create beautiful Pinterest boards full of delicious recipes you want to try, only to forget about them when tea time rolls around? Me too!
Why not write them on your Create-A-Calendar? You could dedicate each month to a certain theme, ingredient, or country to inspire yourself.
For example, if you created a spider diagram with CHICKEN at the centre, then branch off with other ingredients like RICE, POTATOES, LETTUCE, NOODLES. You can then add your meal ideas on the final branches to inspire you on what to cook!

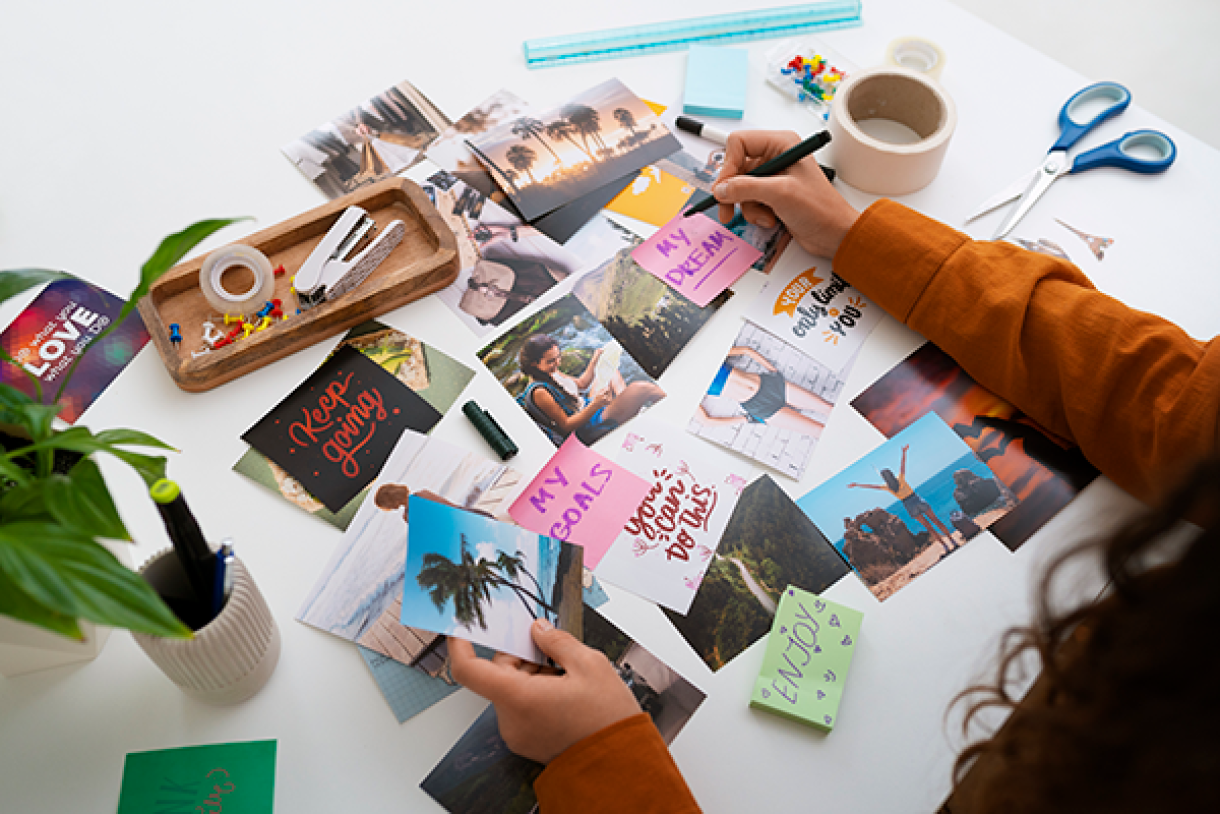
Hobbies & Projects
Do you collect hobbies? Or have too many interests and not enough time? Maybe you have grand plans to create handmade Christmas gifts, but get distracted by other ideas.
Our Create-A-Calendar could be used to decide which projects you work on each month. Each month could be a mood board dedicated to a project, with sketches of your own ideas and colour swatches.
If you're planning a paper craft project, you could use our x10 small samples to plan your colour scheme and test your emossing folders, metal dies, pens, or pencils! We gave it a go below...
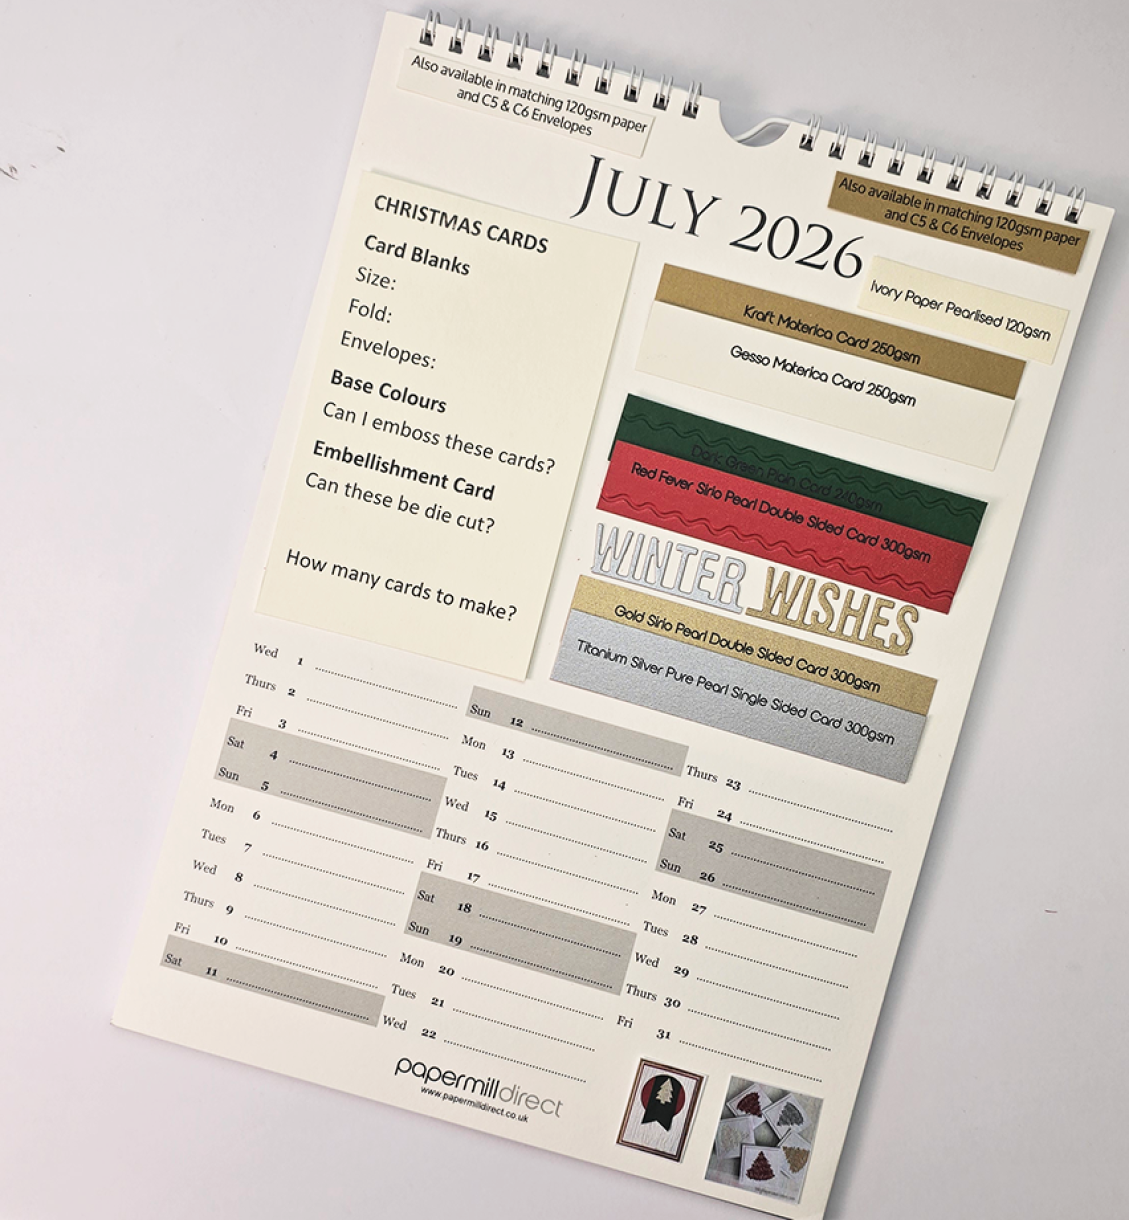
Getting Started
Once you have decided how you want to set up your Create-A-Calendar and what you want to include, it's time to get started on your Create-A-Calendar.
You can either complete the Calendar a page at a time or do each step on every page, whatever works best for you.
Step 1. Trace everything out in pencil
You want to make sure you can fit everything into the blank space without anything looking squished or illegible.
If you're printing tables, then you need to ensure the table is no larger than the blank space -
A4 Blank Space - 8” x 5” / 203mm x 127mm
A3 Blank Space - 11.5" x 7.5” / 292mm x 190mm
Slimline Blank Space -5.9” x 5.8” / 150mm x 147mm
Desk Blank Space -4.7” x 3.5” / 120mm x 90mm
Step 2. Colour the Background
We used watercolours to add a pop of colour to the base of our Create-A-Calendar pages, changing colours for different jobs, goals, or activities.
You could use Markers, coloured pencils, washi tape, or other materials to add your own style. If you're printing a table, you could use coloured card to back the table to make it pop off the page.
Step 3. Outline Everything
*If you're using paint or markers, wait until the page is completely dry*
Go over everything in pencil that you want to appear on your page with a marker. Leave the marker to dry, then erase any pencil marks that can be seen through.
Step 4. Get Creative
If you have blank space left on your calendar the you could fill it with sketches, doodles, inspirational notes or handy tips!


Nobody has commented yet
Be the first to comment on this article by using the form below.