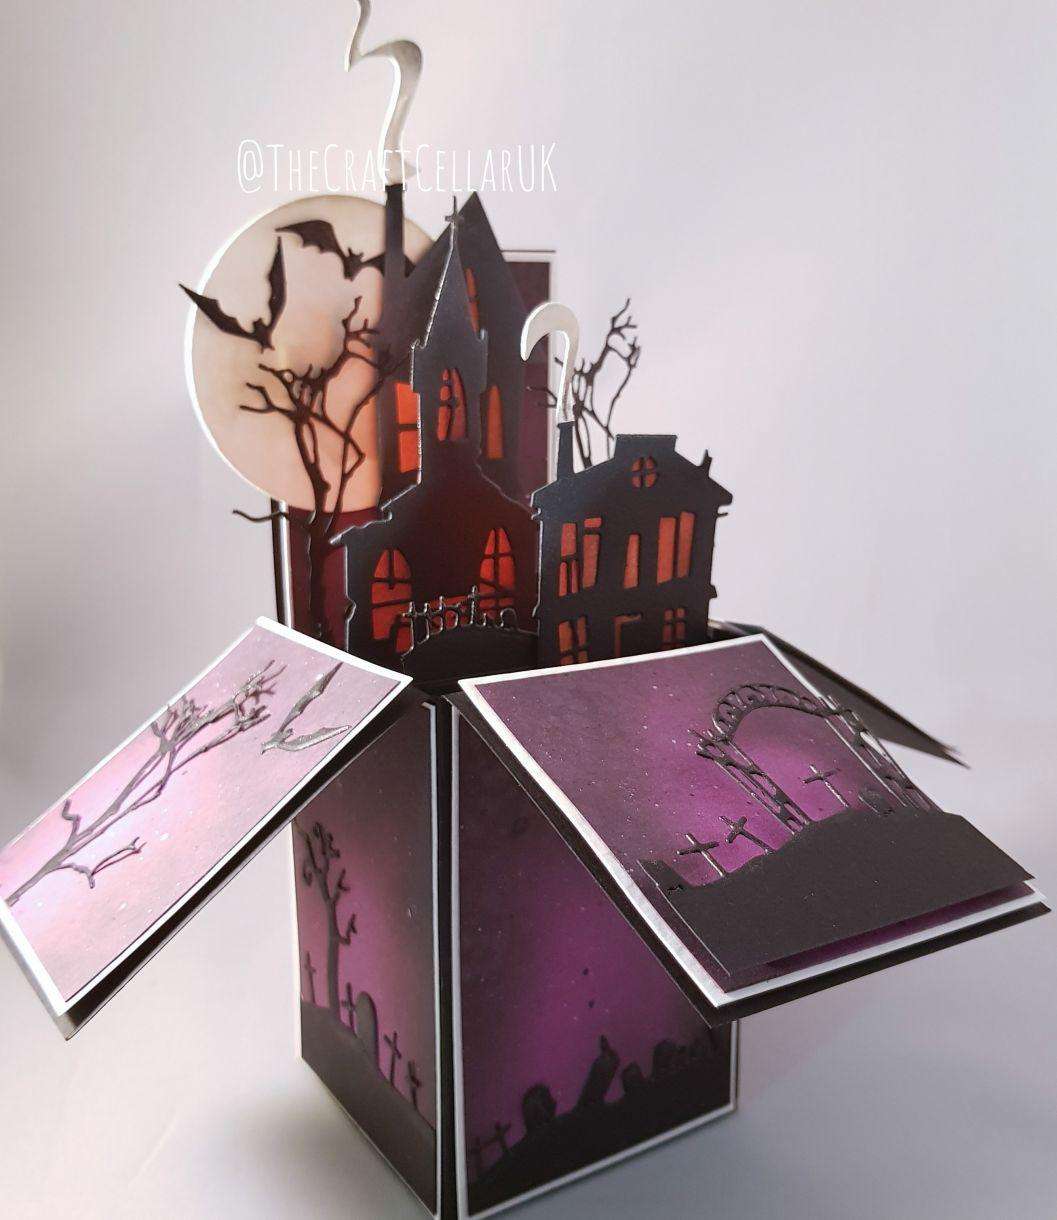
Spooky House Halloween Pop Up Box Card
1
Posted on 14th October 2025 by Alison Pendlebury-Brown
Filed under All Papercraft Tutorials, Card Making Ideas, Seasonal Crafts, Halloween Paper Crafts, Autumn
Any one else love Halloween? You've come to the right place for inspiration if so! Here are the instructions on how I created my spooky Halloween pop-up box card. Grab a cuppa, it's a long-ish one. Happy crafting!
You will need:
You will also need:
- House die cut shapes
- A die cut circle for the moon
- Distress inks in black and light grey for shading
- Kuretake's Wink of Stella in Clear or alternative shimmer pen
- Create the Base Box
- Using your piece of A4 black 240gsm cardstock, score the card along the longest side at 2 3/4", 5 1/2", 8 1/4", and 11".
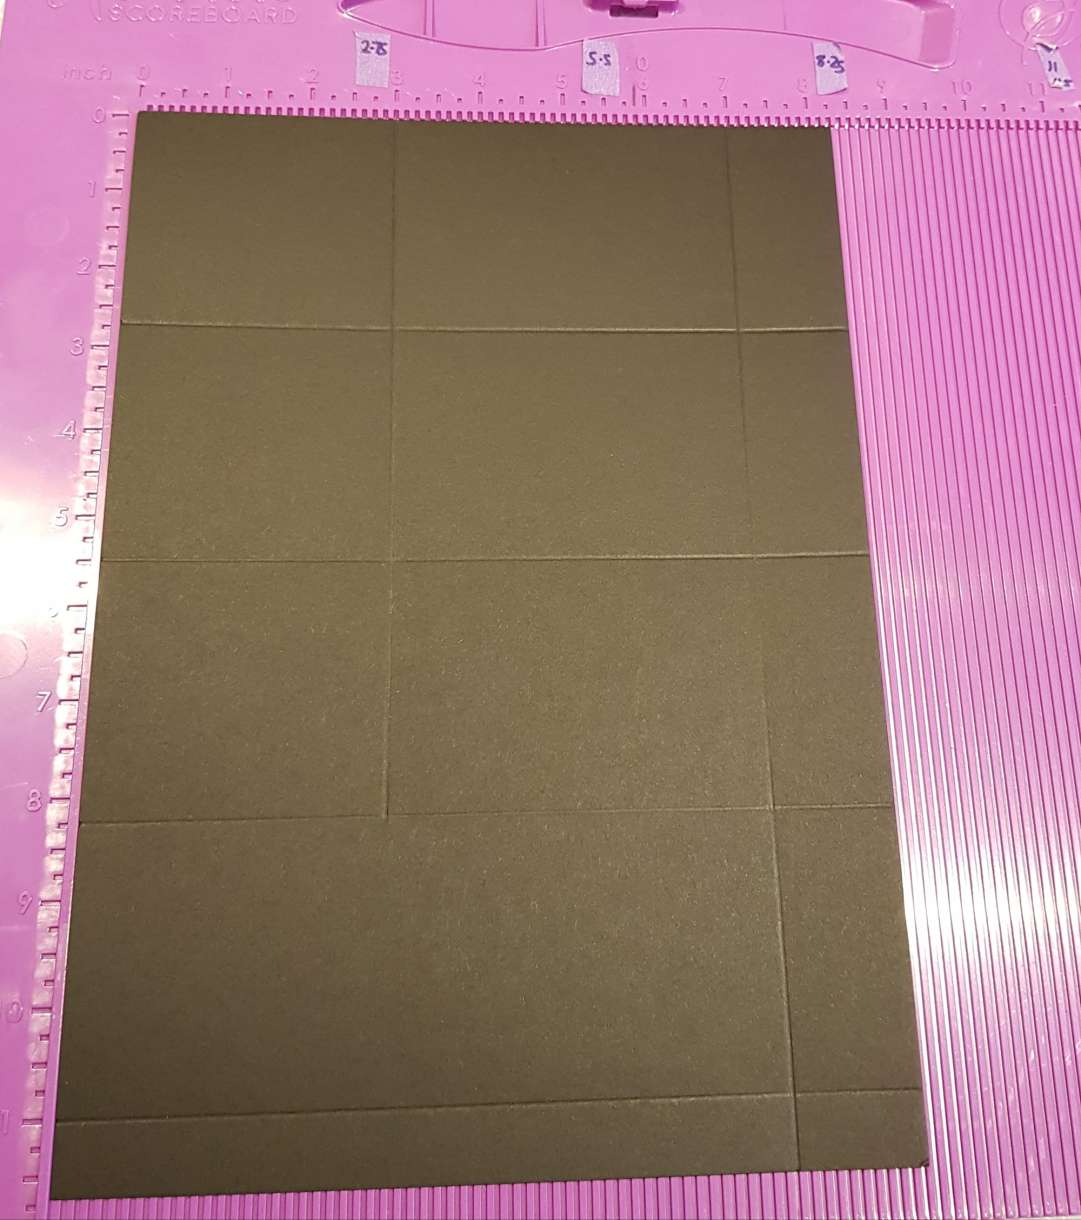
- Spin the card around to the shortest side and score at 3" and cut at 7" retaining the remaining piece for the inserts.
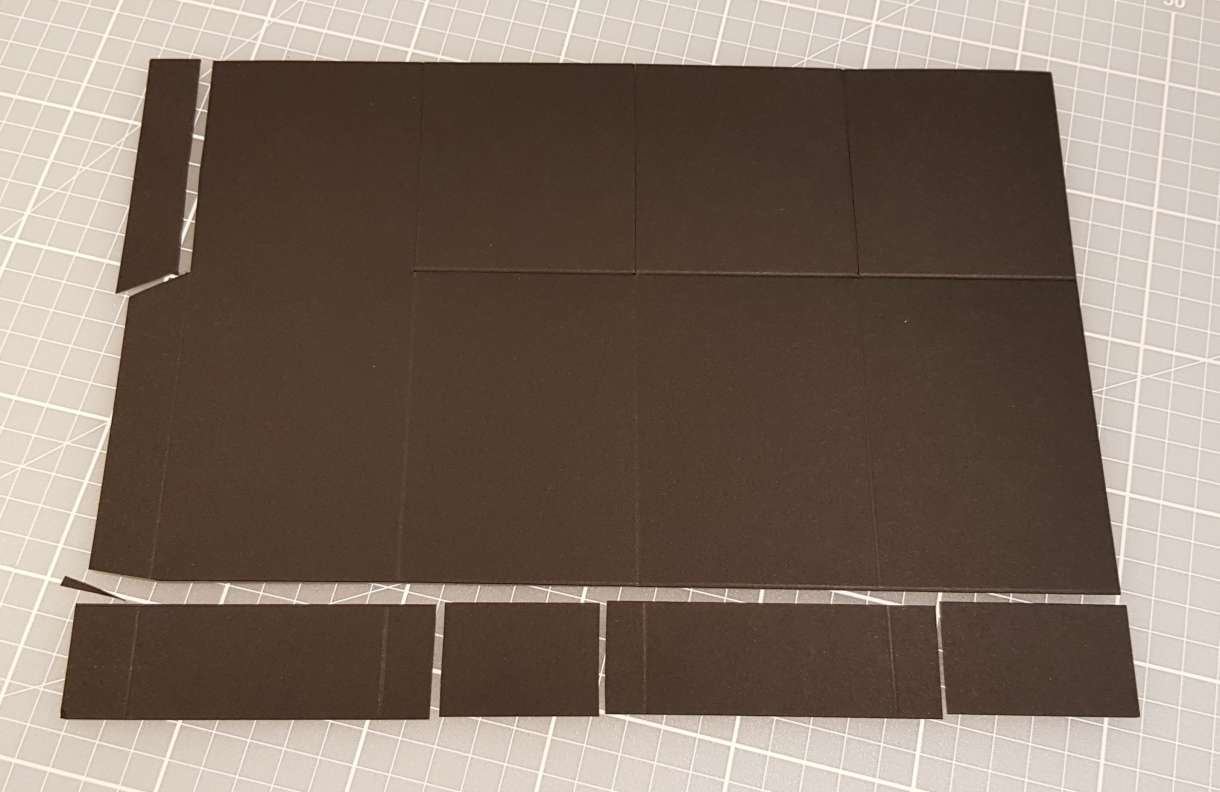
- Cut as shown in the images to create the fold down sections.
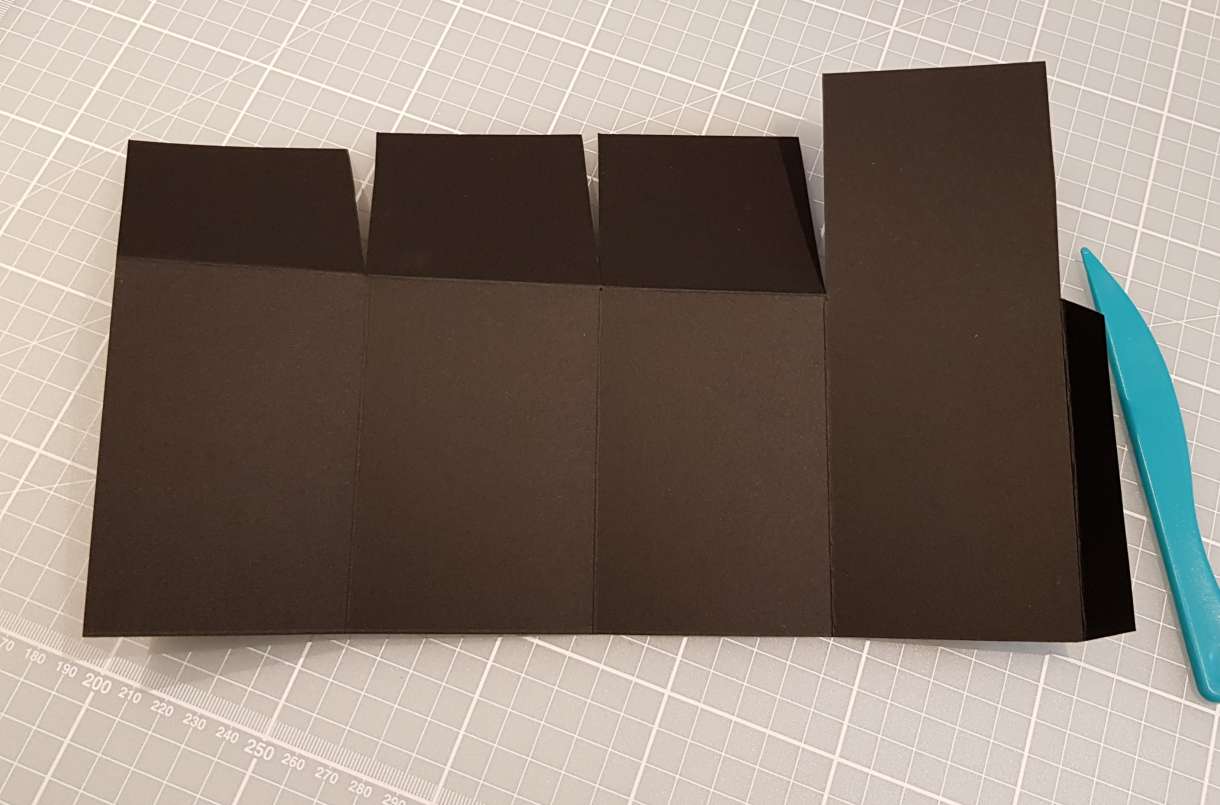
- Glue the 1/2" tab to the other end of the card to create the box shape.
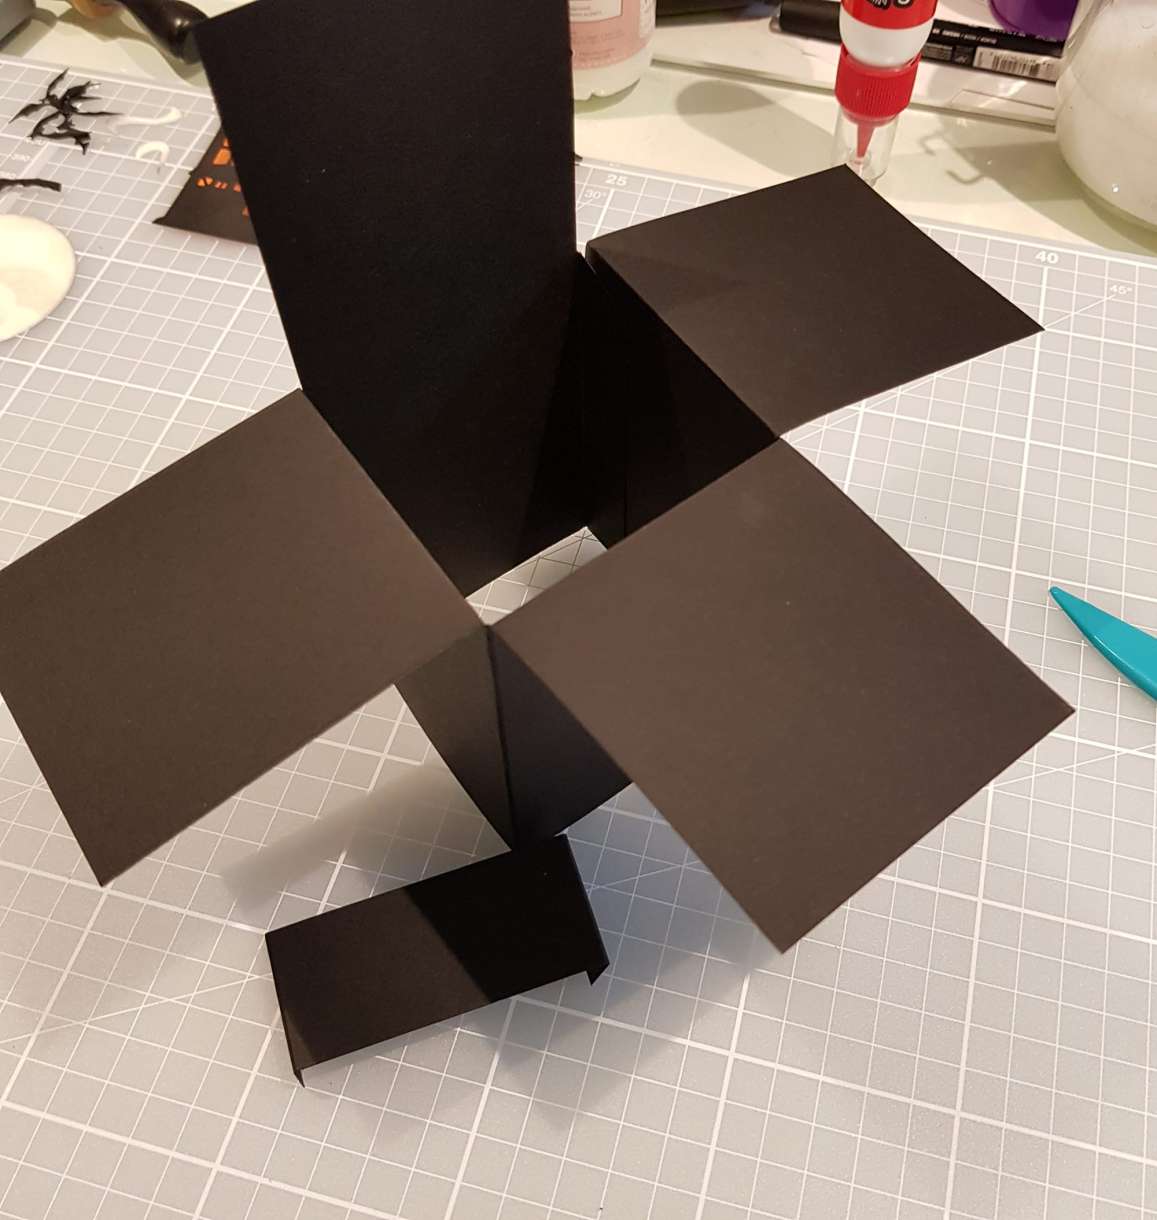
- Fold and glue the inserts where desired inside the box.
2. Create the Mats for each side
White Hammered Card Mats x 3:
- Base - 2 5/8" x 3 7/8"
- Flaps - 2 5/8" x 2 7/8"
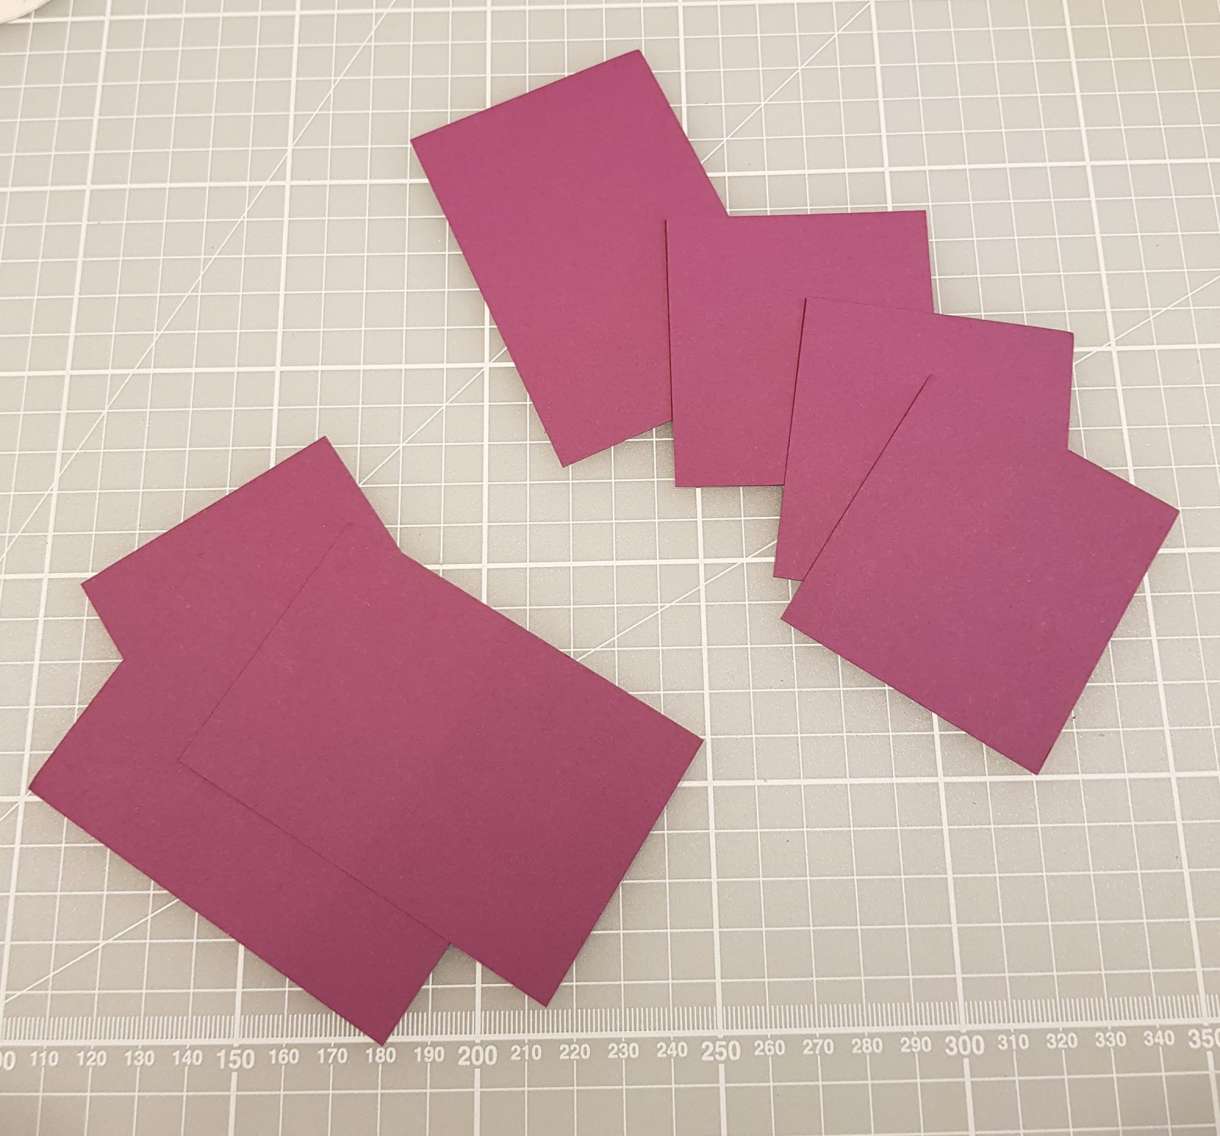
Purple Card Mats x 4:
- Base - 2 1/2" x 3 3/4"
- Flaps - 2 1/2" x 2 3/4"
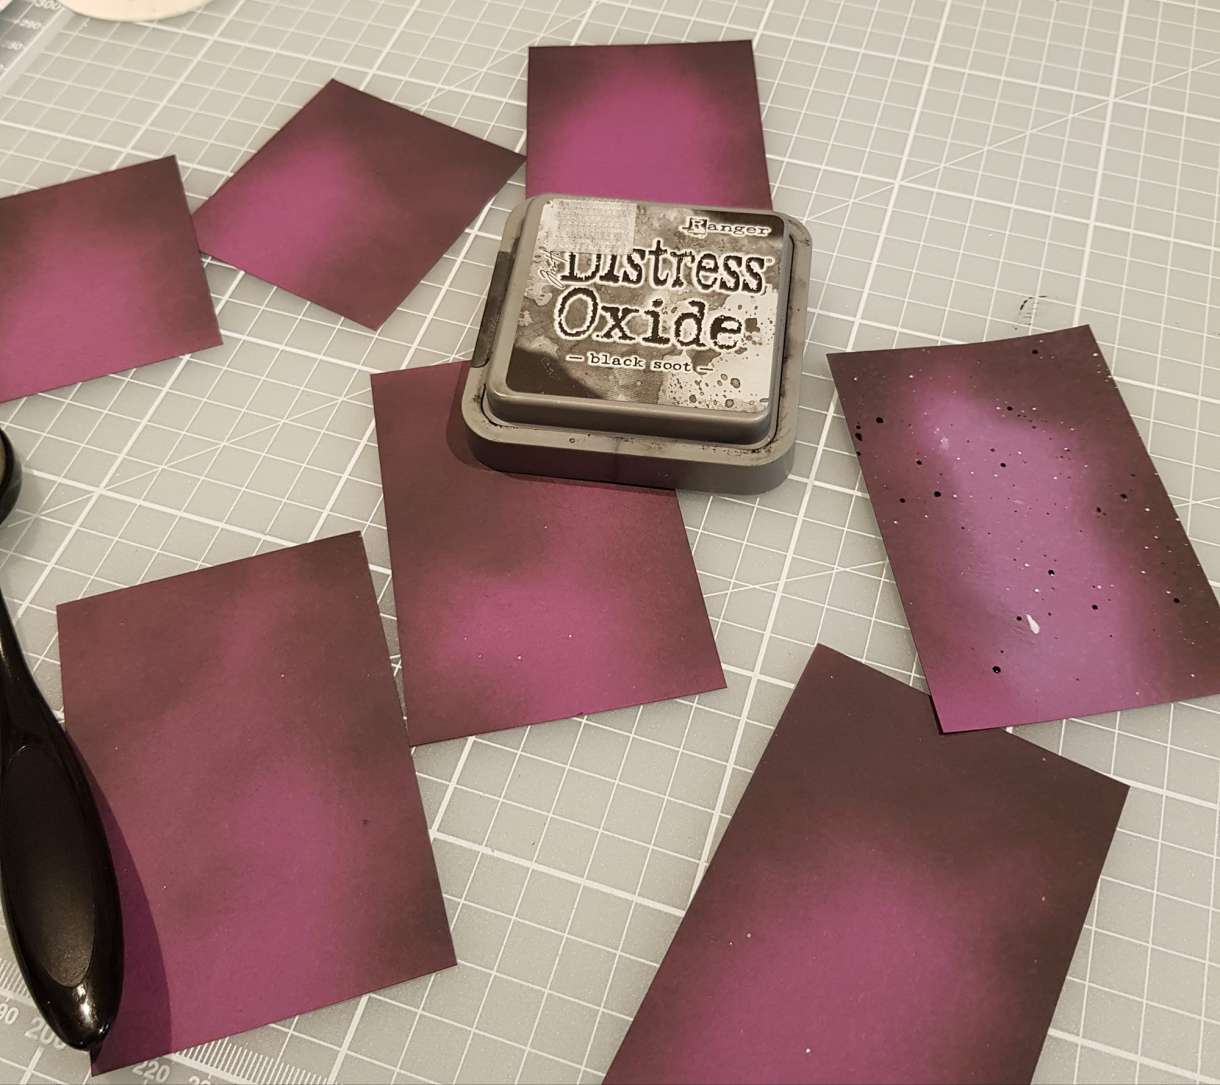
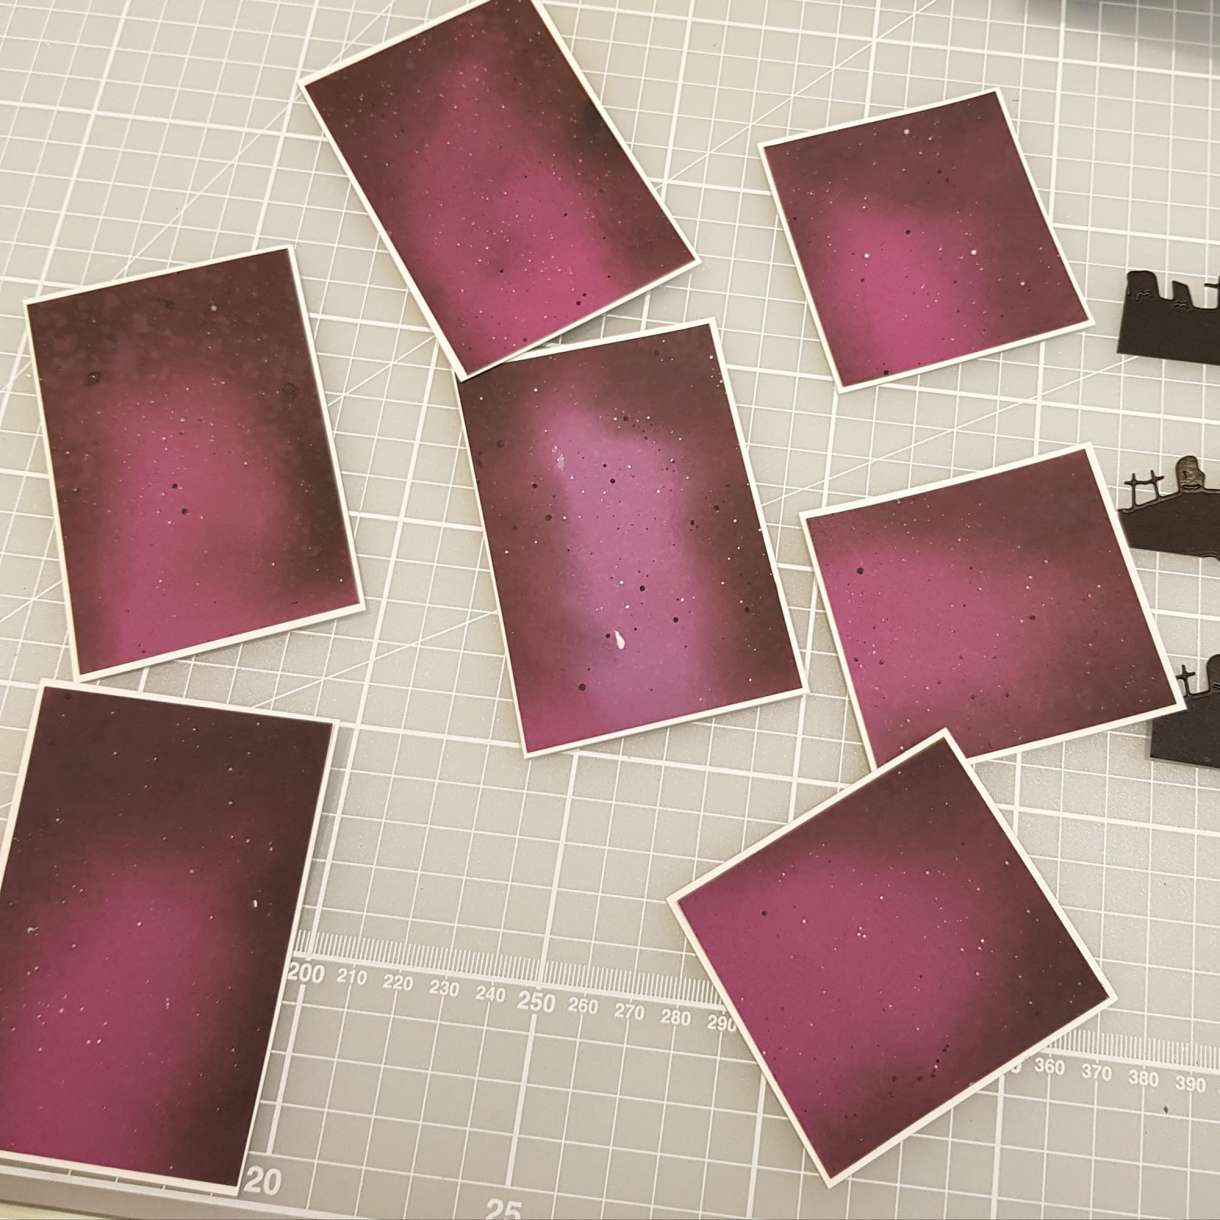
3. Add the Spooky Effects
- Use black oxide inks to create a spooky night sky around the top and sides on the purple card.
- Mist the card with water and dabbed off with a paper towel.
- Stick the purple mat to the white mat with Anita's tacky glue - I prefer wet glue as you have a little wiggle room to make sure it's straight.
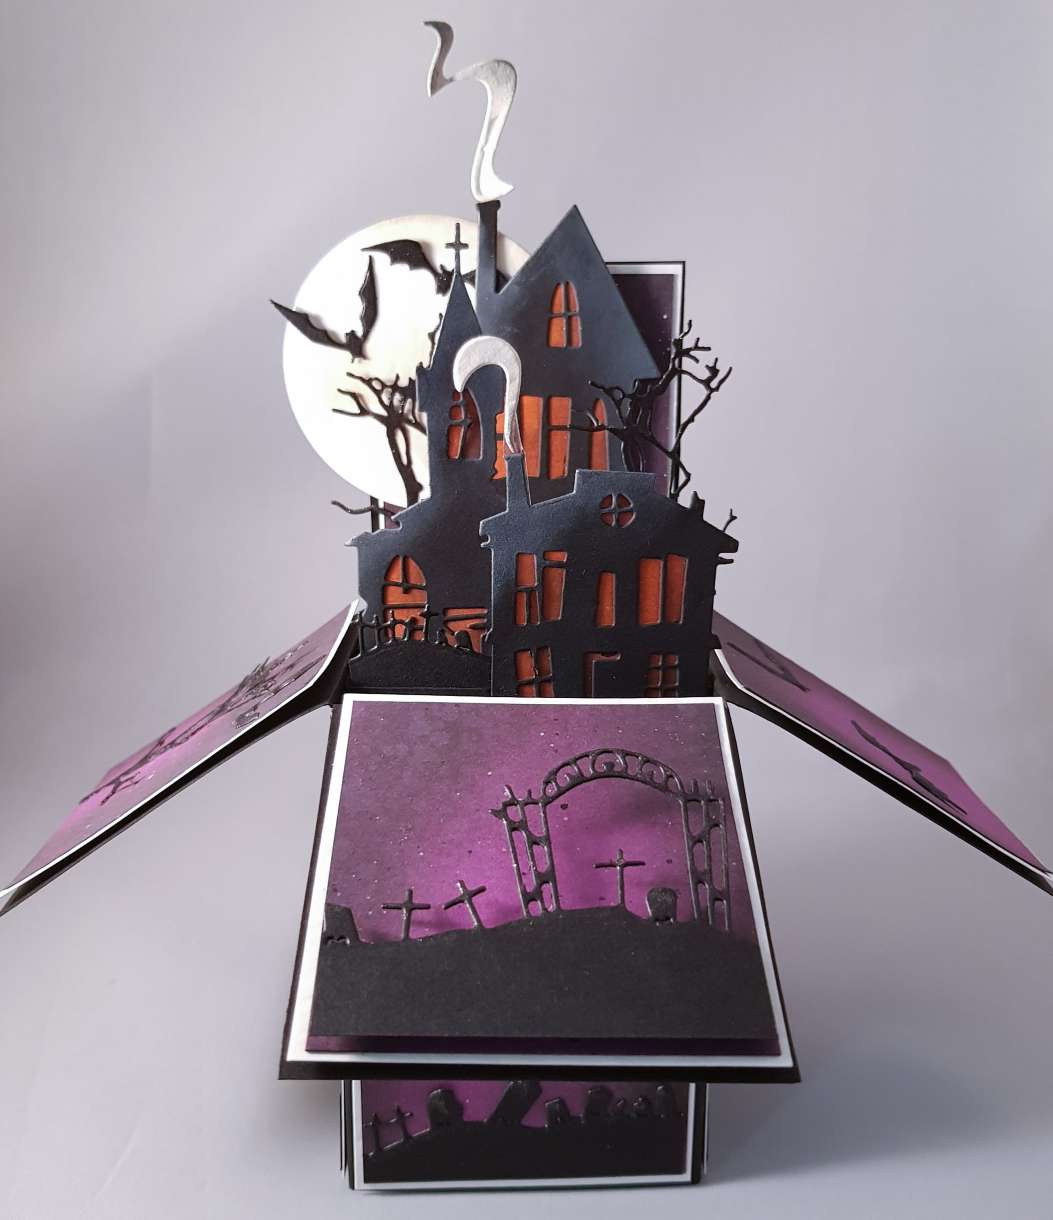
4. Create the Pop-Up Box
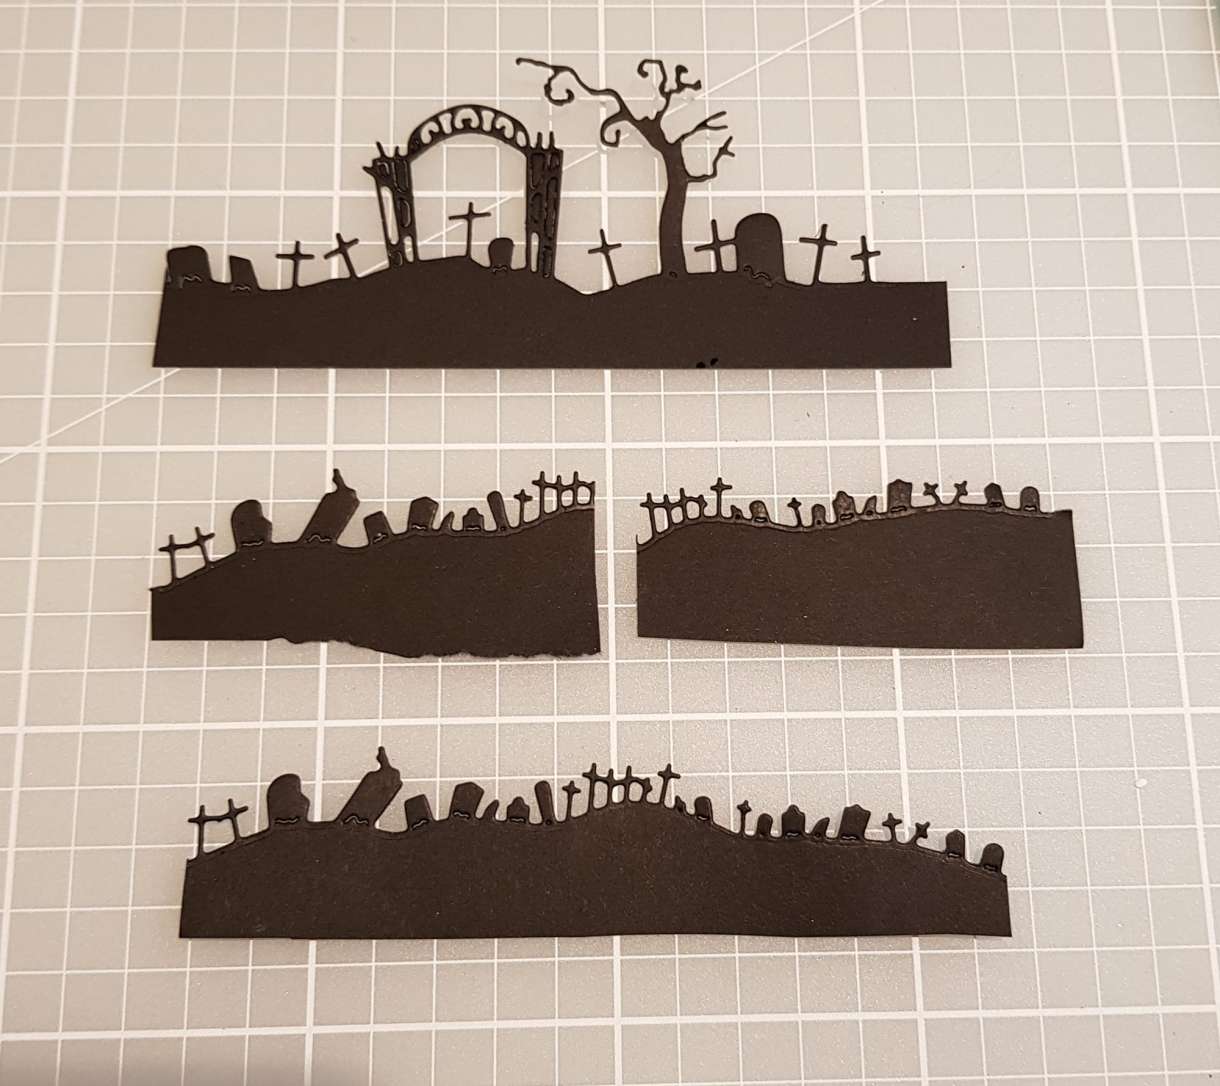
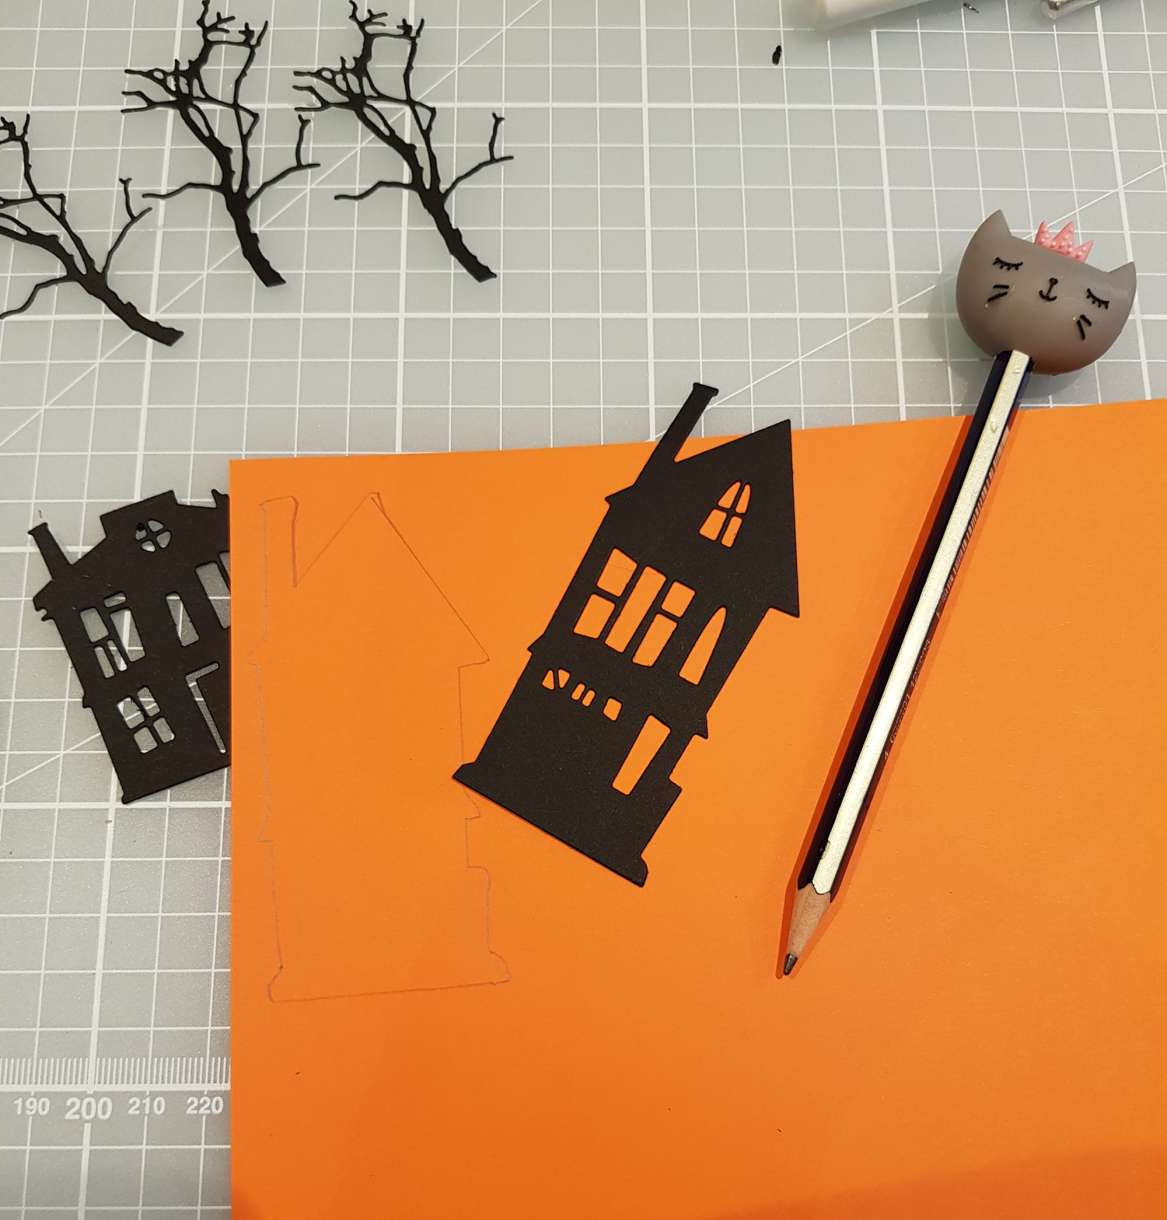
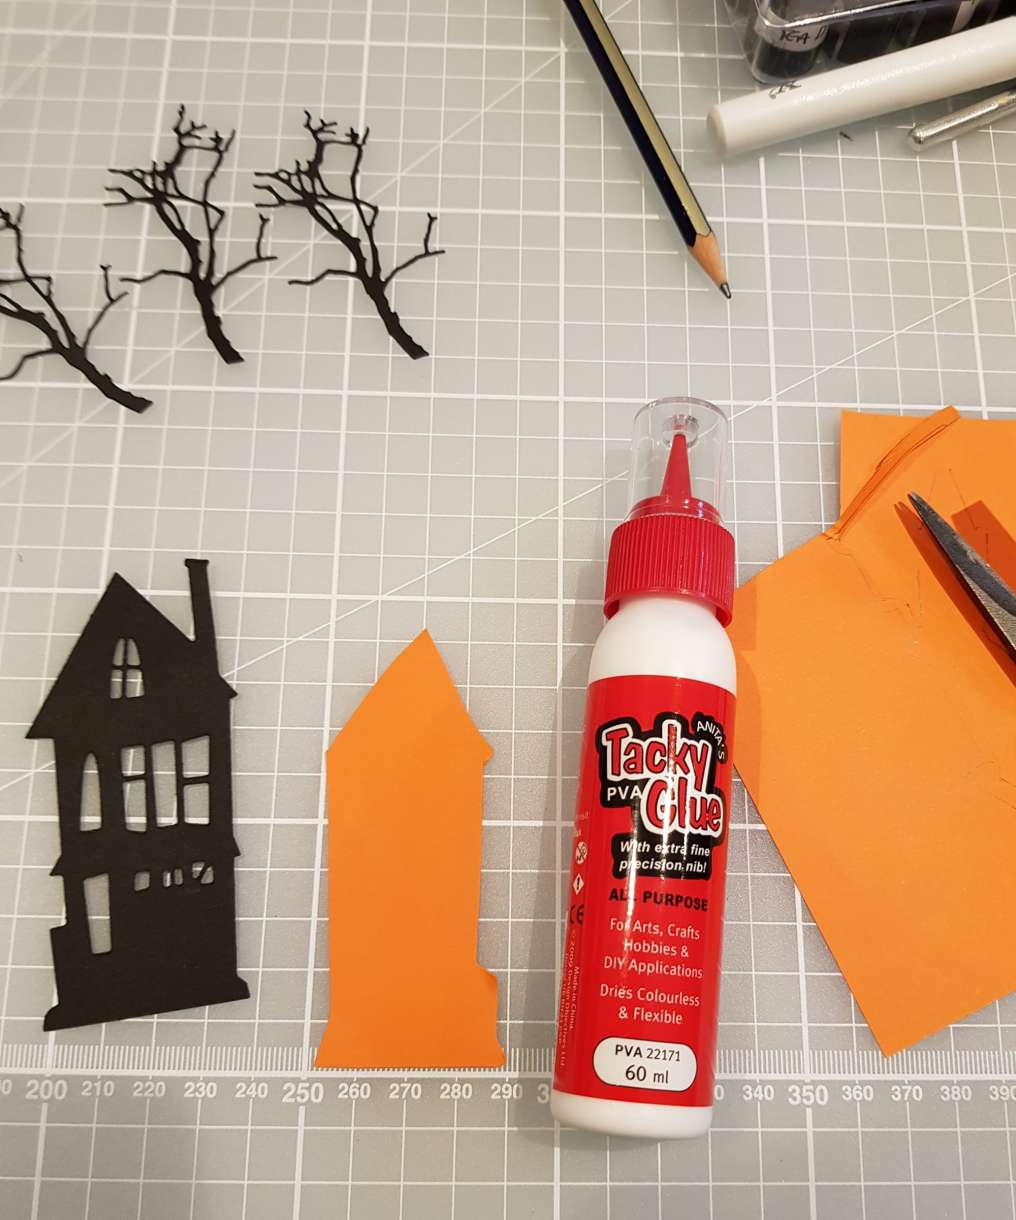
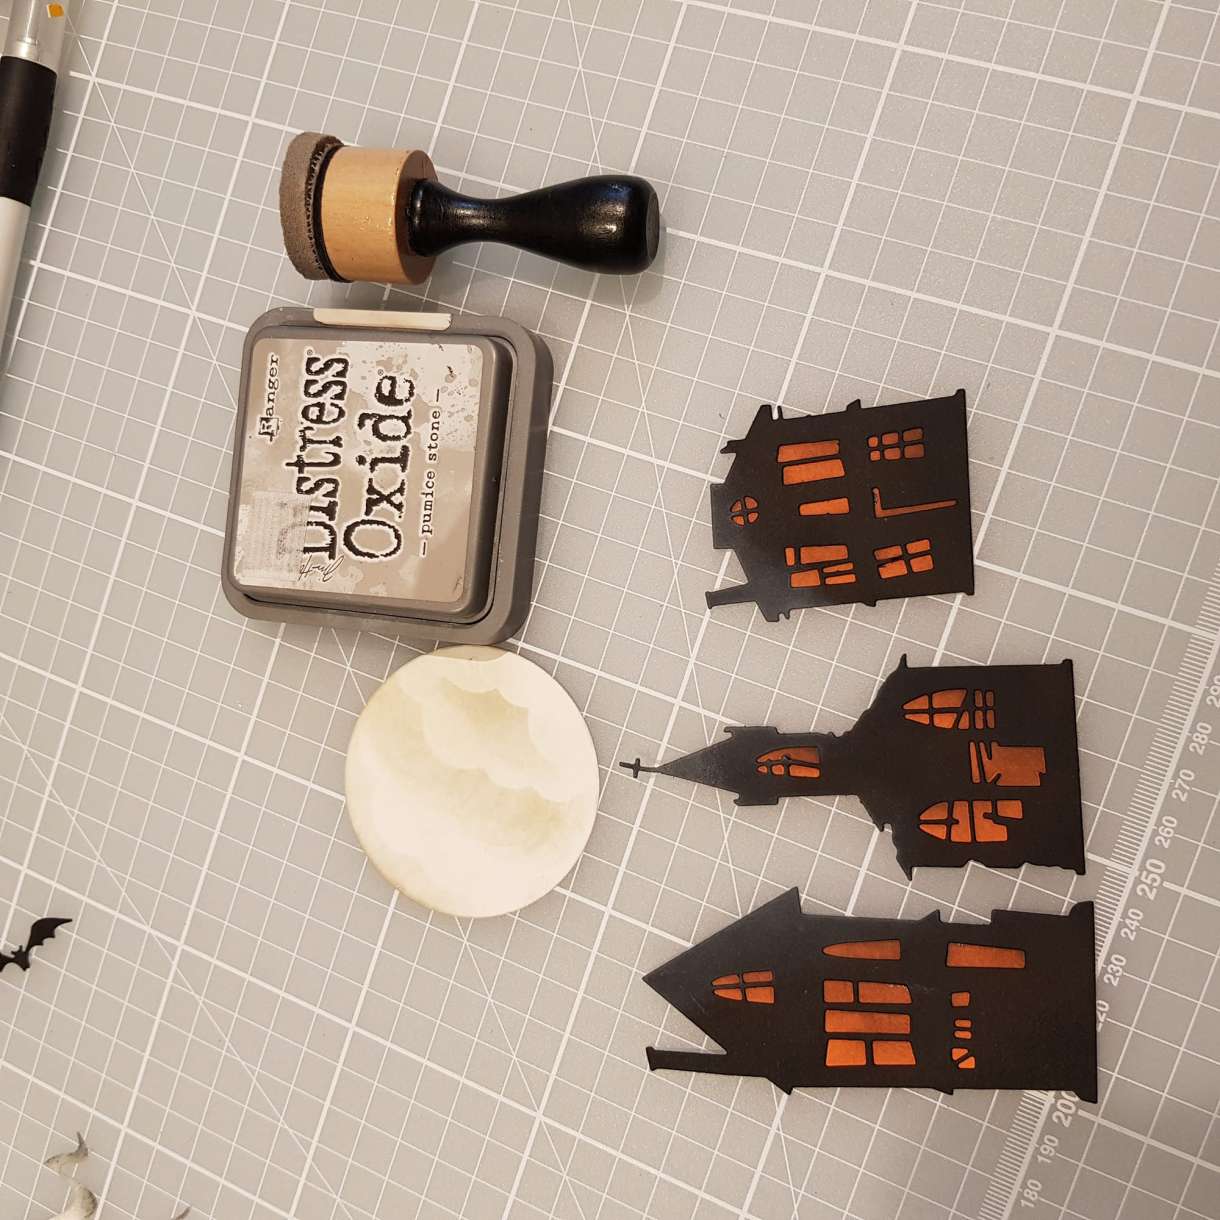
- I die cut the houses, trees (from Tim Holtz 'Ghost Town' die set), bats (from Tim Holtz 'Bat Crazy' die set) and various graveyard silhouettes from black cardstock.

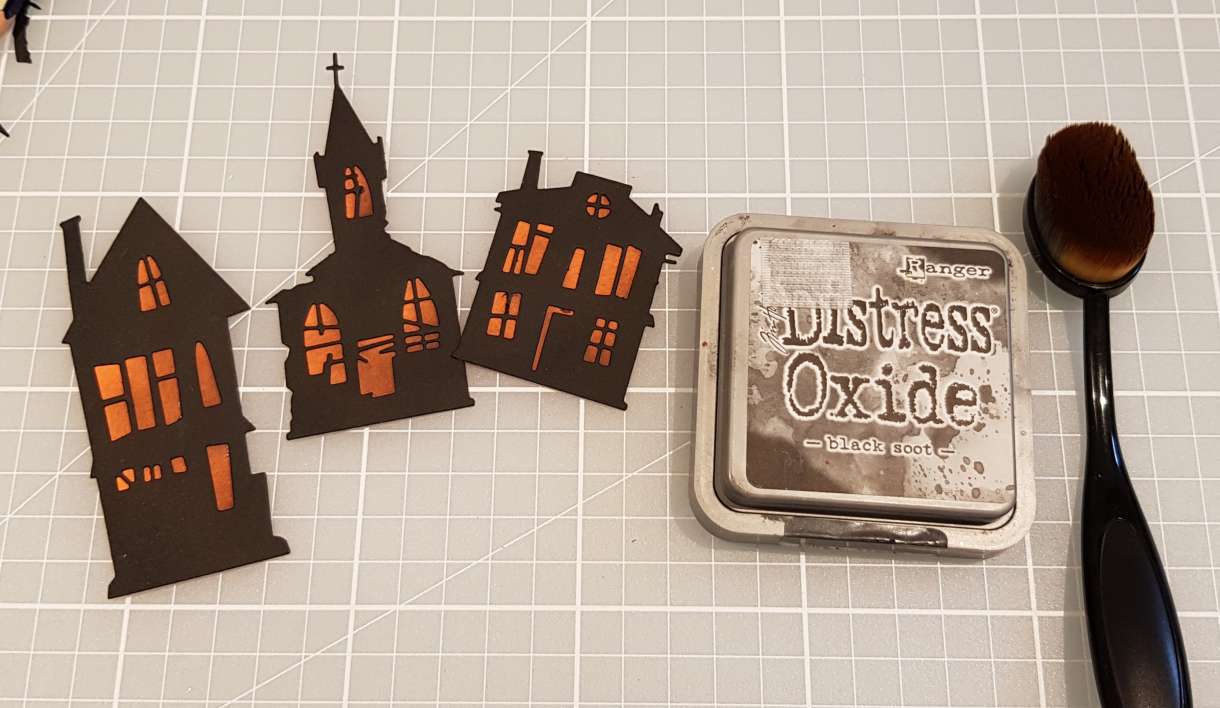
- To create the 'glow' in the windows of the houses I traced around each die cut house in mandarin orange cardstock, cut them out and adhered to the back using Anita's Tacky PVA Glue
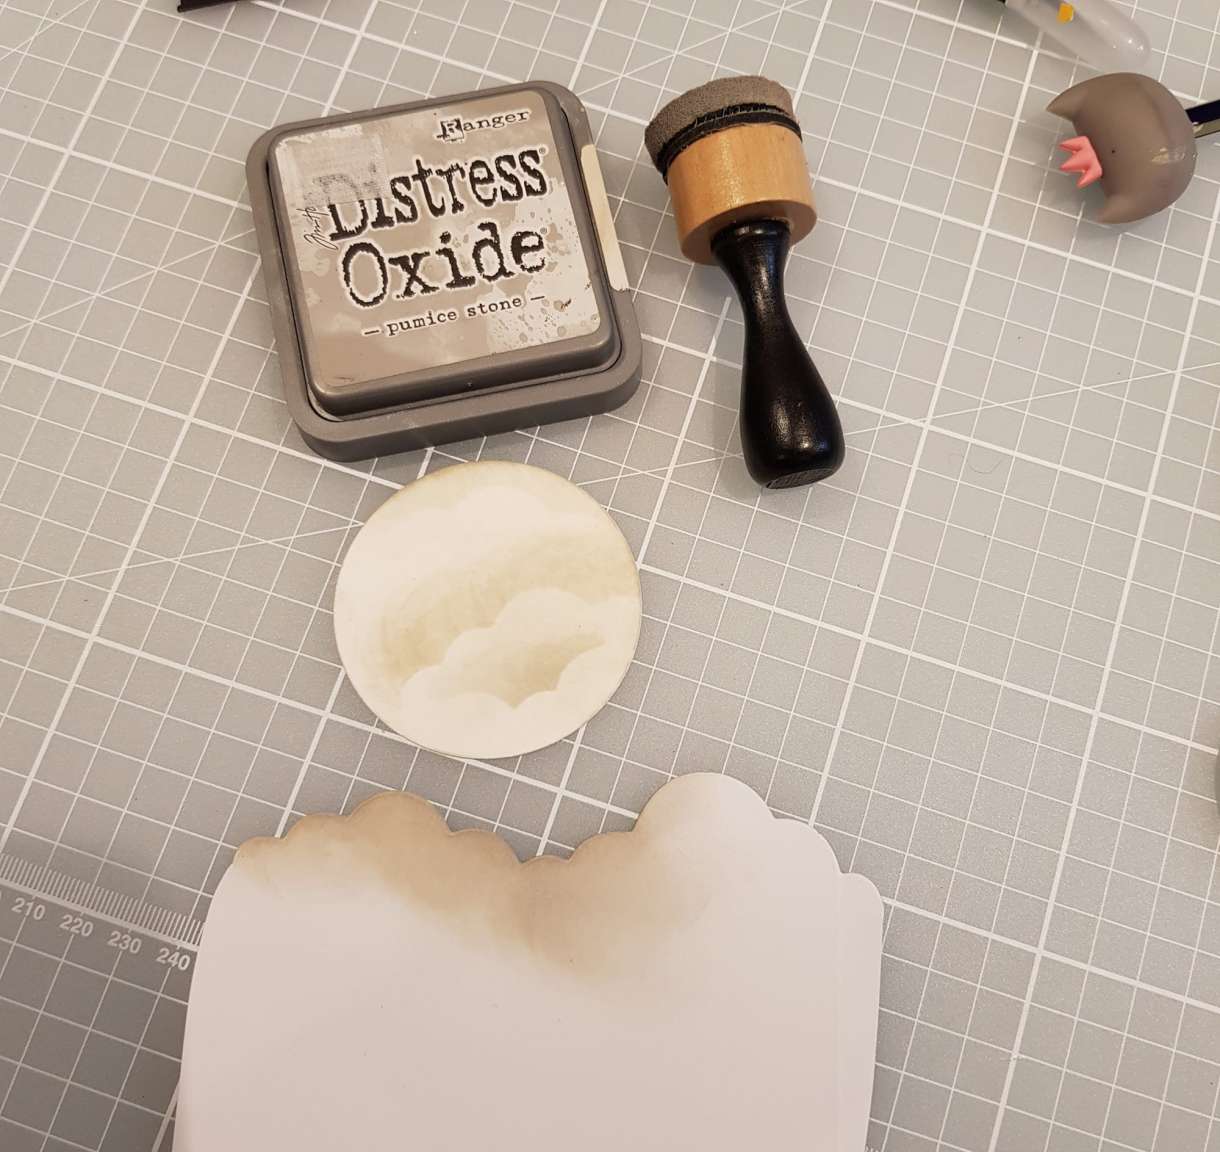
- To create a moon I die cut a 6.5cm circle from white hammered cardstock to provide texture to the moon. I used a cloud template I'd previously made, using grey distress oxide ink to give extra dimension to the moon.
- I added a little grey distress oxide ink to each house where I guessed the moonlight would hit them.
5. Arrange it all together
- I adhered each of the mats using 3D foam tape to give the card a little more dimension.
- After putting it all together I added a little Wink of Stella on the moon and in certain areas where the moonlight would catch each of the elements.

Papermill Direct has everything you need to create this spooky house Halloween pop up box card. For more spooky craft project ideas, check out our blog to get inspired. I hope you enjoyed this blog and provided some inspiration for your next Halloween themed cards. Happy Halloween!


1 thought on “Spooky House Halloween Pop Up Box Card”
Carole
10th October 2019 at 12:25 p.m.
Thank you for this lovely set of instructions for a great card :)