How To Make A Pop Out Swing Card
1
Posted on 25th July 2016 by Sylvia Ames
Filed under All Papercraft Tutorials, Card Making Ideas
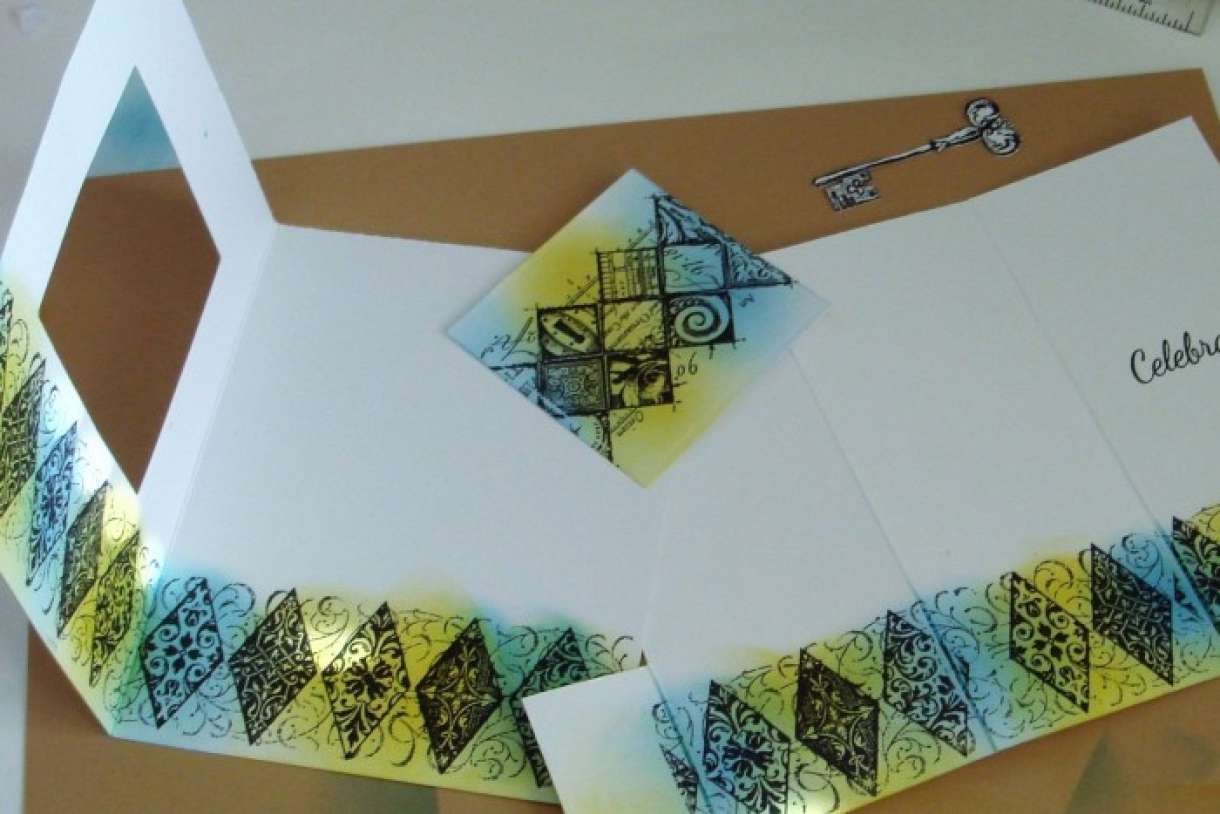
Hi Sylvia here with a pop out swing card tutorial. Swing cards are not hard to make although they do take time as they have to be measured carefully and scored before putting together. I chose this design as there is no fiddly cutting just a die cut aperture for the pop out panel, although you can cut out the aperture with a craft knife if you wish. I have two sizes of card in the tutorial, the first is a normal sized card using an A4 piece of card and the other an oblong card using an A3 piece of card (seaside card above).

Basic materials needed are:
- cardstock
- pencil, ruler, scissors and glue
- die and die cutting machine, or craft knife
- stamps, stencils or embelishments
The folded inserts are easy to make, you can see how to measure and where to score them in the diagram below. I am using the 10.50cm x 14cm card for this tutorial but the principal is the same for the oblong card which has a longer back panel, ideal for stamping a large greeting or writing a message.

For the tutorial I am using the smaller of the two diagrams to make this 10.50 x 14cm pop out swing card.

To start cut a piece of card 21cm x 14cm, score in the center and crease to make the base card. Cut an aperture in the front of the card using a shaped die and keep the cut out card for the swing panel.

Cut another piece of card 17cm x 14cm, measure and score at 2cm, 7cm and 12cm, crease folds well. The 2cm strip forms the tabs to hold the insert to the card to enable the pop out swing. I will show you how to measure the tabs later in the tutorial.

Stamp or decorate the swing panel, card front and insert before assembling.
To measure for the tabs place the insert inside the card (but do not stick yet), close the card and mark where the top and bottom of the aperture come on the 2cm strip. Cut out the center piece leaving the two tabs top and bottom.

Next attach the insert to the inside of the card, glue the back of the third panel to the inside of the card, making sure the edges line up at the right hand edge. Fold the insert towards the back and hold down, add glue to the tabs and close the card onto the tabs, hold until the glue sets. With the card closed add glue to the insert showing in the aperture, place the stamped/decorated swing panel in the aperture and hold util the glue sets.

Open the card and the Z fold insert will pull the swing panel outwards.

The seaside oblong card was made in the same way using a piece of card 42 cm x 12cm folded in half to make the card base and an insert 18.50cm x 12cm which was scored at 2cm. 8cm and 14cm.

Materiials I used for my card:
- Papermill white linen and smooth white cardstock
- Spellbinders nestabilities dies squares and oblongs
- scissors, pencil and ruler
- Michael Powell Tall Urban Stamp - coastal getaway
- Crafty Individuals - seaside treasures
- Stampers Anonymous classics SCF003
- Memory Box Stencil - Waves
- Indigo Blu stencil - textures
- Ranger distresss inks
- strong glue
Check out this week's design team posts for more ideas for swing and flip cards.


1 thought on “How To Make A Pop Out Swing Card”
Beryl Cockman
26th September 2019 at 12:59 a.m.
Haven’t made a pop out swing card before..thank you for the instructions. I will make one up today. Will let you know how it went ..cheers Beryl Perth Western Aust