Papercraft Tutorial - How to make a floral gift tag
0
Posted on 20th May 2014 by Lisa Sumpter
Filed under All Papercraft Tutorials

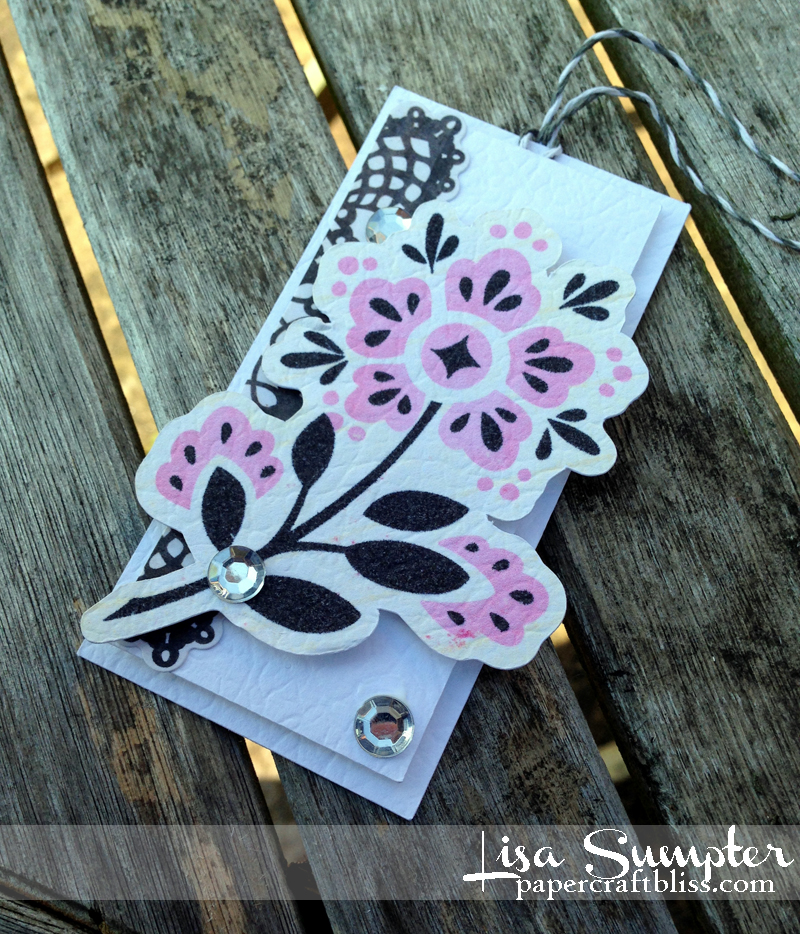
Hello. it's Lisa here with a tutorial for a quick and easy - but super pretty gift tag which could be used for many different occasions. It will take 5 - 10 minutes to make and is suitable for batch making. Barbara has a tutorial on batch making tips for cards which you can also use for making lots of tags. I have used some of the white leather embossed card which is now back in stock. You can find it on the Papermill Direct offers page on the website.

1. Trim two rectangles from the leather embossed card. One measuring 2 inches (W) x 4 inches (H) and the other measuring 1.75 inches (W) x 3.75 inches (H). Cut out the pink flower cluster from the Crate Paper On Trend digital collection either by hand or using an electronic die cutting machine.
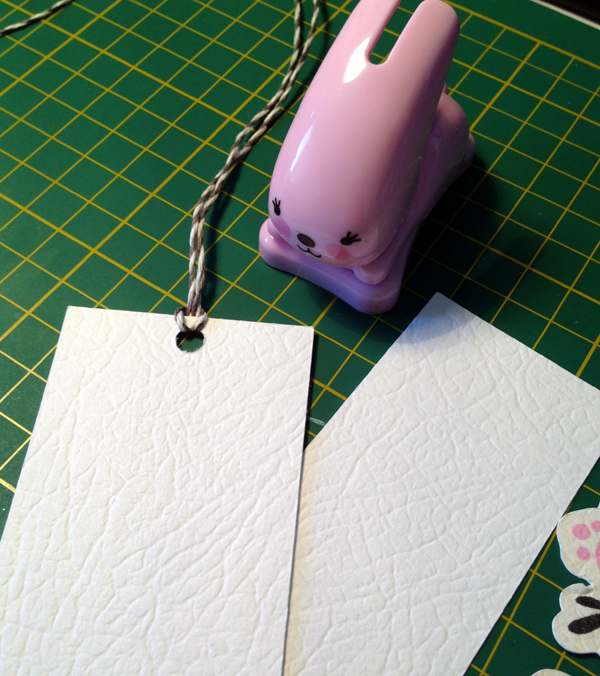
2. Punch a hole in the top centre of the larger rectangle and thread through some twine.

3.Adhere some 3D foam pads onto the back (the side which isn't embossed) of the smaller rectangle and stick to the larger rectangle.
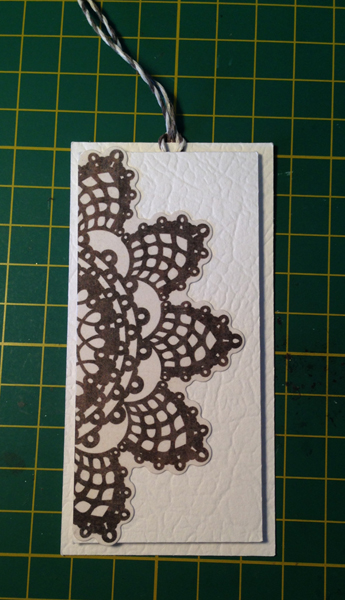
4. Add a doily sticker by MME to the side of the smaller rectangle. You could also use a doily die cut or stamp of skip this part.
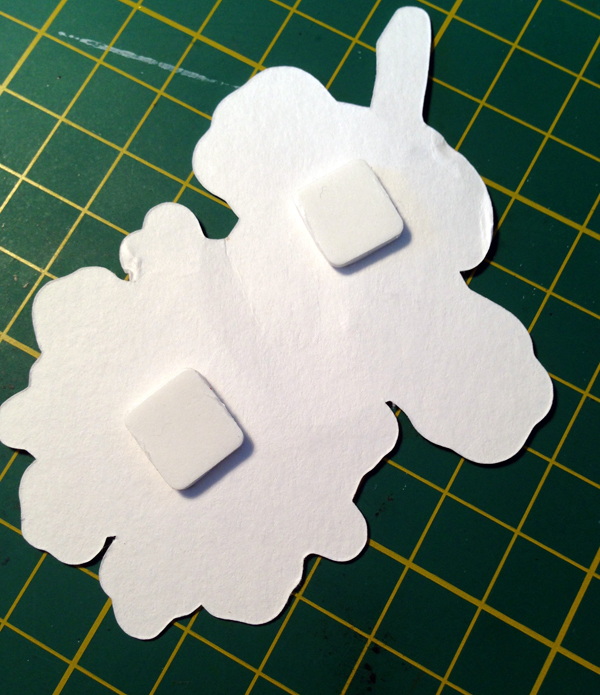
5. Add some 3D foam pads to the back of the flower cluster and stick to the ftont of the tag.
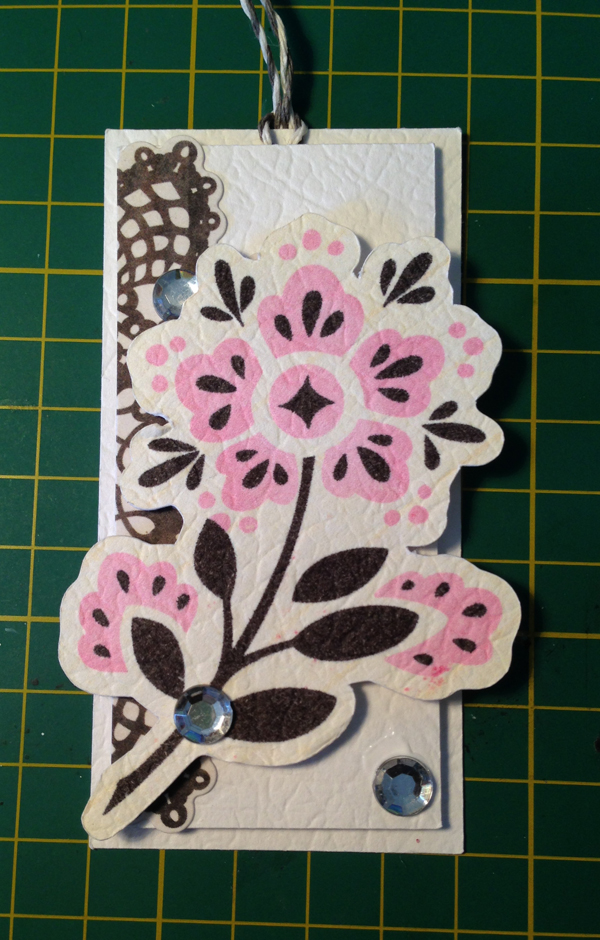
6. Finally, add some rhinestones to the tag for a bit of bling. You could also use pearls or sequins.


Nobody has commented yet
Be the first to comment on this article by using the form below.