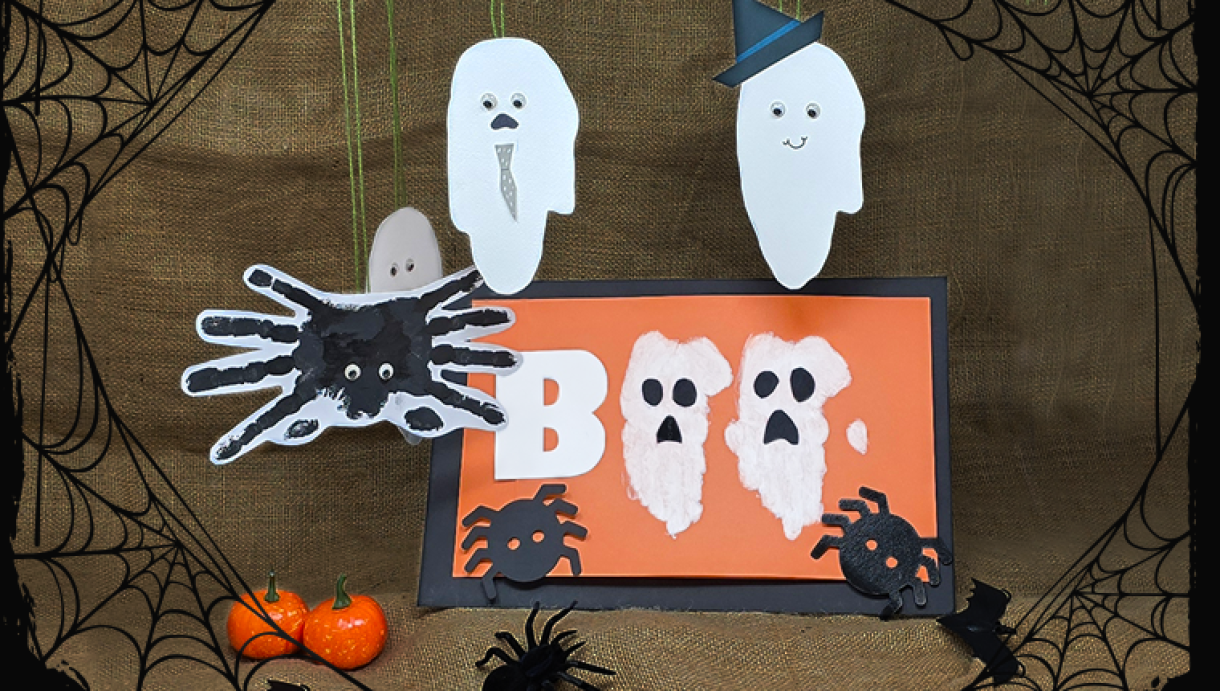
Handprint Halloween Art!
0
Posted on 1st October 2025 by Papermill Direct
Filed under Kids Craft Ideas, Projects And Cards By Occasion, Seasonal Crafts, Halloween Paper Crafts
Halloween is creeping around the corner, and while it's known for its scary thrills, little ones often thrive on the fun and craftier side of the season. For parents of toddlers and preschoolers, scary costumes and haunted houses might not be the best way to celebrate. That's why we’ve put together a collection of delightful hand art activities that will not only keep their little hands busy but also create fabulous memories that will last a lifetime!
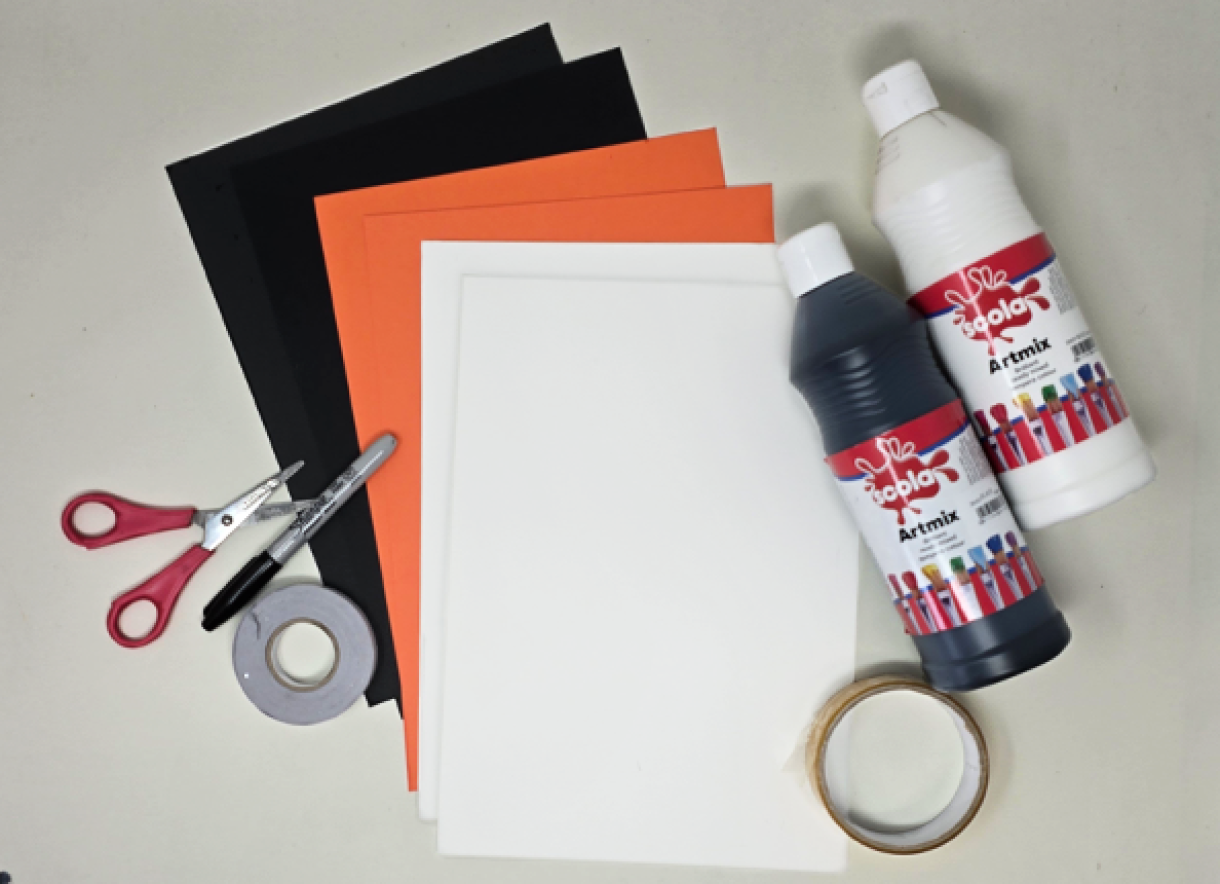
All you need for these spooky crafts are some basic supplies:
- White & Black Paint (washable for easy cleanup!)
- Cardstock
- Scissors (for grown-ups to handle)
- Glue / Double-Sided Tape / Cello Tape
- And, of course, a splash of imagination!
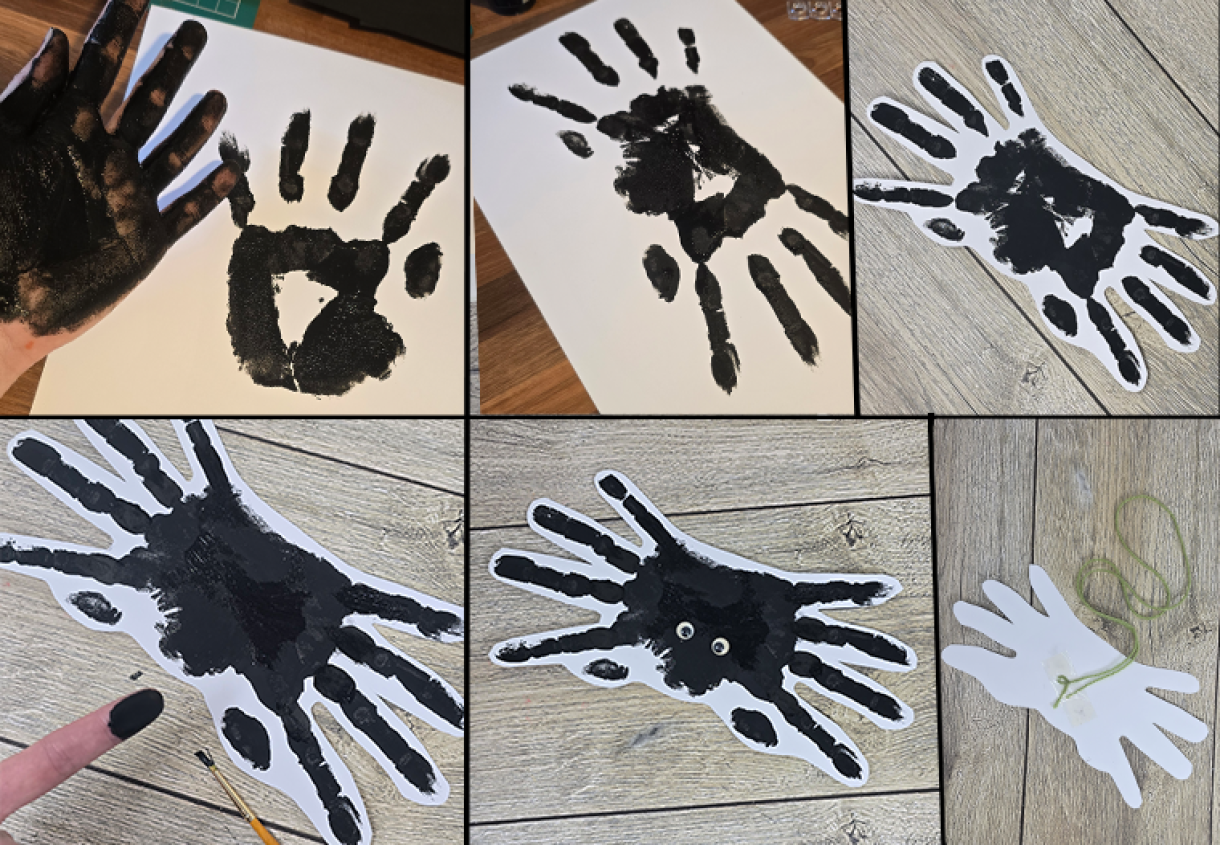
Spooky Spiders
Who says spiders have to be scary? Create cute, friendly spiders that can hanging from your ceiling or adorning your windows.
-To make your spiders, start by painting your child’s hand black.
-Press their hand onto a piece of cardstock to create the spider body. Keep their thumb tucked in but spread their fingers out as far as they can (to make the spiders legs)
-If you have empty spots you can fill these in either using a paint brush or your fingers!
-Use paint, markers, pom poms or googly eyes to add eyes to your spider.
-Once dry, cut out the spiders. Then use tape to adhere the string to the back of the spider and hang them up!
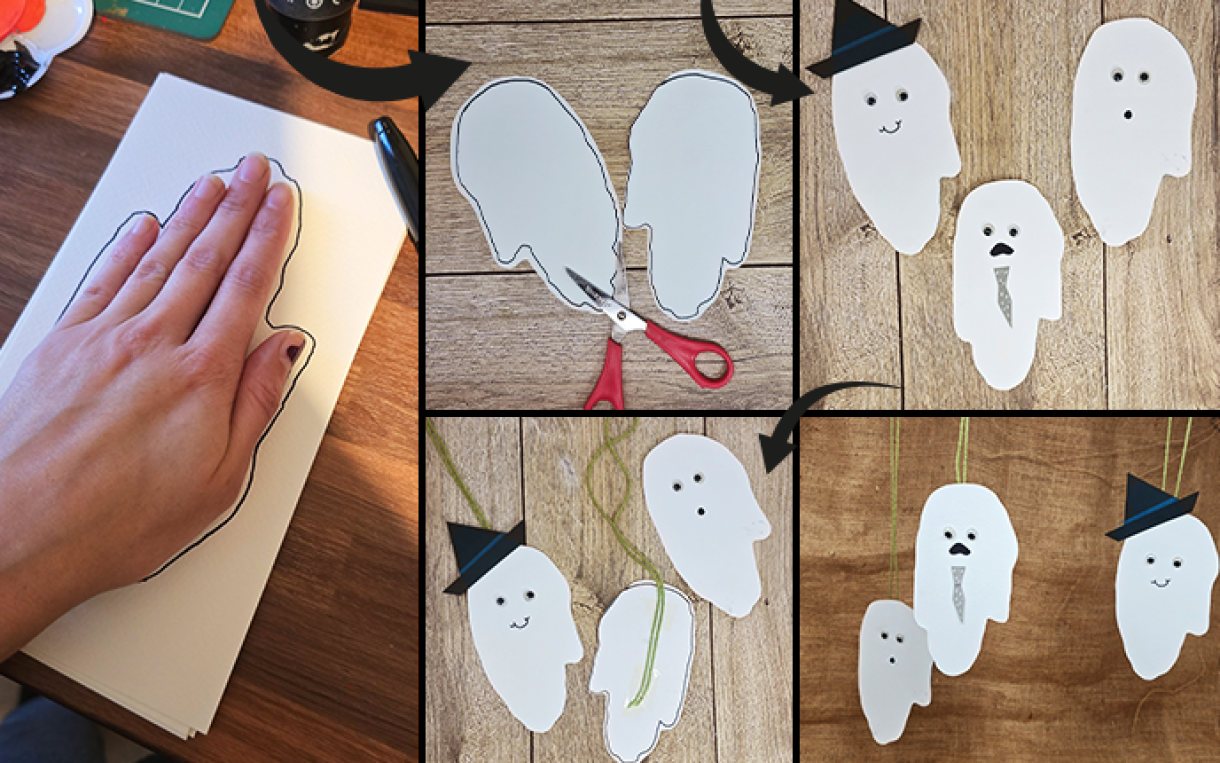
Gorgeous Ghosts
Get ready to bring some ghostly charm into your home!
-Have your child place their palm on a white piece of card with their fingers together and touching.
-Trace around the child's hand.
-Cut out the traced hand
-Then let them decorate their ghost! You could add embellishments, glitter, or use a pen to draw smiley faces. If older children are joining you, you could encourage them to try making witches' hats by cutting out triangles.
-Once the ghosts are finished, adhere the string with tape to the back of the ghost and hang them around the home.
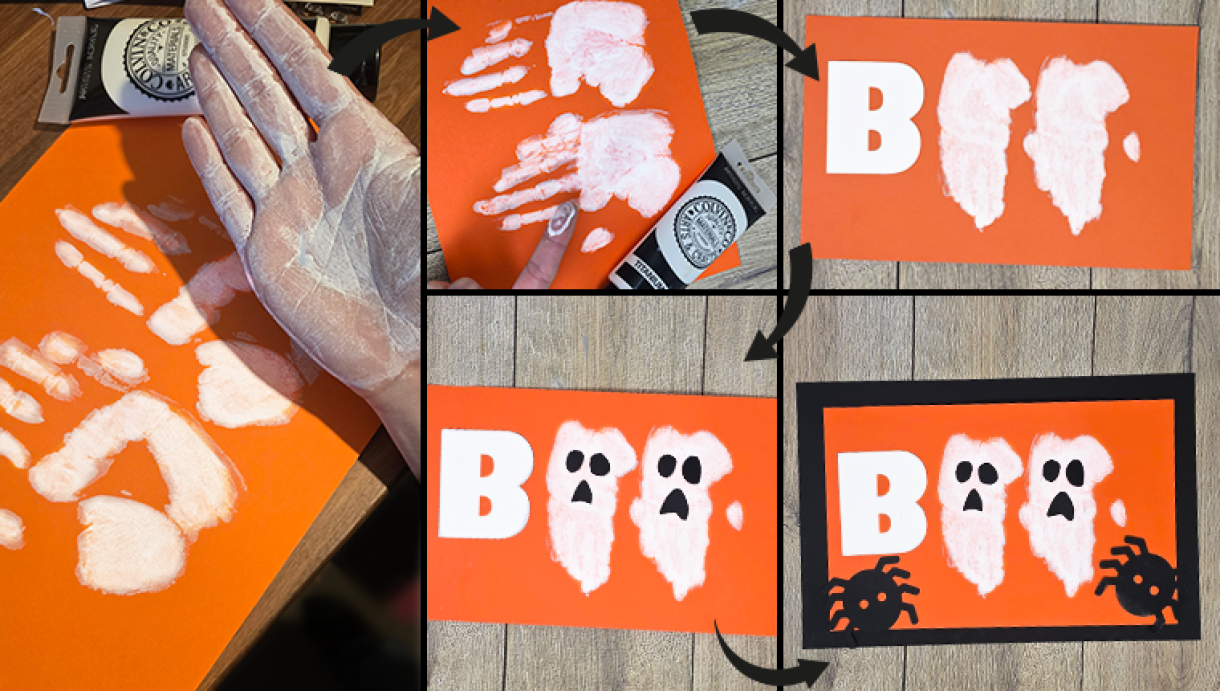
Doorway Signs
Get crafty and make your very own "Boo!" signs. Using their handprints and painted letters, these can be fabulous adornments for your front door or a thoughtful gift for grandparents. Utilize bright colors and fun designs to make these signs truly stand out and invite others into the festive spirit of Halloween!
For our Boo! Sign we used:
-x1 A4 Sheet of Card - We used Mandarin Orange Plain Card 240gsm
-x1 A5 Sheet of White Card - We used All Media Artist Paper
-White Paint
-Black Marker / Paint / Pom Poms / Card cut up - to make eyes and mouths
Let's get started:
-Leaving enough space on the left side of the card to add a B, paint your child's palm white, and place their hand flat on the A4 piece of card. Do this twice so the hand prints are next to each other. Allow the paint to dry, then, using your fingers, fill in any gaps where the paint is missing.
-Draw and cut out a B the same size as your child's hand prints, and place the B before the two palm prints. Use sticky tape or a prickstick to adhere them to the page
-Use black paint, markers, googly eyes, or pom poms to add cheerful eyes and a mouth—voilà, you have an adorable ghost!
-You could add spider webs and spiders, or bats as decor around the Boo! or even add a Happy Halloween banner at the top of the page if you want to.
-Once you've finished adding any extra decorations to your sign, trim around the edge - we trimmed 5mm off each edge - and use an A4 sheet in a complementary colour to create your border! We used 580gsm card


Nobody has commented yet
Be the first to comment on this article by using the form below.