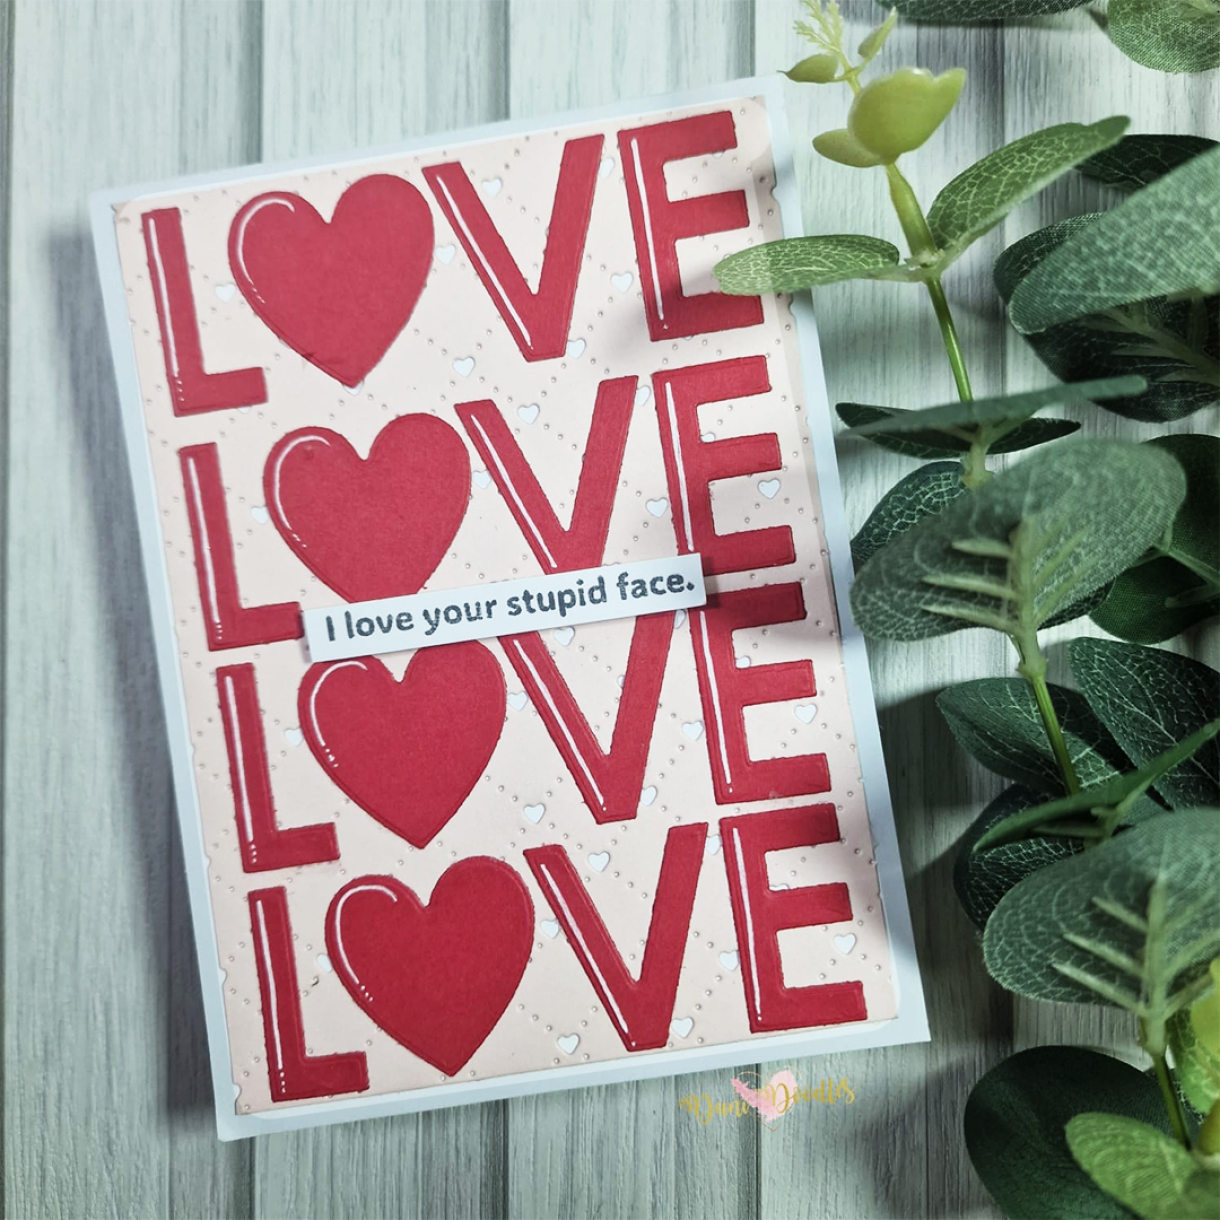
Love Love Love
0
Posted on 11th February 2024 by Danielle Bigland
Filed under Card Making Ideas, Design Team, Papercraft Disciplines And Techniques, Die Cutting Techniques, Projects And Cards By Occasion, Anniversary Card Ideas, Seasonal Crafts, Valentines Day Crafts
Hello everyone! Are you well?
Love day is nearly here so I made a card for the occasion.
Honestly, I don't celebrate Valentines but it's all a bit of fun right?
I'll show you how I made this fun card.

I started by preparing a UK A6 top fold fold blank from 'White Super Smooth 300gsm' card.
Next, I cut my background panel from some 'Woodstock Cipria 285gsm' card.
The panel was 4 1/2in x 5 1/2in so I trimmed it down to fit my card front with a 3mm border around each edge.
I attached this to my card front using small dots of wet adhesive in between all the open areas of this panel.

The next step was to add the words.
I die cut my 'love' word 4 times out of 'Christmas Red 240gsm' card.

I lined them up on the panel to plan spacing to ensure all words / letters were spaced equally.
Once happy, I used my corner tool to ensure all letters were straight before adhering with wet adhesive.
To use this tool, place it in an L shape. Butt the left side against the left side of your card and line the base of your letters up against the bottom of the tool to get them perfectly straight.

I added some White highlight using my white gel pen.
Then to finish, I added a sentiment by stamping onto 'white super smooth 300gsm' card and attaching this to the card with foam tape.

This is it!
I do love a cheeky sentiment which I feel goes perfectly with the rest of this card.
until next time, take care.
Love, Dani xx


Nobody has commented yet
Be the first to comment on this article by using the form below.