Pinterest Inspired Easel Christening Card
0
Posted on 11th June 2016 by Sandra Dunne
Filed under All Papercraft Tutorials, Card Making Ideas, Projects And Cards By Occasion, Cards For Children
Hi, it's Sandie here today with my Pinterest inspired card. I loved the design of this card so much that I replicated it, but I made it into an Easel card and followed the design through to the inside.
This is the the card I was inspired by. 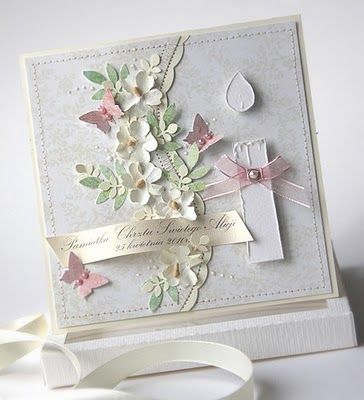
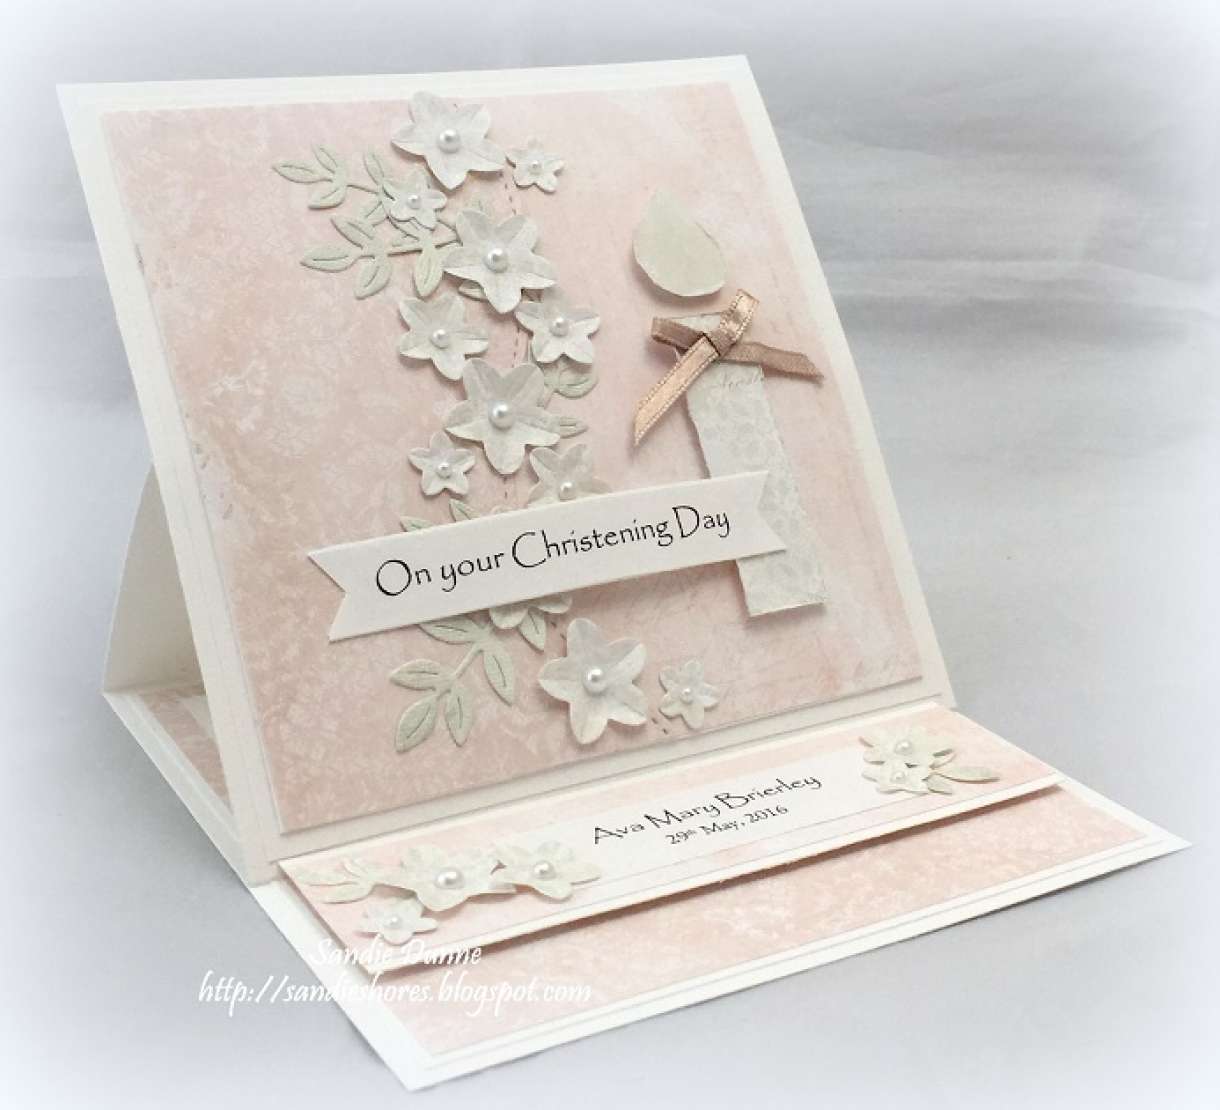
And this is my take on it. 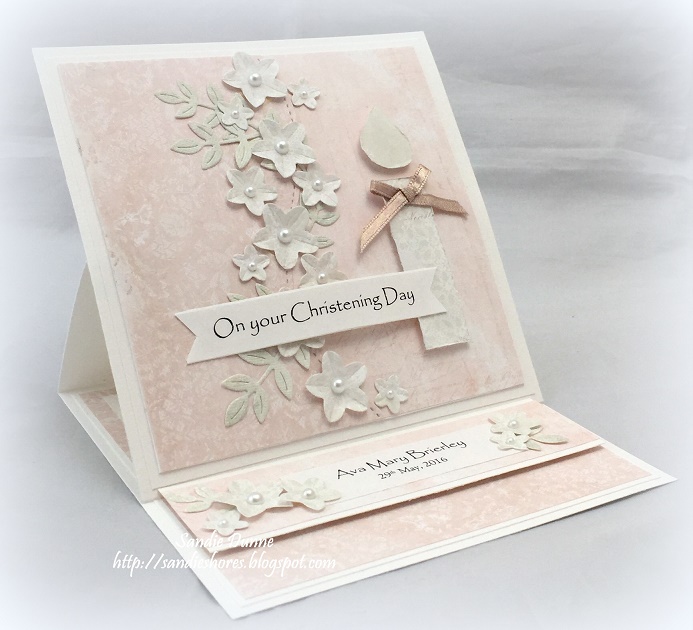
Supplies needed:
Plain White Card
Plain White paper
Patterened papers: The Promise by First Edition
Ribbon (5mm wide)
Dies:La-La Land Crafts

Cut 3 pieces of white card.
One at 5.75" x 11" for the card base, one 5.75" square and one 5.5" square.

Fold the 5.75" x 11" piece of card in half to make a 5.75" square card base. Then fold the top in half again, as shown.

Cut another 5.5" white square for the inside of the card.

Cut three 5.25" squares from the pattened paper. You need two of the same design and one contrasting design. Using the stitched die, cut the contrasting piece in half.(approx)

Cut some flowers and leaves using the dies

To give the flowers dimension use a quilling pen, make a line up the middle of each of the flower petals, and pinch with your fingers.

Layer up the white card and patterned paper on the 5.75" square and arrange the leaves and flowes along the stitched line.
To make the candle, I hand cut it and used my scissors to distress the edges.
Tie a bow using the ribbon, trim the tails and adhere to the candle.

On the inside, layer the white card and patterned paper.
Cut at 2.5"x 5.5" strip of white card and layer on a 2.25" x 5.5" piece of patterned paper. Adhere this panel to the inside of the card, mounted on foam dots.
Arrange some flowers and leaves on the strip.
Print the sentiment on some white paper, and fish tail each end. Adhere on the front of the card.

Add some pearls to the centre of each of the flowers

Adhere the card front to the easel base, ensuring only to add glue to the bottom half of the card front. Alternatively, you can apply the glue/tape to the card base.
To personalise the card, print the name and date, and adhere to the strip inside the card. When the card is popped open, the name will be displayed.
Sandie
xXx


Nobody has commented yet
Be the first to comment on this article by using the form below.