Pillow Box Christmas Advent Calendar
0
Posted on 24th December 2021 by Samantha Burrow
Filed under Seasonal Crafts, Christmas Craft & Cards
These cute handmade pillow boxes are so easy to make with your Cricut. They can be used as a handmade advent calendar, which you can fill with your favourite treats. With the great selection of colours in the Papermill Direct plain card range, you can create something to complement your festive colour scheme year after year.
Below are instructions on how to create a Pillow Box using an image from the Cricut Design store, if you have a different cutting machine, pillow cutting files can be found from Creative Fabrica by following this link: https://www.creativefabrica.co...


Open Cricut Design Space and select New Project to take you to the design canvas. Click on the Images button and search for image ID #M45558, this will bring up a basic pillow box template image, click Add to Canvas. The image dimensions should be 2.26 x 3.11” by default, if it is not, change the size in the Edit Panel.
Now click the Shapes panel and insert a square. Change the size of your square to 0.9 x 3.4”.

Click on Text and in the search bar type in “stencil”, this will give you a selection of fonts that will cut as stencils, which is best for the band we’re going to create. Once you have picked your chosen font, type in the number “24”. In the Edit panel, change the size of the number 24 until it has a maximum width of 0.7”, make a note of the font size you have at this width. This step is important, to ensure all your numbers 1-24 are the same font size, and we’re using the number 24 as our guide because it is the widest of all the numbers.
Repeat add text for all the numbers 1-24, ensuring they all have the same font size (not the same width size).


Duplicate the long square image until you have 24. Working with one square and one number at a time, align the number central to the square, then click Slice in the Action panel. When finished, you will have 24 long bands, each with a number cut into the centre. You can select all of these and change the colour to match the shimmery paper of your choice.
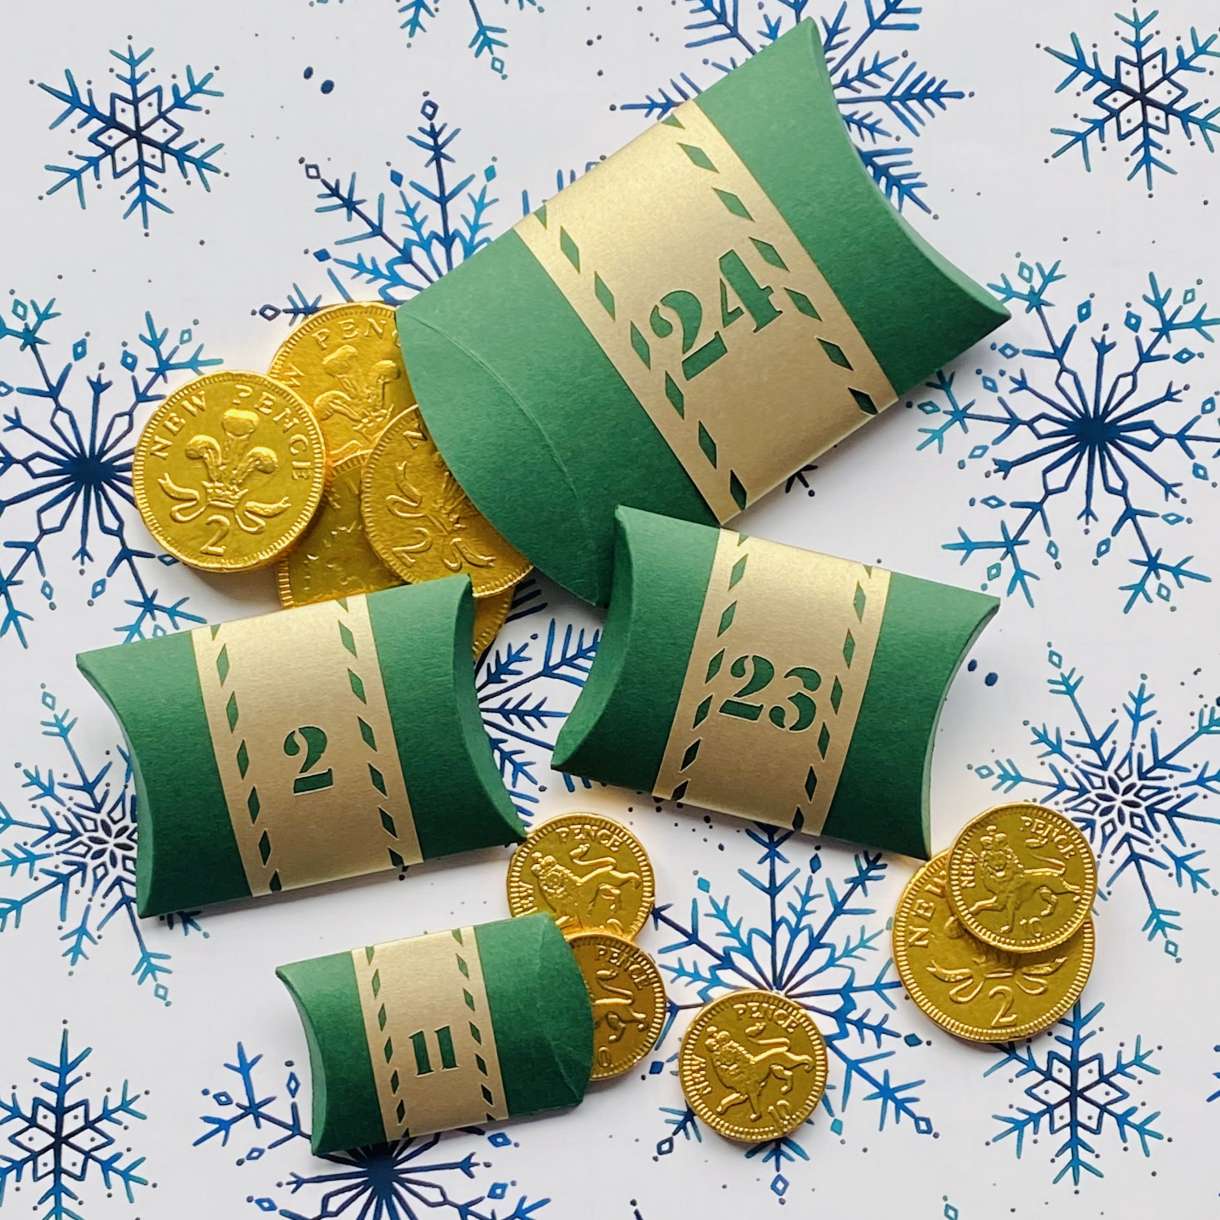
If you plan on keeping all your pillow boxes the same size, then it is not necessary to duplicate the pillow box 24 times, you can simply increase the quantity of the cut during the make it phase (but make sure you have hidden the bands or you will end up with 576 of them!) To make different sized pillow boxes, align the pillow box image central to one of the bands. Change the width, for my boxes in the photos I have gone up in 1” widths (2.26”; 3.26”; 4.26”). By aligning the box with the band before adjusting the width, you can make sure your band will be large enough to wrap around the new size box.


When you’re happy with your design, click Make It and follow the on-screen instructions to cut each element of the design. Remembering the colour of your boards on screen relate to your card colours not the actual cutting mats.
Using glue or double-sided sticky tape, seal the box together along the top flap. Gently fold the curved sides inward starting with the cut out side first. Take your band and wrap around the parcel with the number central to the box. You can either leave the band loose so it can slide off by just sticking the band at the overlap, or stick it all the way around directly to the box. Open one side, pop in your treats and fold over to close. Pop your parcels in a Christmas basket ready for the 1st December!
Why not try slicing other basic shapes into your band to make unique designs? I’ve tried some slanted rectangles to give a ribbon pattern. You’ll need to do this before you slice the numbers, making sure you adjust the font size because the space in the centre will be narrower. You can also cut your parcels into different colours, or mix up the band colours instead.


Nobody has commented yet
Be the first to comment on this article by using the form below.