Spread a little sparkle on a rainy day
0
Posted on 19th November 2021 by Samantha Burrow
Filed under Card Making Ideas


Open Cricut Design Space and select New Project, this will open the canvas screen.
Click images and search for image ID #M3D69D the umbrella image and add to canvas. Using the action toolbar, click duplicate until you have 3 umbrella images. Change the size of each umbrella to a width of 2.5”, 2.25” and 1.75” so you now have three umbrellas of varying sizes.

Now open the Layers Tab and using that you can now change the colours of each part of the umbrella image. For the back layer, which will be the whole umbrella, change the colour to black. For the front layer, which is just the top of the umbrella, change to the colour of your choice.

Click images again, and this time search for image ID #M3F100, the flower image, click add to canvas. For this design, the background image is not used, so you can either delete or hide that using the layer tab.
Change the colour of the flower to the colour of your choice and duplicate until you have 10 flowers. Change the sizes of the flowers to widths between 0.4” and 0.8” so you have a nice mix of different sizes.

Now create the background layers for your card. This is designed to fit a 5” x 7” card blank, you can make changes to the sizes in design space if you wanted this card to be square, smaller or larger (note: the elements above may also require adjusting to fit your new card size).
Click on Shapes and add 2 square shapes to the canvas. Adjust the squares to the following sizes, (note: click on the padlock to unlock aspect ratio) 4.8” x 6.8” and 4.6” x 6.6”. Change the larger square shape to a colour of your choice, and the smaller square shape to white.
Repeat the step again, adding 2 more square shapes to the canvas, this time changing the sizes to 2.2” x 3.2” and 2” x 3”.

The main elements to the design are now complete, it’s time to add some text to the smallest white square on your design.
Select Text and choose from the list a suitable “print type” font which has a writing style option. I have used the Awesome font, (note: if kerned fonts is selected, you may not see all print type fonts, simply uncheck this).
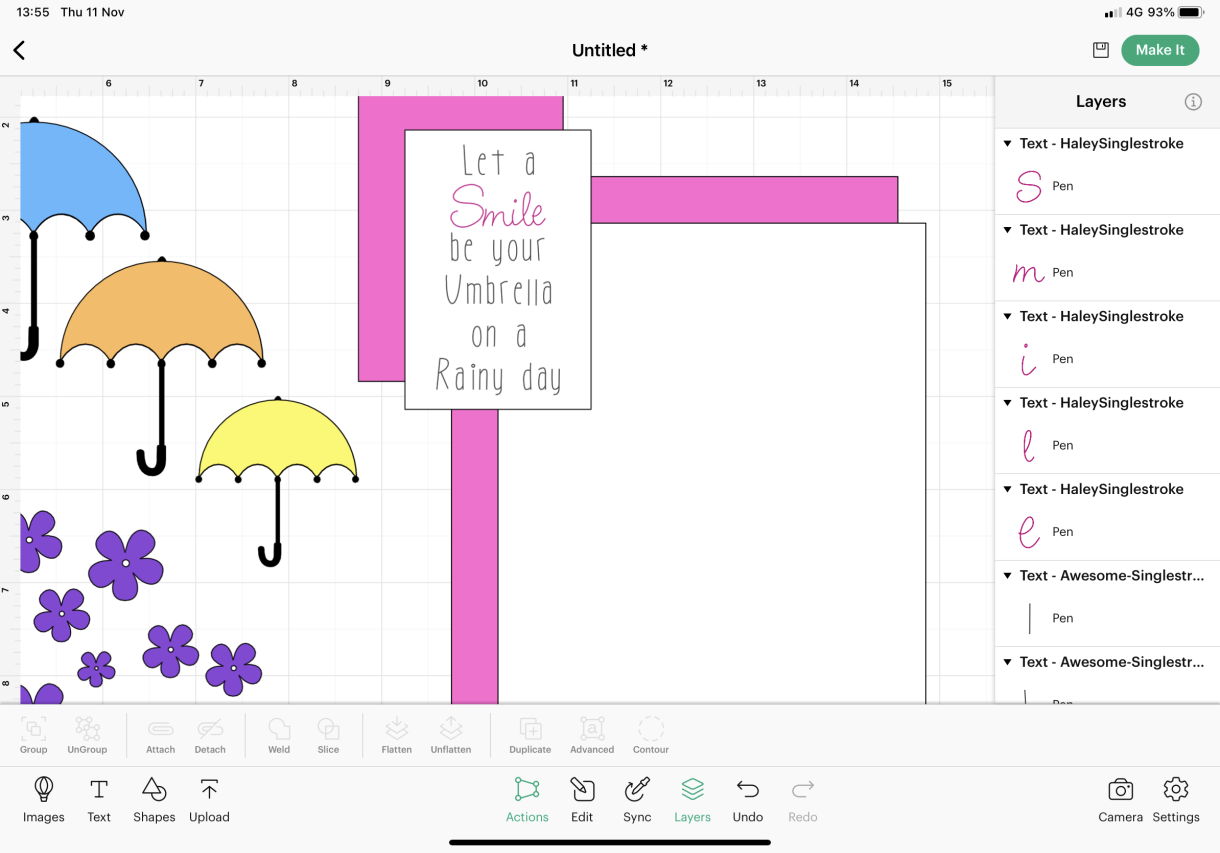
Type your sentiment, for this design I have gone with “Let a Smile be your Umbrella on a Rainy day”. Be sure to add in the new lines and centre align the text. Shrink the text box so it fits within the smallest white square shape. You can also change the spacing between the letters to create a clearer spaced look for the text.
The text then needs to be secured to the smallest white box to ensure the Cricut machine writes on that layer of your design. Once you have finished editing and positioning your text box over the smallest white square, select the square and the text in the layers panel, and click Attach.

If you want to create a more unique and personalised design, you can change the colour of selected letters from the layer panel, this will prompt the Cricut machine to request a new pen for those letters. You can also ungroup the text box, delete the letters S m i l e then add a new text box for the word Smile, choose a cursive font and different colour, and position this where the old Smile word was.
You can play around with different colour choices, add matching coloured umbrella handles or leave them black. Change the wording or fonts to create something truly unique to you.


Nobody has commented yet
Be the first to comment on this article by using the form below.