How to make a lobster fathers day card!
0
Posted on 11th June 2018 by Jennifer Squire
Filed under Card Making Ideas, Papercraft Disciplines And Techniques, Papercut, Seasonal Crafts, Fathers Day Cards
As we are fast approaching fathers day I thought I had better show you how to make a simple lobster fathers day card that can be done with a scalpel or a die cutter.
You will need:
- Scalpel
- Cutting mat
- Fine nibbed glue pen
- Tracing paper
Card for lobsters:
- Papermilldirect A4 post box red smooth card x2
- Papermilldirect A4 white card smooth card x1
- Papermilldirect A4 black plain card x1
Card for lettering and background:

First of all I did a sketch of my lobsters. You can use my scale rule at the side to ensure everything is the right size when printing off your lobster design.
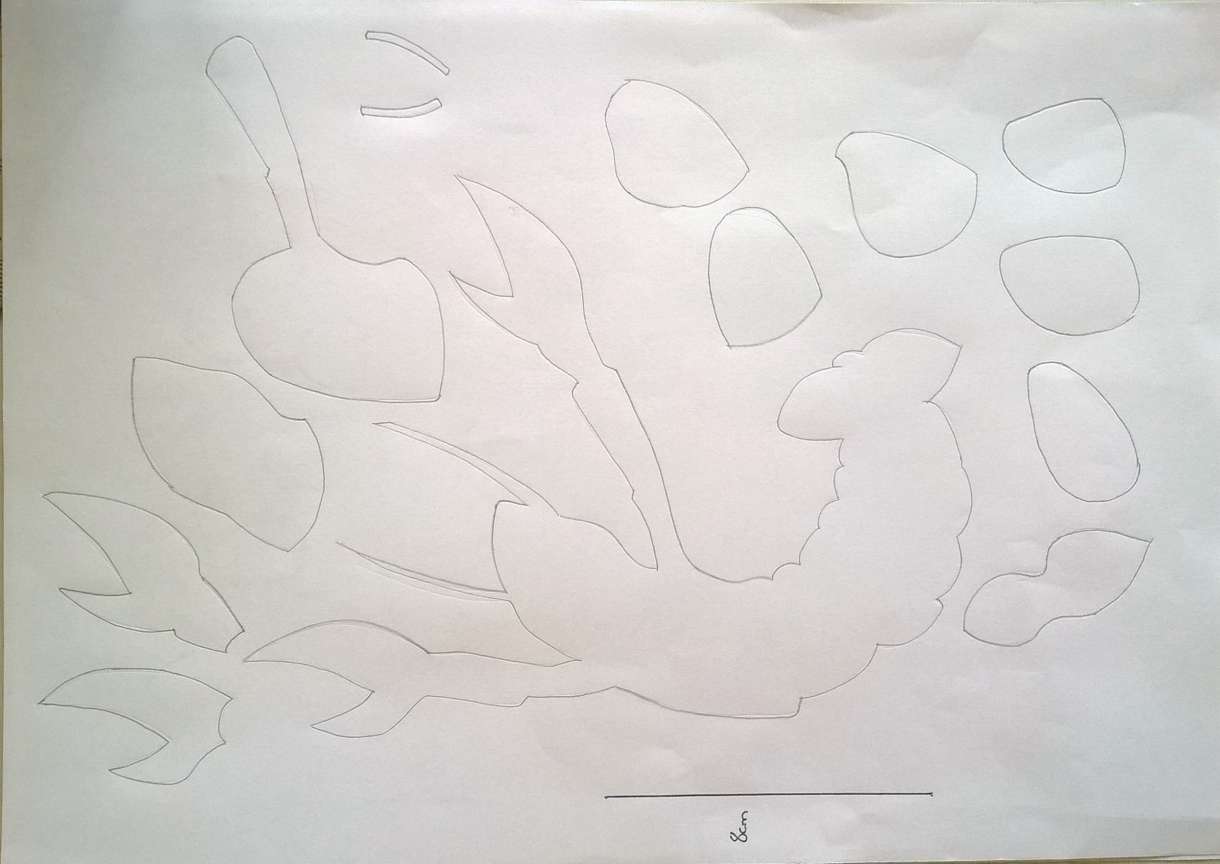
To start we will work on the big lobster. From my sketch I traced on to paper all of the different components that make up the lobster. Doing the same as the previous sketch you can print off the image or trace out the different parts yourself from the original sketch.

You then repeat this process for the smaller lobster. I do these separate parts on to paper to be scanned into a die cutter but if you are using a scalpel you can trace directly onto your red card.

You then cut out all of your different parts for your big lobster, as shown in the previous image.

In the previous image you can see that I have placed the pieces on the left of the image in the order that they get stuck on. The first piece will be from the bottom.

Starting from the bottom you stick the first piece in the middle of the tail of your lobster base, as shown in the previous image.

You then stick the next bit on top of your last piece. You should be able to line up your small piece with the outer ridges of the main lobster.

You then repeat this process with the next piece, sticking it on top of the other piece lining it up with the base ridges.

You then repeat this process until all of the small pieces are stuck on top of one another.

And repeat.

Then once all of the small pieces are stuck on the body we can move onto the main bit.

Then you glue on the main piece, the one that looks a bit like a dalek head, onto the main body using the arm on the right to line it up properly.

You then stick the right claw on top of the right arm.

Then stick the left claw on top of the left arm.

Then you stick on the head.

Then you need to cut out two 9mm diameter circles from the white card. You can use a compass and pencil for this.

You then stick these circles on top of the red stalks.

You then cut out two 4mm diameter black circles and stick these on top of your white circles in the middle.

You then stick your right eye stalk in place.

Then you stick the left eye stalk on the back of the head putting the glue on the front of the stalk.

Then you can move on to your baby lobster! Repeat the same process of tracing and cutting out, like you did with the big lobster with the red card.

I have lined the pieces up on the right hand side of the main body of the lobster. Working from the bottom one up you can stick the first bit in the middle of the tail.

Then stick the second piece on top of that piece.

And then the next part using the outline ridges on the main body as a guide.

You should be sticking the main body part down now.

You then stick the head on top of the main body.

You then cut the red strip in half. Then cut out of the white card two 4mm white circles and stick them on the ends of the red stalks.

You then cut out the black small circles. I cut out two 3mm ones but feel free to do whatever size you fancy.

You then stick the eye stalks behind the head.

And there you have your finished lobsters!

I than folded a piece of A4 blue card and stuck on my lobsters. Then I cut out lettering using a die cutter and glued them down on to the folded card.

There you have you finished fathers day card! I hope all the dad lobsters out there have a good one and that making your dad lobster cards are enjoyable.


Nobody has commented yet
Be the first to comment on this article by using the form below.