How to Make a Gap Card - A simple Tutorial
0
Posted on 31st July 2014 by Angela Dodson
Filed under All Papercraft Tutorials, Design Team
Hello, Angela here with a simple tutorial to make a 'Gap Card'. I used to make these a few years ago and I notice they are becoming popular again. The beauty of a Gap card is that it is a simple design but the 'Gap' creates all the interest. So you can keep it simple by just cutting off a straight strip of card or make it a little different by by angling or shaping the cut out as i have done with this version. (Materials List at the end).

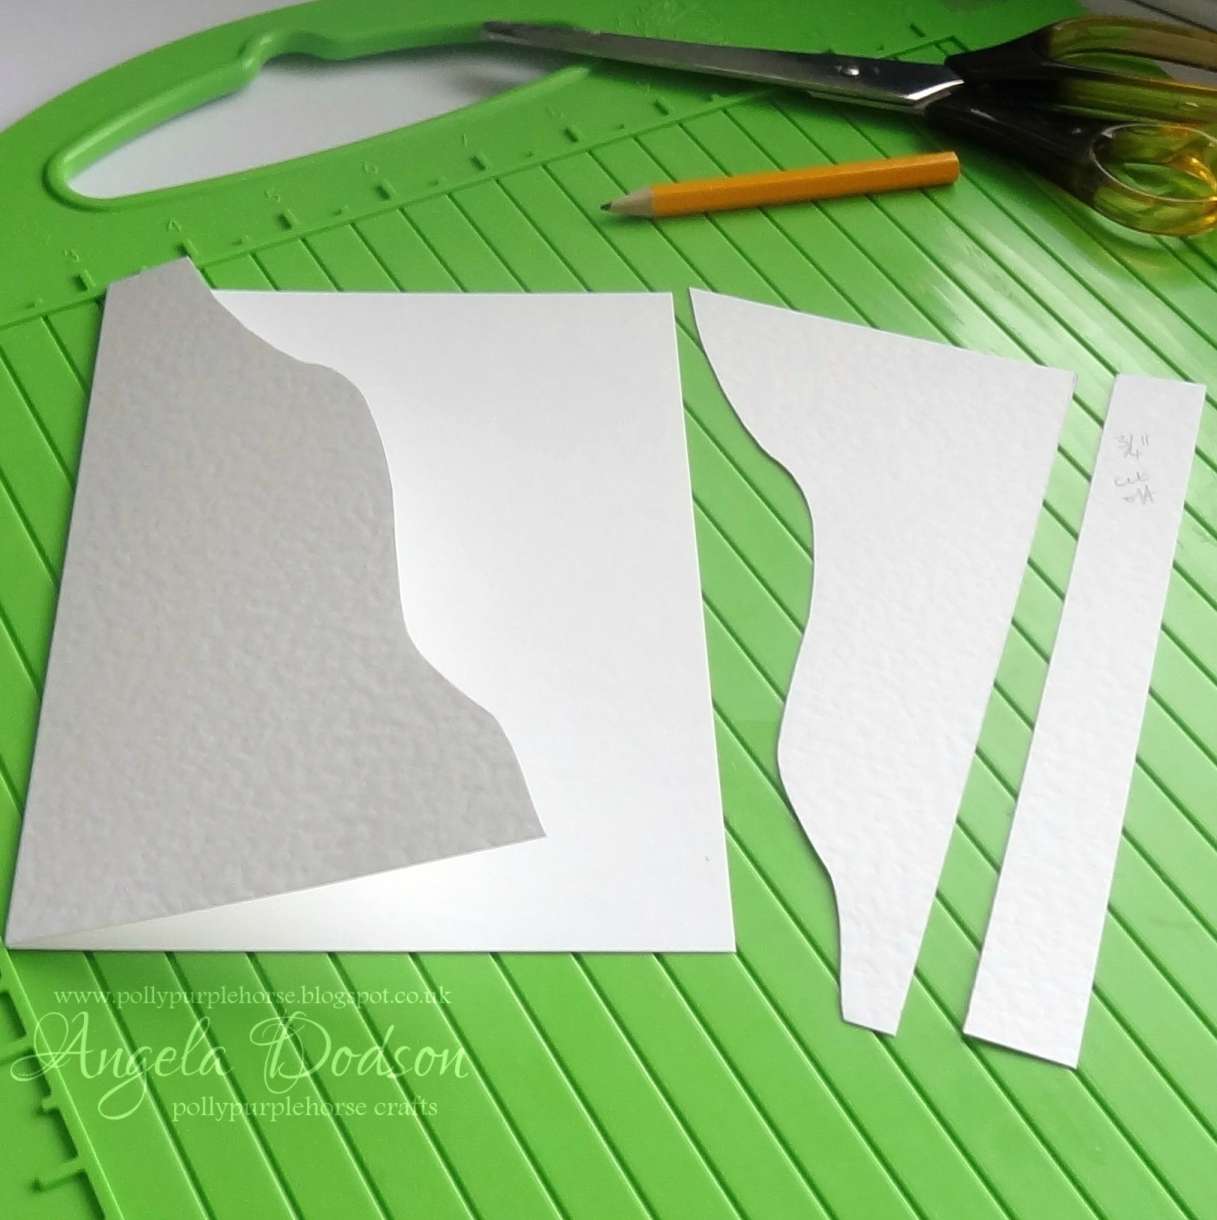
1. Score and fold an A4 sheet of papermill Hammered White card and cut to create a landscape card base approx. 5" x 7".
2. Take a pencil and draw freehand a random gently curving line diagonally from bottom left towards upper right, but don't go too far to the top or bottom of the card, you need to leave space there of at least 1".
Take your scissors and cut along your pencil line (on the front panel of your card only). Now take an eraser and gently rub out those pencil marks.

3. Take the piece of card you have cut off. You now need to cut off a straight strip of card measuring approx. 3/4". This needs to be cut away from the bottom straight edge of your piece of card. I used a pencil to draw the line and cut along it with my guillotine to give a nice even straight edge. Again if you used a pencil, be sure to gently rub out the marks, easier to do this now then after assembly.
4. The next step is to create your butterfly decorations. I cut my butterflies using 4 different colours of card from the papermill range, Purple Grape, New Lilac, Raspberry Pink and Baby Pink. My butterflies are in 2 sizes and I used a set with layers. Assemble your butterflies and allow to dry if using glues, glitters or inks on them.
5. Now it's time to check positioning. Take your card base and the cut away piece. Carefully line up the new straight edge of the cut away piece with the base card. You can see where it needs to be to align it with the bottom and sides. I used a clear acylic block to weight down the card base to give both hands free to line it all up.

6. Now you can see the gap running right along your card, it's time to test your positioning of the butterflies. Play about and see what works best for you. You just need to ensure that each butterfly's wings will touch both the top and bottom of the gap, as this is where they will be glued into place.
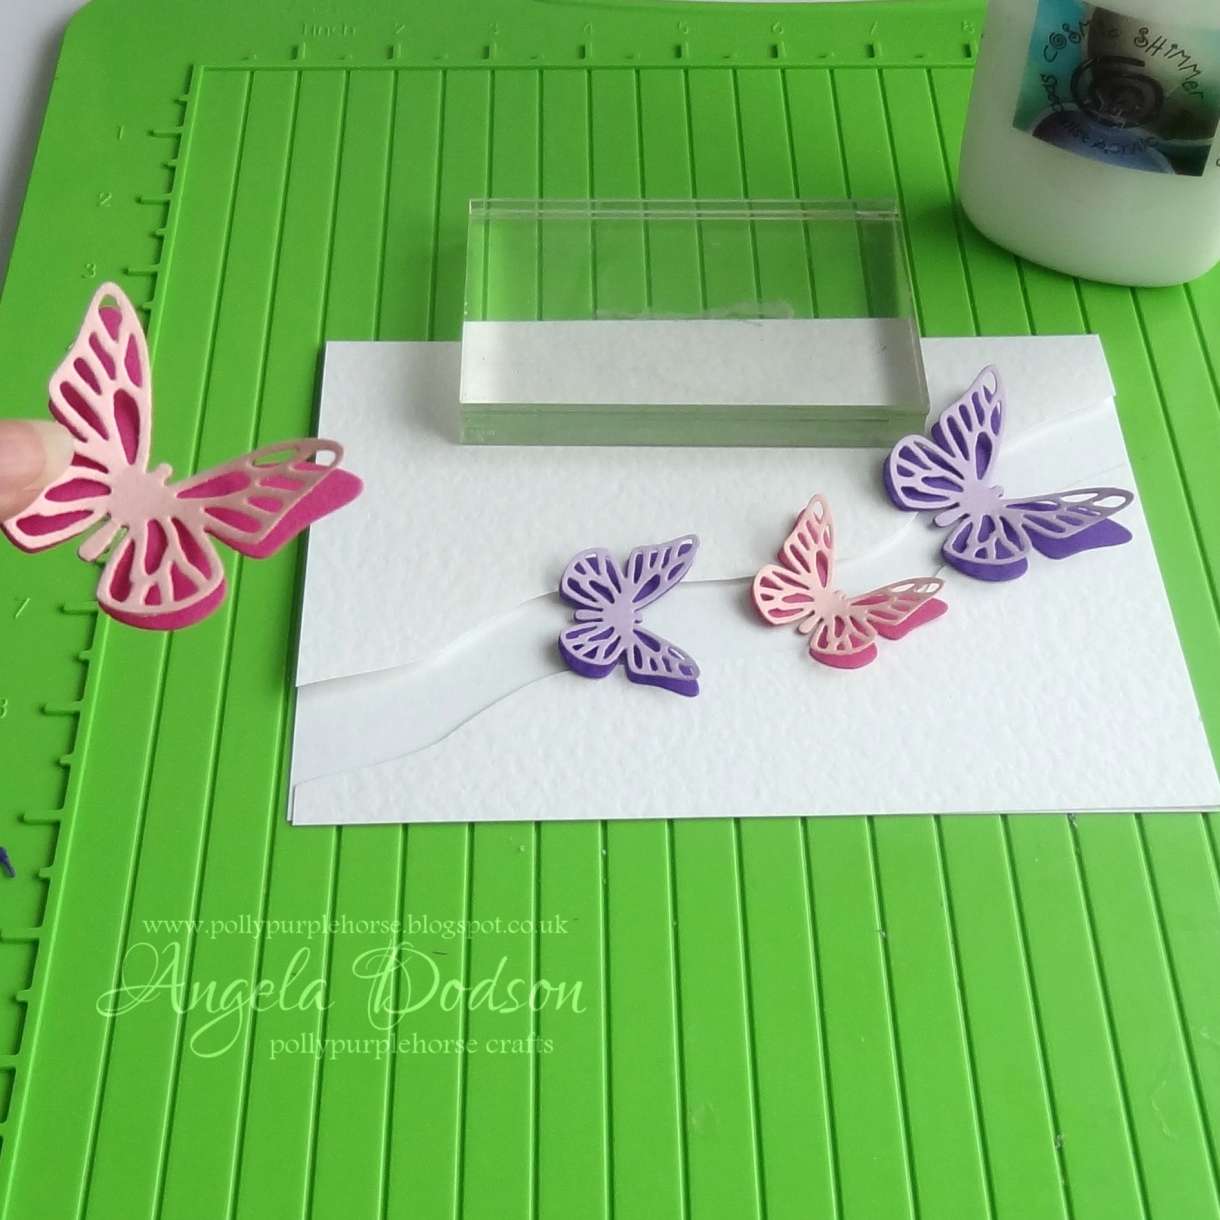
7. When you are happy with the position, you can them add a little glue to back of the wings, just the parts that will touch / stick to the base card. As I chose to use 4 butterflies evenly spaced, I glued my first and last butterflies into position first. I used cosmic shimmer glue so that I could keep the card lined up at each side and at the bottom, if it moves slightly a wet glue will allow you to gently slide things back into position. continue gluing your butterflies across the gap and allow to dry. Don't panic if the bottom panel of your card is slightly longer than the base, you can always trim it back a little.


8. Now you can have fun embellishing your butterflies. I used some little faux pearls. You can add a sentiment, stamped or diecut or whatever else you wish. I chose to stamp a sentiment of 'You Make Me Happy' onto a piece of white hammered card which I dicut and added to the card front with 3D foam pads. I also added some extra pearls.

I chose to die-cut butterflies for this project, as I think almost every paper crafter has at least one set of butterfly dies in their craft stash. If you don't have dies or die-cutter, then you can also stamp your butterflies onto the card and cut them out with scissors. Butterflies are a great shape for Gap cards as the symmetrical designs of their wings give an even cover of the gap, but you could also use flowers or other shapes too or maybe a mixture of designs. Papermill card is the perfect card for this project, it is great quality for die-cutting and also a good gsm which is especially important as the die-cuts form the connections in the card that hold it all together.
Have fun creating and I would love to see what designs you come up with.
Materials List:
Card Base - White Card Hammered
Sentiment stamp, faux pearls, etc to embellish
3D foam pads, cosmic shimmer glue to complete.


Nobody has commented yet
Be the first to comment on this article by using the form below.