Graduation Card
0
Posted on 21st July 2020 by Hannah Williams
Filed under
So today we will be making this glitzy 4 stepper card for new Graduates. This one is a little complicated but is totally worth the time and it feels so accomplishing when it's finished.
So if you're willing to give it a go, then let's do this!


First things first, let's talk about what supplies you will need:
- 300gsm White Cardstock (12"x6", 11.75"x5.75", 5.7"x5.7", 4.9"x1.1", 4.3"x5.43", 2.43"x5.43", 4.04"x5.43")
- Rose Gold Non-Shedding Glitter Card 285gsm (A4 Pack of 5)
- Charcoal Sparkled Pearlescent Card 300gsm (A4 Pack of 10)
- Blue Moon Cocktail Double Sided Pearl Card 290gsm (A4 Pack of 10)
- Printer & White Paper Plain 135gsm (for printing design for the front on)
- Anita’s PVA Tacky Glue 60ml
- Stick it! 3D Foam Tape 18mm
- Double Sided Sellotape 25mm or Tape Roller
- Yellow/Gold Thread
- Score Board
- Cutting Mat, Craft Knife & Set Square/Ruler
- Scissors
- Bone Folder/Smoother
- Coloured Markers
- Templates attached below

Once you have all of your supplies together you should start creating your templates. First you should look at the template above and use this with your score board to mark your lines. The lines in Yellow are Mountain folds and the Blue lines are valley folds. Any black lines you should cut with a craft knife, the image below shows what you should be left with. I created this on 300gsm white cardstock. Once you have scored and cut all the appropriate lines, fold and crease using a bone folder to enhance the folds.


Once you have cut and scored the piece from the template you should then take another piece of 300gsm white cardstock. This should be cut 12" x 6" and scored at the 6" mark to create a 6" x 6" square card when folded.
After doing this cut out your next pieces (leave the 'V' piece until later) using the template for the measurements from the Rose Gold Non-Shedding Glitter Card 285gsm, shown below:


Once you have all the pink glitzy pieces, stick all of them down except for the 4 small squares (1.12" x 1.18") using double sided tape ensuring that they are centred in place.

Next take the Charcoal Sparkled Pearlescent Card 300gsm and cut out 4 pieces that measure 1.32" x 1.38". These will be stuck down on the blank spots of your card shown above, you can then stick the four pink glitzy pieces you saved earlier on top of the black making sure they are centred.
Now for the outer part of the card. You should have your 6" square white card with the pink glitzy piece stuck down on top. You will now need to print out the graduates drawing onto some high quality printer paper making sure that the square outlined measure 5.5", you can ensure this by importing this template or saving the image below into pages or word and sizing it up or down until you end up with the square is 5.5". Once you have it sized, cut it out and stick it on top. You will also need to print out these: Template 1, Template 2, Template 3, Template 4. Making sure that you size up the images as you did before.

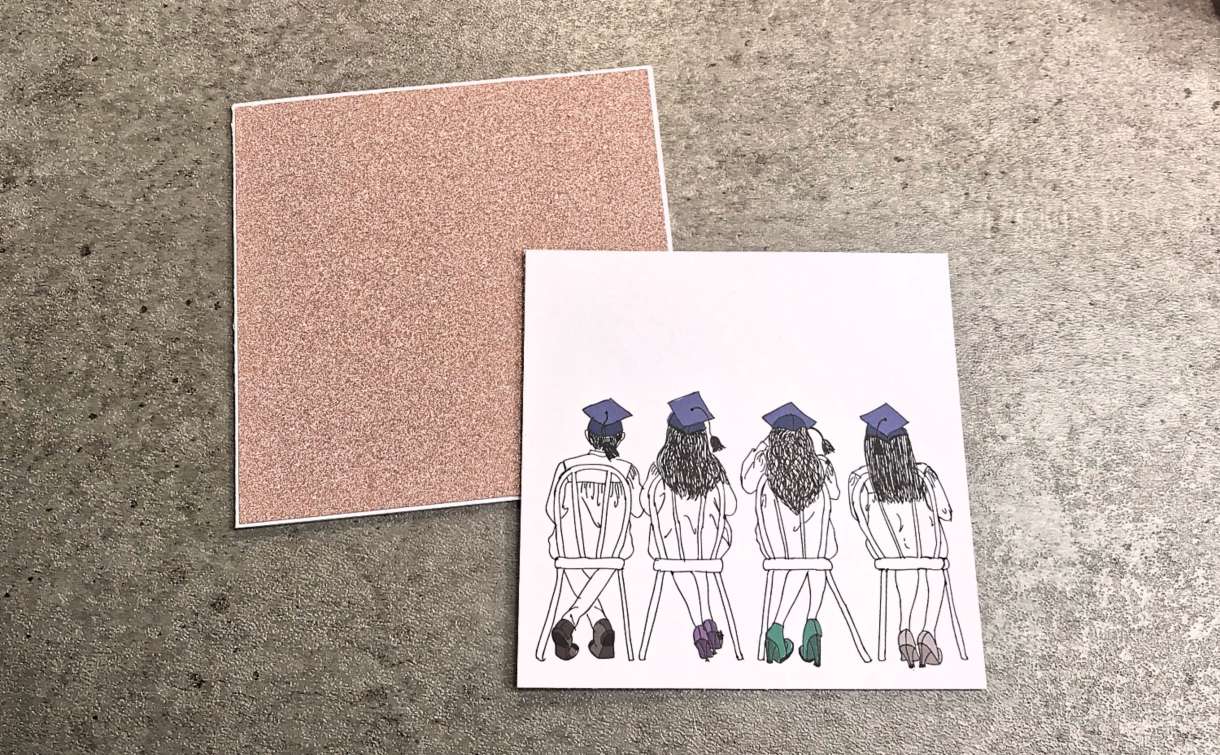
Stick the graduate drawing on to the 6" square card and take the flag in both the pink glitzy card and the white one you just printed. Lay them on top of each other centrally by placing the end flush on both as shown in the image. Once you have done this take your Stick it! 3D Foam Tape 18mm and place a few strips on the back. Stick this on the front of the card above the graduate image, shown below.


Next take the other white pieces you printed and stick them on top of the inside piece ensuring they are centred, as shown below.

Next cut out the pieces from the template shown below in the Blue Moon Cocktail Double Sided Pearl Card 290gsm. These will form the cap and gown, once you have cut them out lay the triangular shape onto the white as shown below. The 'V' pieces you didn't cut out before can either be cut from the template or you can cut multiple strips 0.2" in width and lay them flush with the robes until you create 3 'V' pieces in both the black and pink glitzy card (shown in image below). Trim any hangover until it looks just right.


Next let's work on the cap, for this you will take the small square you just cut i=out in the blue moon card. Take some gold thread and wrap it around four fingers multiple times until you have a good amount. Once you have done this snip the looped ends so you end up with multiple pieces, tie this together with a single piece of thread to make sure they don't fall out. You will then bend this collection of thread in half and tie another piece around the centre to create your tassel. Secure this to the back of your cap with some glue or sellotape. Once you have done this stick your cap onto the gown as shown in the image below using double sided tape.


This step is optional but it does enhance your card. Fill in the text that was printed on the white card pieces with some fun colours, I used pro markers but just use whatever you have.
And finally, put some double sided tape on the back of the inner piece making sure to only put this on the piece that has the cap and gown portion and the piece with the 'You did it' message on as shown below. Don't put any tape on the stepper part of the card.


Once you have put the double sided on the pieces required you can now stick this onto the 12" x 6" card making sure that this is centred. If this is done correctly when you open the card the stepper piece will pop up and lay flat flawlessly.
I also cut out the numbers 2020 in the black sparkle card with a craft knife but how you do this is up to you, you could draw this on top of the pink sparkle or print out the numbers and stick it on, this is up to you.
Congrats on making this card and to the 2020 graduates!


Nobody has commented yet
Be the first to comment on this article by using the form below.