Card Making Tutorial - Sending Love all Year Round
1
Posted on 5th February 2015 by Craig Laird
Filed under All Papercraft Tutorials, Design Team, Seasonal Crafts, Seasonal Crafts, Seasonal Crafts, Seasonal Crafts, Valentines Day Crafts

Good afternoon. Thank you for taking the time to read my first blog post as a new DT member of Papermilldirect I can't tell you how excited I was to be joining an already highly talented team. I'm really looking forward to bringing my different stye to the team and of course I do hope you enjoy seeing what I make. Feel free to replicate my designs as you wish, should it be certain elements or the whole card layout. It's all about sharing and having fun in craft land.
I was trying to decide what I could make as my first design post and seeing as it's the month of Valentines, I thought I'd go with with a Valentines themed card. However, it could be easily made into an anniversary card or even birthday card just by changing the sentiment. Or why not give it to your loved one for no reason what so ever, just a card to say I love you.
To create this card I used the following products;
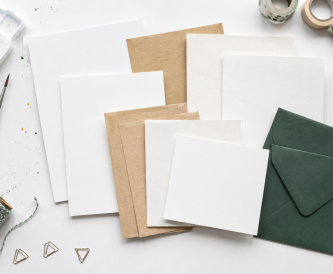
Papermilldirect Card in Buff, White Supersmooth and Hammered White.
Stix2 Adhesives
9mm double sided tape - FPAL2732950
Double sided A4 foam pad sheet - S57172
Silicone glue - S57100
6mm double sided polyester ultra strong sticky tape - S56947
Non stick craft sheet - S57132.
AdditionalPoppy heart stamp - Indigo Blu.
Lancashire rose guilding flakes - Indigo Blu.
Grey Squirrel - Promarker.
Tuxedo black ink pad - Memento.
ScanNcut - Brother.
Freehand591 BT - Sentiment font.
Construction Method
1- Take 2 squares of 7" Hammered white card and using using score board, score a line at 1cm along the top. Add a line of double sided tape along the top of your card and attach to a second 7" sqaure card. This will now create your 7x7" card base.
2 - Using your 9mm double sided tape, matt and layer a 6 3/4" Buff square on to your card base.
3 - Now, on your ScanNcut, select your chosen shape. I have selected the square scallop and sized it at 6 " x 6". Place 6 1/2" x 6 1/2" white supersmooth square onto your cutting mat and cut out your chosen shape. Using 9mm double sided tape again, matt and layer this in the center of your Buff base.
4 - Take a 4" Buff square card and first off I suggest adding your double sided tape to the back now before you take your chosen stamp and stamp the image in the centre of the card using your Tuxedo black ink pad. Using scrap pieces of the Tan card, I have re-inked my stamp and re-stamped the image again and this time I have selected certain areas to cut out and decoupage on top of my main heart image using my 3D foam pad sheet or silicone glue - what ever you feel comfortable using.
5 - Using your grey Promarker, simply draw around your stamped image to create a slight shadow that gives it a touch of depth.
6 - Staying on your stamped image, Take your 6mm double sided polyester tape and run it around the edeg of the 4" Buff square. Once done, remove the backing off and gentle dip into your pot of guilding flakes. I say gentle because they are so light that if you go in heavy handed they puff up and float in the air causing a mess. Once the adhesive is covered, take your scoochie that usually comes included with your guilding flakes and rub off all the exes until it becomes a lovely smooth guilded finish.
7 - Remove the backing off your double sided tape and matt and layer it on top of your scalloped white card matt.
8 - I then printed off a sentiment (this one being valentines) and matted it onto a small piece of scrap Buff card and using my 3D foam pad, I attached it to the front.
I hope you like to see what I have created above but as you will see from below, your stamps and guilding flakes also work well on many textures of card stock from PaperMillDirect.
White Paper Linen Embossed

Super Smooth White

Ivory Card Hammered

Thank you for reading
Craig


1 thought on “Card Making Tutorial - Sending Love all Year Round”
Ms Linda
09th February 2015 at 7:49 p.m.