Embossing Technique with Ink - Me & You Valentines Card
0
Posted on 18th January 2016 by Angela Dodson
Filed under Card Making Ideas, All Papercraft Tutorials, Seasonal Crafts, Seasonal Crafts, Seasonal Crafts, Seasonal Crafts, Valentines Day Crafts, Projects And Cards By Type, Papercraft Disciplines And Techniques, Printing Techniques
Hello, Angela here to share a new card design with you. This week the Design Team are looking at Embossing Techniques and I thought I would show how simply adding ink can make a difference to your embossing.
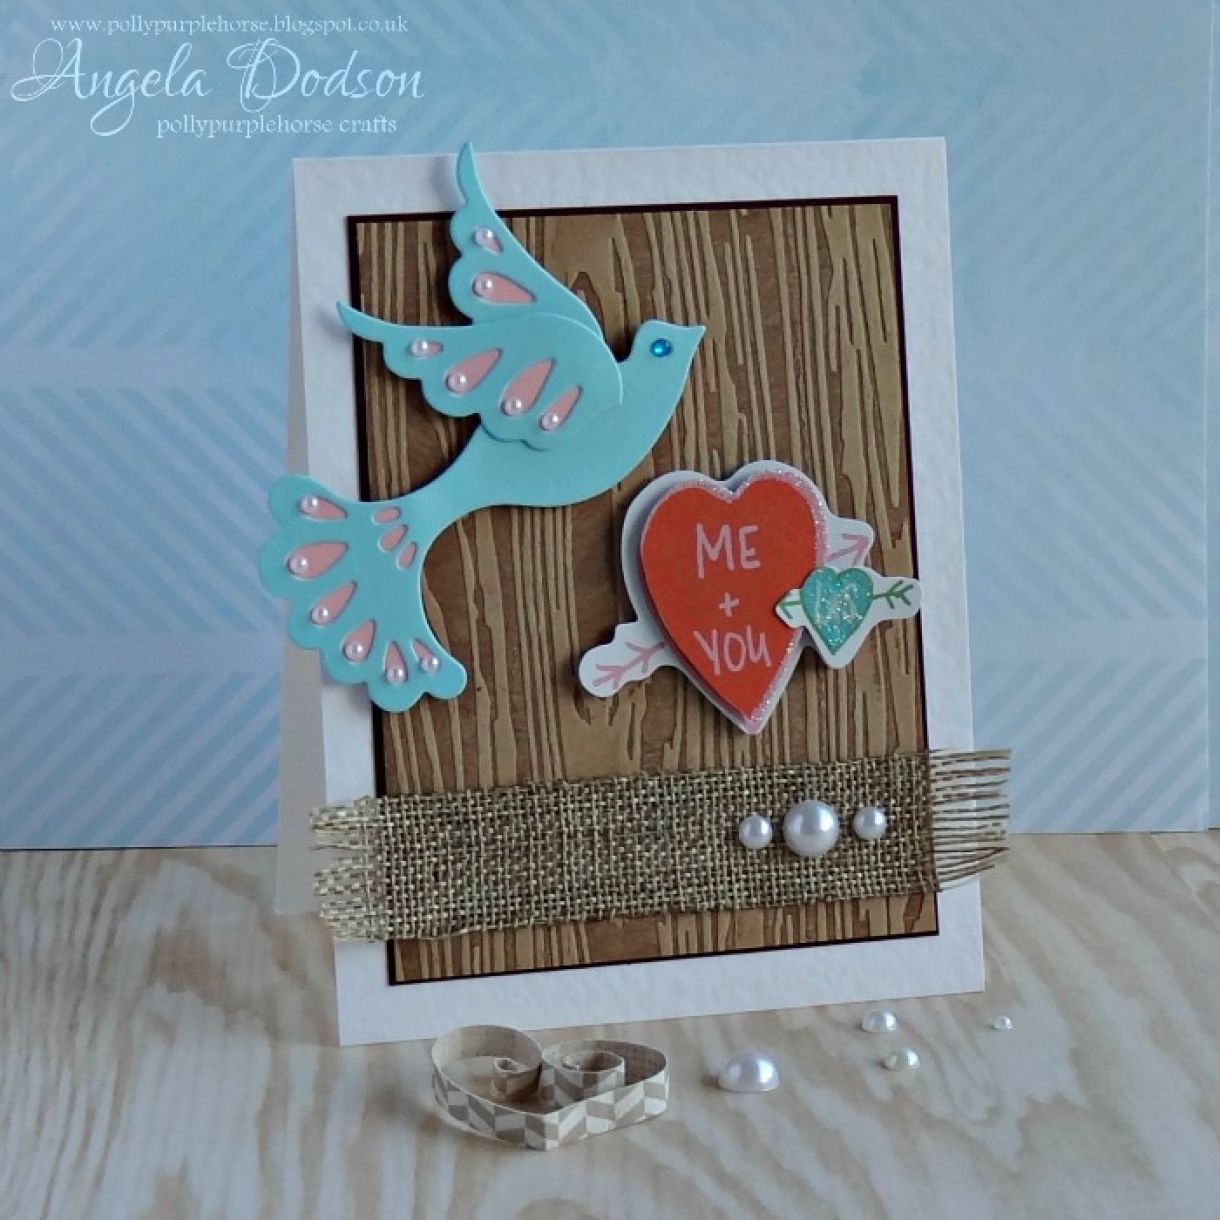
For this design I took a ‘Wood Grain’ embossing folder, opened it up and added ink to one side with my inkpad. I used one of my small dewdrop inkpads in Rich Cocoa colour and simply dabbed and swiped it over one inner side of the plastic embossing folder adding ink to the raised edges. (If you prefer you could use a larger inkpad and brayer to apply the ink). I placed a piece of Papermilldirect Buff coloured card inside the folder and ran it through my Big Shot machine, opened the folder and the card has been embossed and inked to resemble wood grain. (Just clean any excess ink off the folder with a baby wipe). I trimmed the wood grain panel down to approx. 3 ¾ “wide by 5” high and used double sided tape to mat onto PMD Maroon card to give a small border.
To create the card base I simply scored and folded an A4 sheet of PMD White Hammered card in half and then trimmed down to give me a 4 ½ “ wide by 5 ¾” high card base ( I like the fold across the top for this design but you may prefer it with fold to the left). The wood grain panel was attached centrally with double sided tape.
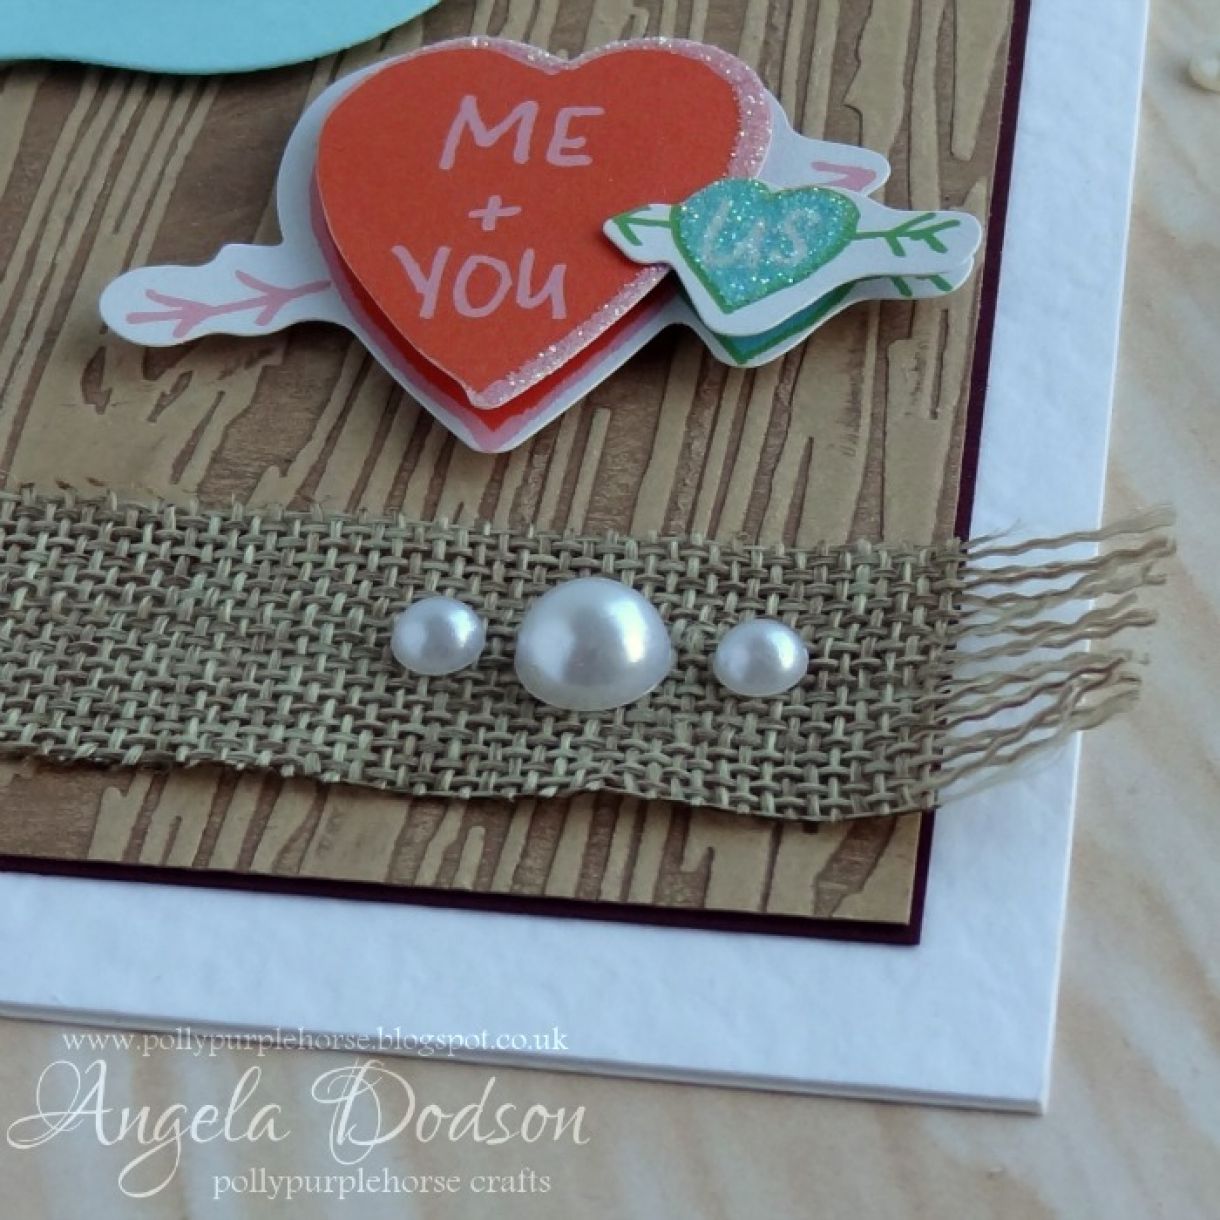
I took a small length of Jute Hessian trim from my stash and cut it to just overlap the card edges, fraying the ends, double sided tape secures the trim along the bottom of the wood grain panel.
Using PMD Pale Turquoise card and the Marianne Design Dove die set, I cut one bird body and 2 wing pieces. You could leave the pieces with the cut outs as they are or do as I have done and added PMD Baby Pink card to the back so it shows a contrast colour in the cut-outs. Glue wings to dove body arranging as you wish and then use 3D foam pads to adhere the Dove to the wood grain panel towards the top LH side, allow the wings and tail to overlap the card slightly, this adds extra interest drawing your eyes ‘off the page’ adding to the idea of the bird flying.
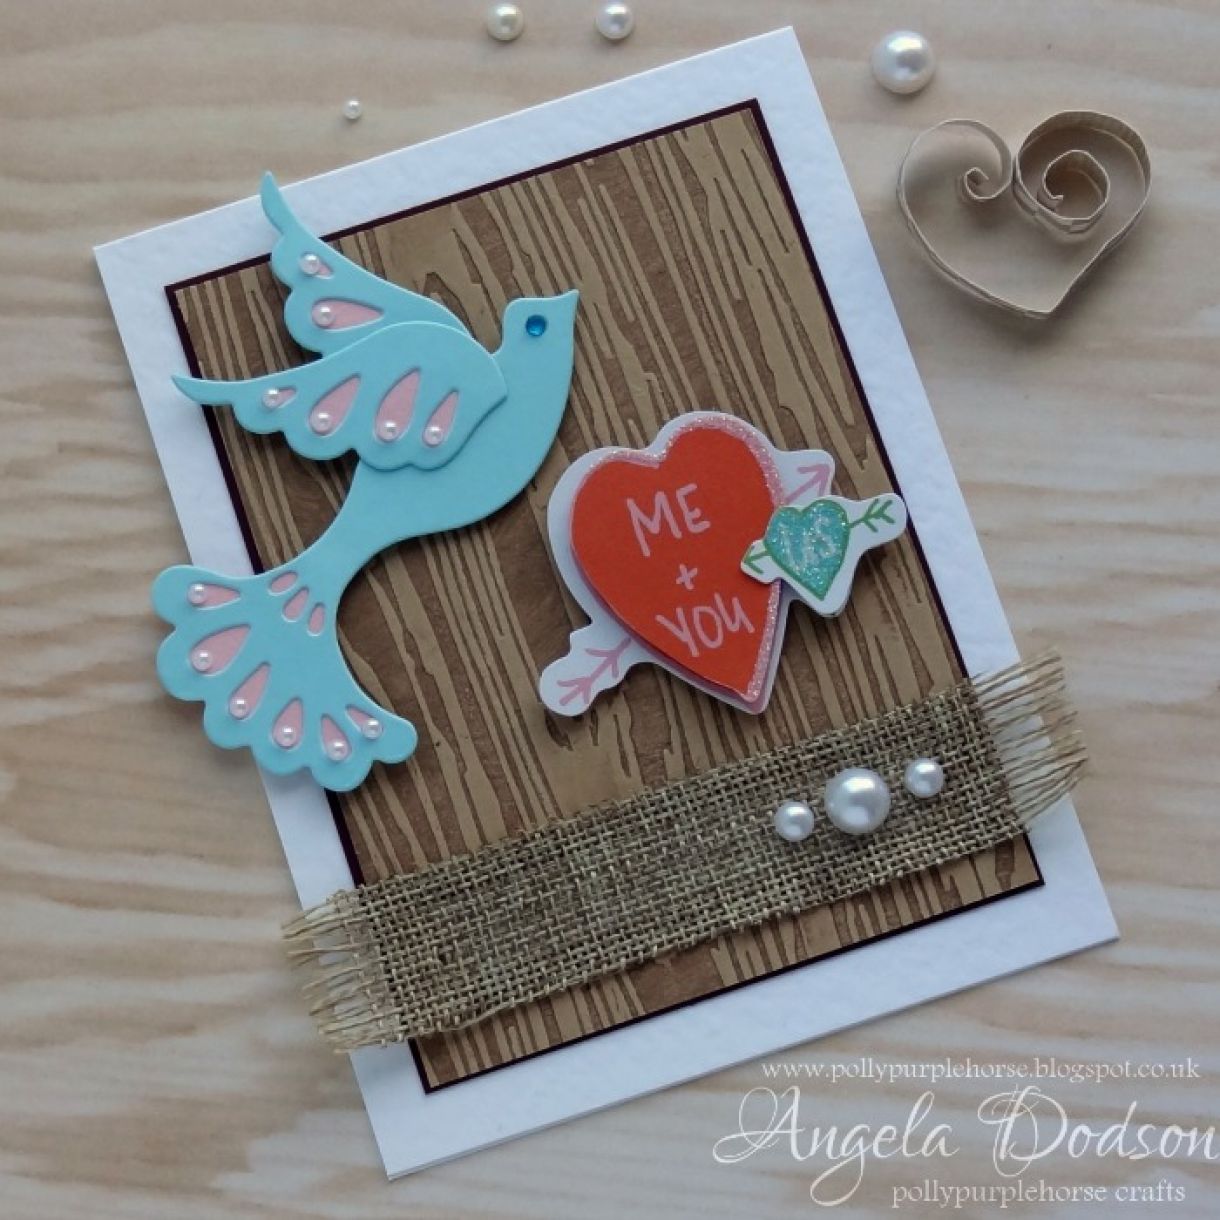
The sentiment is provided by the ‘Me & You’ sticker from the Forest Friends embellishments, I placed this below the dove and slightly to the right. To finish a self-adhesive blue gem was added to the eye of the dove and pearls were added to decorate the tail and wings. 3 self-adhesive pearls were also added to the Jute Trim at RH side.
I think the inking of the embossing folder worked really well and along with the embossed surface, raised embellishments and Jute trim, it made for quite a tactile card. Why not experiment with your own embossing folders and don’t forget to share your makes over on the papermilldirect facebook page, we’d love to see them.
Materials Used:
White Hammered Card – Papermilldirect
Pale Turquoise Card – Papermilldirect
Baby Pink Card – Papermilldirect
Wood Grain - Textures Embossing Folder – Crafter’s Companion
Rich Cocoa – Dewdrop Inkpad – Memento
Decorative Dove LR0149 - Creatables Die – Marianne Design
Forest Friends Embellishment Stickers – Grace Taylor
Adhesive gem and pearls, Jute trim
Adhesives: Double Sided Tape, 3D Foam Pads,cosmic shimmer glue


Nobody has commented yet
Be the first to comment on this article by using the form below.