Cute Happy Birthday Card using Free Digi Download - Step By Step Tutorial
0
Posted on 31st May 2016 by Angela Dodson
Filed under Card Making Ideas, Free Printables For Card Creation And Scrapbooking
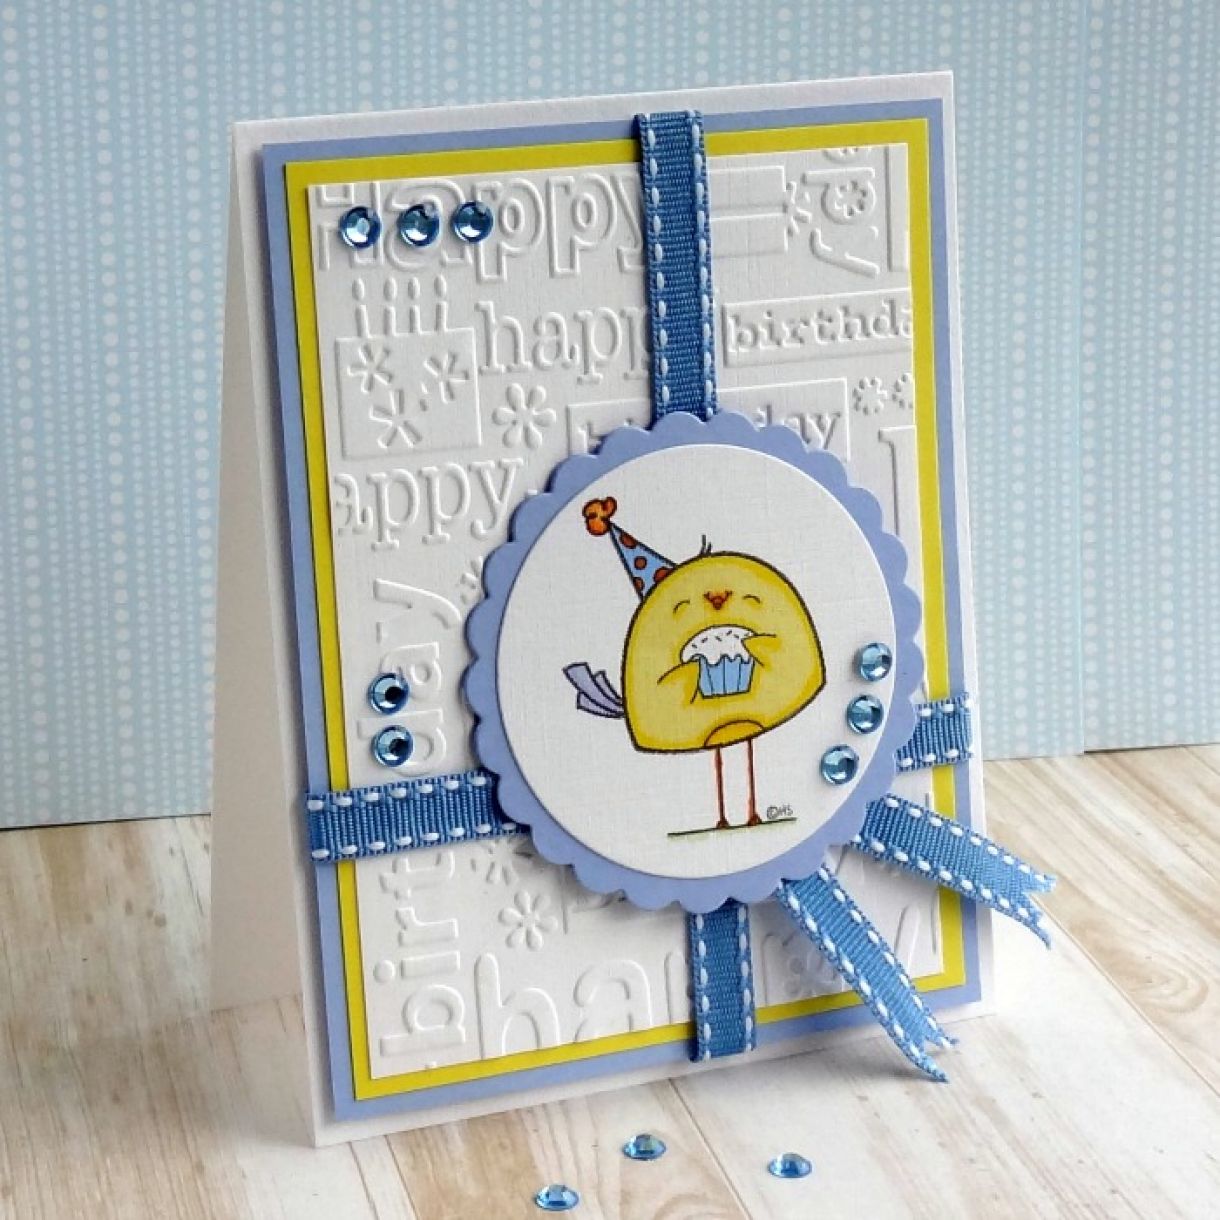
Hello, it's Angela here to share a simple step-by-step Tutorial. This week the Design Team are working on the theme of Free Printables or Downloads and I have a cute little birthday chick card to share with you. The image used is from a set of 4 free download digi images available from Simply Cards & Papercraft magazine (Link at end of post).
Step By Step:

Download and print off your chosen image form the set of 4 (I have chosen the chick with birthday cake) I like to print onto Papermilldirect White Linen cardstock as I love the effect. Use your chosen medium to colour the image, I have used my favourite First Edition craft marker pens and as this is a simple design you can simply block colour for ease or get more detailed with shading if you wish.
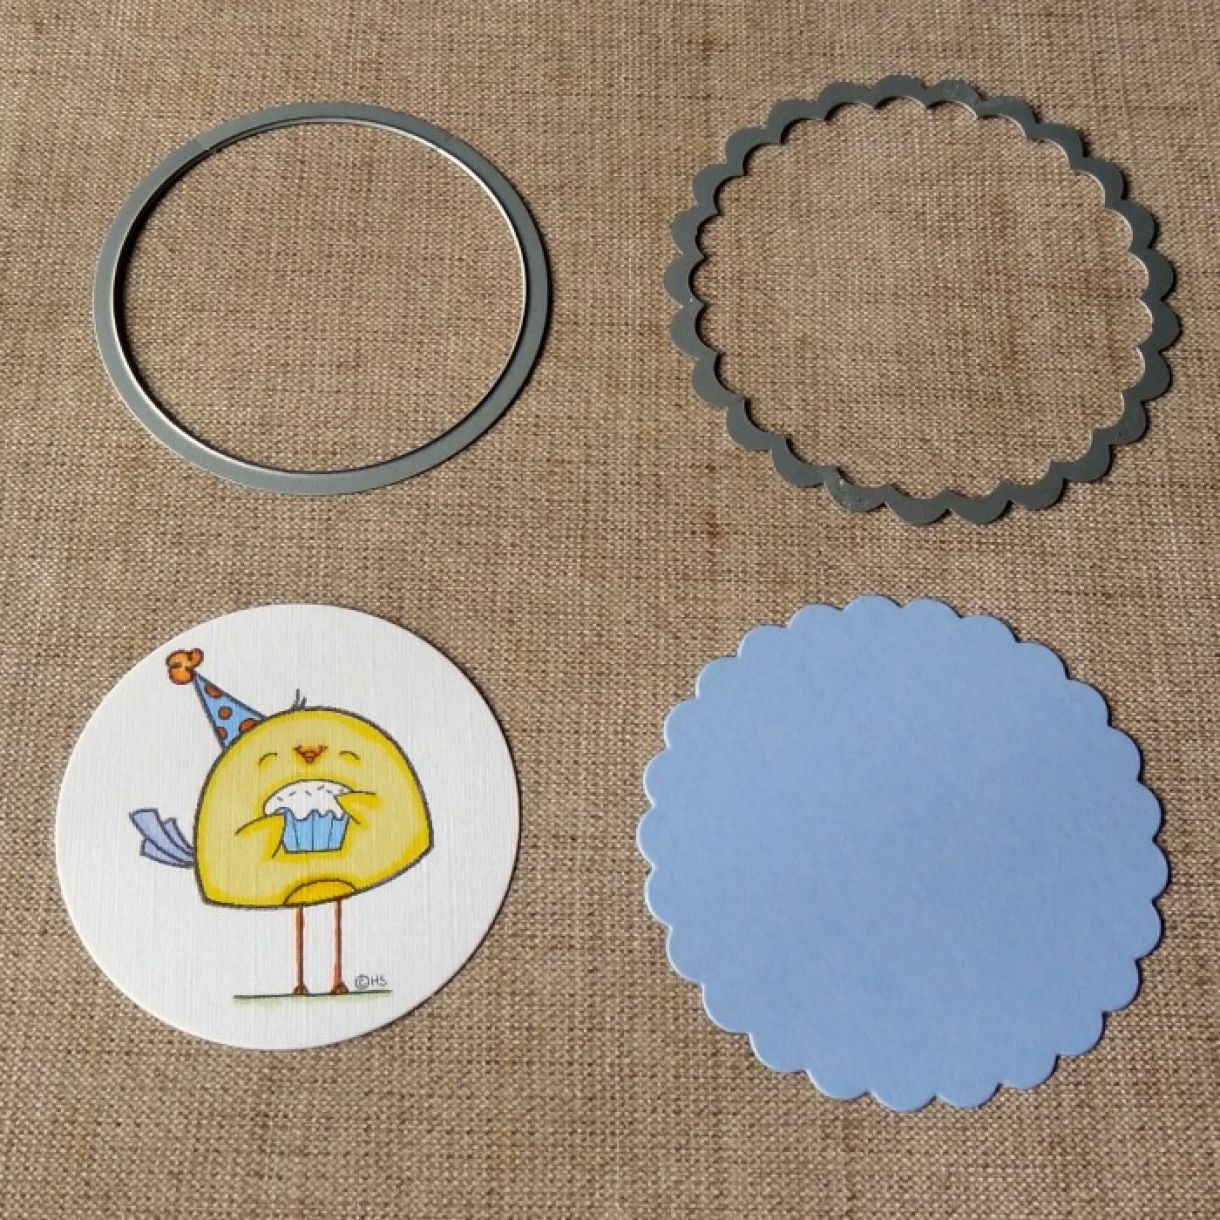
Cut out image using a circular nesting die and cut a slightly larger shape from PMD Marine Blue coloured card. Mat image onto blue shape using glue. I have added extra interest by cutting the coloured layer using a scalloped circle die, but you can use a plain circle if your prefer and of course if you don't have a die cutting machine then just cut image into a square panel.
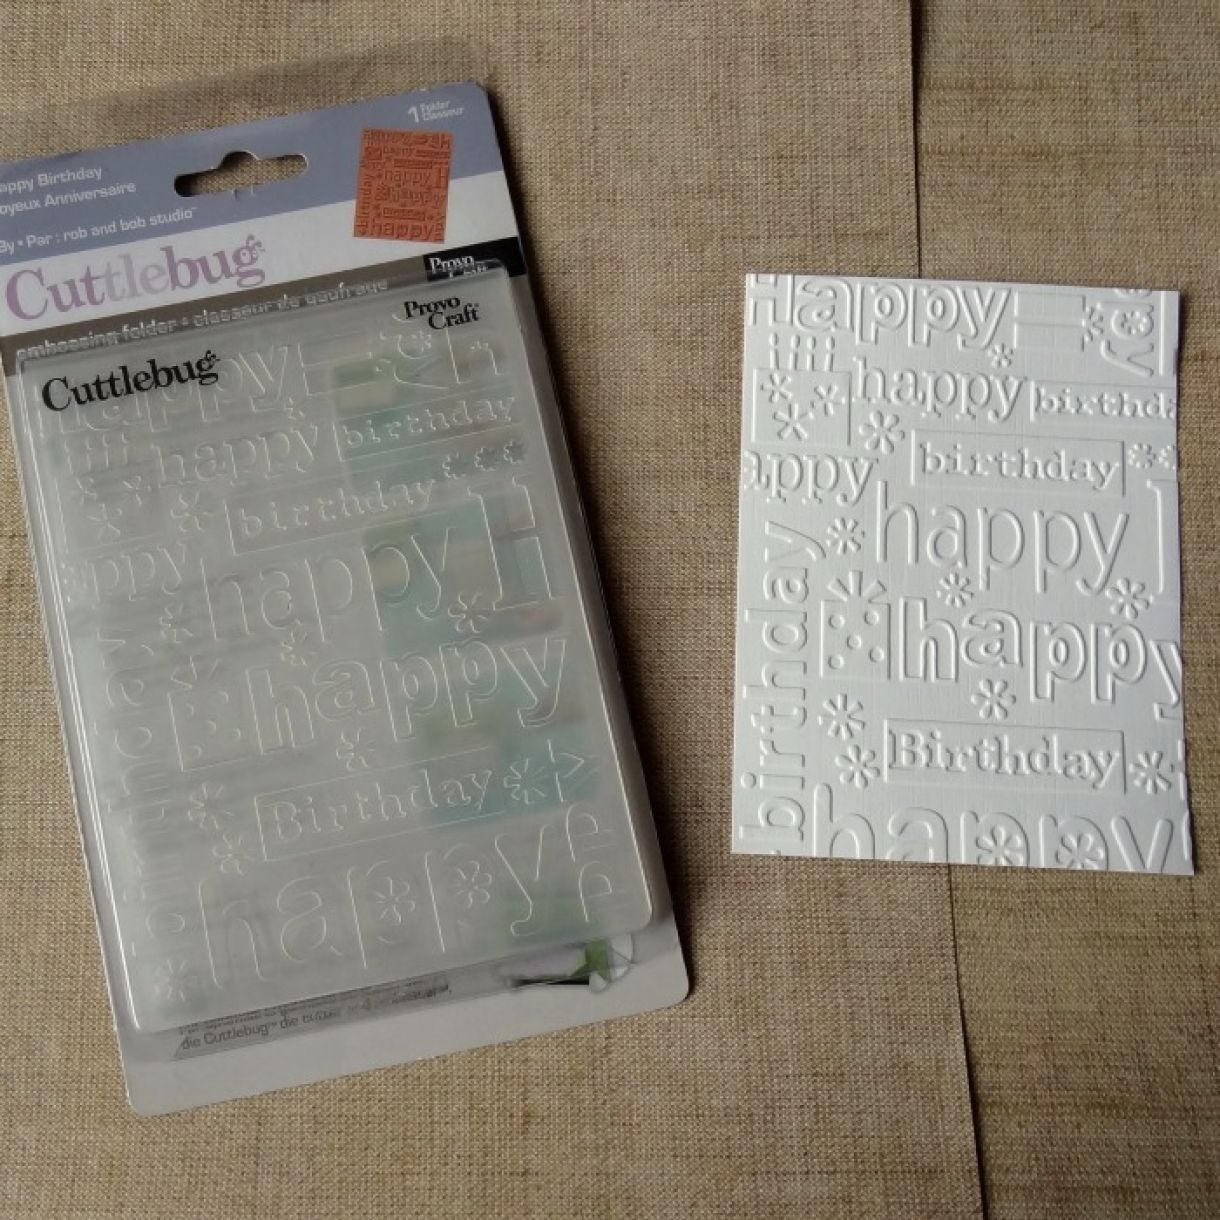
Use a Birthday themed embossing folder to emboss a piece of PMD White Linen Card and trim down to measure approx. 3 3/4" x 5".
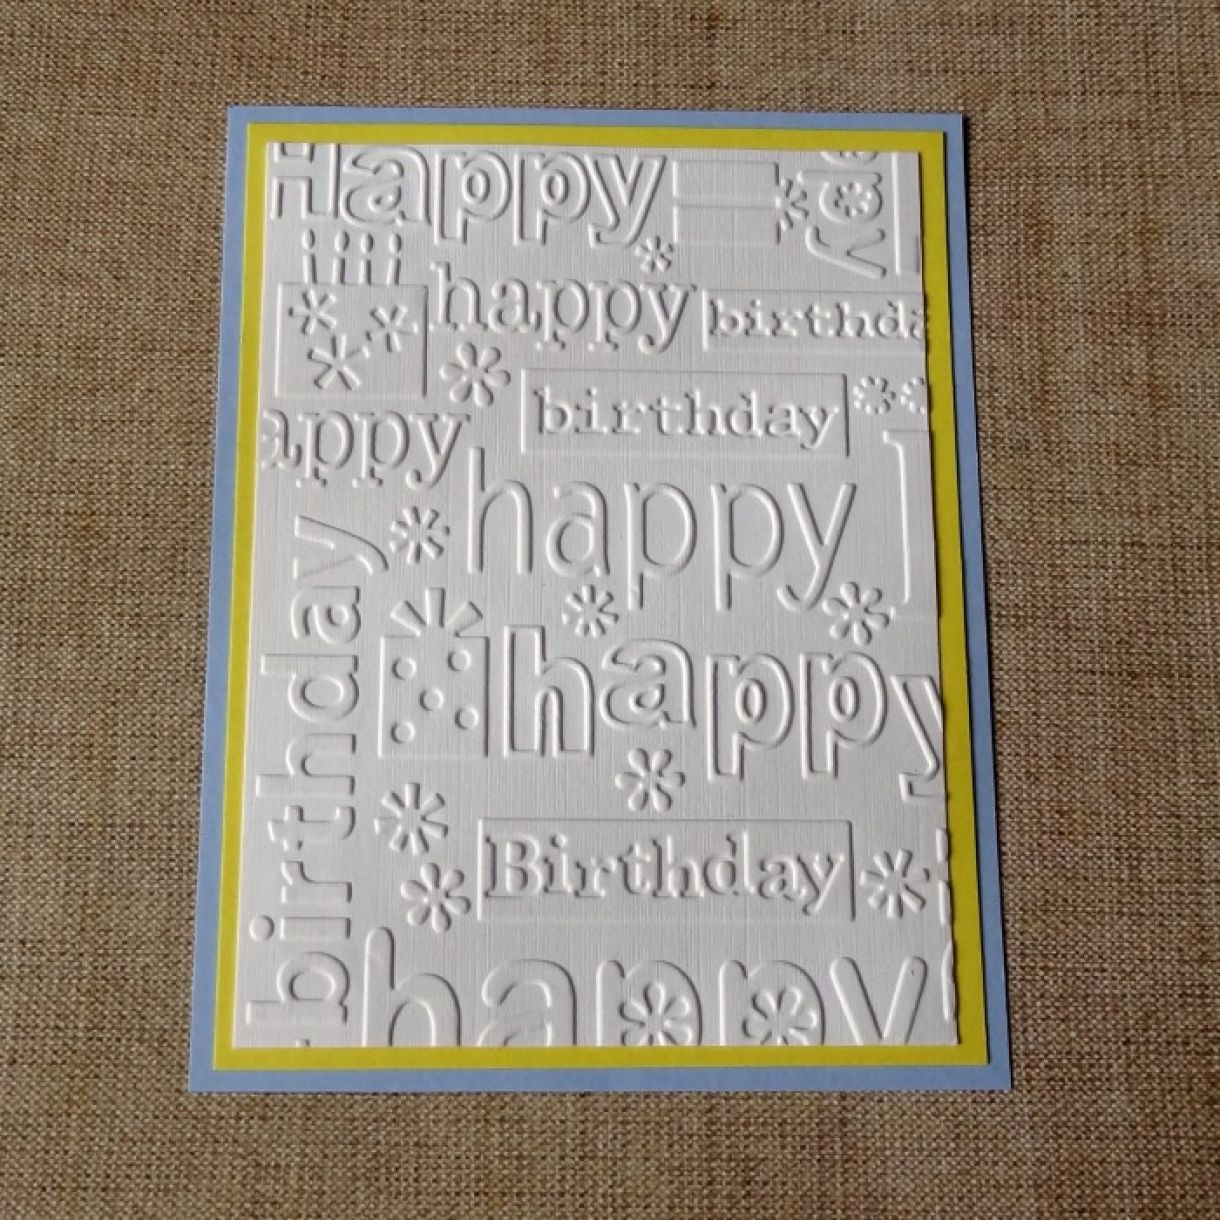
Mat embossed panel onto a slightly larger panel of PMD Daffodil Yellow card using double sided tape, and mat again onto a panel of PMD Marine Blue cardstock approx. 4 1/4" x 5 1/2".
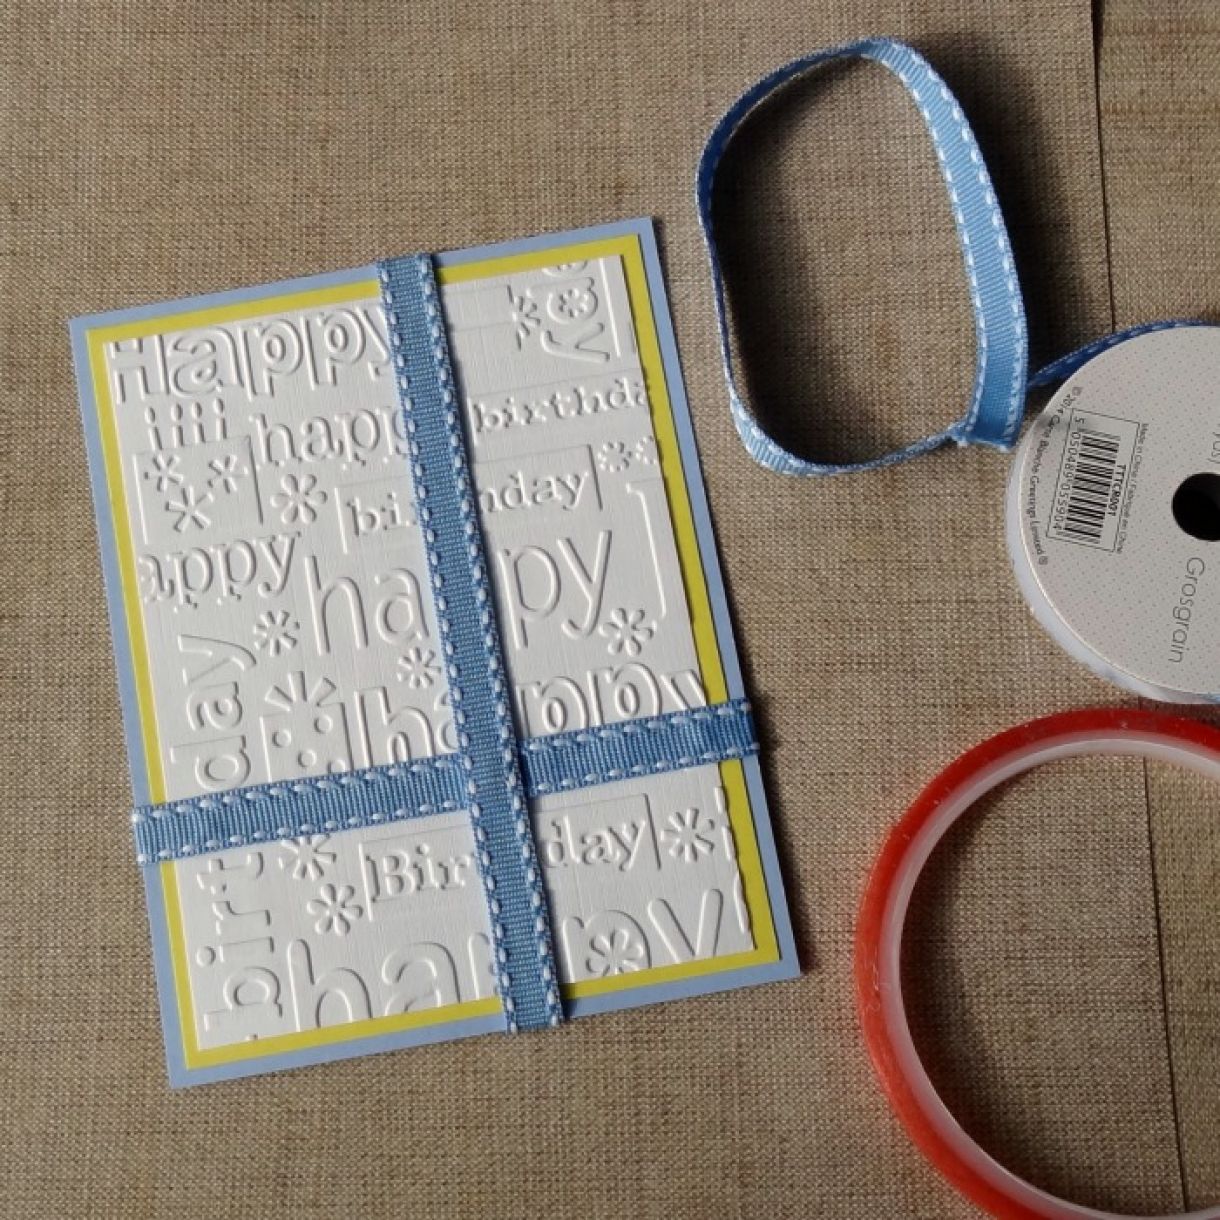
Add blue grosgrain ribbon across matted panel as shown adhereing with permafix tape and securing ends at back of panel. Cut 2 small pieces of ribbon, fishtail ends and add where ribbons cross.
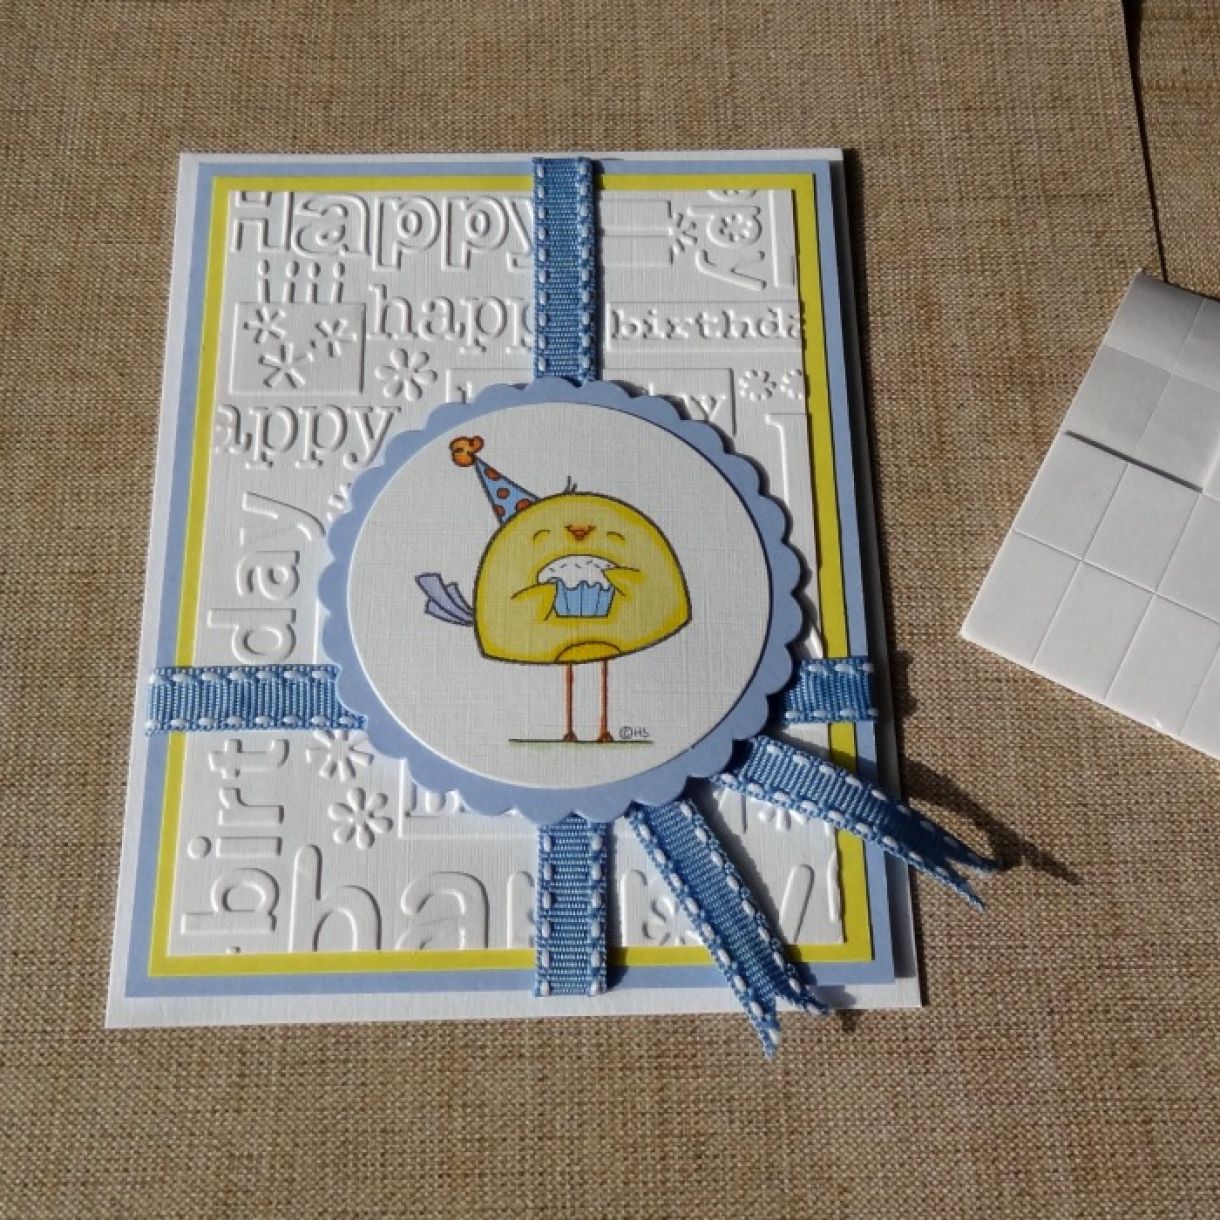
Score & fold Papermilldirect Plain White card and trim down to create a 4 1/2" x 5 3/4" card base. Add embossed panel to card front using 3D foam pads. Add layered image towards bottom of card on top of where the ribbons meet, again using 3D foam pads.
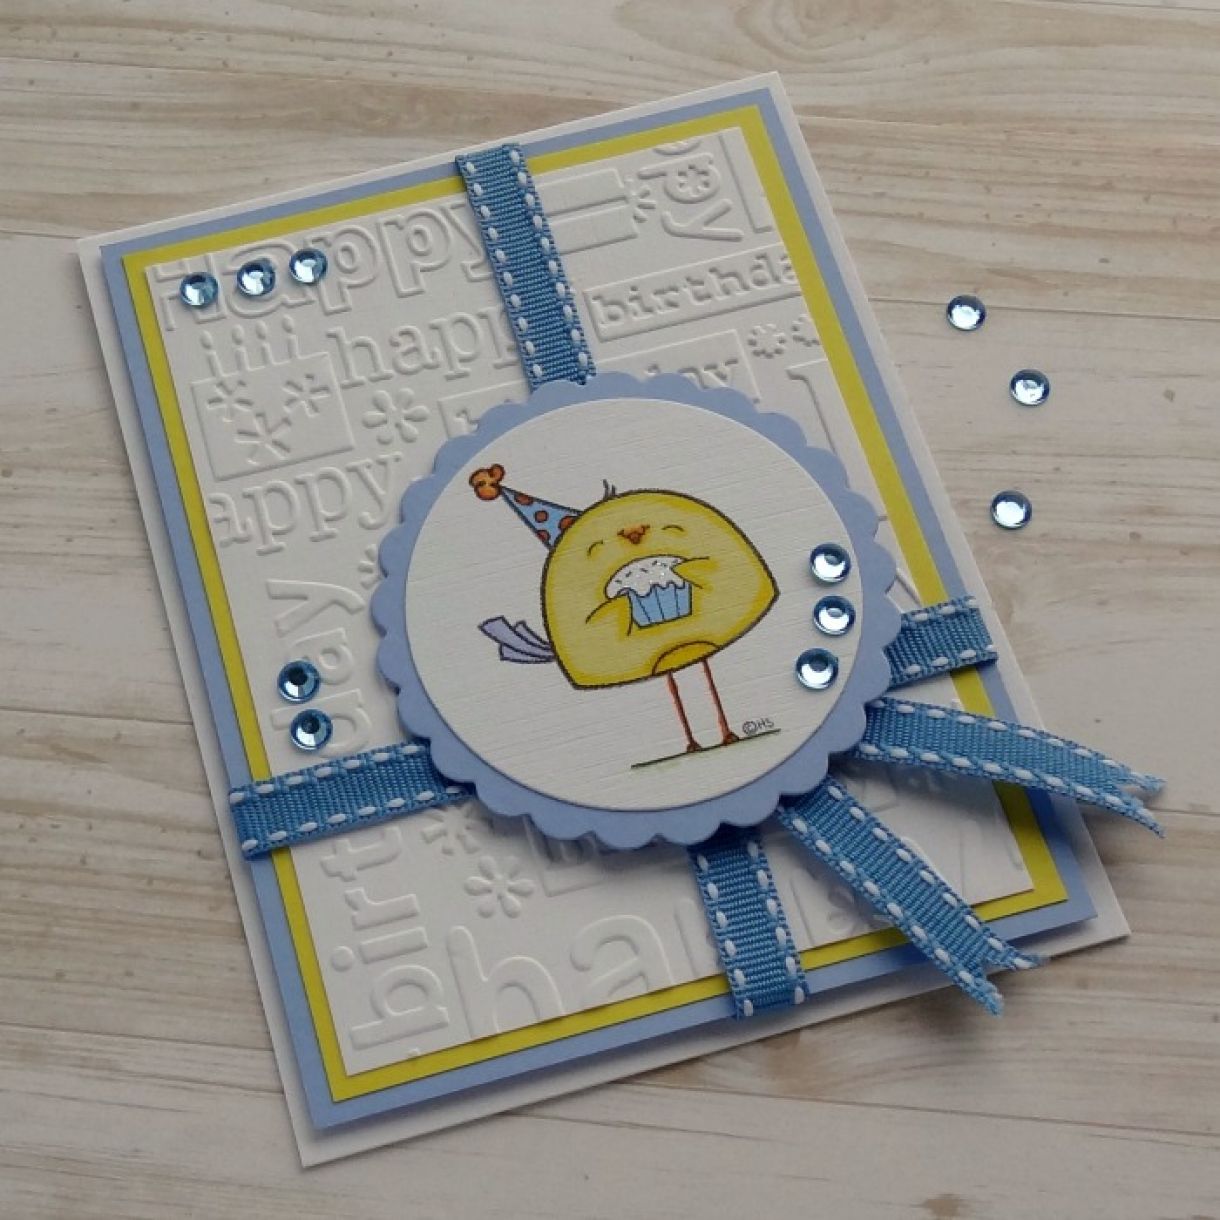
To finish, add glitter glue to icing on the cake and decorate card front using pale blue adhesive gems.
Materials Used:
White Linen Card - Papermilldirect
Marine Blue Card - Papermilldirect
Daffodil Yellow Card - Papermilldirect
Plain White Card - Papermilldirect
Dies - Nesting Circle Dies - Sizzix
Embossing Folder - Happy Birthday - Cuttlebug / Provocraft
First Edition Craft Markers - First Edition
Blue Grosgrain Ribbon, Blue Adhesive Gems, Glitter glue
Adhesives: Double Sided Tape, Perma-Fix Tape, 3D Foam Pads.


Nobody has commented yet
Be the first to comment on this article by using the form below.