A Papercut Heart Wedding Card
0
Posted on 25th July 2017 by Angela Dodson
Filed under All Papercraft Tutorials, Card Making Ideas, Projects And Cards By Occasion, Celebration Cards

Hello, it’s Angela here to share a Wedding card design idea with you. I love to use Papermilldirect White Linen card not only for it’s lovely texture and the luxury look it gives, but also because it cuts beautifully on my Cricut. I needed to make a Wedding card with a lemon and white combo so I choose the PMD Pastel Canary card to partner the linen card centrepiece.

Step By Step.
The design of the card is based around a papercut style heart, I used a heart shape from Design Space and adapted it by welding in some shapes to close some of the open spaces and make it easier to mount onto it’s backing. (The Design Space images I've used are shown at the end of this post)
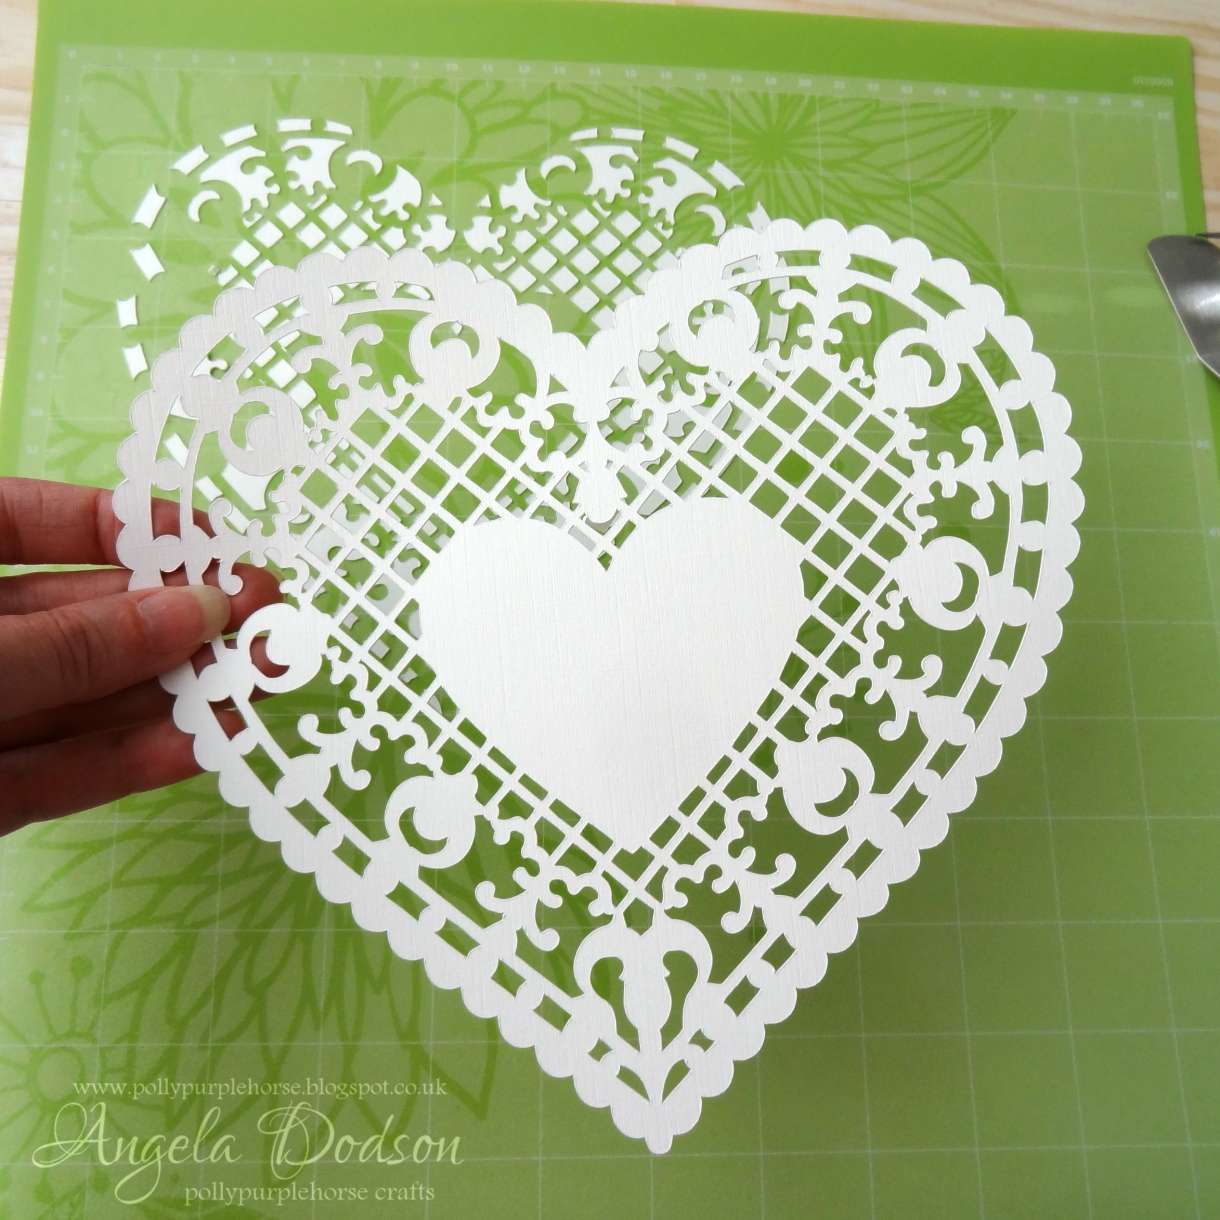
Mount the White Linen papercut heart onto it’s Pastel Canary backing shape using 3D foam pads and decorate with adhesive pearls and clear gems. Prepare an 8x8 white card base by adding a mat and layer of embossed white card onto Pastel Canary using d/s tape. Affix decorative heart to card front using d/s tape and clear drying glue.

Attach a panel of Pastel Canary card inside the card and add a panel for the greeting. I have cut another heart from smooth white card and used my Cricut to write ‘On Your Wedding Day’ upon it. I have also added a die cut Wedding Cake and 2 Champagne Flutes using die sets.

Cut the centrepiece heart panel from White Linen card and add to it’s Pastel Canary backing shape using 3D foam pads. (I have personalised the centre heart by slicing the words into the shape using a Cricut Font, you could use the write function if you prefer?) Decorate heart with small adhesive gems and then add to card front.

Add other decoration to card front if desired, I have added a bride and groom die cut from White Linen card using a FE Wedding Die set and mounted using 3D foam pads.

Add personalised layered hearts to bottom left and bottom right. I have used my Cricut to write ‘Mr&Mrs’ on one and the Wedding date on the other. To finish, add a trio of paper flowers using sticky dots, twirl the wire stems if they have and arrange as desired. I used a ready-made white box to hold the card and decorated it with a personalised layered heart and a paper flower to match,
Angela x

Products Used:
White Linen Card – Papermilldirect
Pastel Canary 160gsm – Papermilldirect
Smooth White Card – Papermilldirect
Wedding Die Set – FEDIE042 - First Edition
Congratulations Die Set – DCDIE038 – Dovecraft
6mm Adhesive Pearls – SCDOT045 – Simply Creative
3mm Adhesive Clear Gems – SCDOT017 – Simply Creative
Adhesives: D/S Tape, Clear Drying Glue, 3D Foam Pads
Design Space Images used:


Nobody has commented yet
Be the first to comment on this article by using the form below.