Mother’s Day Card to Make - A Step By Step Tutorial
0
Posted on 13th March 2017 by Angela Dodson
Filed under Card Making Ideas, Design Team, Seasonal Crafts, Mothers Day Crafts

Hello, it’s Angela here to share a Mother's Day card to make. It could also be for a Mum’s birthday.
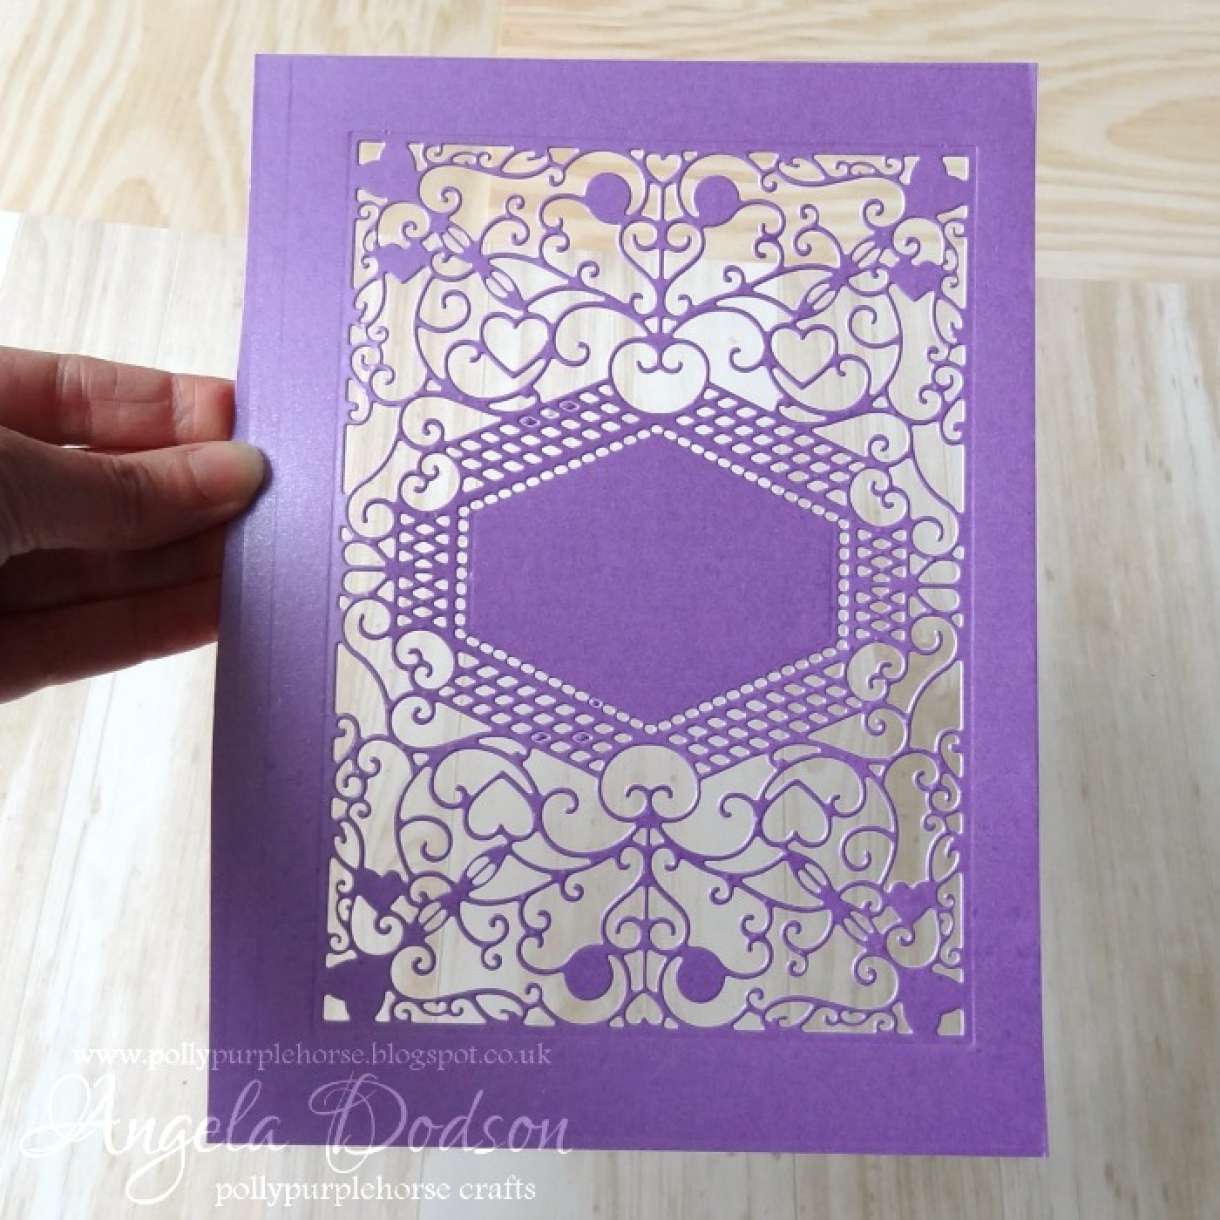
The ‘papercut’ panel effect is very popular at the moment and dies are a great way to achieve a similar look in an easy way. I have been playing with one of the new Craft-A-Card dies and some of the gorgeous Papermilldirect Lustre Print cardstocks. These are 300gsm, fabulous quality cardstocks with a luxury lustre finish and they cut beautifully through my Big Shot die cutting machine

Step by Step:

Cut the 5x7” craft a card die from Papermilldirect Periwinkle Lustre Print Silver card.
Remove the waste from the die cut by shaking it, use a pokey tool for any tiny bits.

Trim the die cut panel down to leave an even border all around (I cut to approx. 18.5 cm x just over 13cm). Add foam squares to the back of the panel, add them around the outside and to the larger shapes, cut them smaller if required for some areas.

Score and fold an A4 sheet of Papermilldirect Natural White Pearlised cardstock in half, trim down to create a 5 ½” x 7 ½” card base. Carefully position die cut panel onto the front and when happy with positioning press down firmly to secure.

Die cut letters to spell ‘MUM’ from PMD Natural White Pearlised card using an alphabet die set.

Glue letters to centre panel on card front, using a clear drying glue. For even spacing, glue the first and last letter in place and then add the centre letter.

Die cut a selection of flowers and leaves from PMD Lustre print Silver card. Spring Green for the leaves and the pink shades for the flowers.

Shape the flower petals and leaves in your fingers to give shape, layer some up using 3D foam pads and then glue as desired to card front.

To finish add an adhesive gem to the centre of each flower.
I love the pretty colours in Papermilldirect’s Lustre Print card range, The Periwinkle is sooo pretty and my favourite colour, so I themed this card around the purple and pinks. There are lots of other shades to check out too, why not try experimenting and if you make a project using PMD card then please do share it over on the Facebook page, Twitter or Instagram, we love to see what you have been making.
Angela x
Products Used:
Lustre Print Silver 300gsm Card in Periwinkle, Spring Green, Persian Pink, Misty Rose, Red Wood – Papermilldirect.
Natural White Pearlised card 300gsm – Papermilldirect.
Craft A Card Die 5x7” FEDIE179 – First Edition
Alphabet Headliner Die XCU503153 – X Cut
Faux Quilled Blooms Dies CED1402 – Creative Expressions
Self Adhesive Pearls
Adhesives: Cosmic Shimmer clear drying glue, 3D foam pads


Nobody has commented yet
Be the first to comment on this article by using the form below.