Happy Burger Day!! Fun Birthday card with embossing folders & inks
0
Posted on 7th December 2015 by Angela Dodson
Filed under Card Making Ideas, All Papercraft Tutorials
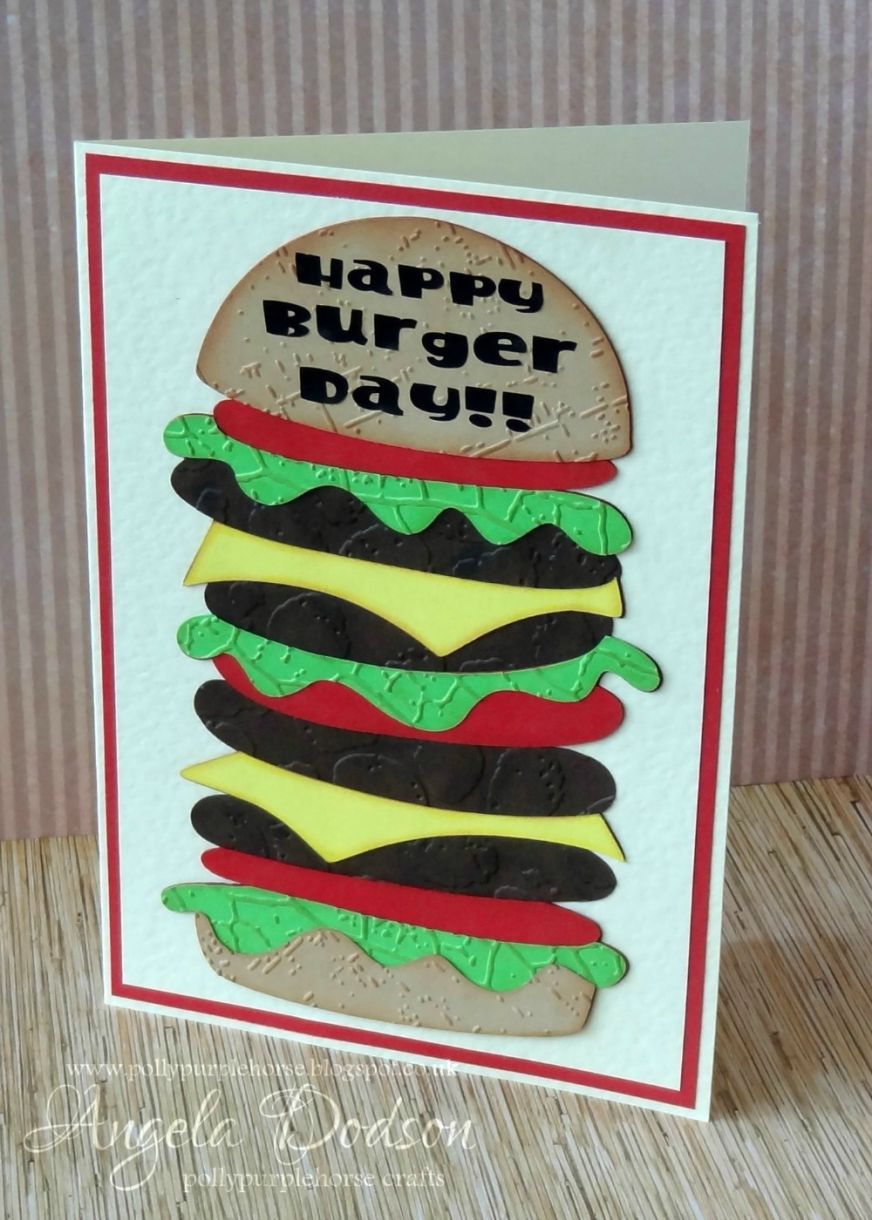
Hello its Angela here to share an embossing folder & inking project with you. I wanted to create a fun Birthday card with a fast food theme and used a play on words to come up with this ‘Happy Burger Day’ card. Recently I had been thinking about all the embossing folders I have and different ways to use their effects. For this project I took a set of ‘Textures’ embossing folders from Crafters Companion teamed with distress inks to add interest and texture to the Burger design. If you don’t have the exact same folders then I’m sure you could use others from your stash that will be equally effective.
I started by cutting out the components to make my burger, I used my Cricut Explore to cut the shapes and I have included my Design Space link in the materials list at the end if you wish to use the same. You can of course easily create your own burger shape by drawing the shapes onto card using a pencil, the shapes of the ingredients are not needed to be exact, I’m sure they will be instantly recognizable as a burger.
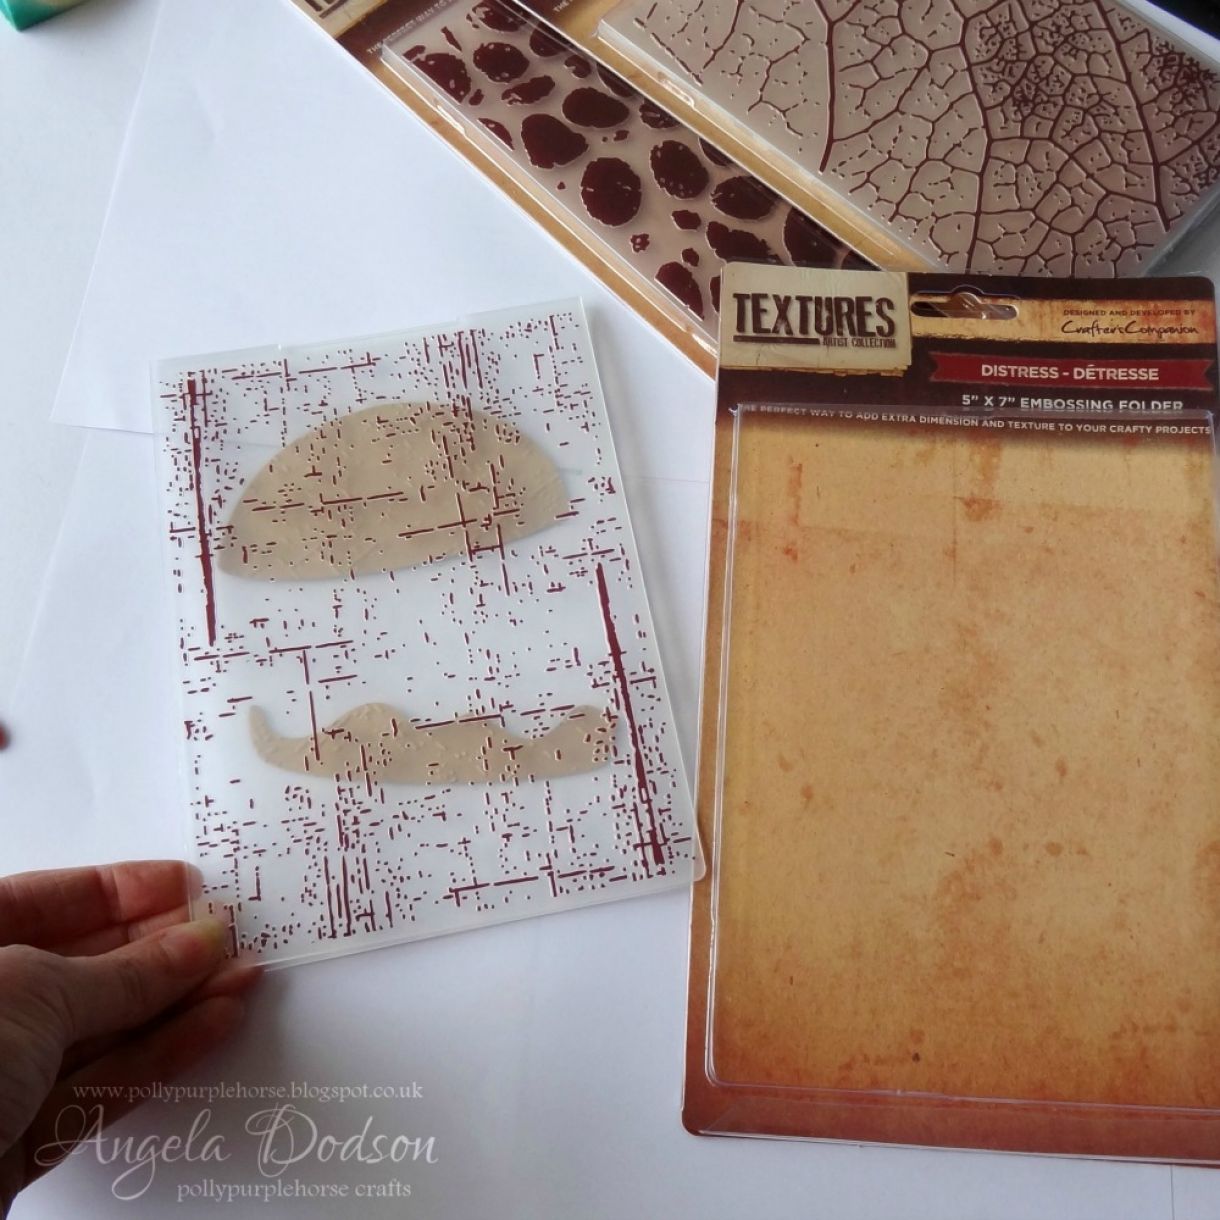
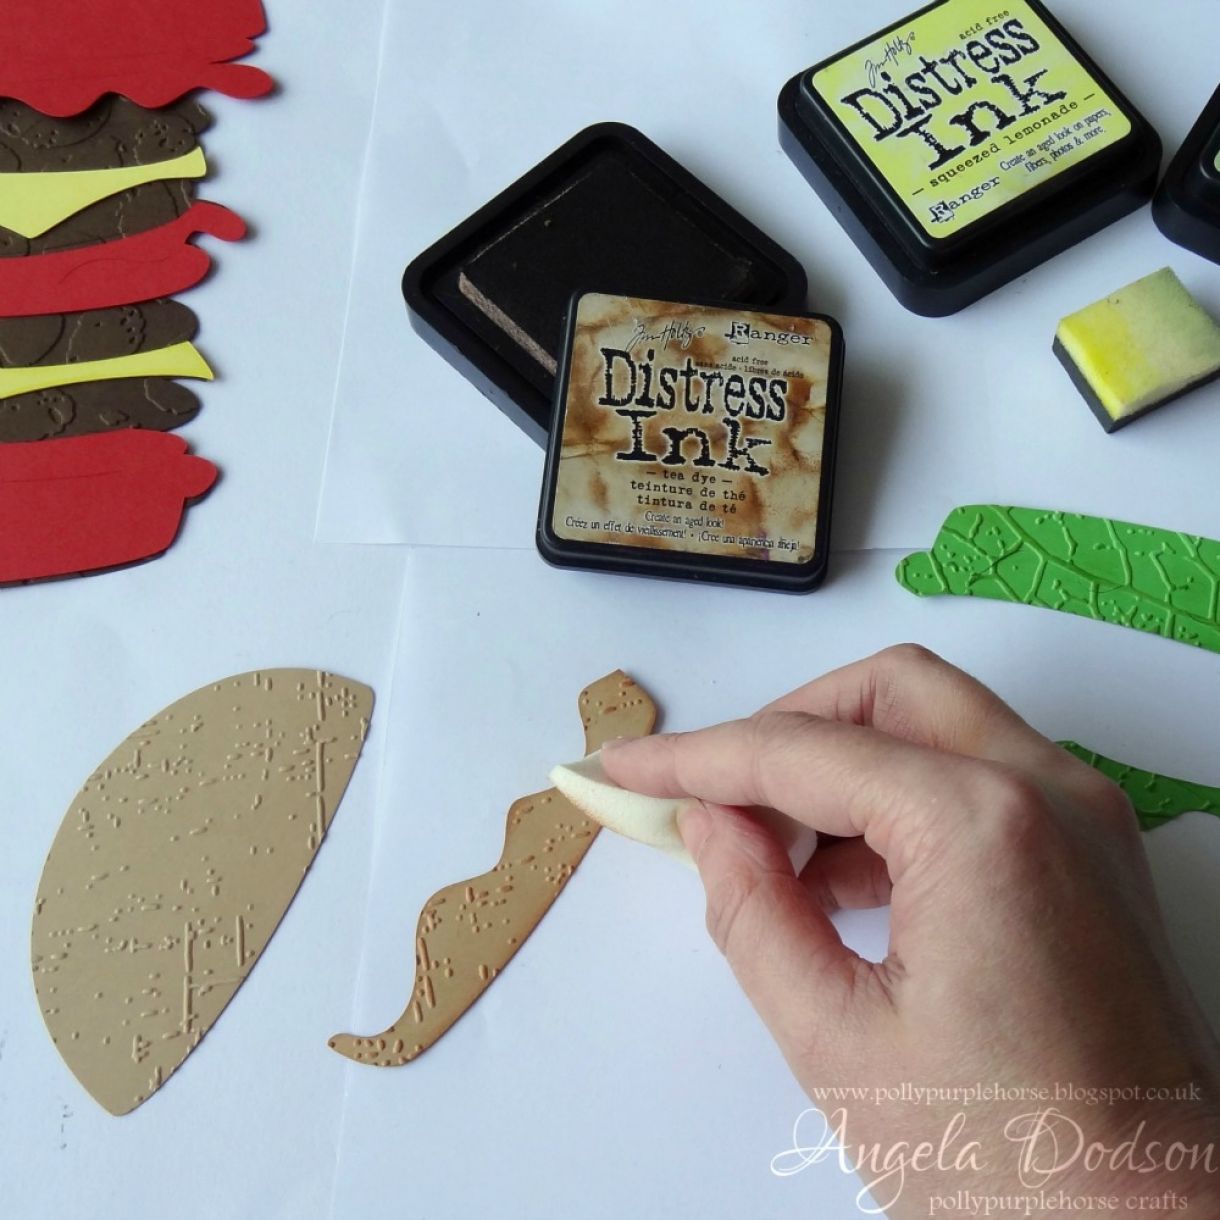
I cut a top and bottom for my ‘burger bun’ from PMD Buff cardstock, embossed with the ‘Distress’ embossing folder and then I swiped distress ink in ‘Tea Dye’ across the raised embossing to highlight it.
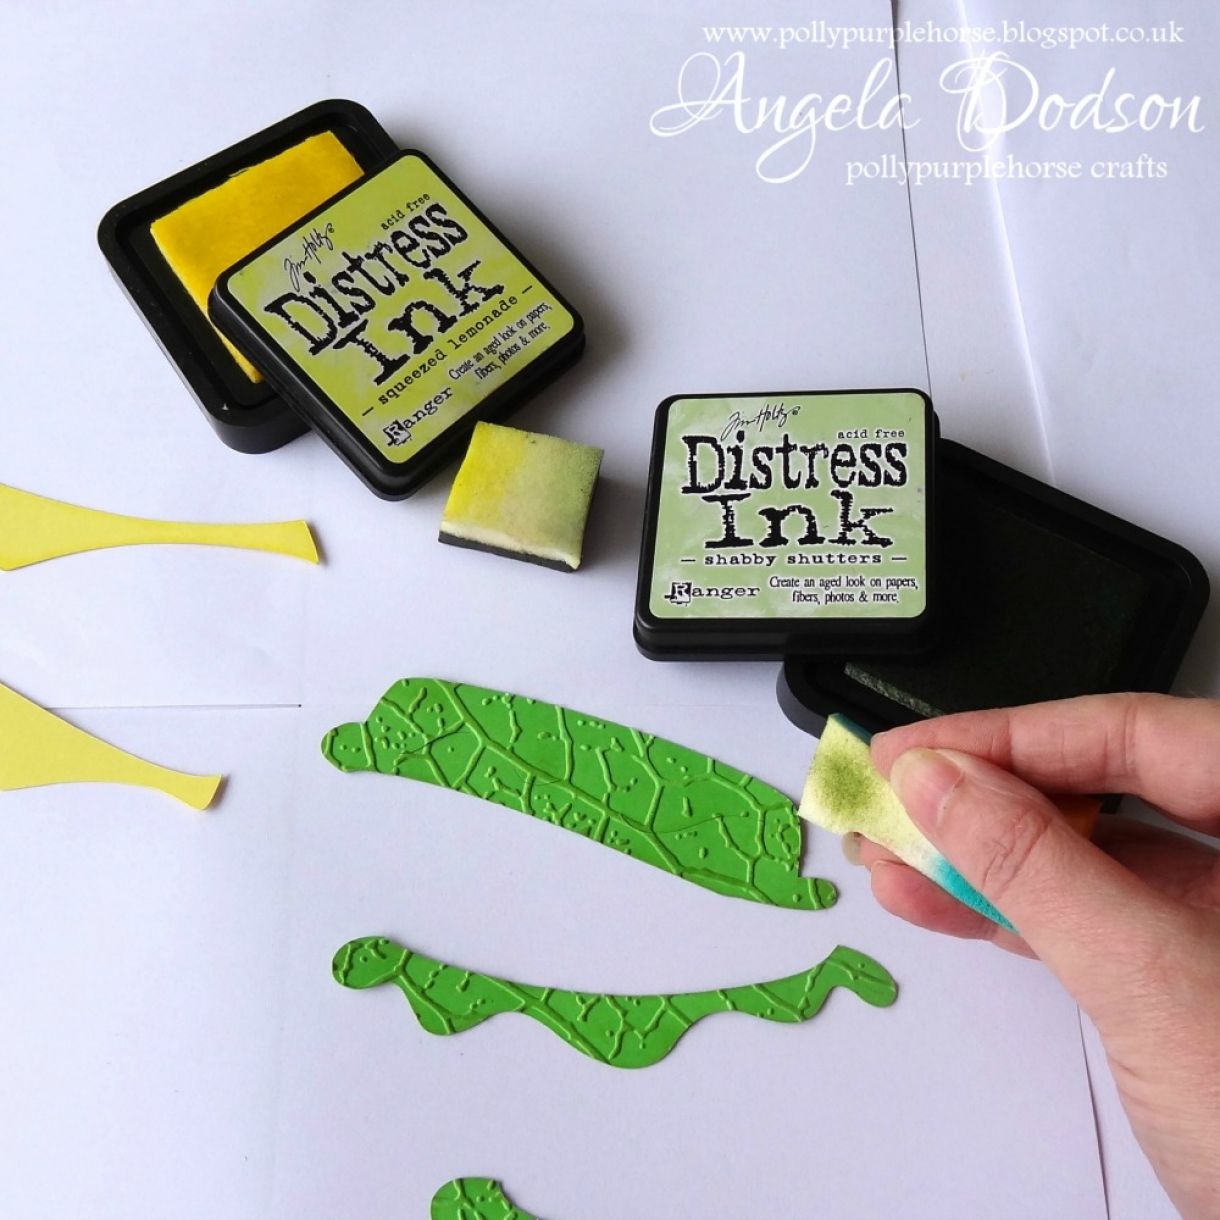
The ‘lettuce’ is cut from PMD Apple Green card and embossed with the ‘Leaf Veins’ embossing folder, ‘Shabby Shutters’ distress ink to highlight.
Slices of ‘Cheese’ have been cut from PMD Daffodil Yellow cardstock, no embossing folder but I did ink around the cut edges with ‘Squeezed Lemonade’ and a little ‘Tea Dye’ distress inks to add some definition.
‘Tomato’ also has no embossed but has been inked around using both ‘Worn Lipstick’ and ‘Tea Dye’ inks.
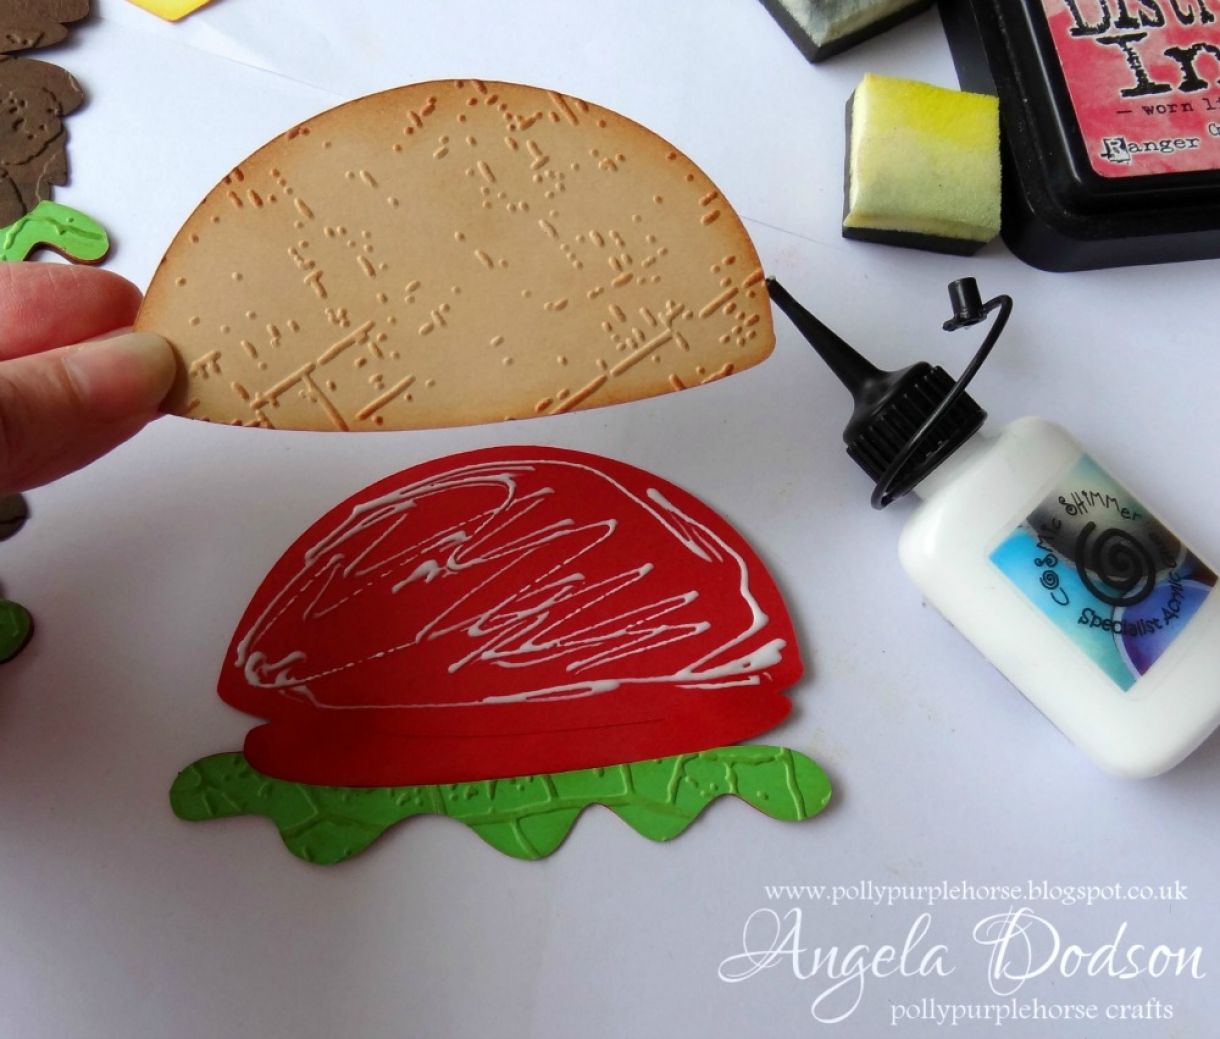
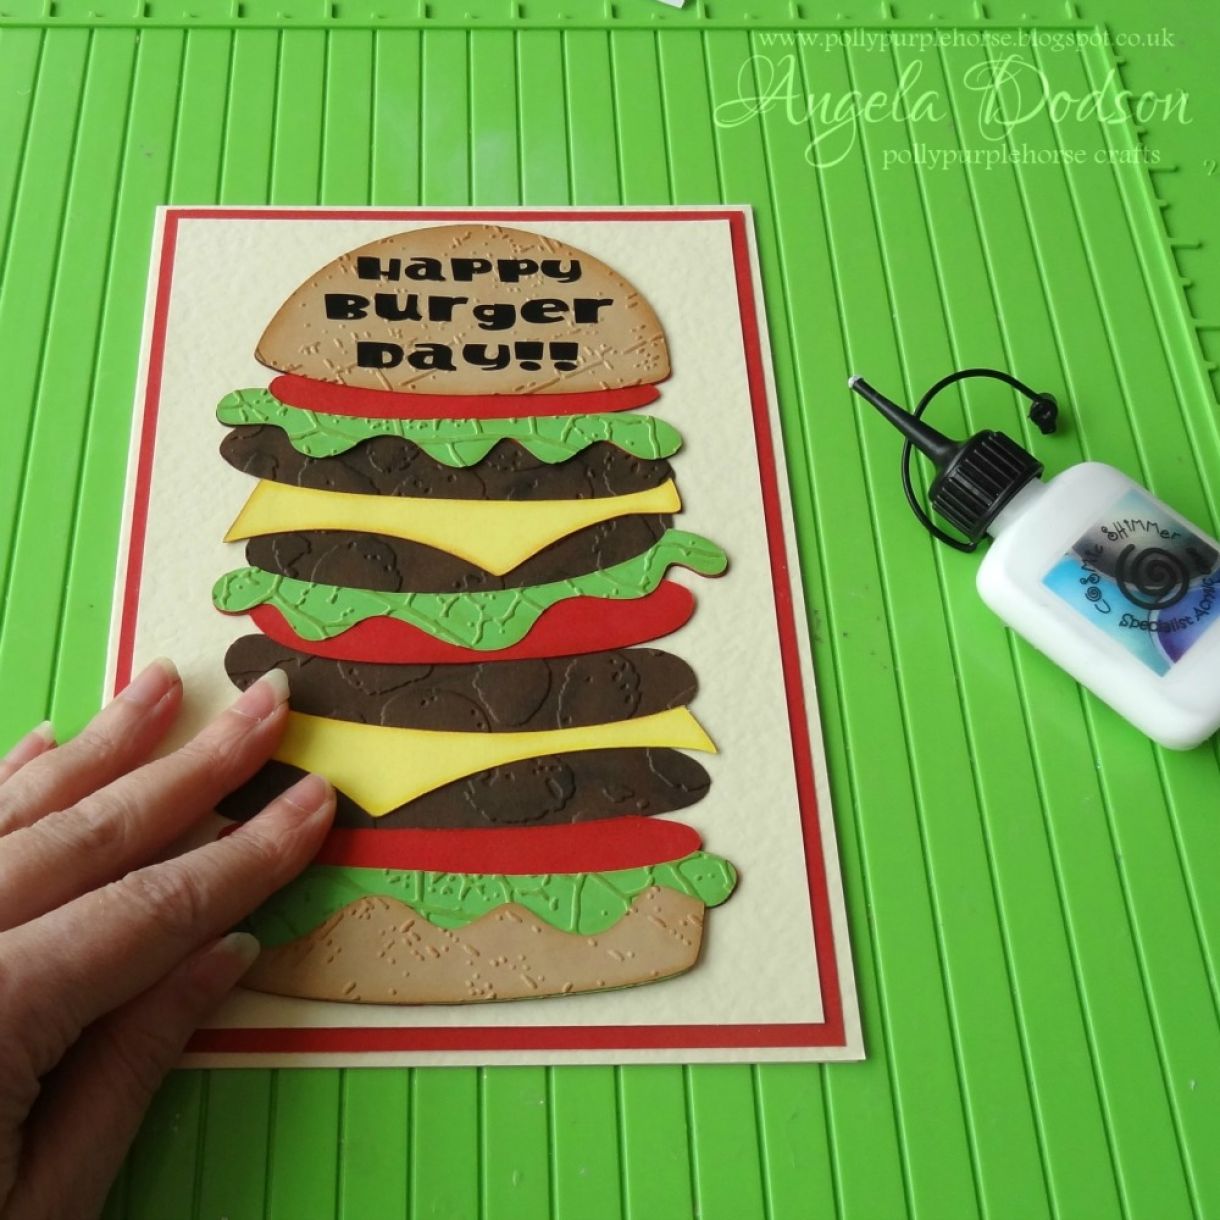
If using the Cricut Design Space file, you will also see a shadow base layer to help you place your components to form the ‘burger’. I cut this base from PMD card in ‘Mocha Brown’. All layers have been adhered using Cosmic Shimmer glue, I like this as it dries clear and gives you a little ‘wriggle room’ to coax your pieces into place.
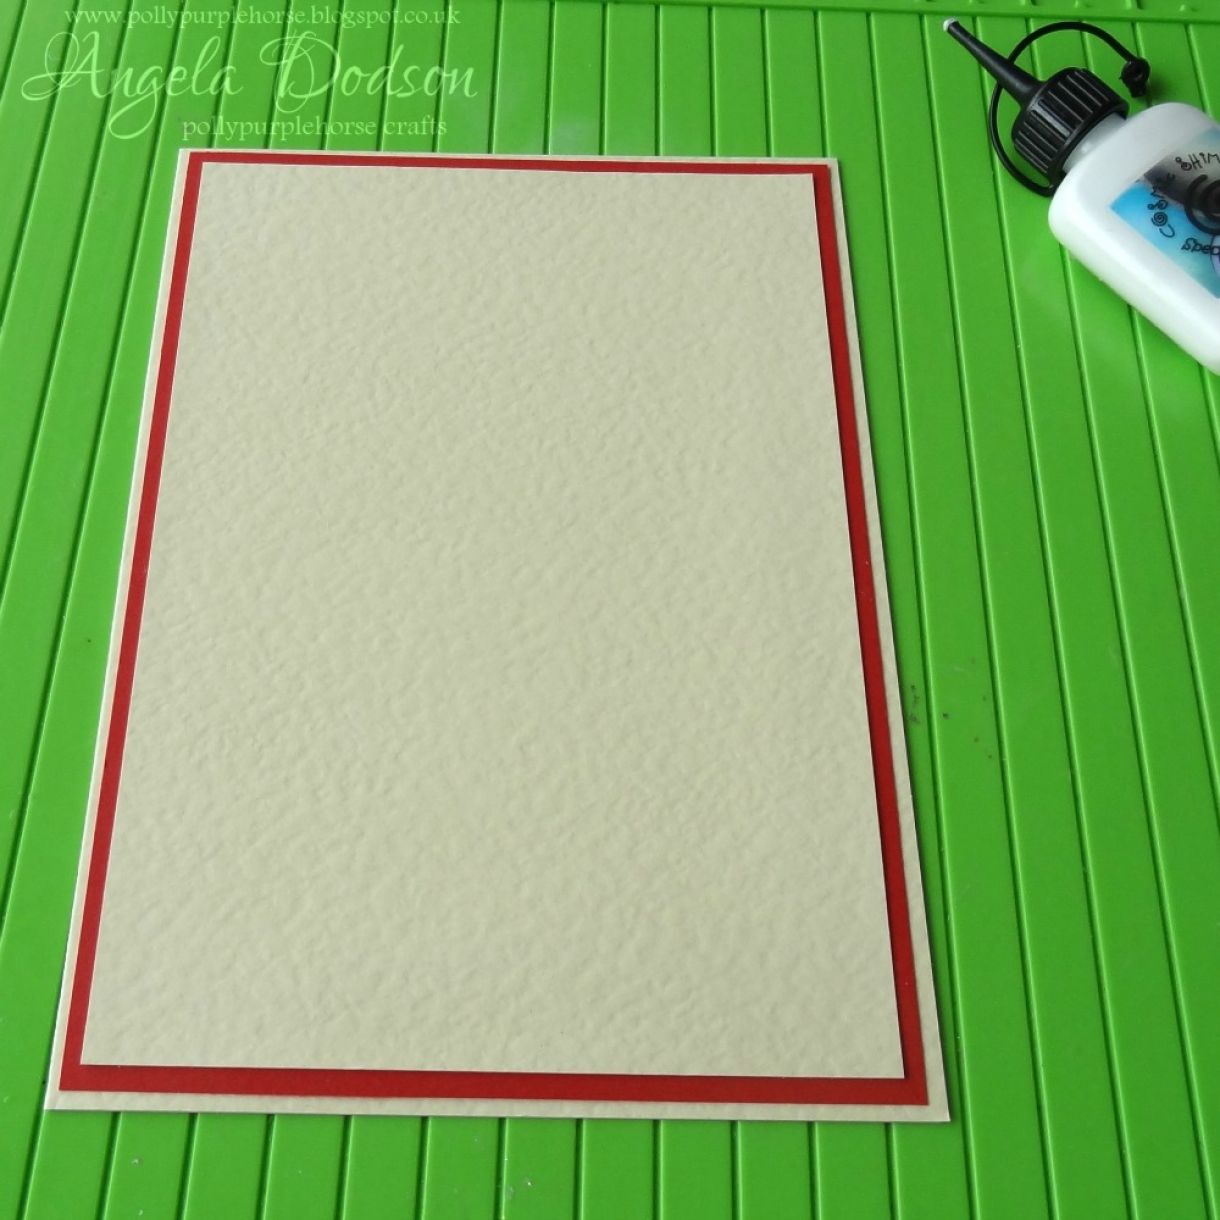
The card base has been created by scoring and folding an A4 sheet of PMD Rich Cream hammered card and trimming it down to size. Mat and layered panels of Rich Cream and Christmas Red card were then attached using a combination of double sided tape and cosmic shimmer glue.
The completed burger was the mounted centrally on the front of the card. To finish I added lettering to spell out ‘Happy Burger Day’, I cut this in black vinyl using my Cricut Explore (I have included the lettering in the DS link below). If you prefer you could cut from card or use peel offs or stamps or die cut lettering.
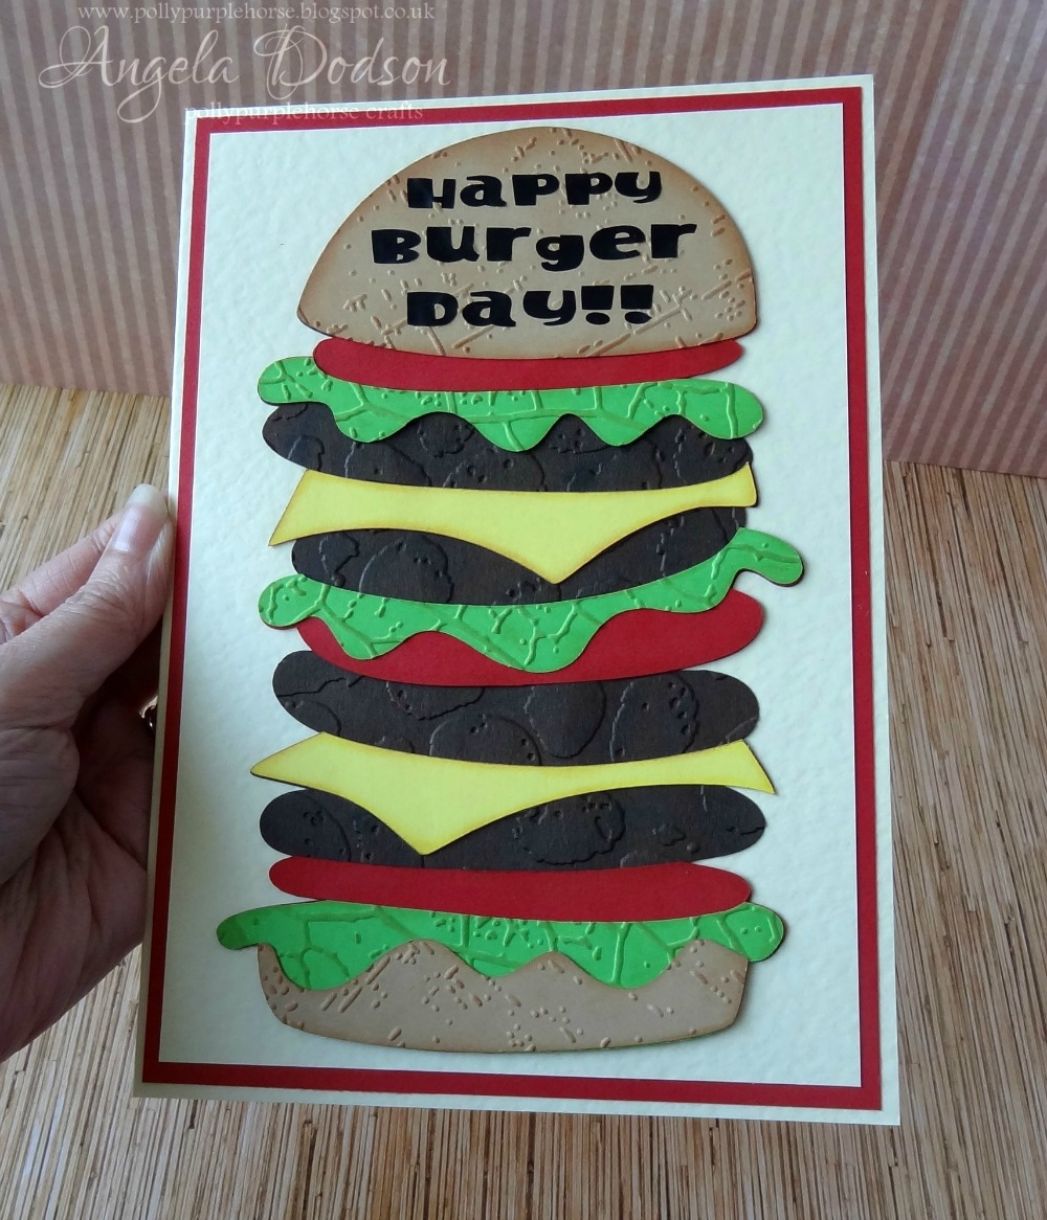
I really like the textures of the embossing teamed with the PMD Hammered card and felt it worked well with the PMD Christmas red card as a mat layer to give a slightly retro look to the project. I hope, like me, that you will look at your embossing folders in a new light and think of different ways to create with them that may be different to how you first see them, for example I used ‘Pebbles’ to create burgers. Don’t forget to share your makes over on the Papermilldirect facebook page, we would love to see them.
Materials Used:
Rich Cream Hammered Card - Papermill Direct
Buff, Mocha Brown, Apple Green, Christmas Red, Daffodil Yellow coloured card - Papermill Direct
'Textures' Embossing Folders - Leaf Vein (Lettuce), Distress (Burger Bun), Pebbles (Burger) - Crafters Companion
Distress Inkpads - Shabby Shutters, Squeezed lemonade, Tea Dye, Worn Lipstick, Black Soot - Tim Holtz / Ranger
Adhesives - Cosmic Shimmer Glue, Double Sided Tape
Black Vinyl (for lettering) or use peel offs or stanps etc


Nobody has commented yet
Be the first to comment on this article by using the form below.