Creating a hand cut paper flower
1
Posted on 1st February 2018 by Keji Aofiyebi
Filed under All Papercraft Tutorials, Seasonal Crafts, Mothers Day Crafts, Papercraft Disciplines And Techniques, Papercraft Artists, Paper Flowers
Hi Everyone, I’m Keji and I have joined the design team, this is my first post and I thought I would start off by putting together a basic tutorial on creating a hand cut flower.
I’m currently working on a flower wall and I require a Hugh number of flowers so this felt like a good place to start.
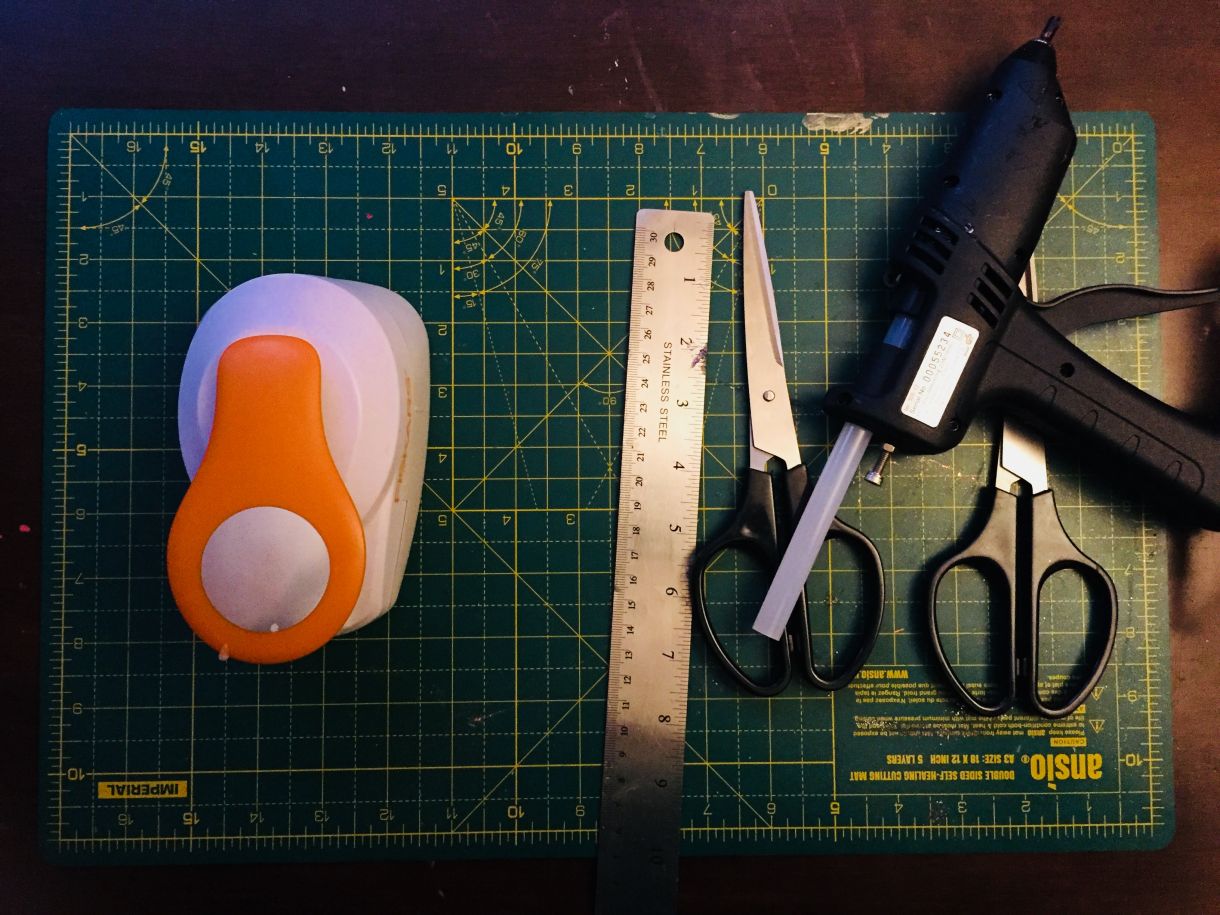
Materials used
- Papermilldirect New lilac smooth card 240gsm
- A good pair sharp of paper scissors.
- Glue gun
- A large paper punch, I use the fiskars brand
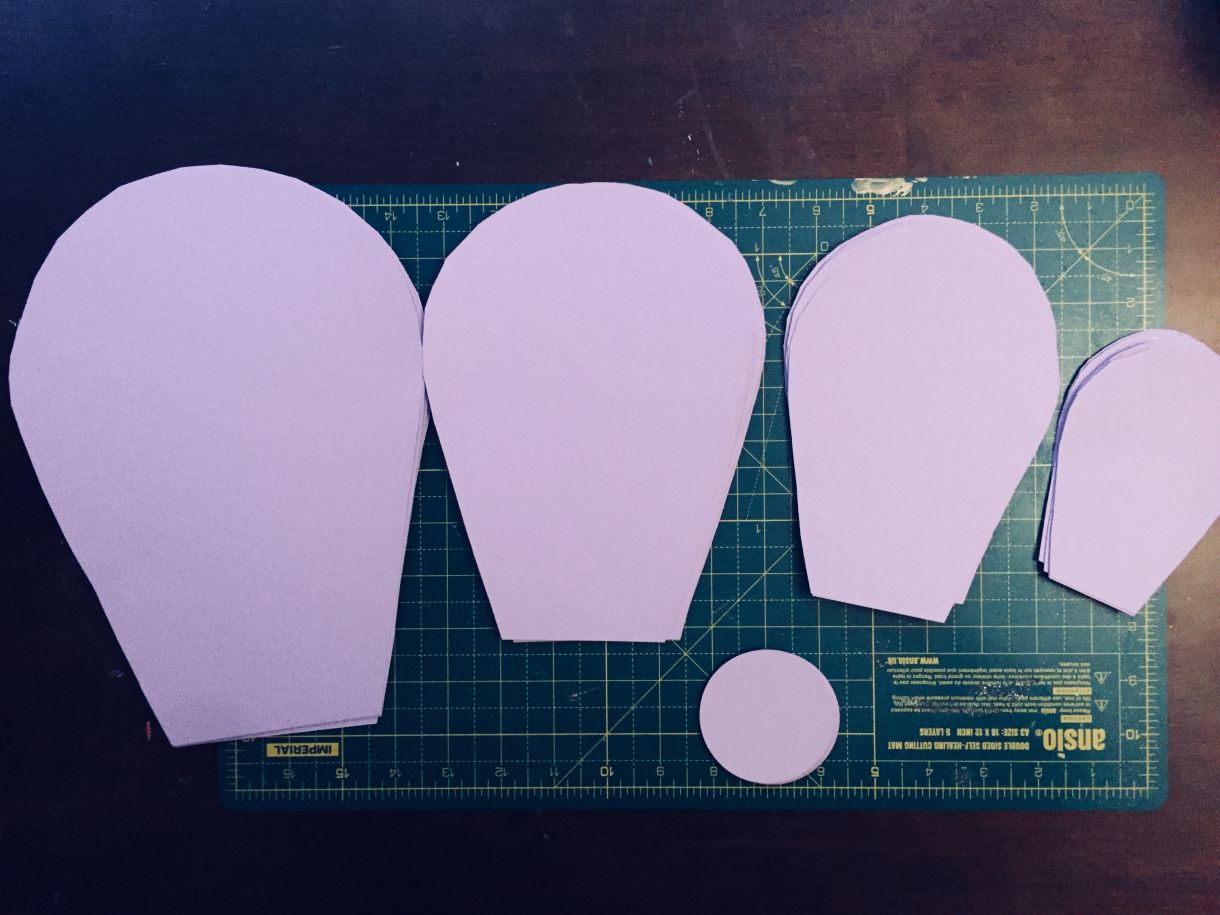
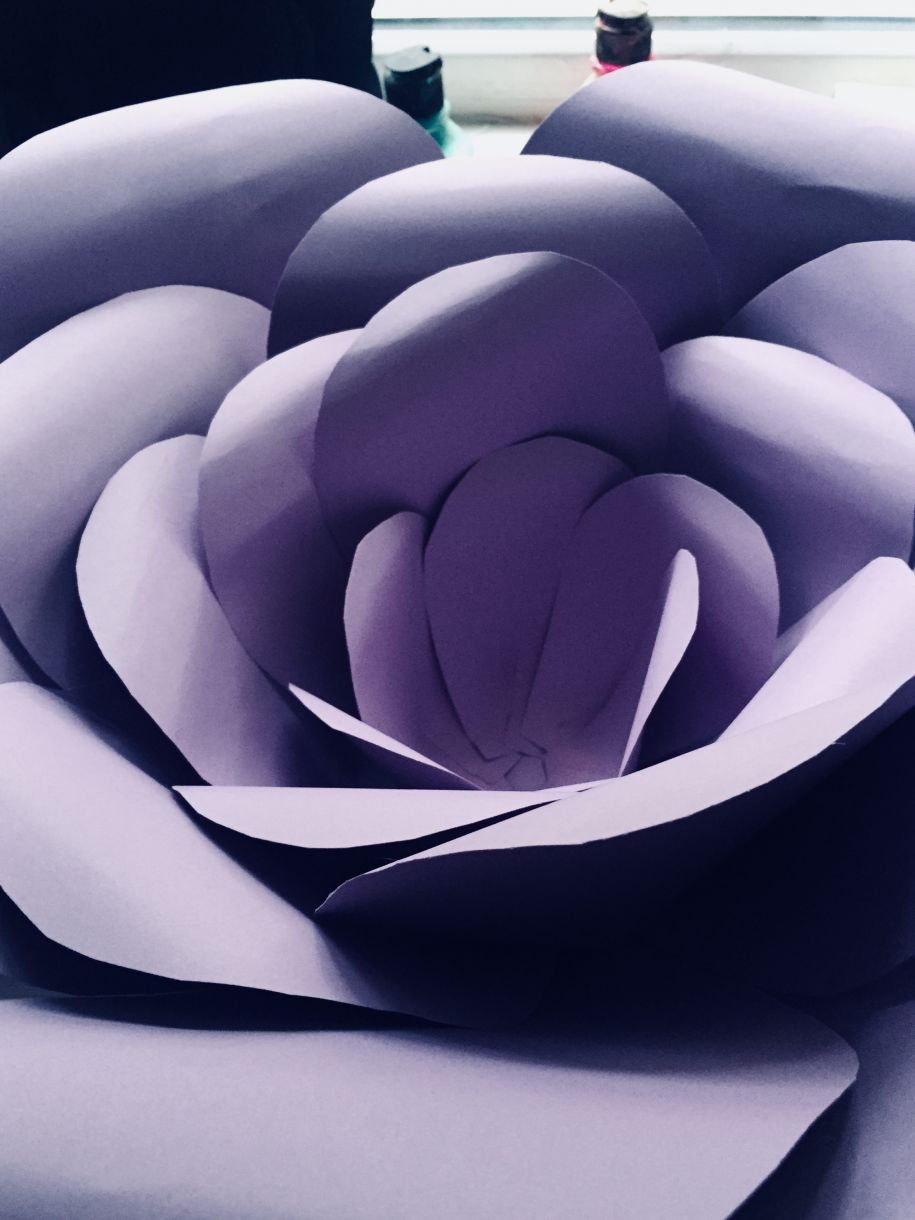
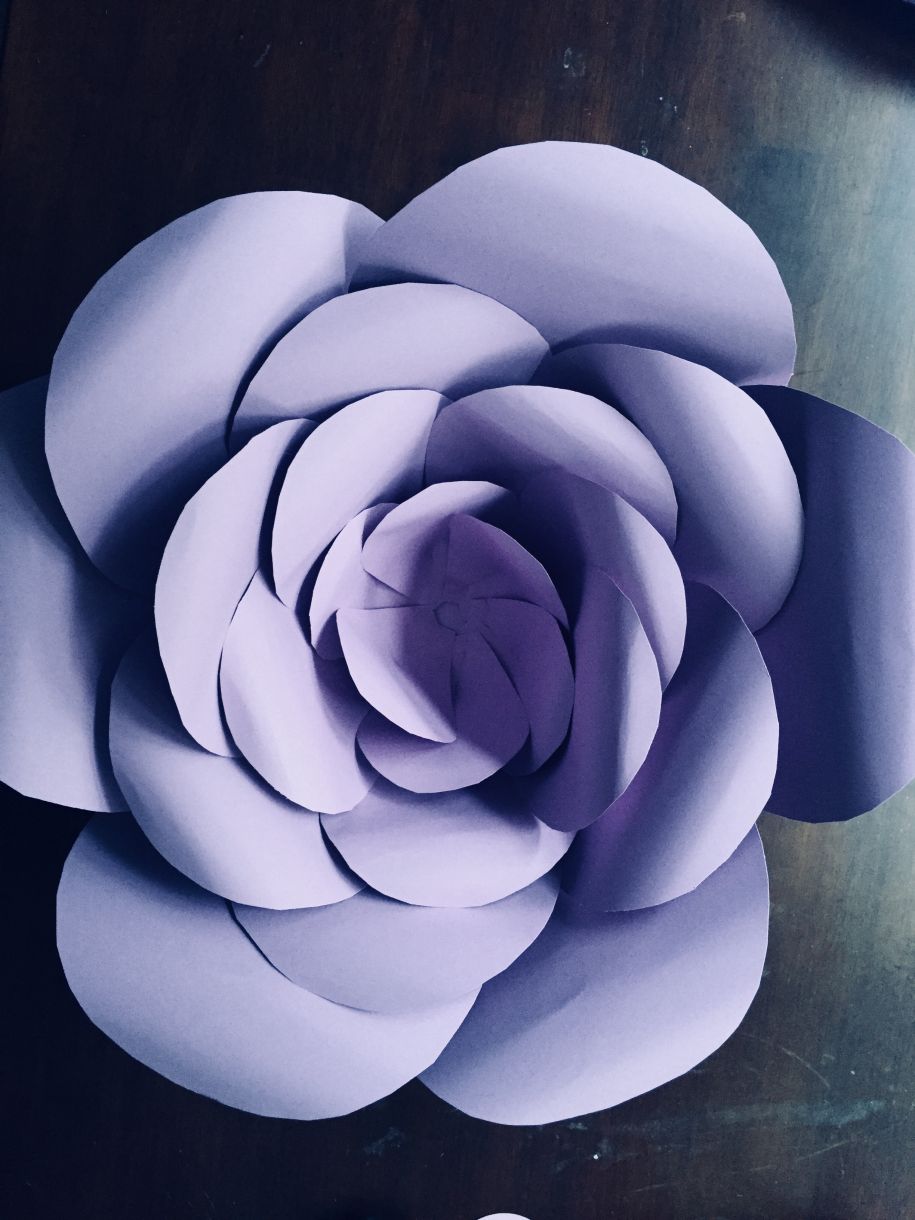
I create a basic petal template in a few different sizes, I used 4 different sizes the larger the flower the more layers you may need. Use your created template to cut multiple petals in each size.
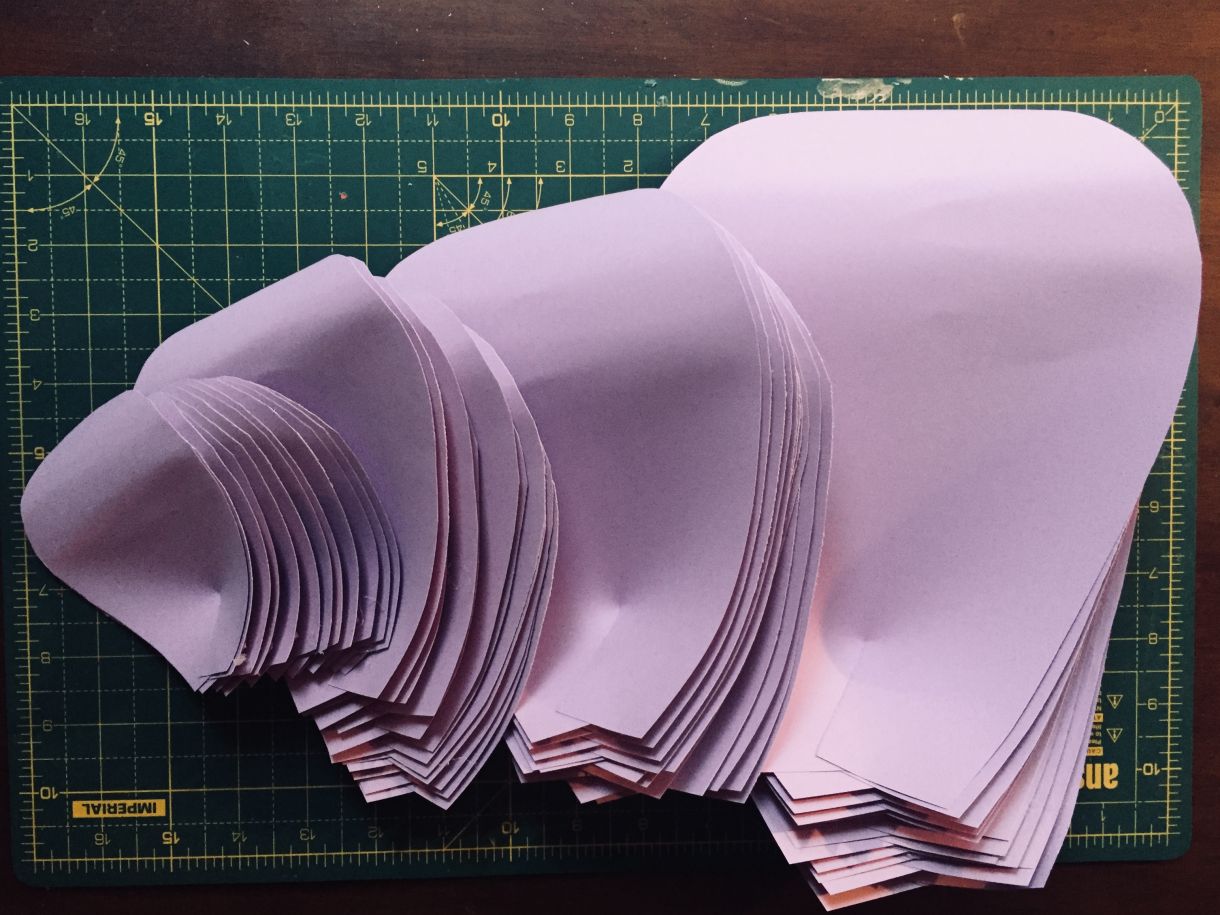
Now prep and curl your petals to give the card some definition and texture. You can use any small round object, I tend to use a large glue stick, and roll about a third of the way down on the backside.
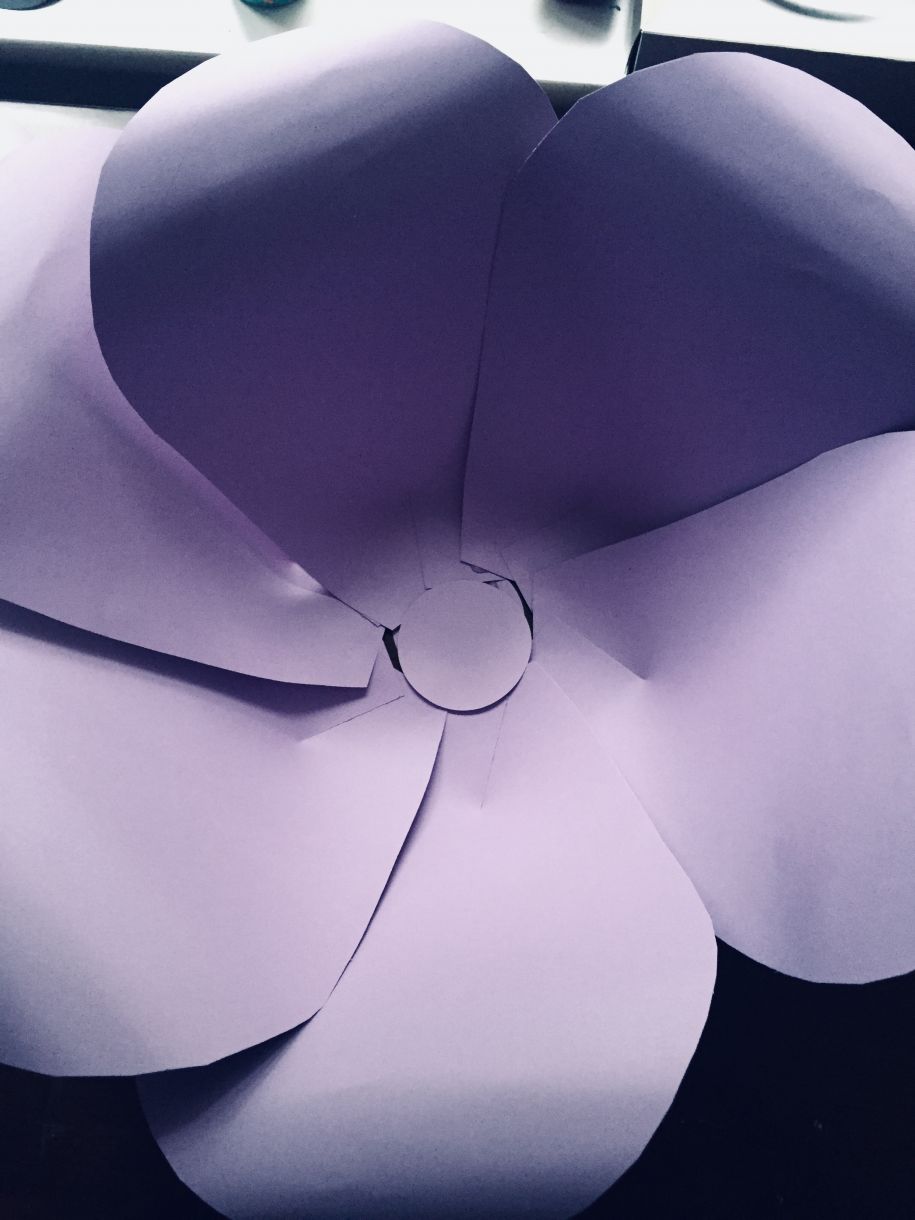
Once all the petals are prepped and curl you ready to assemble your flower. I start by cutting a circle and gluing the petals on the edges starting from the biggest and going inwards as you change in size, going from the biggest to the smallest
I look forward to seeing your creations.
In my next blog I’m covering creating a flower using my circuit .....
Bye for now.....


1 thought on “Creating a hand cut paper flower”
Doreen Porter
04th May 2018 at 9:56 a.m.
The paper flower is just beautiful, but you don't mention doing a cut in the base of petals and overlapping with glue to shape.