How To Make A Pop Up Box Card
3
Posted on 26th May 2014 by Sylvia Ames
Filed under 3d Crafts, All Papercraft Tutorials

Hello everyone, Sylvia here with a tutorial showing you the basics for making a pop up box card. Pop up box cards are very popular at the moment, wherever you look there are so many in different sizes and subjects and for all of you who want to have a go but don't known where to begin I hope my tutorial is helpful . I used Papermilldirect coloured card in pastel colours, baby pink, daffodil yellow, new lilac and spring green for the base and the flowers. The sides were covered with digital papers from Pink Petticoat printed onto Papermill white linen paper, Memory Box butterfly dies and a computer generated sentiment. How to make a pop up box card, you will need:
Card, patterned paper, ruler, pencil, scissors, glue or double sided tape, wire or acetate strips and die cuts/embellishments to fill your box.

Below is a photograph showing the measurements of the box, score lines (all) and cutting lines (in red)
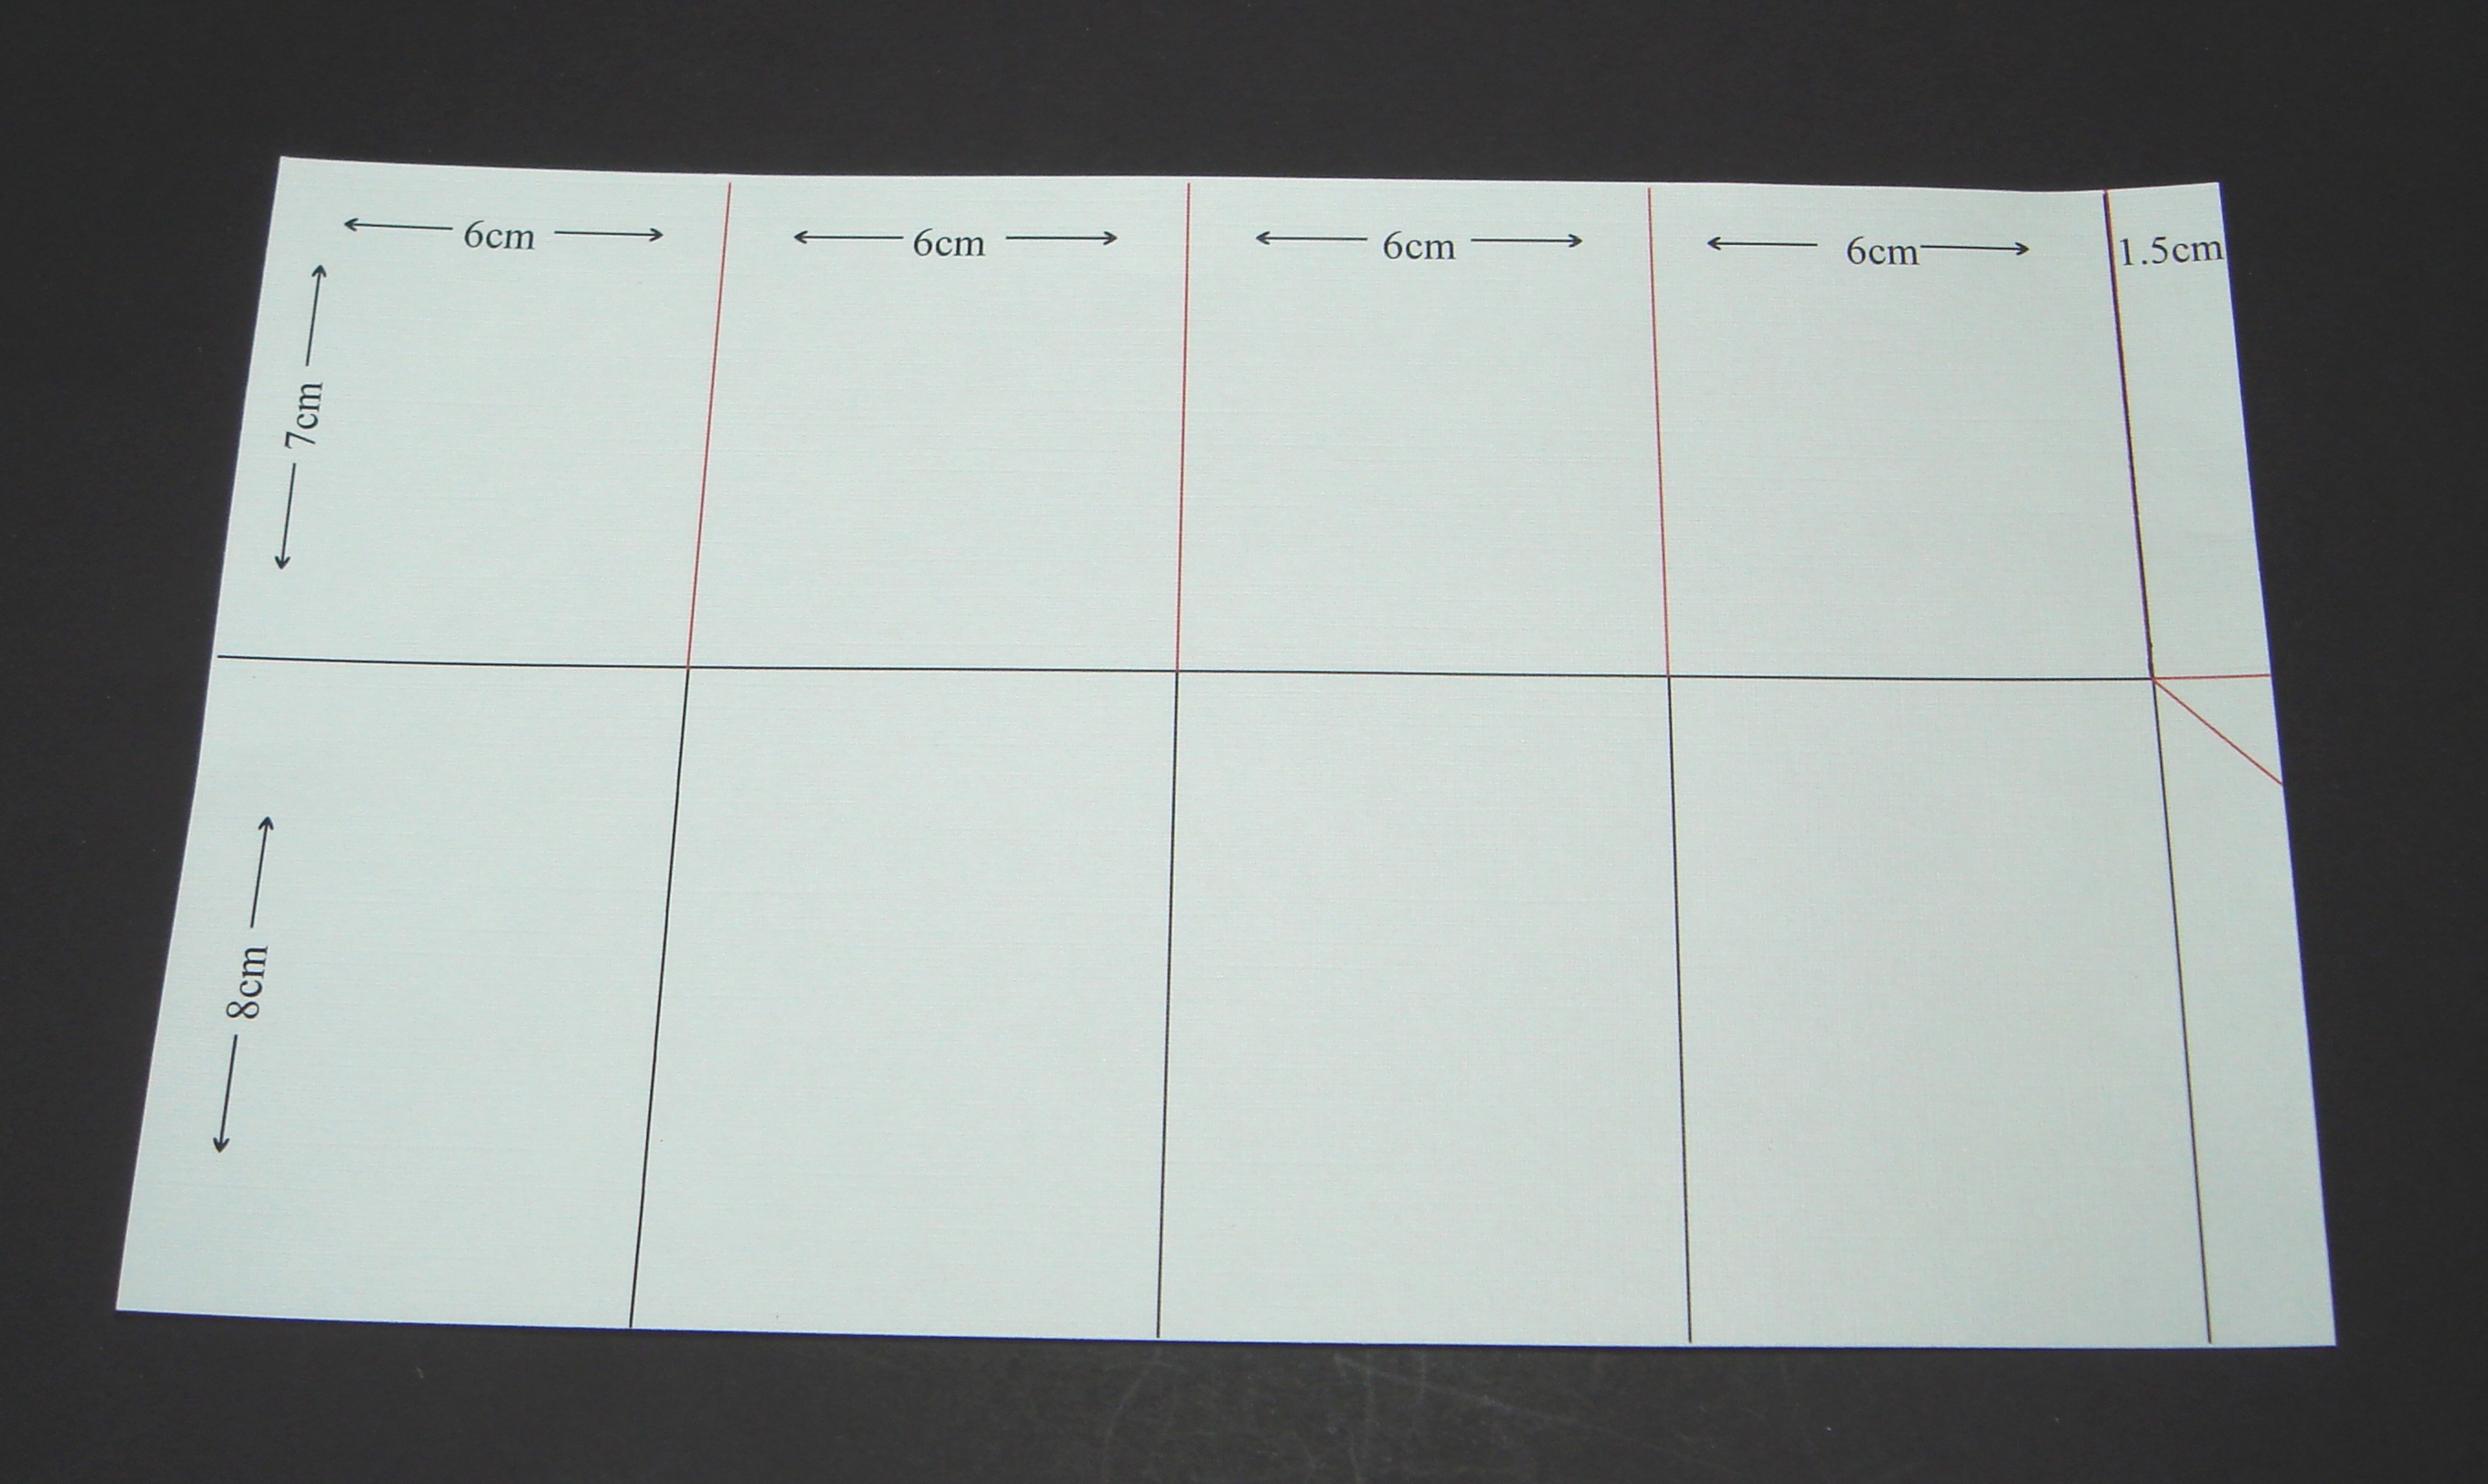
Cut a piece of card 25.5 cm long and 15cm deep. Mark the score lines down at 6cm, 12cm, 18cm and 24cm. score accross the width of the card at 7cm down from the top edge

To form the fold out flaps cut down to the 7cm line at 6cm, 12cm, 18cm and 24cm. On the 24cm cut take a little off the bottom of the box at an angle, as shown below

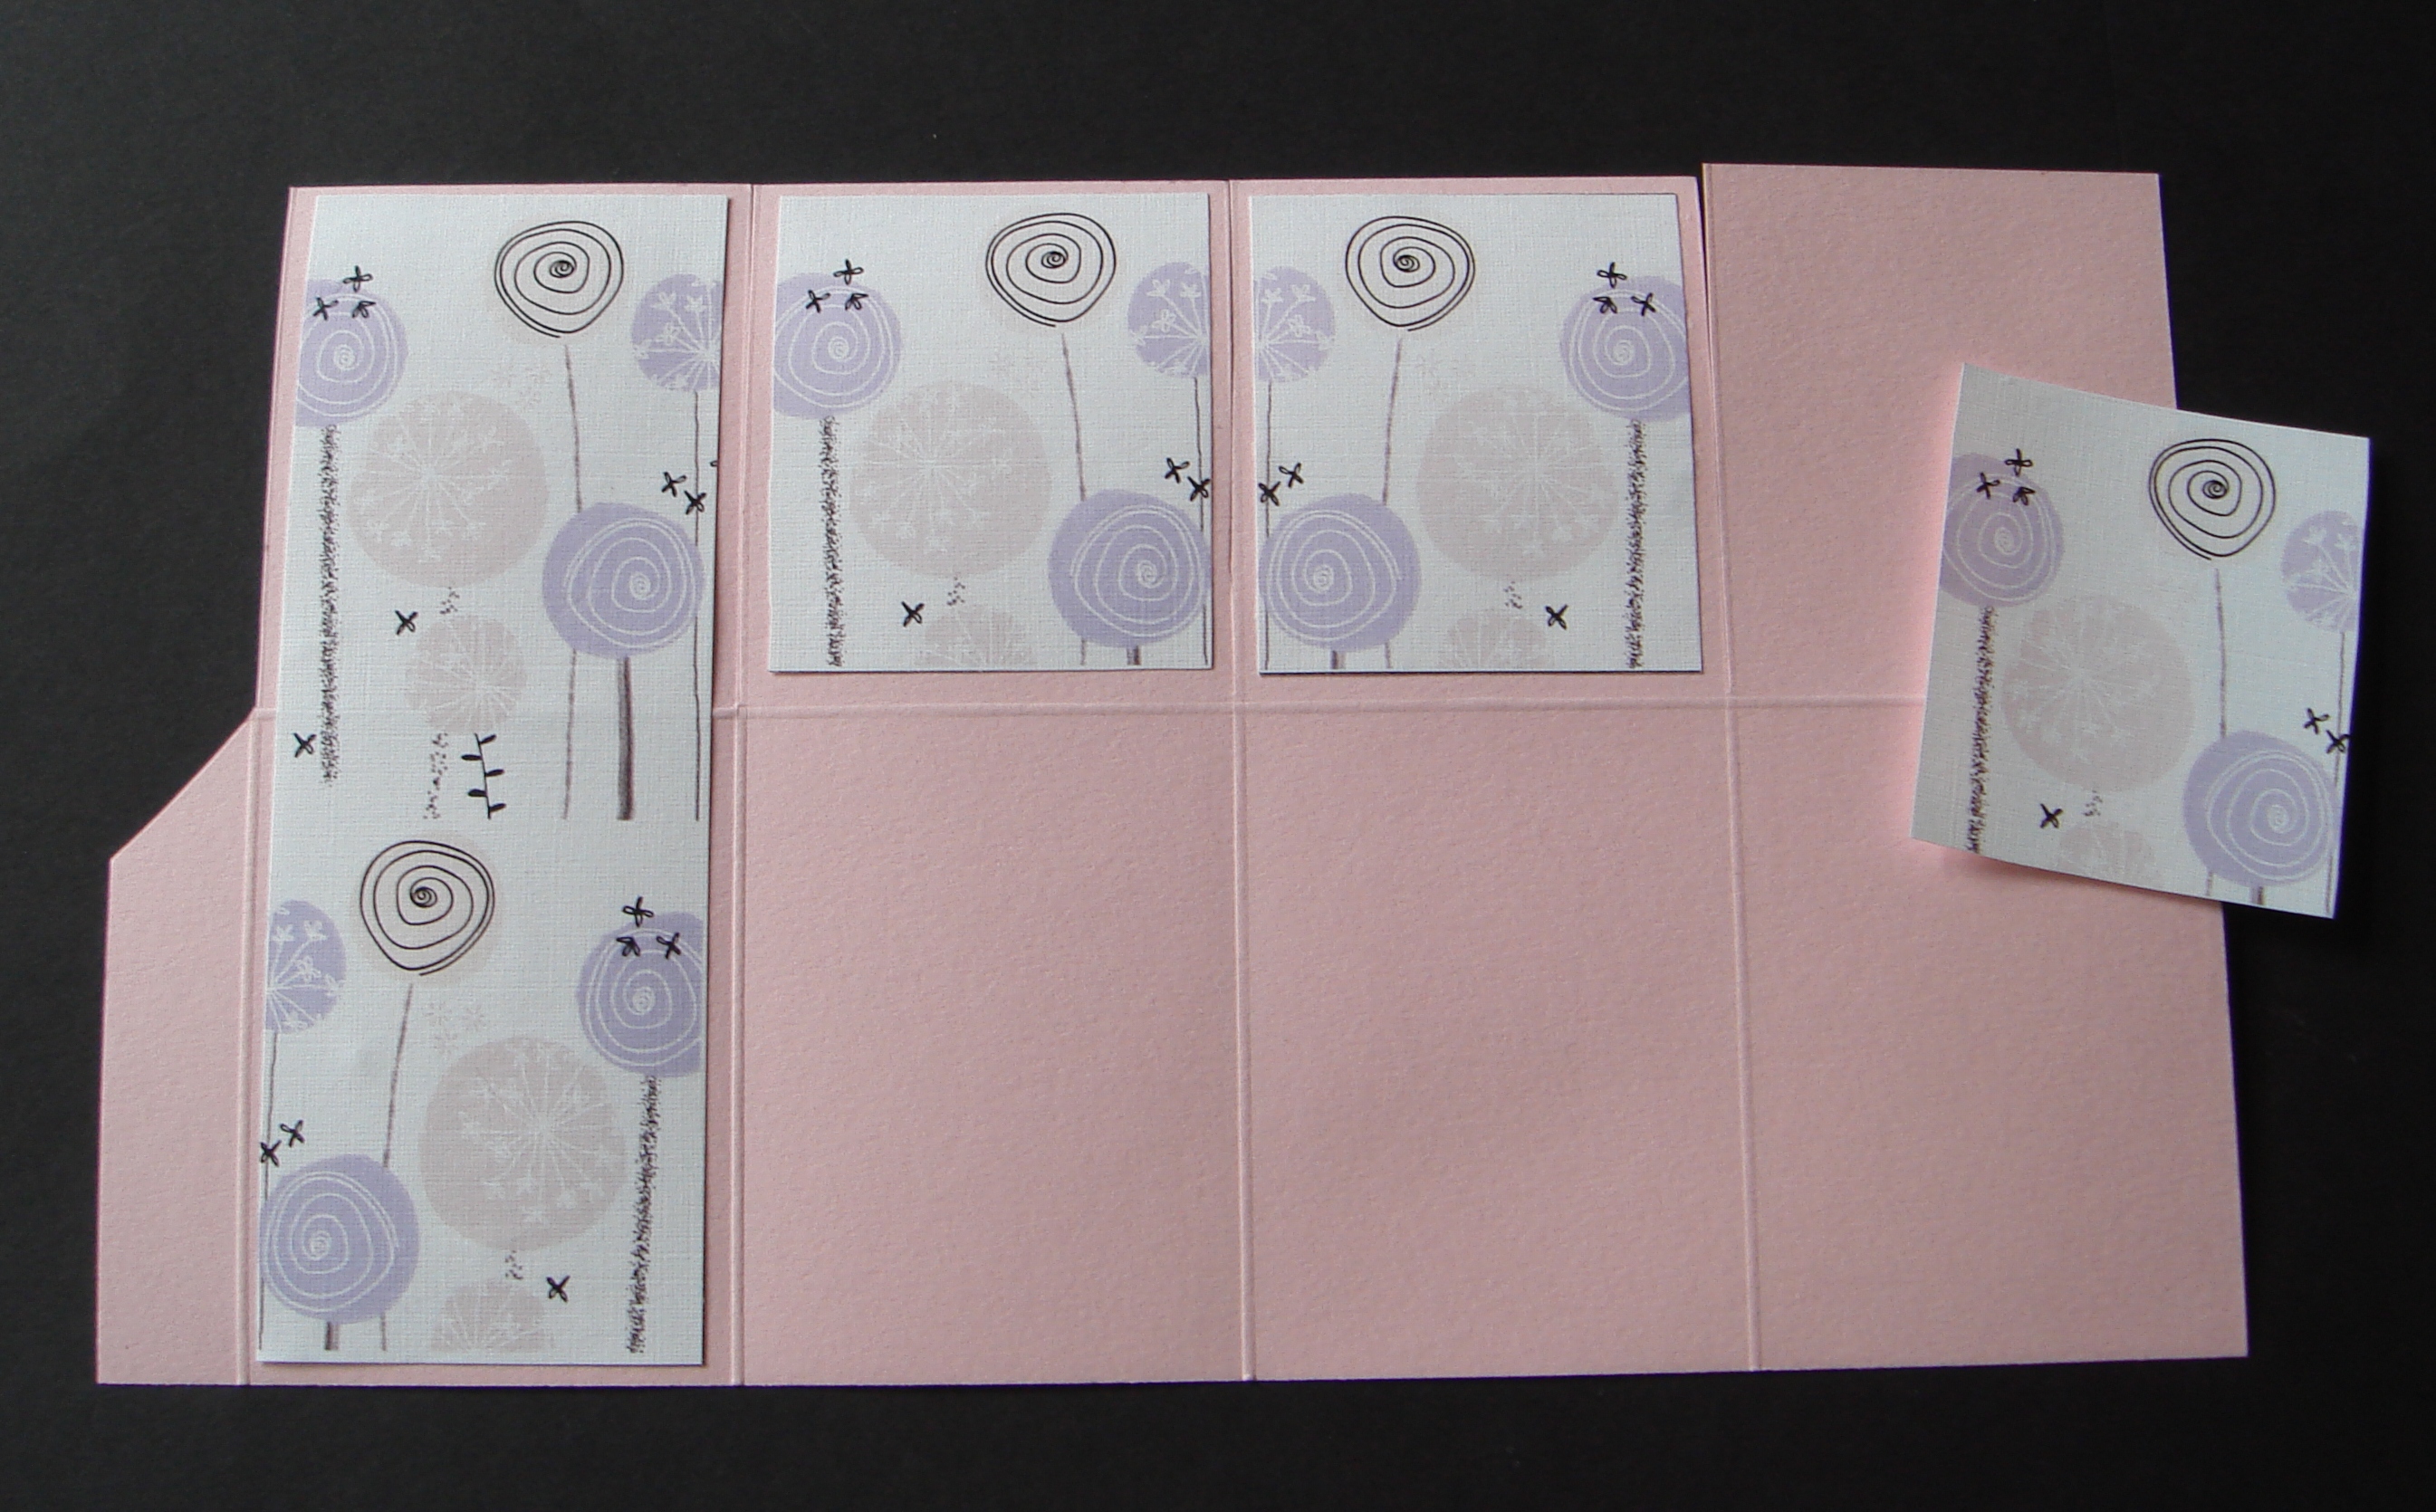
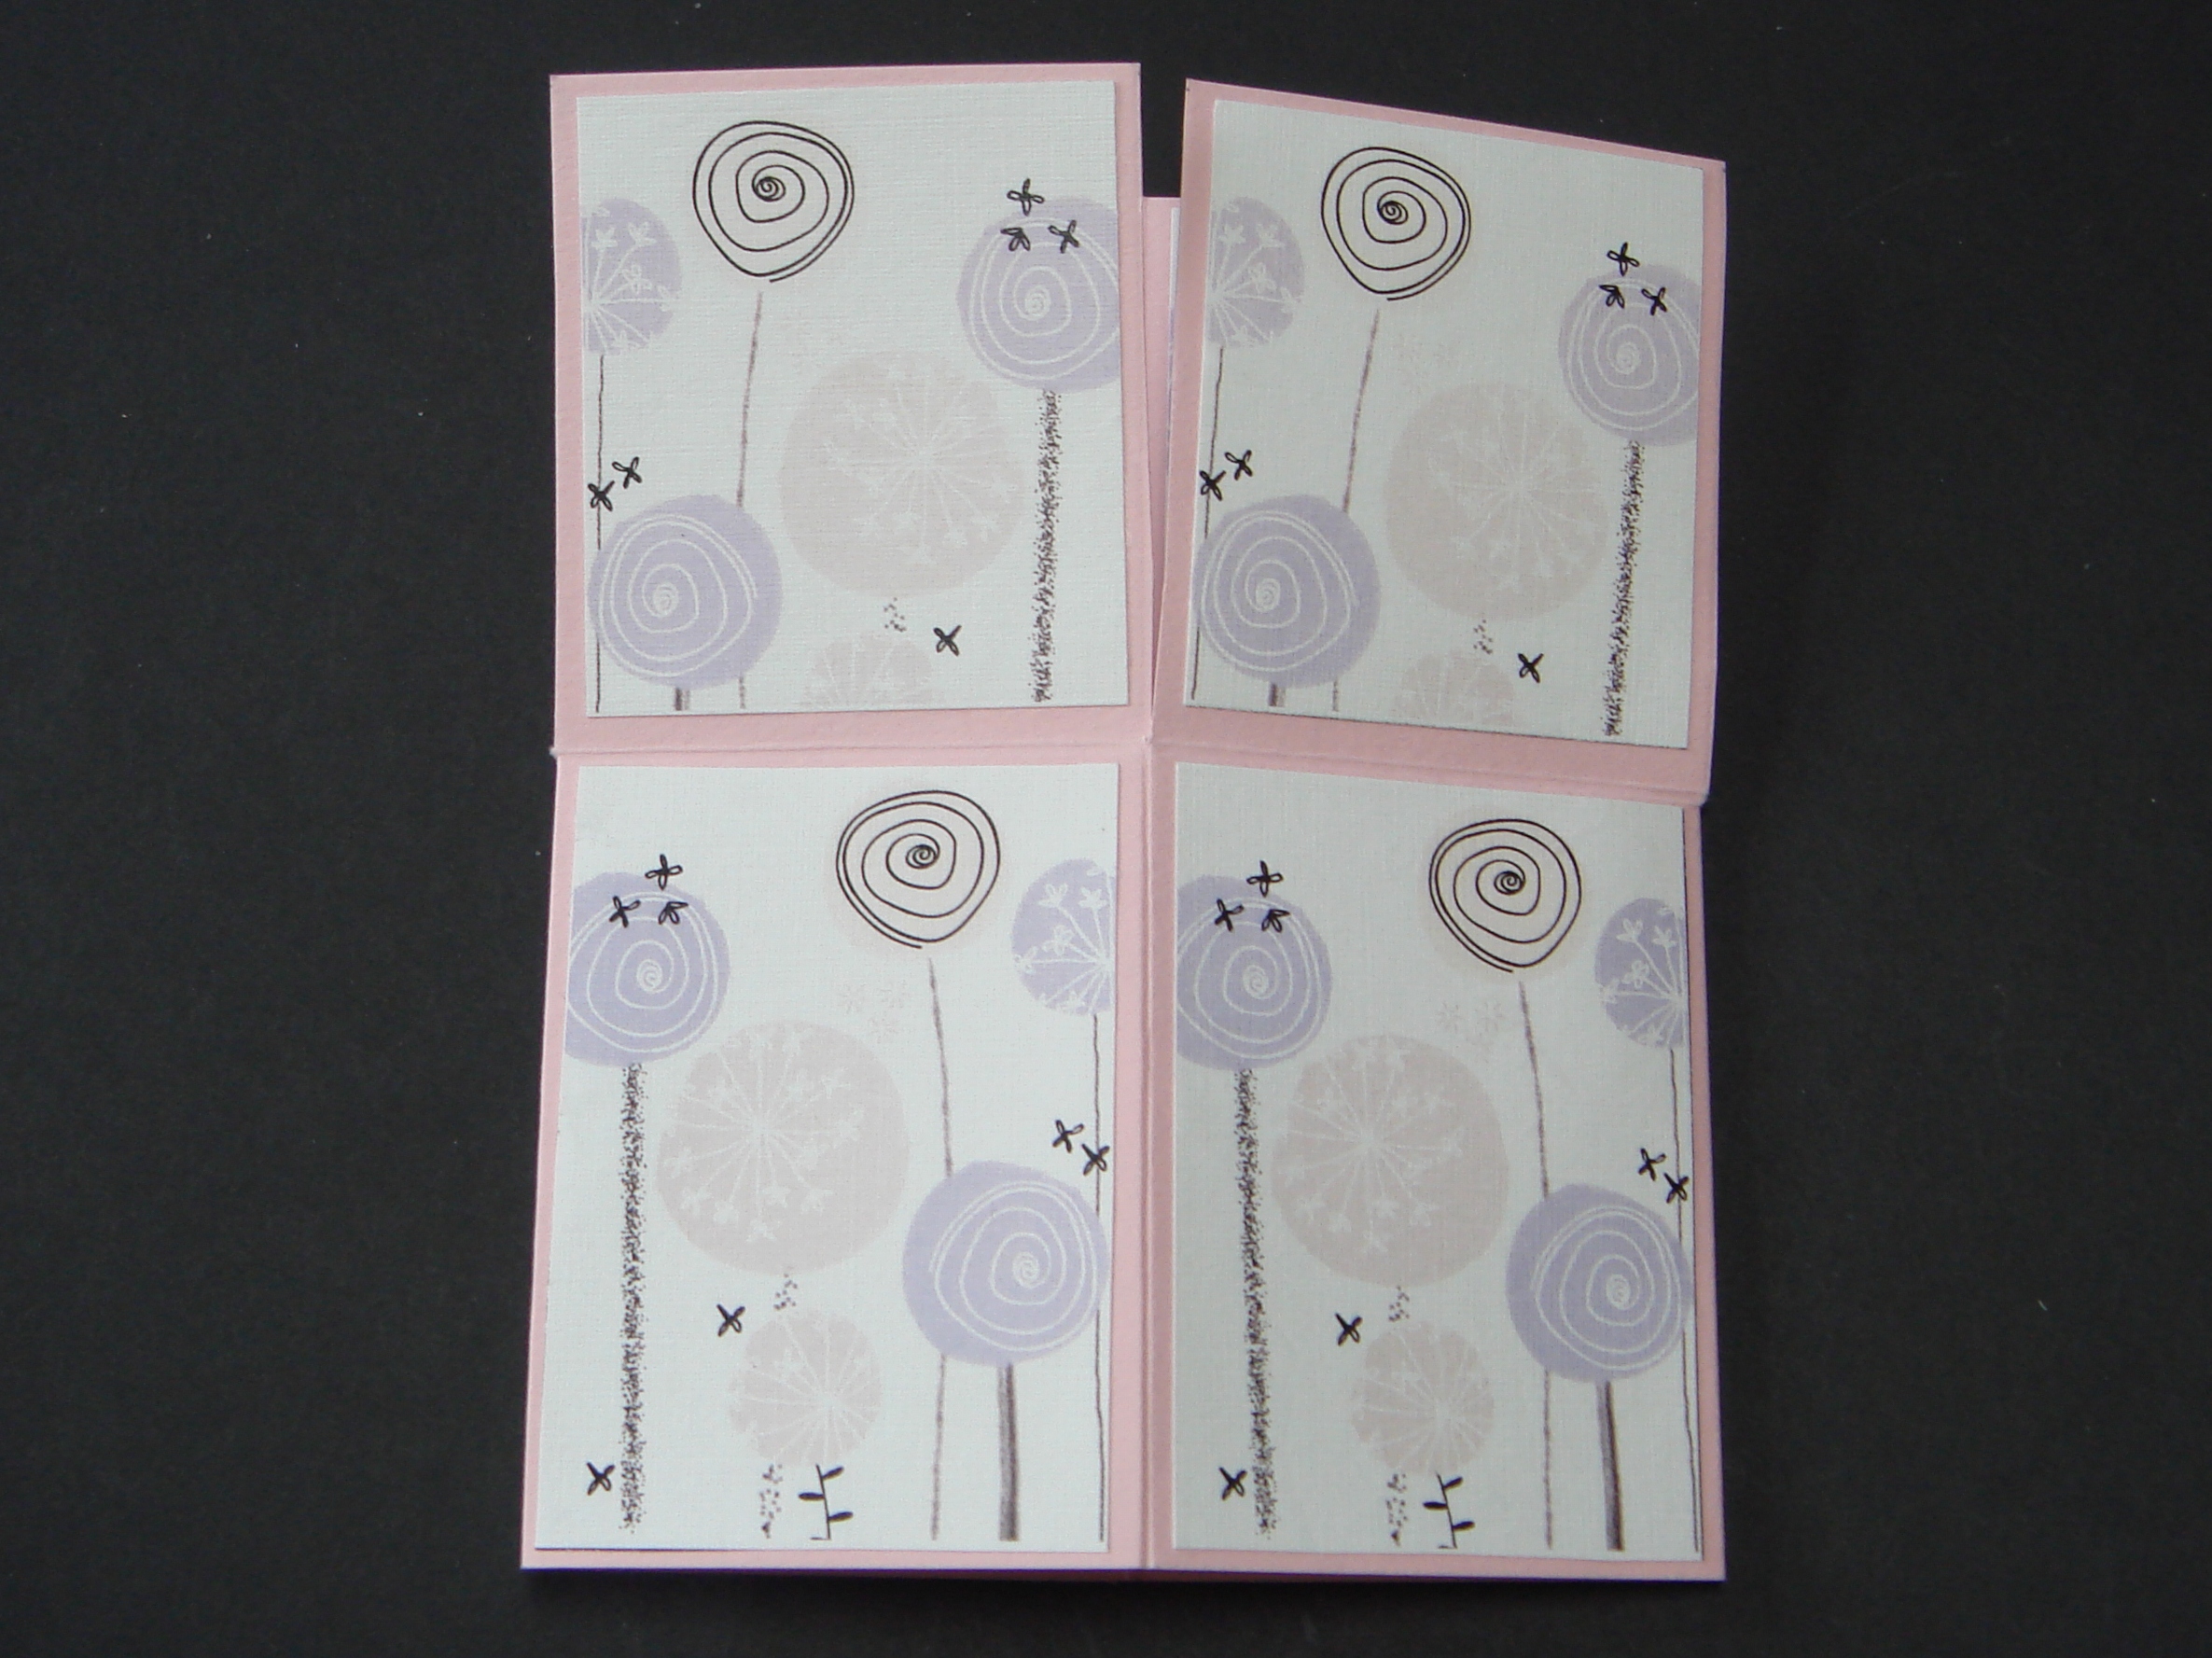
Decorate the sides of the box with the patterned paper. Below is the inside of the pop up box card with the patterned squares on the fold out flap. On the reverse of the box cover the bottom (deeper) sides with patterned paper
 The base of the box card can now be constructed by sticking the small flap to the inside of the box as shown below.
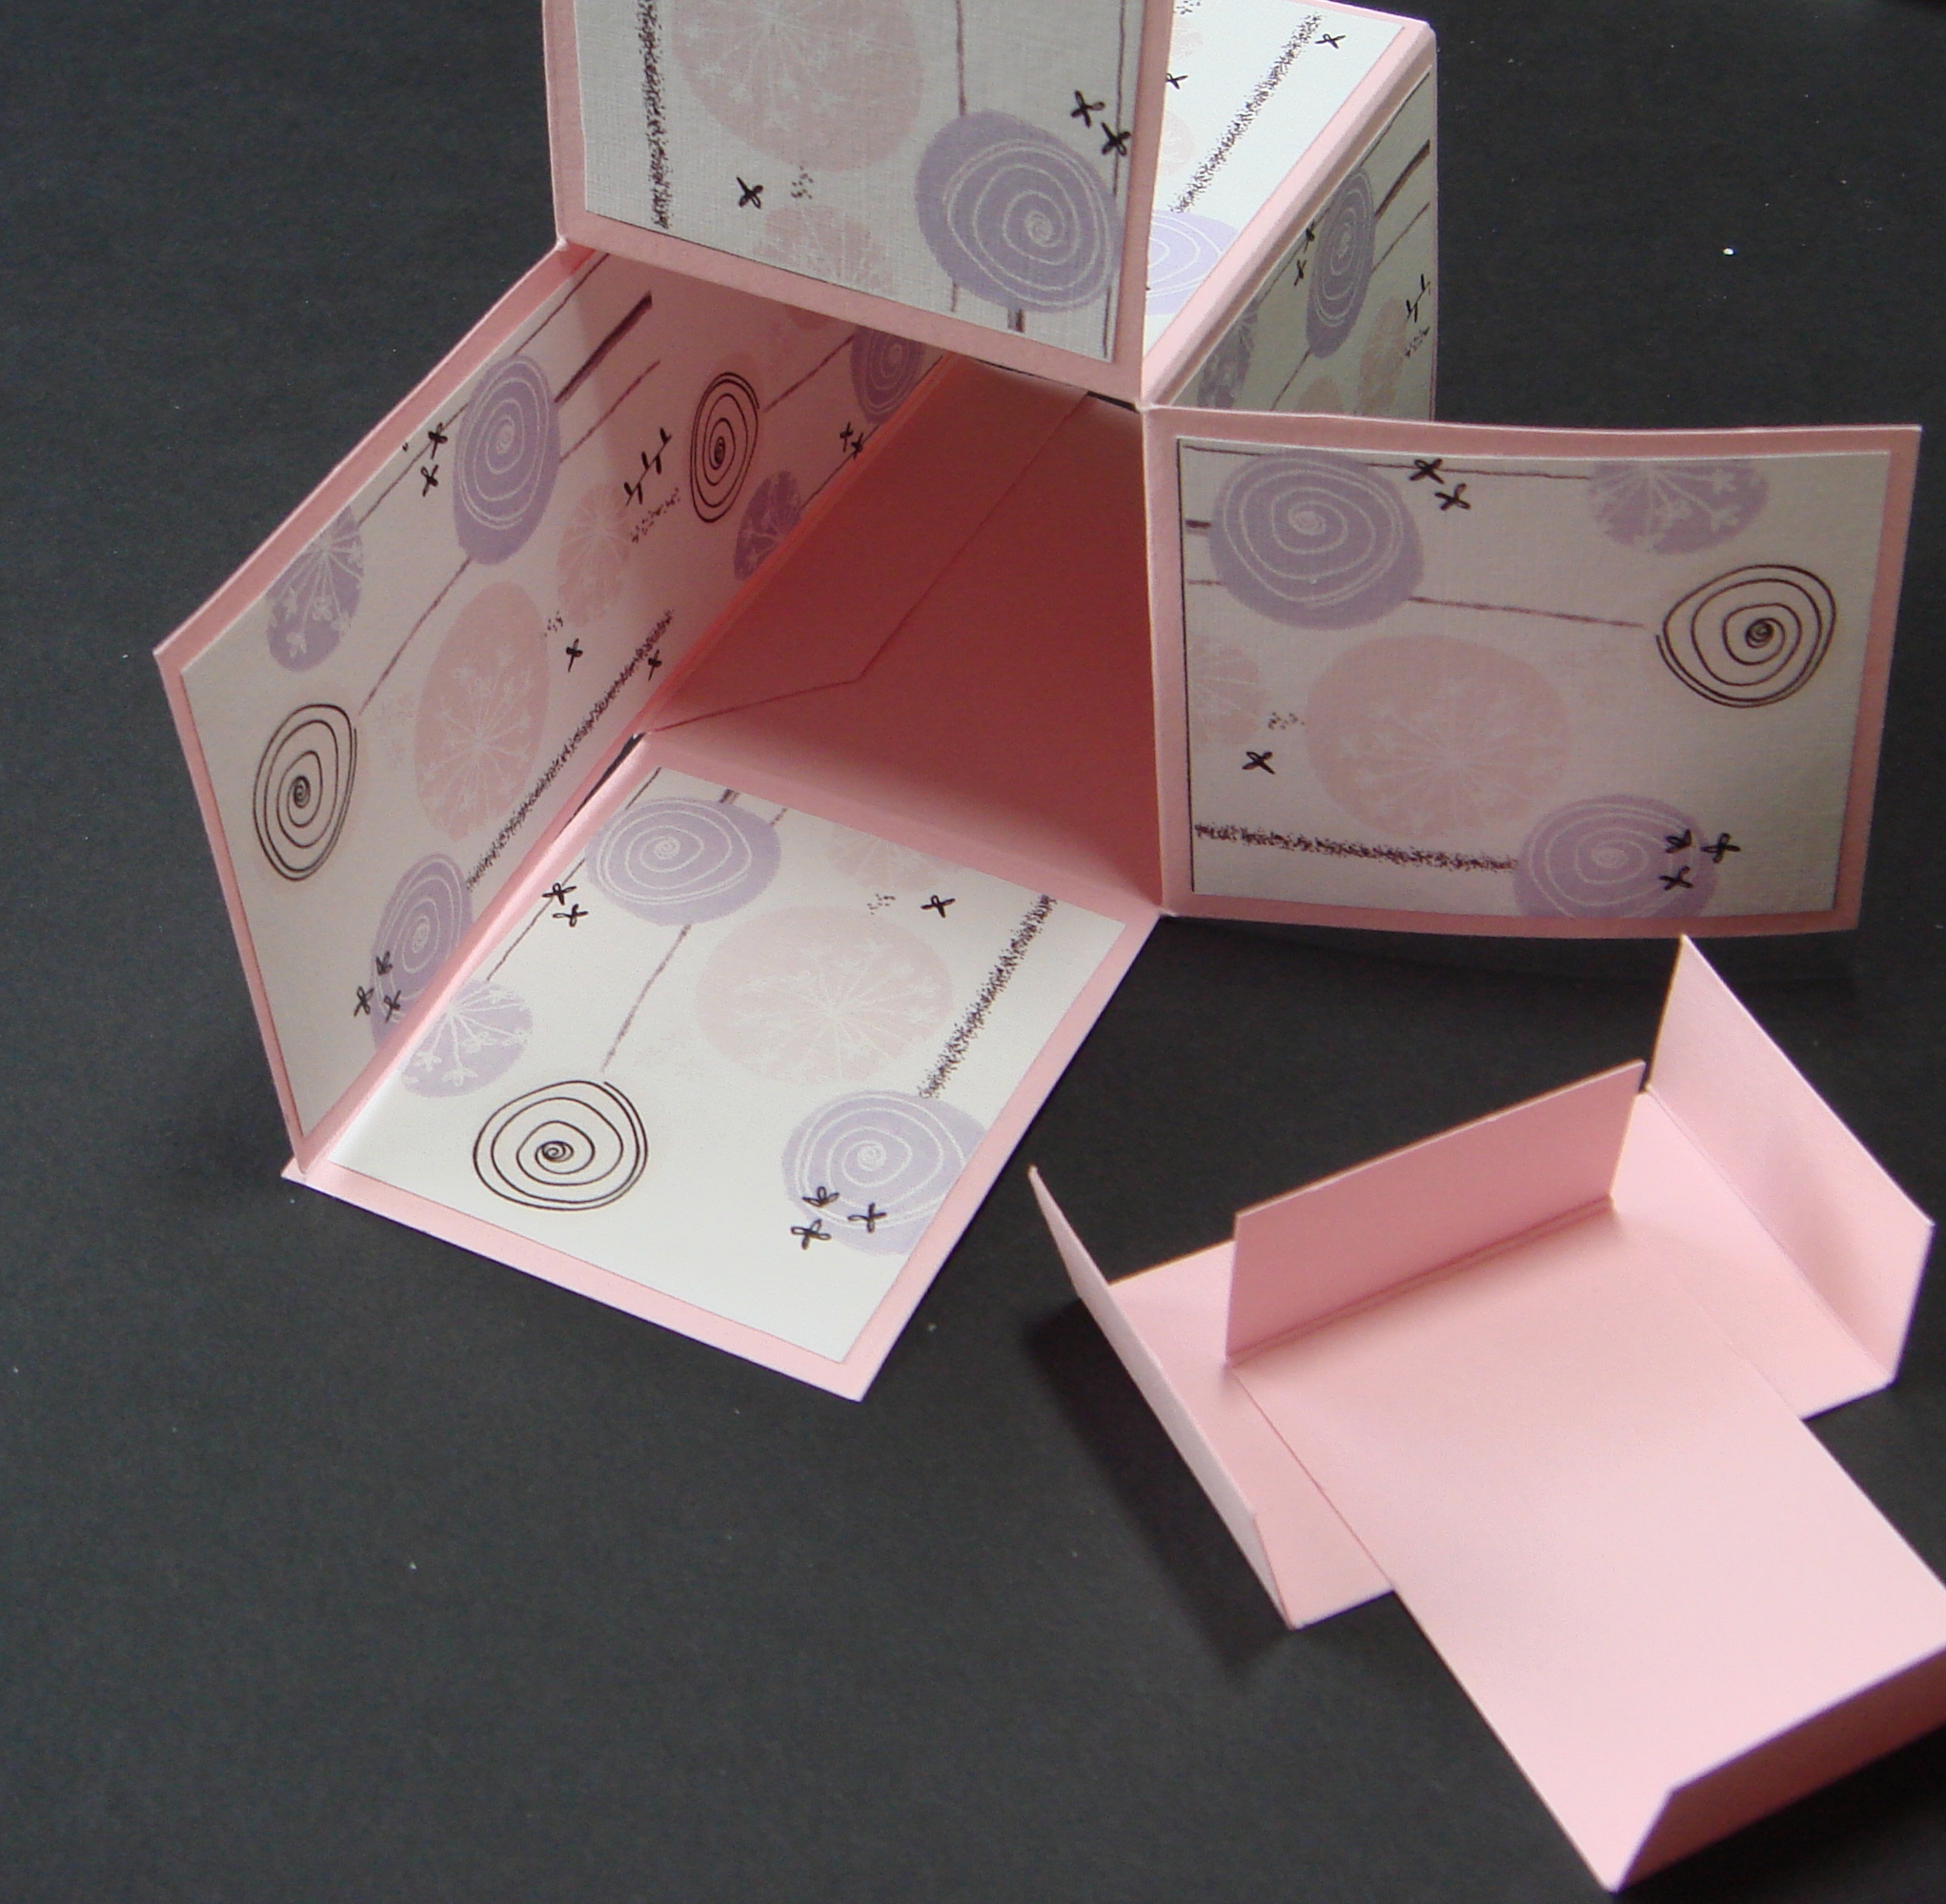
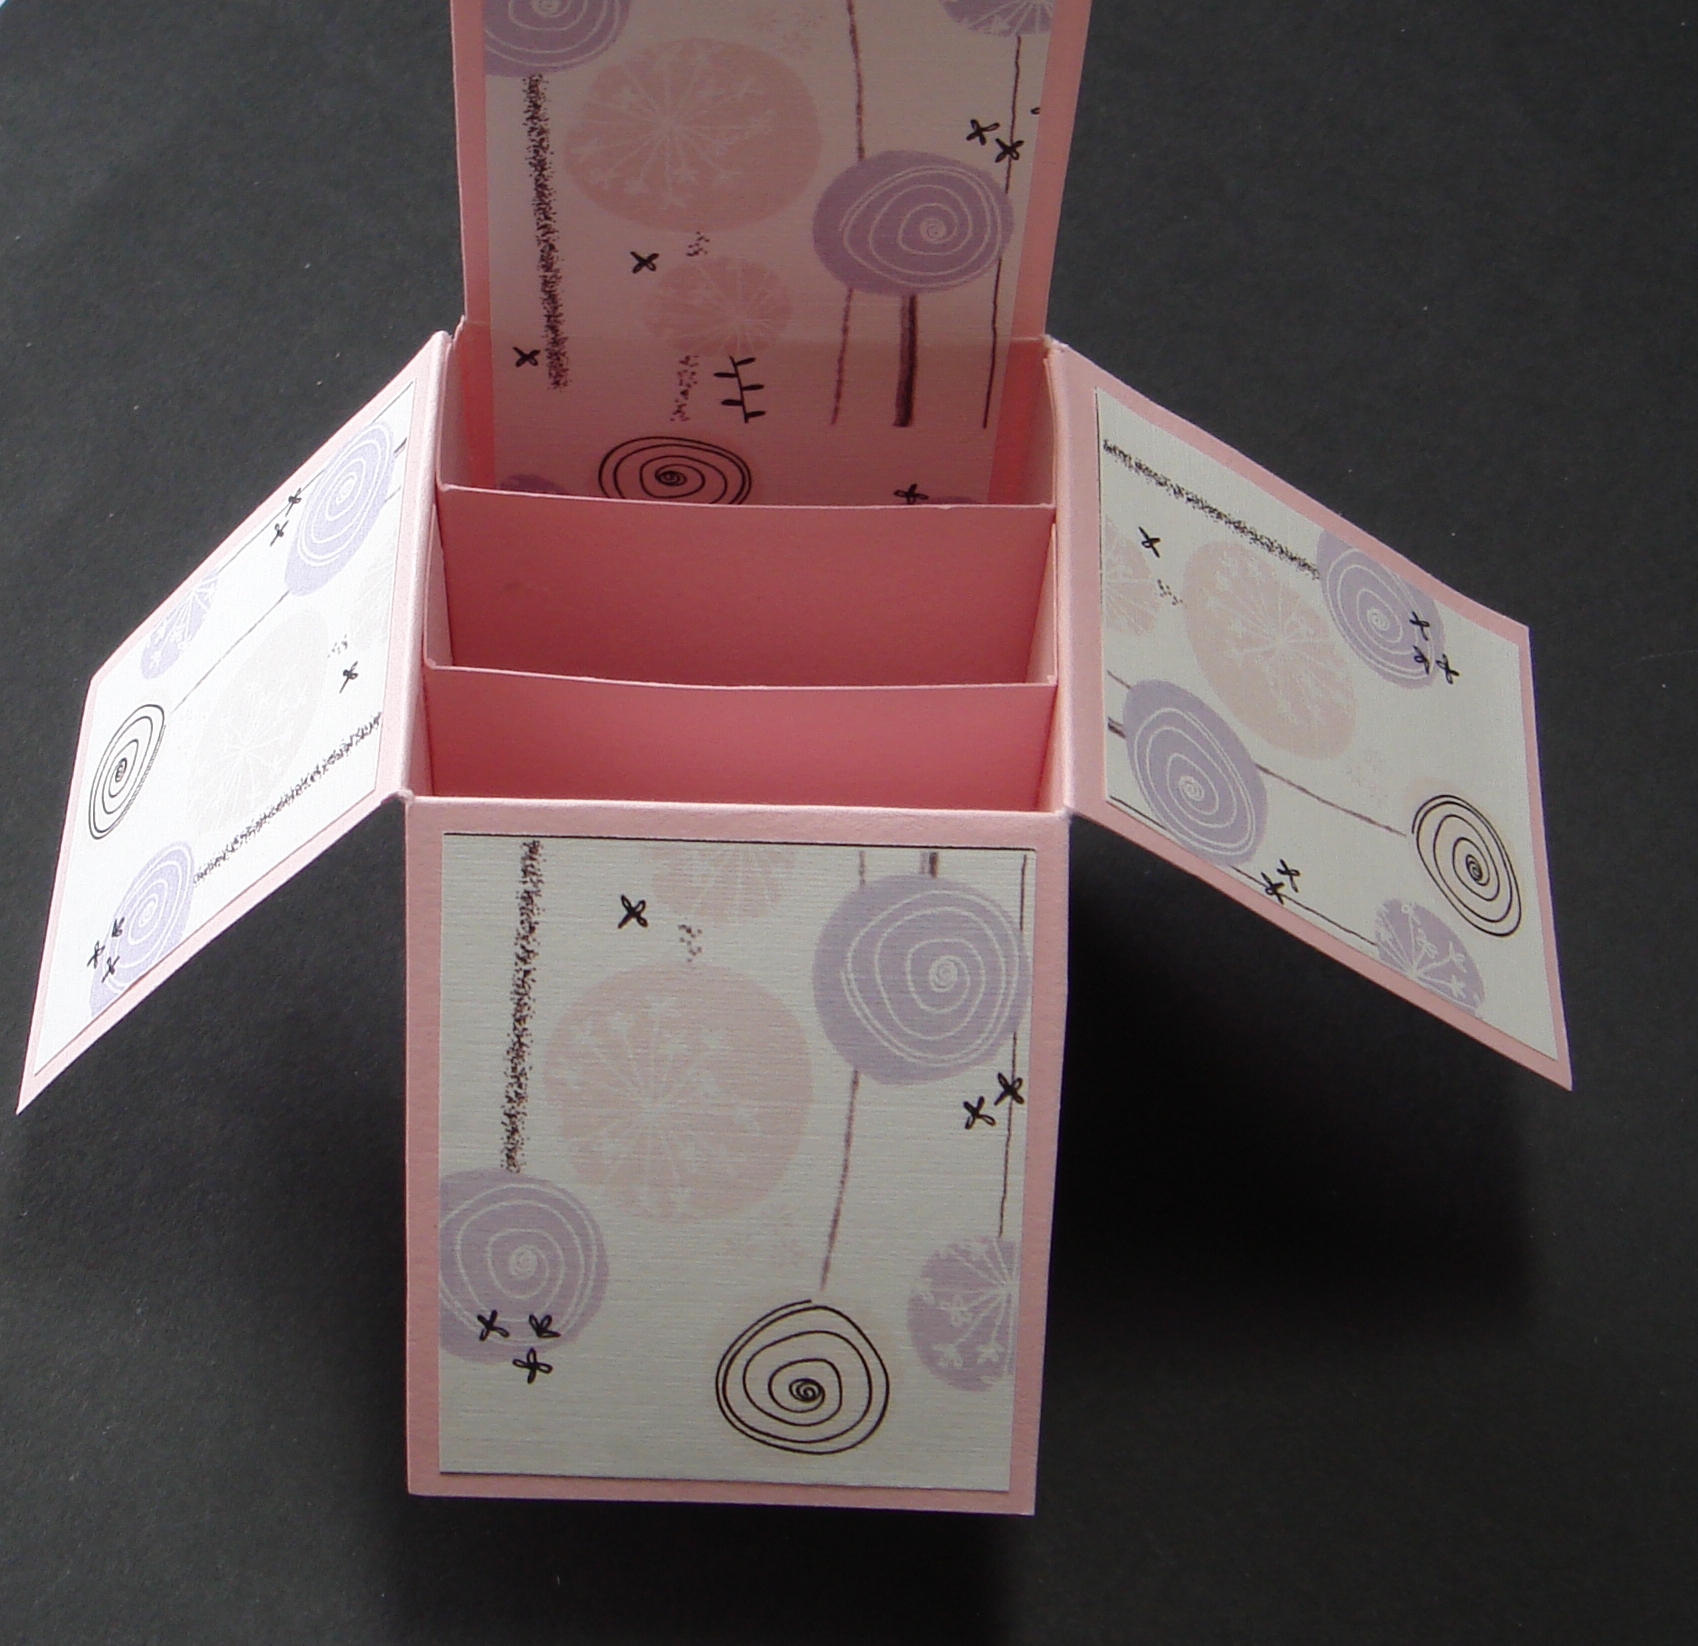
Cut two strips of card 9cm wide and 5cm deep, fold in 1.5cm at each side of the long edge for fastening to the box. These form the cross pieces for attaching your embellishmentsAttach the two strips inside the box as shown below
The box should fold flat, and will fit into a 15.50cm square envelope easily
Stick your embellishments onto strips of acetate or wire and fasten to the cross pieces to finish your box
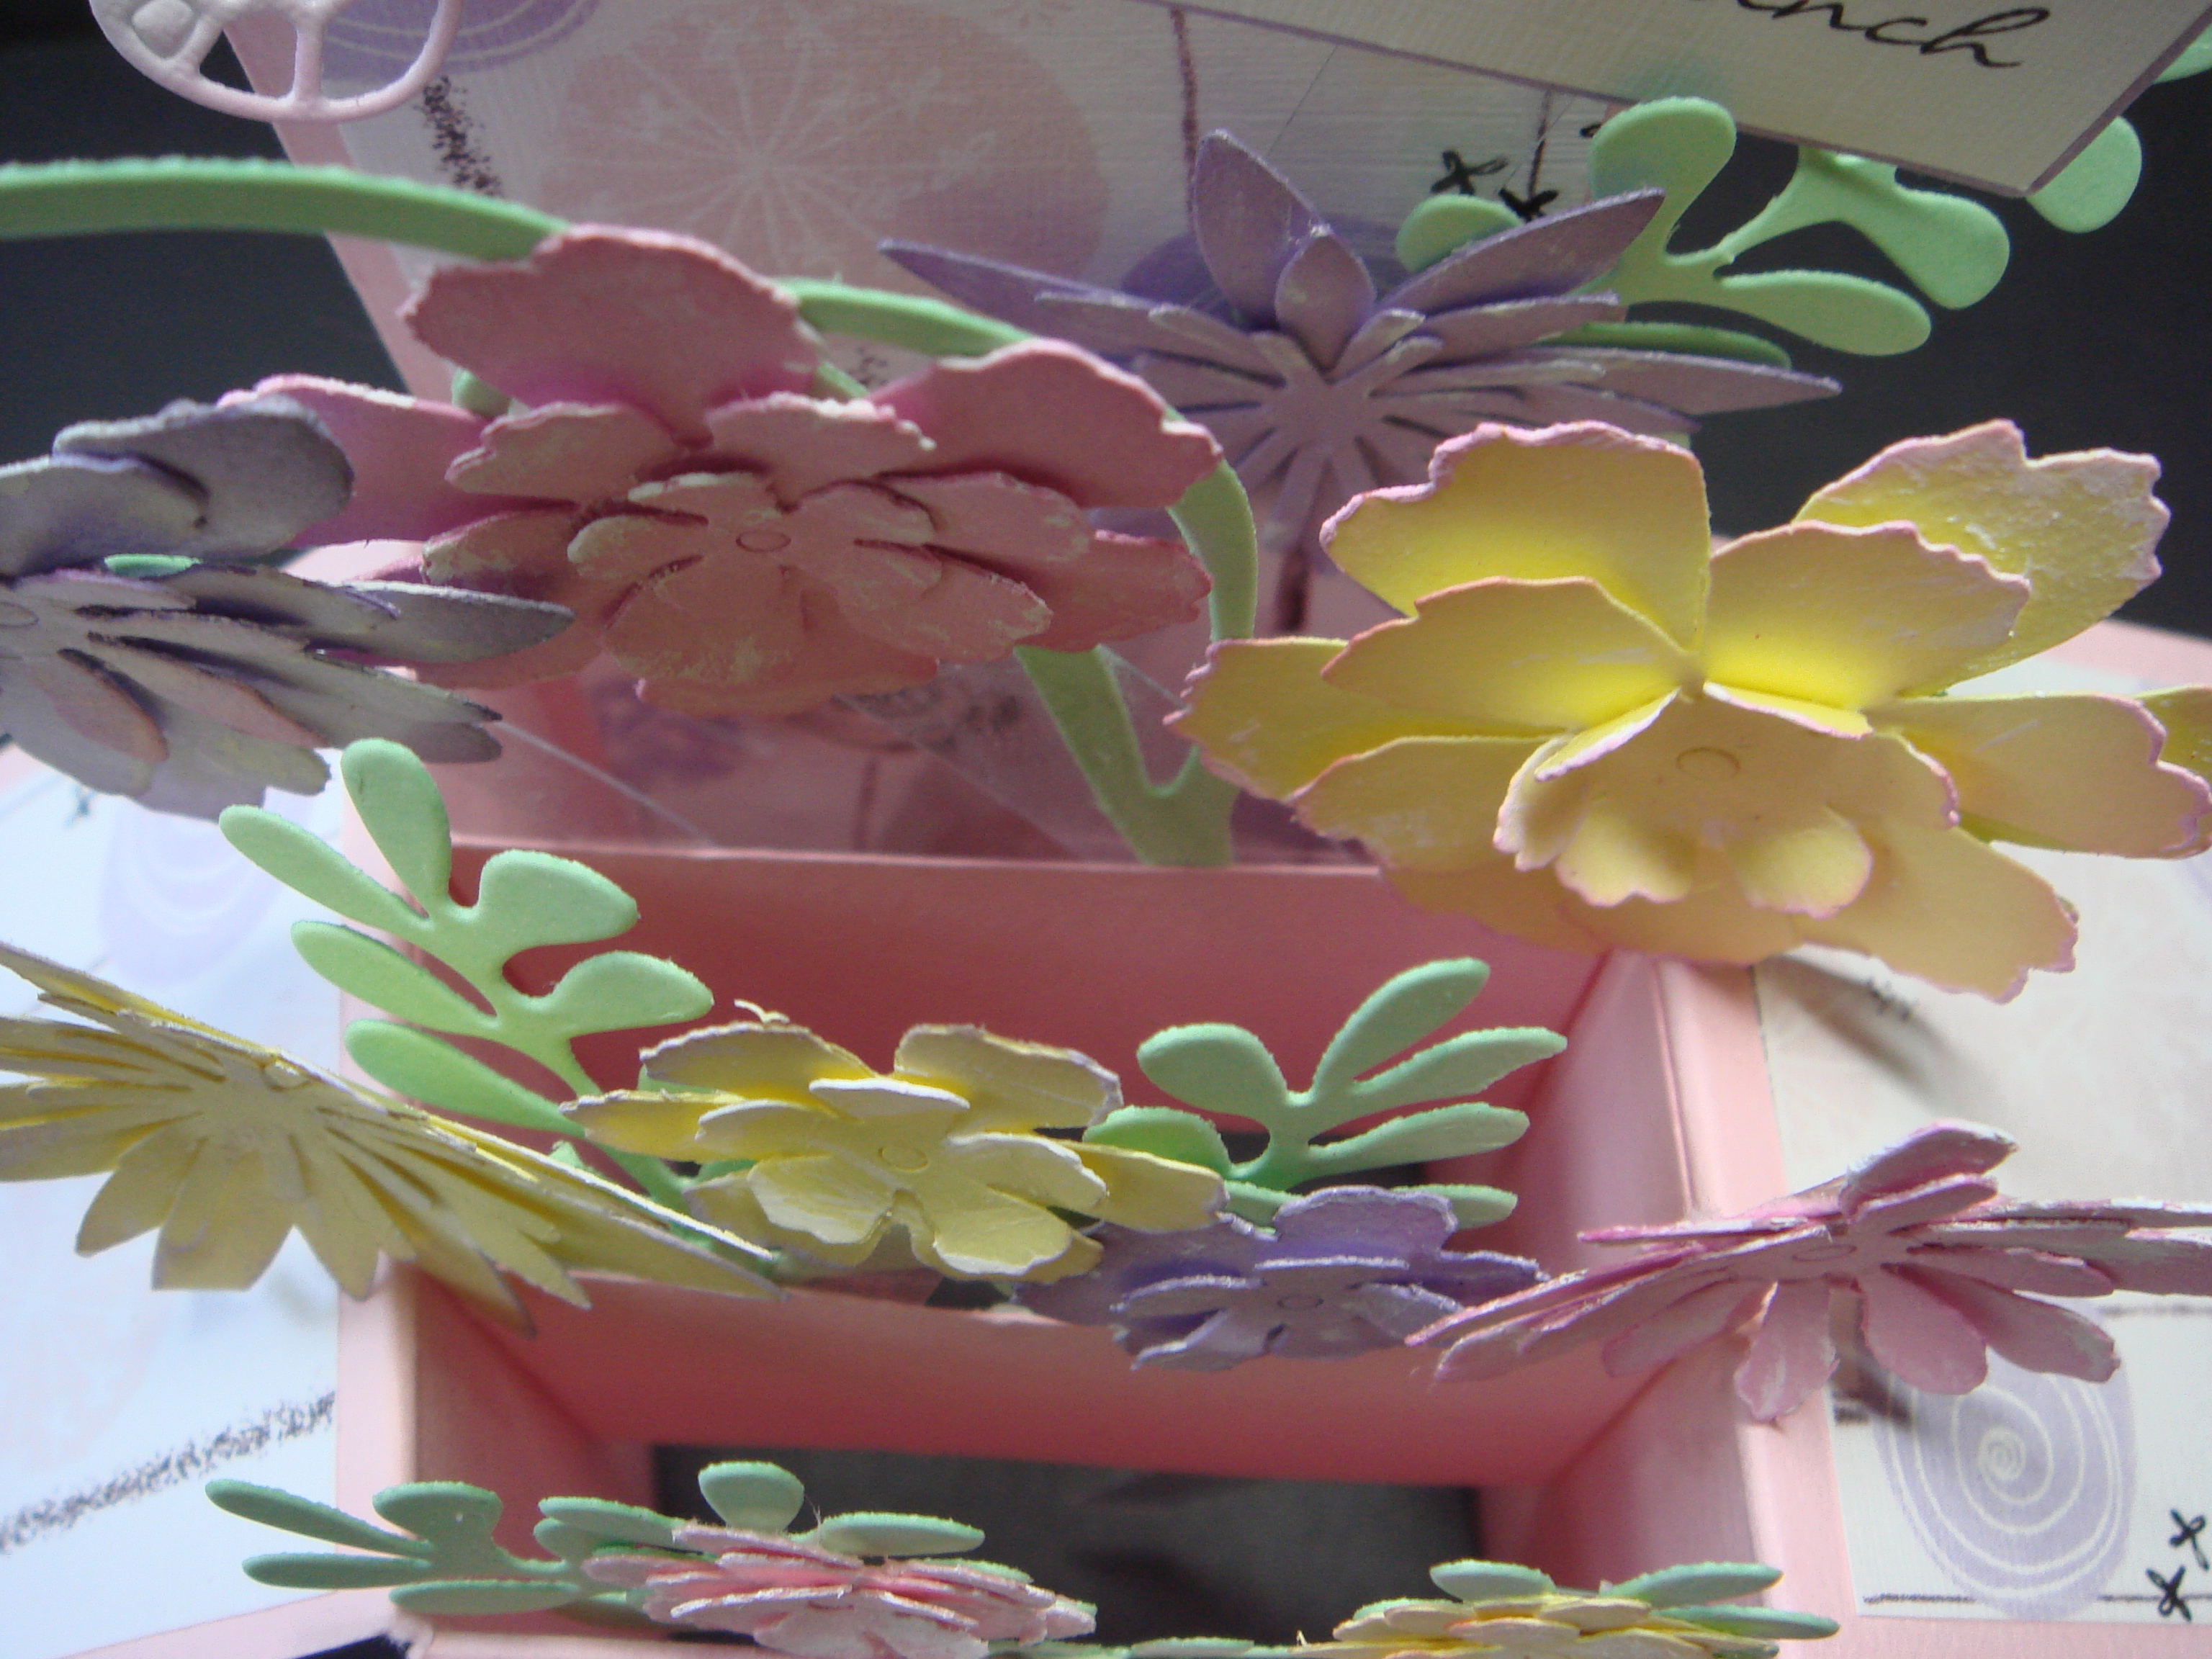
And here we have the finished box, what will you fill your pop up box card with?

Hope you found the tutorial easy to follow and will be inspired to make some pop up box cards, we would love to see what you come up with.
Find all the card you need for this project - head to our product pages and browse through our pic&mix range of card and paper.


3 thoughts on “How To Make A Pop Up Box Card”
Jeanniene
11th March 2019 at 3:37 p.m.
Can you close the box ?
Jacqueline
27th February 2018 at 4:53 p.m.
The pop up card is so easy to follow Thank you so much
Audrey
19th June 2017 at 7:15 a.m.
Loved this pop up box and easy to do Thankyou so much