Save The Date Card - Simple Step by Step Tutorial
0
Posted on 28th June 2016 by Angela Dodson
Filed under Projects And Cards By Type, Happy Birthday Card Ideas, Wedding Stationery
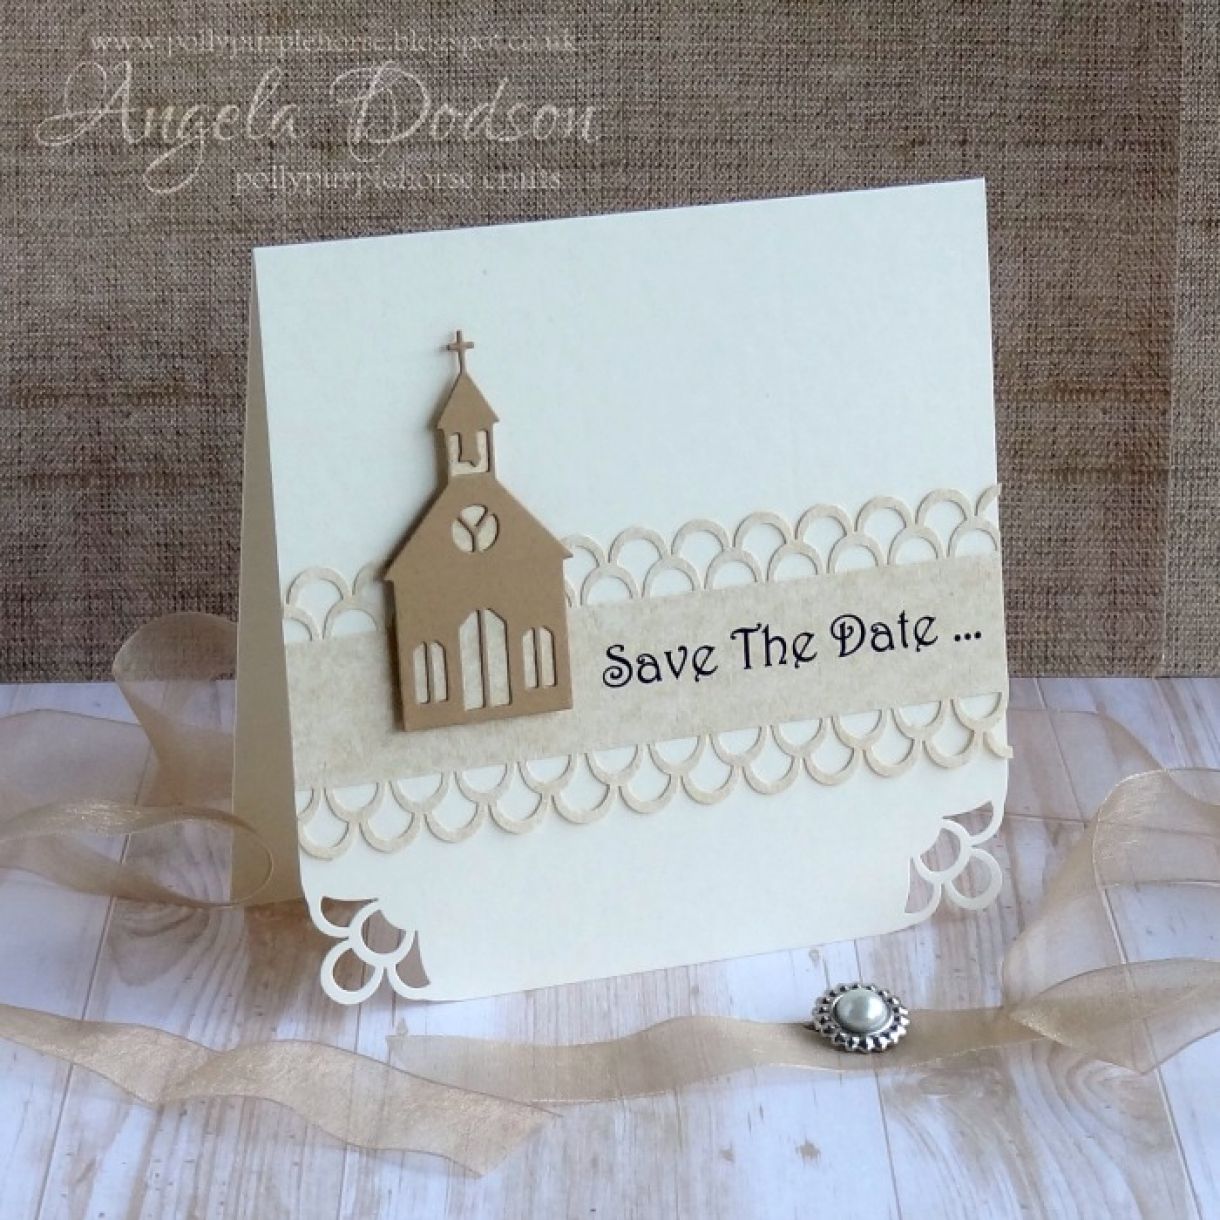
Hello, it’s Angela here with a simple step by step tutorial for you. This week the Design Team are working on the theme of Weddings – Save the Date. I am working with the Ivory Long Grain card, which is one of this week’s special offers, and I have chosen a neutral colour palette by teaming it with Natural Parchment and Buff coloured card.
The Ivory Long Grain is a nice weight of card being 250gsm so perfect for a card base and punches cleanly as you can see on the corners of my card.
Step By Step:
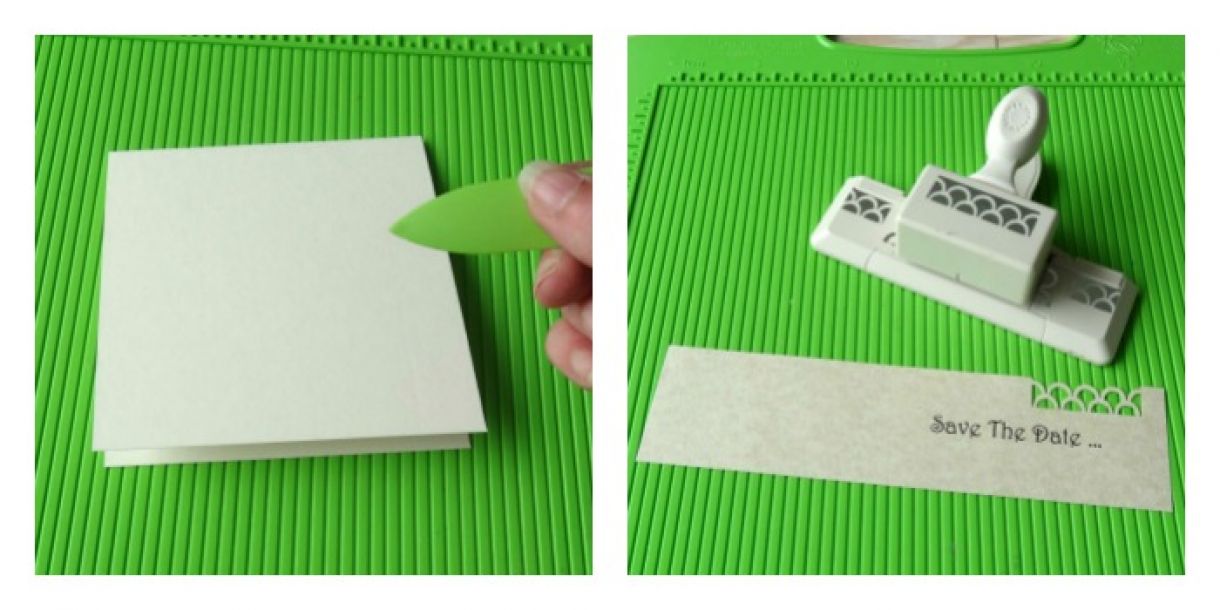
Take a sheet of A4 Ivory Long grain cardstock, score and fold in half, then trim down to create a 5” x 5” card blank with fold across the top.
I used my computer and printed off a sentiment of ‘Save The Date’ from Word onto Natural Parchment paper, you could use a stamp if you prefer of course.
Using a Border Punch I punched along the top and bottom of the sentiment strip, after punching the overall depth of the strip was approx. 2” which I felt worked well with the proportions of a 5 x 5” card base. You can experiment with sizes and different punches to achieve the look you desire.
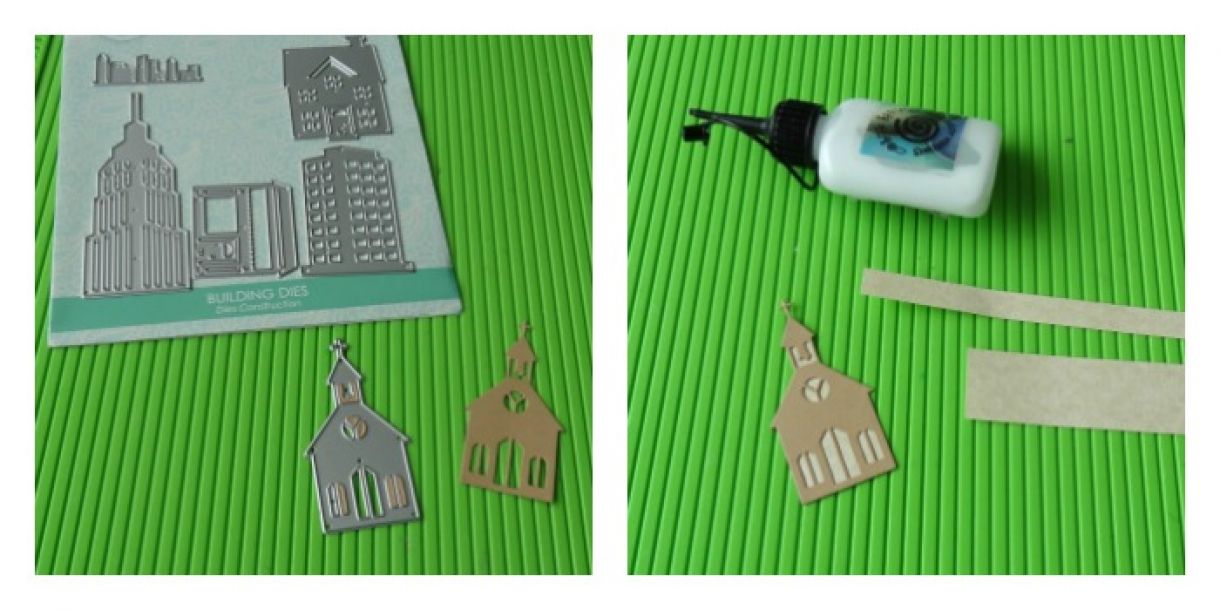
Using the Buildings die set, I cut a church shape from Papermilldirect Buff card and backed it with parchment paper so it showed as a contrast through the cut outs in the die. I just used some off cut strips and a few dabs of glue on the back to adhere.
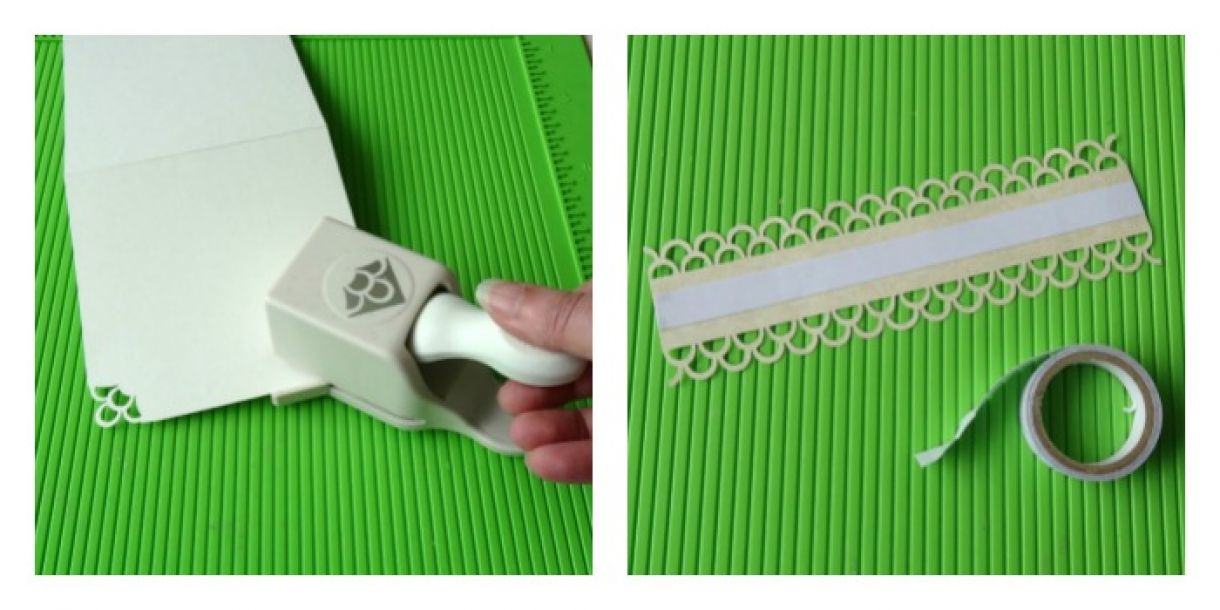
Taking a corner punch, I’m using the Double Loops one from a Martha Stewart set to match the border punch, punch both bottom corners. If you don’t have a fancy corner punch, then you could use a corner rounder or leave them plain.
Add a length of double sided tape to the back of the sentiment strip.
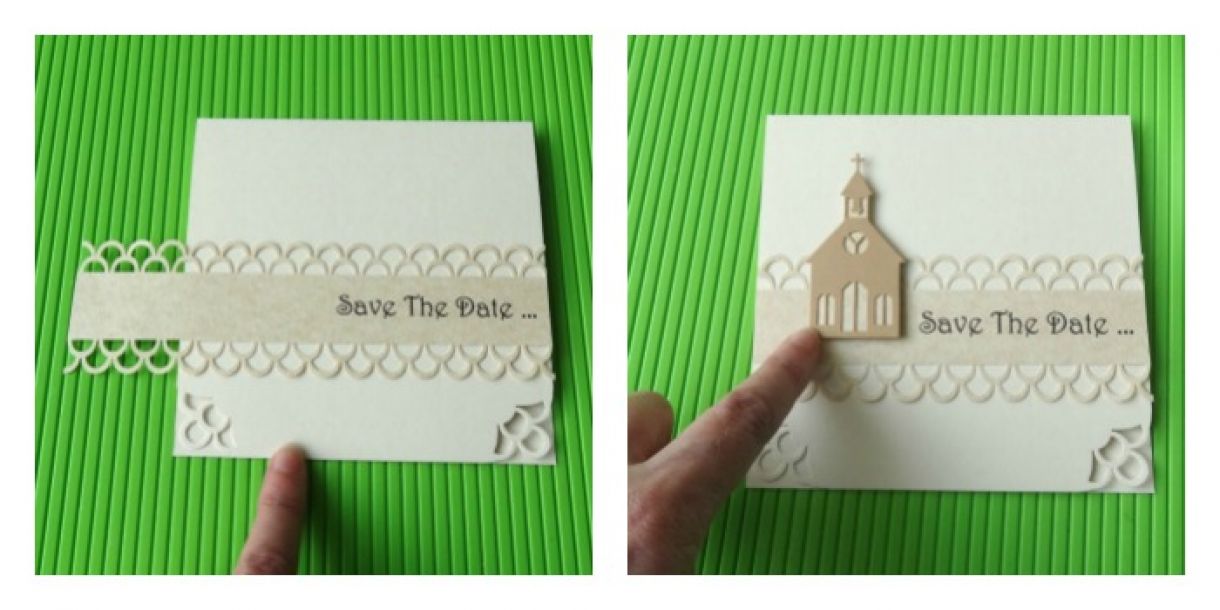
Attach sentiment strip across the card front using double sided tape and trim flush with the card edges.
Use 3D foam pads to attach the church to the card front, positioning it to the left of the sentiment and standing on the border.
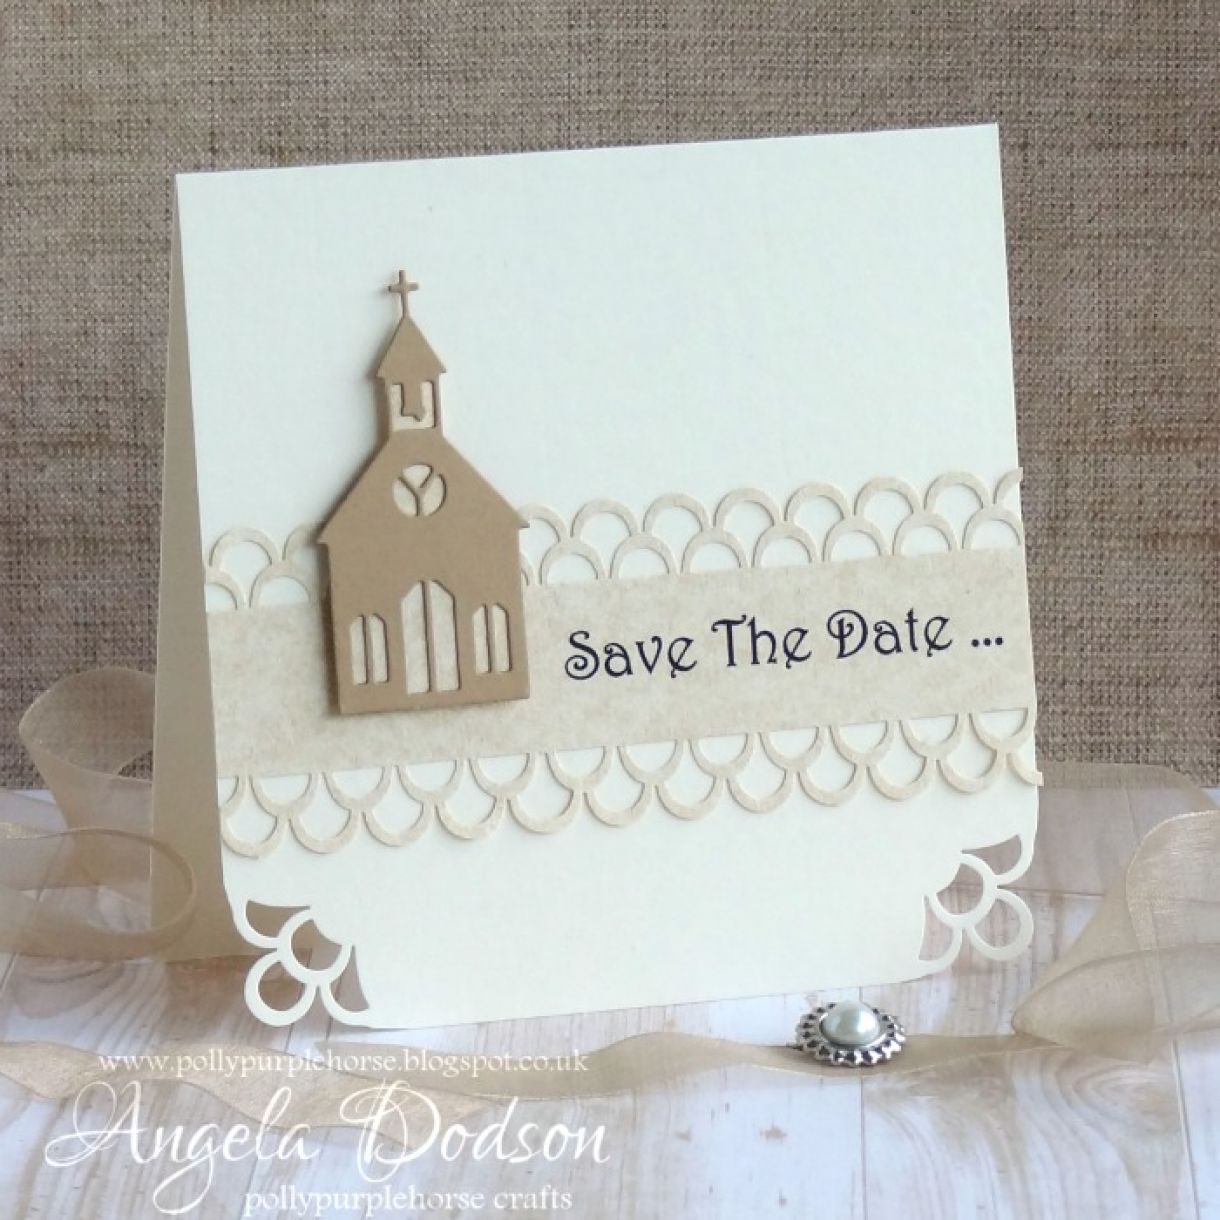
I have deliberately kept this design simple and neutral, this is especially helpful if batch making a number of cards. You can create the card bases and then each element as a production line. You can print off all the date details perhaps onto parchment to match the card front and adhere them as an insert inside the card.
Products Used:
Ivory Long Grain Card - Papermilldirect
Natural Parchment - Papermilldirect
Punch Around The Page border & corner punch set – Double Loops – Martha Stewart
Buildings die set # FEDIE064 – First Edition
D/s tape, glue, 3D foam pads.
Computer to print sentiment (or stamps)


Nobody has commented yet
Be the first to comment on this article by using the form below.