Make a Fun Wine Bottle Tag
0
Posted on 23rd June 2016 by Sandra Dunne
Filed under All Papercraft Tutorials, Projects And Cards By Type, Happy Birthday Card Ideas, Design Team
Hi everyone!! It's Sandie here today and I am sharing a quick tutorial on how to make a fun Bottle Tag.
You will need:
- Plain White card
- Patterned paper - Simple Stories
- Contrasting card or paper
- Stamped/Coloured image - Stamping Bella 'Winobella'
- Oval Die - La-La Land Crafts
- Lace, Ribbon, Pearls
- Adhesive, 3D foam dots/tape
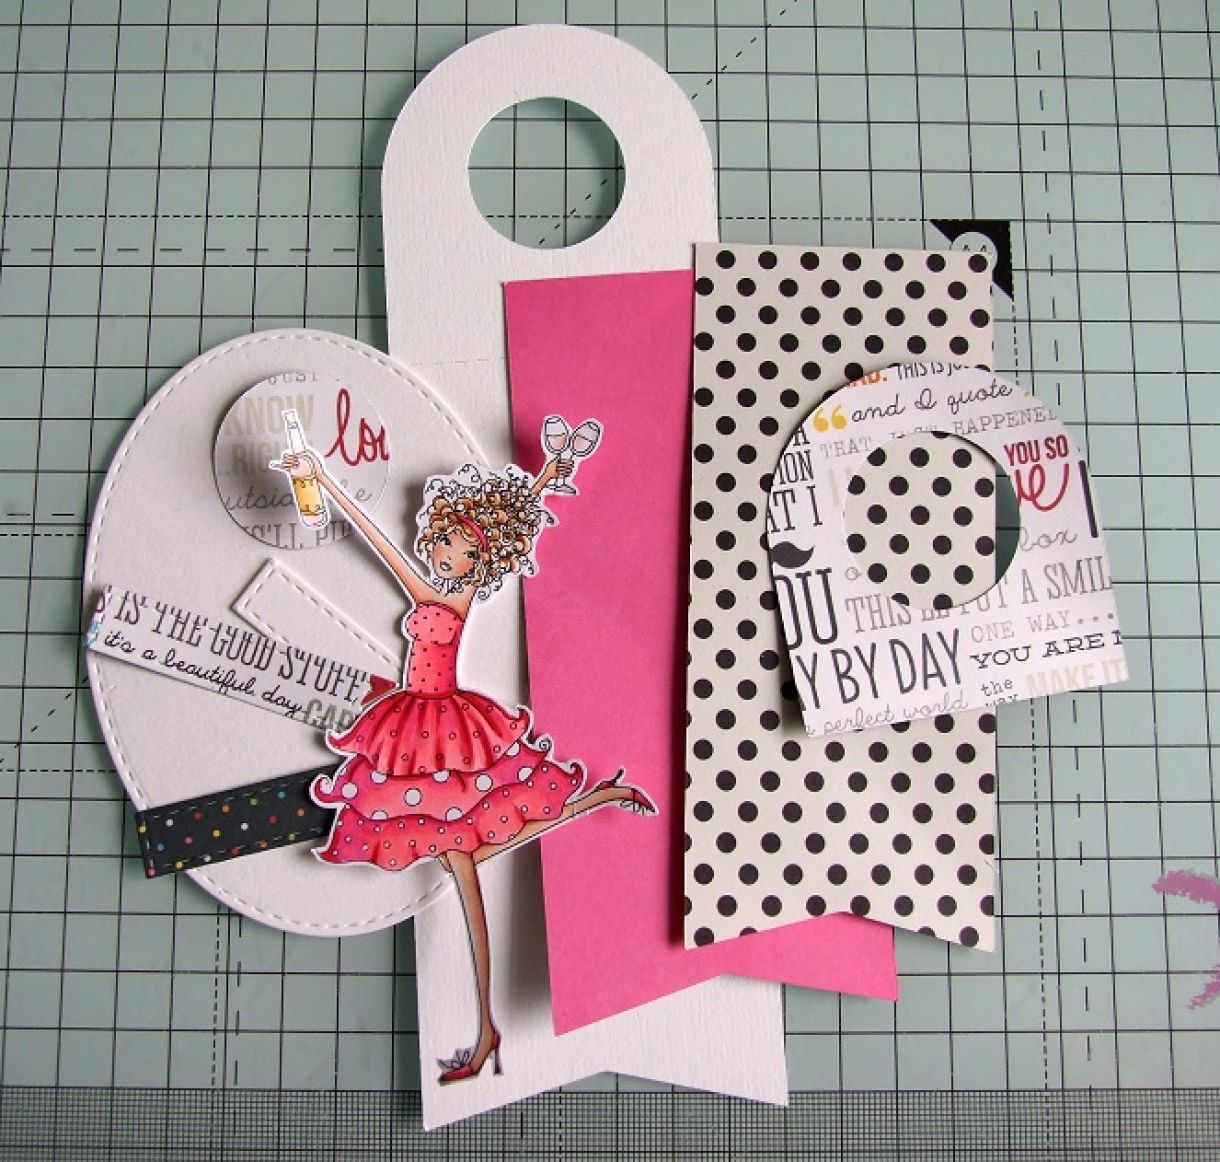
I cut the tag, and layers, on the Silhouette but they are also quite easy to cut by hand.
Here are the instructions if you are cutting by hand
- Cut a piece of white card at 8" x 2.5" and scored at 2.5" from the top.
- Using a 1.25" circle die, make a hole about 0.75" down from the top, and centered.
- You can round the top using a large circle die, or just round the corners with a corner punch.
- Cut a contrasting layer for the bottom section at 5 1/8" x 2 3/8" and a layer of patterned paper at 5" x 2.25".
- You can leave the bottom of the tag square, or fishtail it with a scissors. Just remember to fishtail the layters too.
- For the top section, cut a 2 1/8" square. Round the corners and cut a 1.5" circle as with the base.
Colour the image and fussy cut using a precision scissors. Then set aside while you assemble the tag.

Adhere all the layers down.
Next, add a basic shape (circle, oval, square, tag, etc). Layer some lace and ribbon and adhere any embellishments that will be behind the image.
Using 3D foam dots, adhere the image. Stamp the sentiment on some white card and cut the ends at an angle. Roll the sentiment through your fingers to curve it. Apply a little adhesive to each end of the sentiment and glue down over the bottom of the image. Finish the tag by adding some pearls, or other embellishments of choice.
Thanks for popping by today. I hope you enjoyed this tutorial and are inspired to make some fun bottle tags.
Sandie


Nobody has commented yet
Be the first to comment on this article by using the form below.