Tutorial - Techniques Using Gilding Flakes
0
Posted on 15th March 2016 by Sylvia Ames
Filed under Card Making Ideas, All Papercraft Tutorials, Seasonal Crafts, Easter Craft Ideas
Hi, Sylvia here with another technique tutorial, today I am using gilding flakes to make a panel for a greetinsg card. There are many companies selling gilding flakes in a variety of colours and flake size, they also sell the tacky glue required for this technique. Double sided sticky tape can be used to create borders and souble sided sticky sheets can be covered with flakes then stamped with an image.
Using gilding flakes can be a very messy process so try to keep your fingers clean and glue free. I use a box to work in to prevent the flakes blowing all over the place and it makes cleaning up easier too.
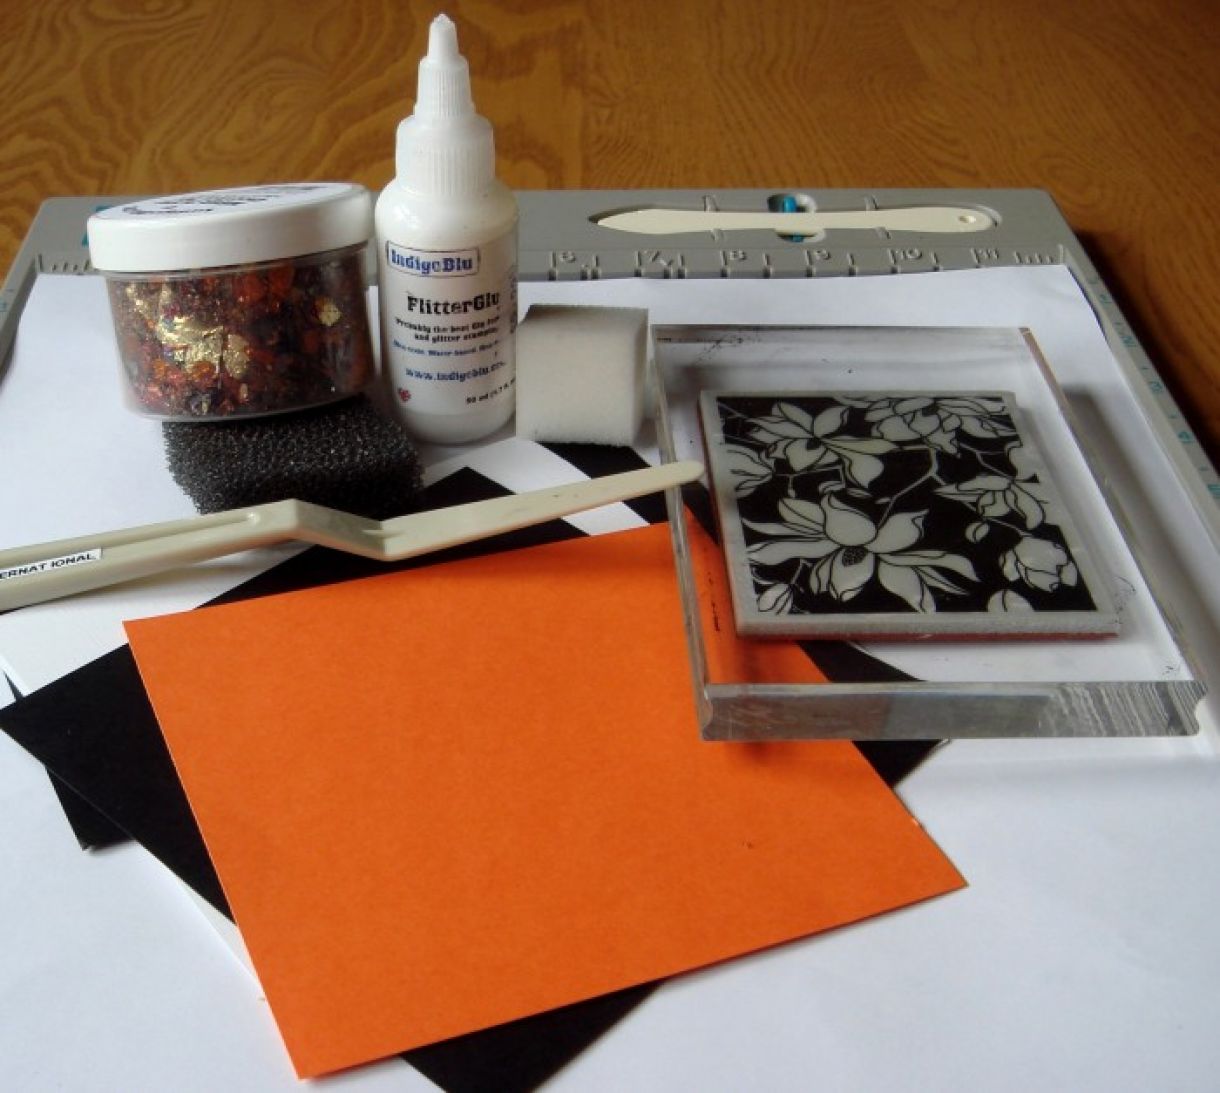
The materials I used are:
- Papermilldirect white linen, smooth black and mandarin orange cardstock
- Hero Arts stamp large blossom and a Darkroom Door sentiment
- Indigo Blu flitter glue and gilding flakes
- sponge for applying glue
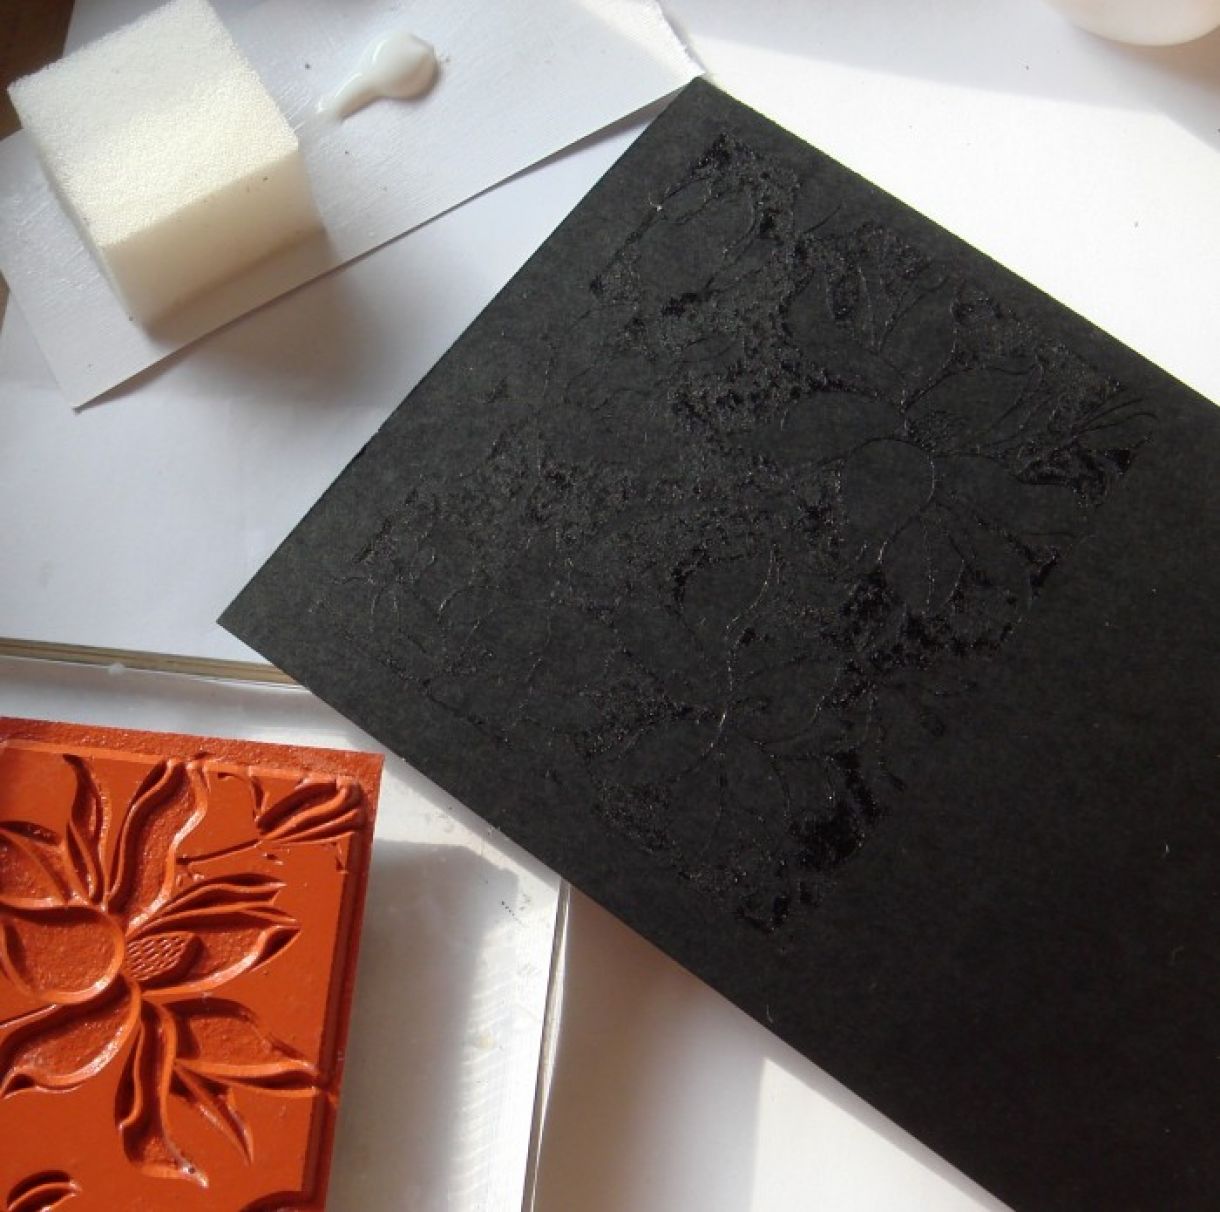
Spread the glue onto a piece of card and dab a piece of foam onto it to pick up the glue evenly. Don't take up too much glue, you need to cover the raised area of the stamp and not get glue in the recessed areas.
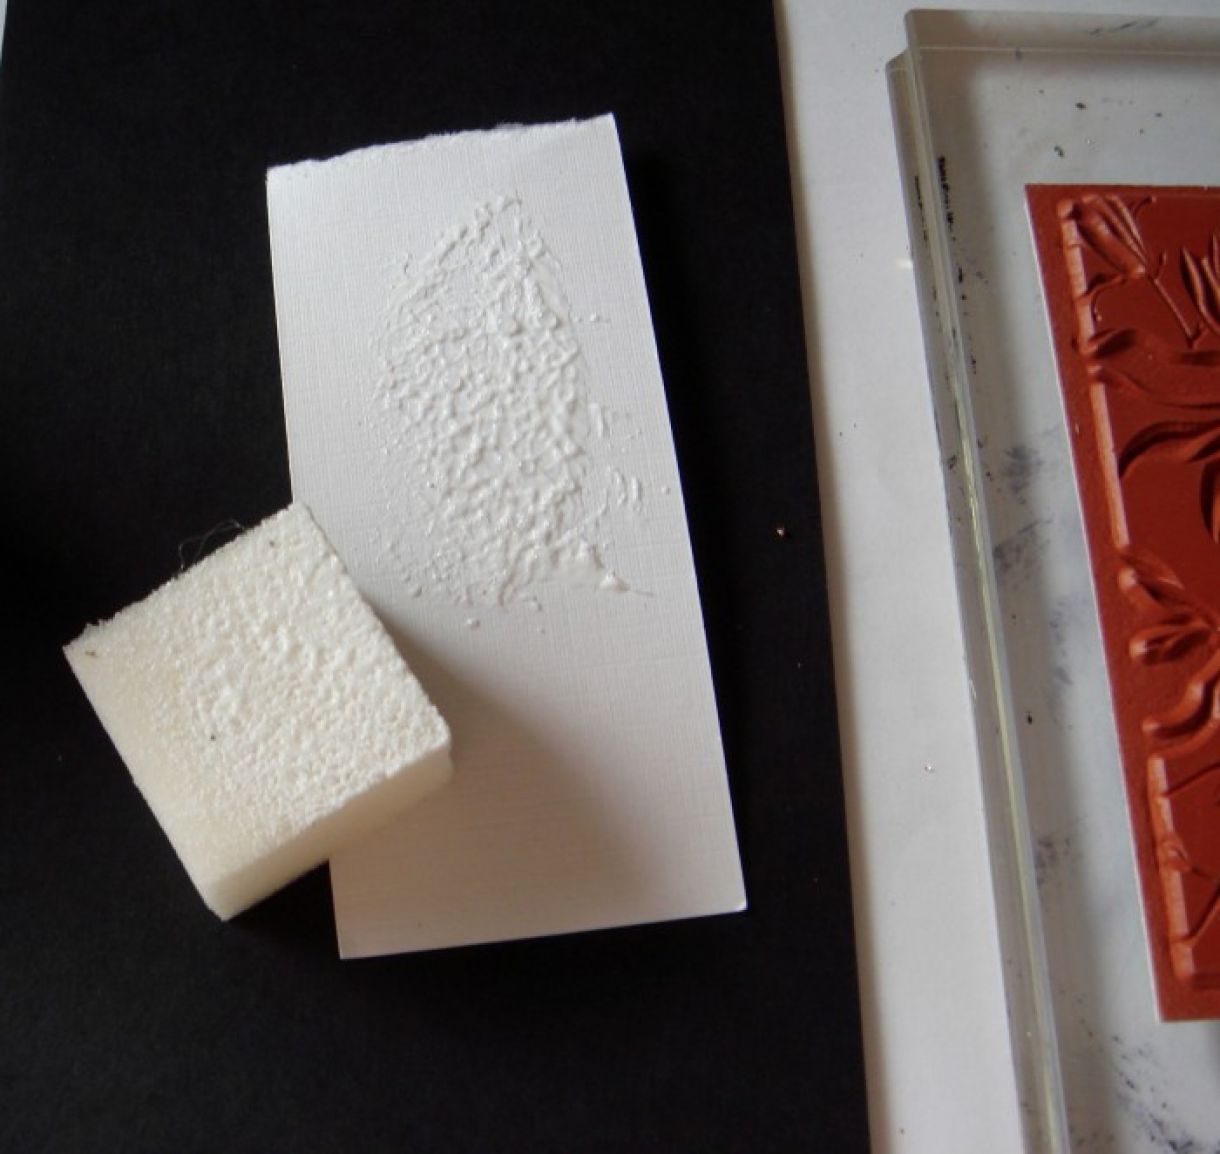
Dab the glue onto the stamp evenly, it should cover the stamp leaving a white film of glue.
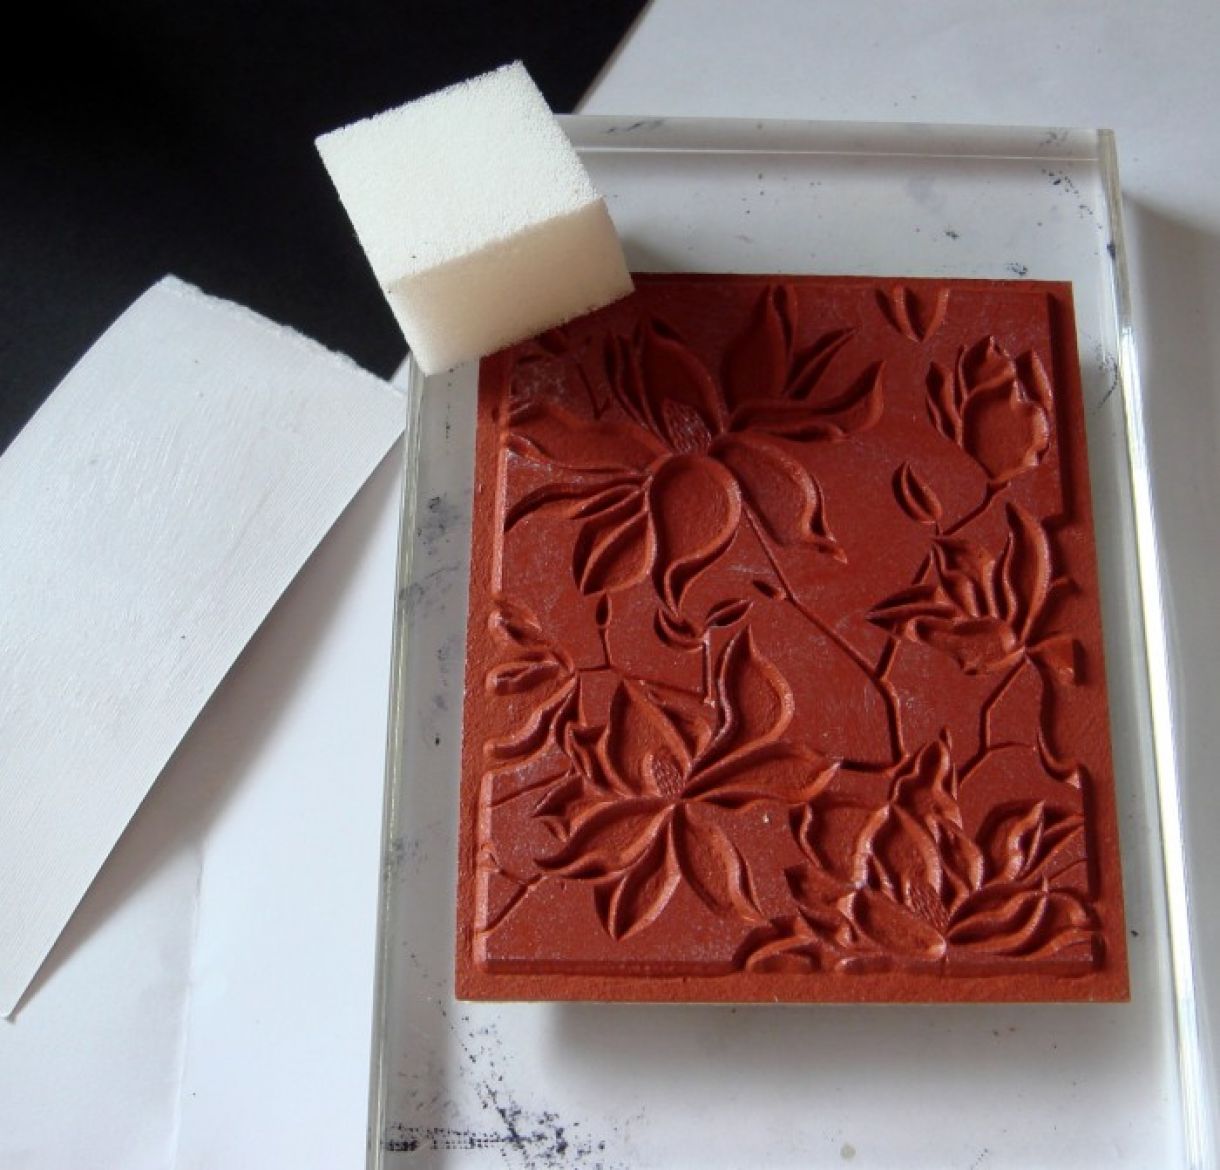
Stamp onto black card and lift the stamp carefully as soon as you have stamped, it may stick if left on the card too long and the card may lift off onto your stamp. Wash the stamp immediately with soap and water. The sticky glue will remain tacky for quite a while on the card.
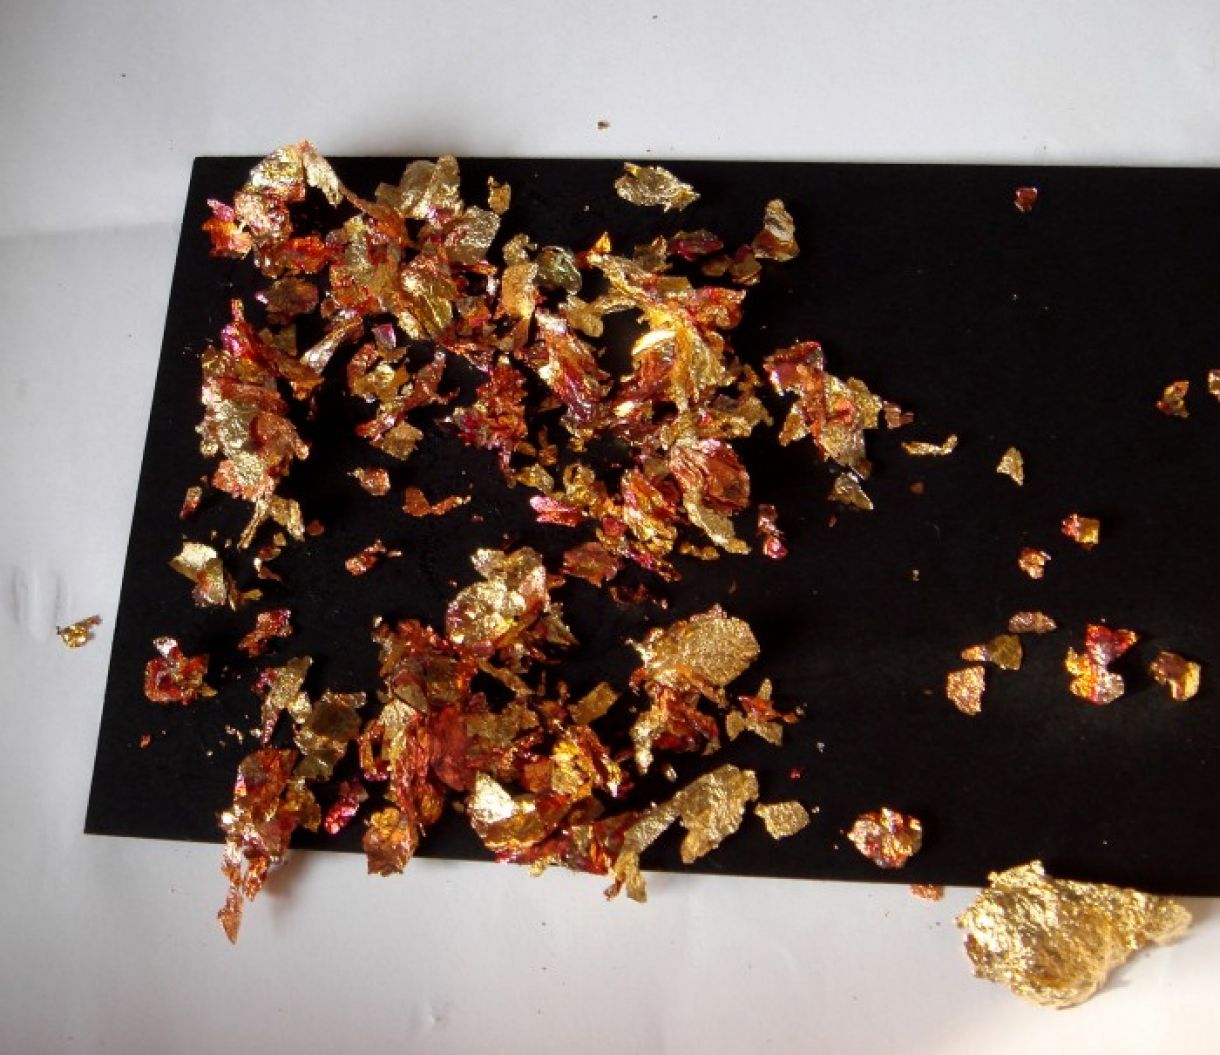
Carefully open you box of gilding flkes and sprinkle some onto the sticky image. You do not need to cover the image completely the flakes go a long way.
Gently press down the flakes and rub in a circular motion with a piece of scoochy foam. Move the flakes over the image until it is completely covered. The flakes will stick to the glue leaving the open areas showing the black background.
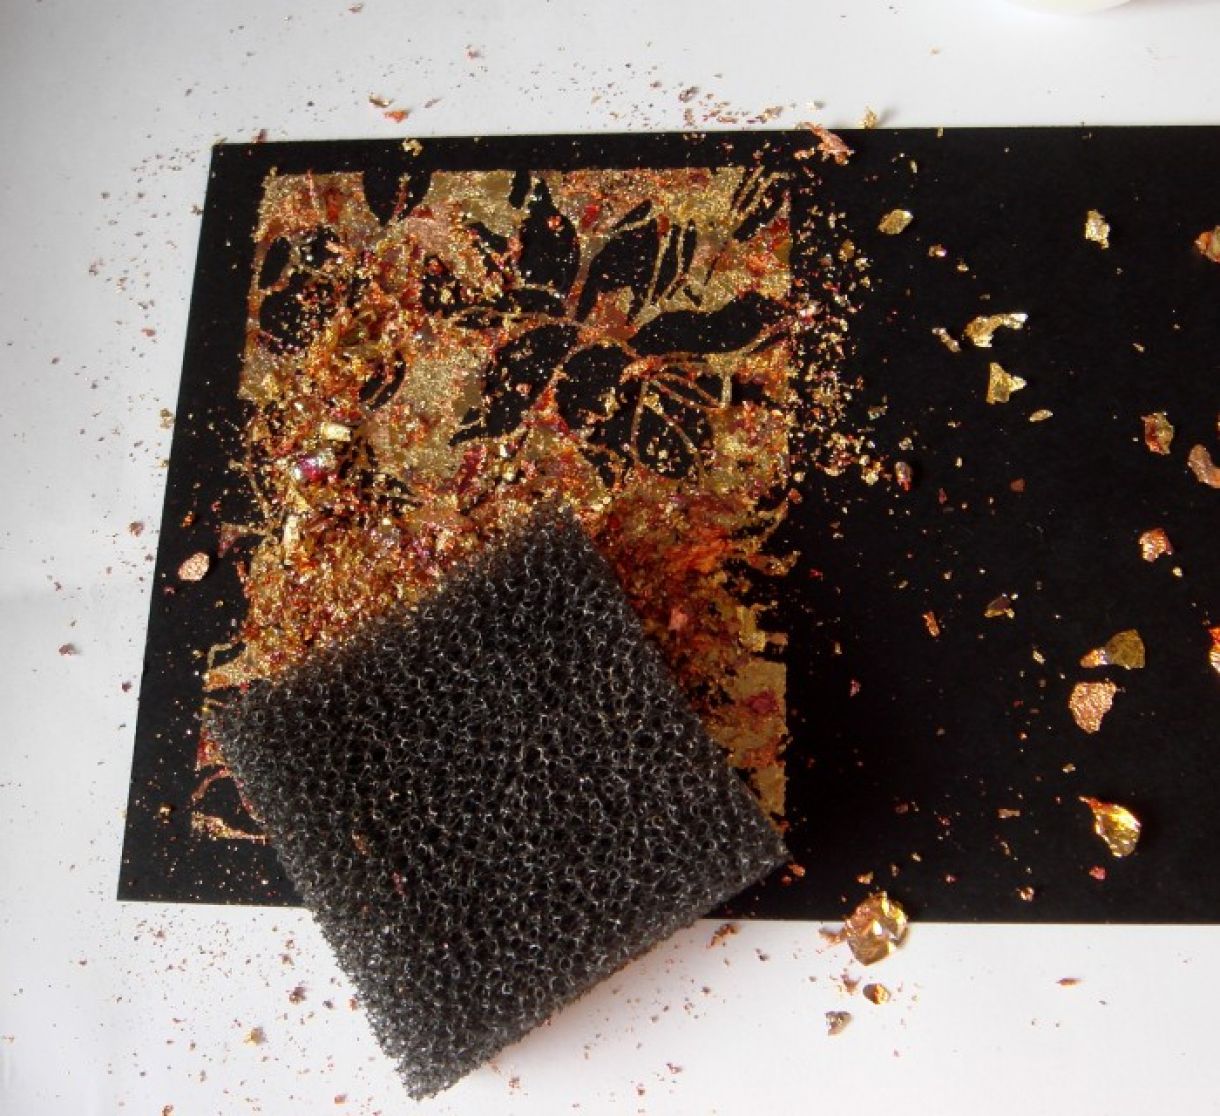
Burnish the image with the scoochy foam and trim the edges ready for mounting on the card.
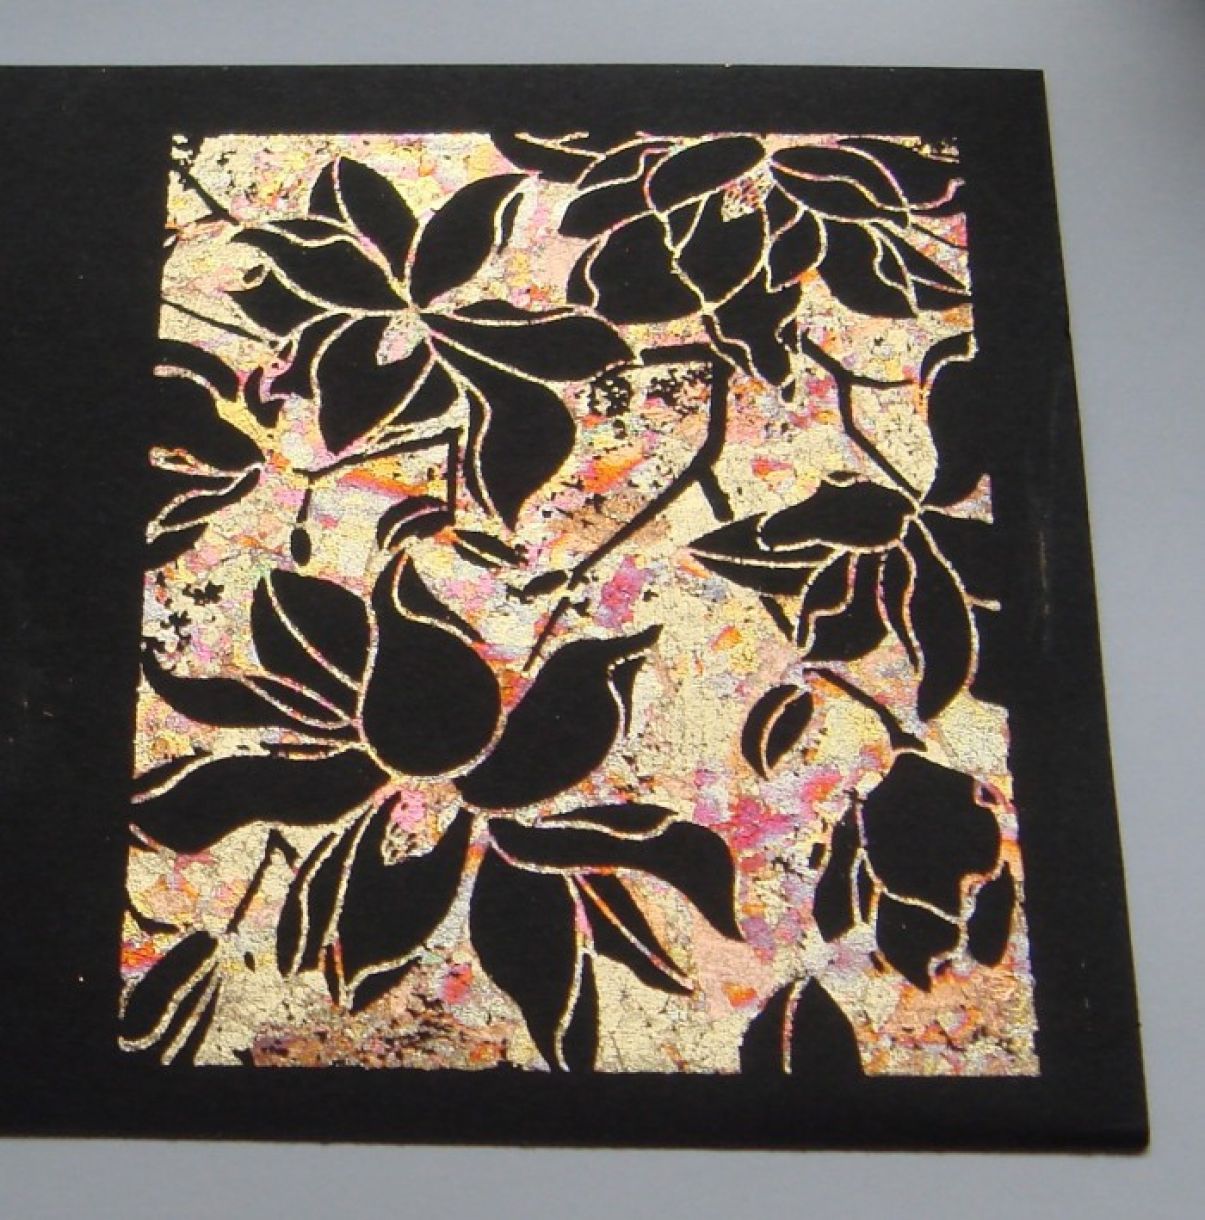
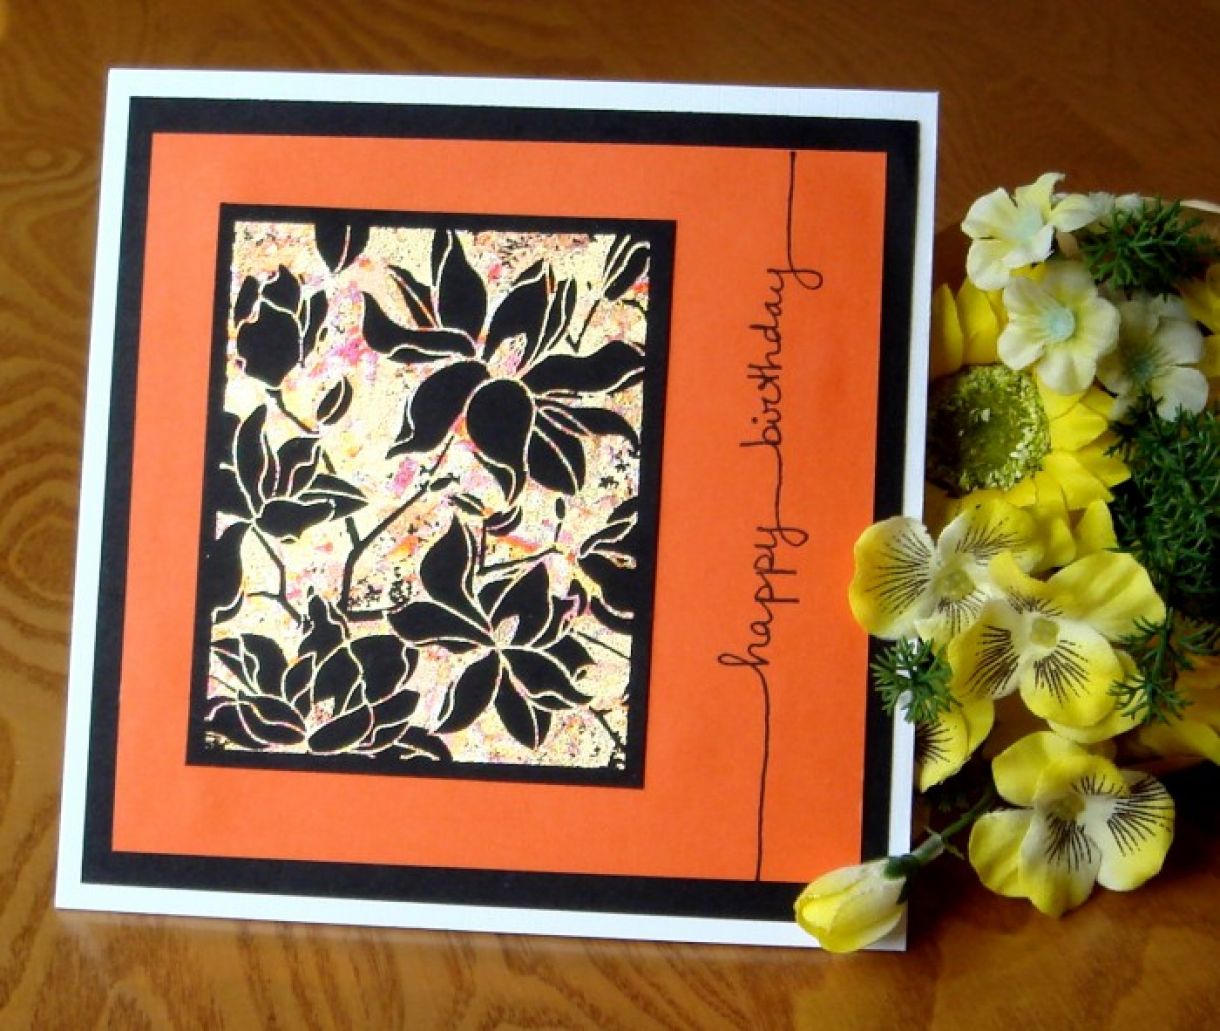
To make up the card, mat a 14cm x 14cm black square onto a 15cm x 15cm white linen card blank. Mount the gilded image on to a 13cm x 13cm square of mandarin orange card and stamp with a sentiment. Layer the orange card onto the black mat.
If you want to see more ideas and ways of gilding, or have a technique you would like to see on the blog, leave a comment and I will cover it in one of my monthly blogs for you.
Sylv xx


Nobody has commented yet
Be the first to comment on this article by using the form below.