Thank You Card Tutorial
2
Posted on 4th January 2016 by Angela Dodson
Filed under Card Making Ideas, All Papercraft Tutorials, Projects And Cards By Type
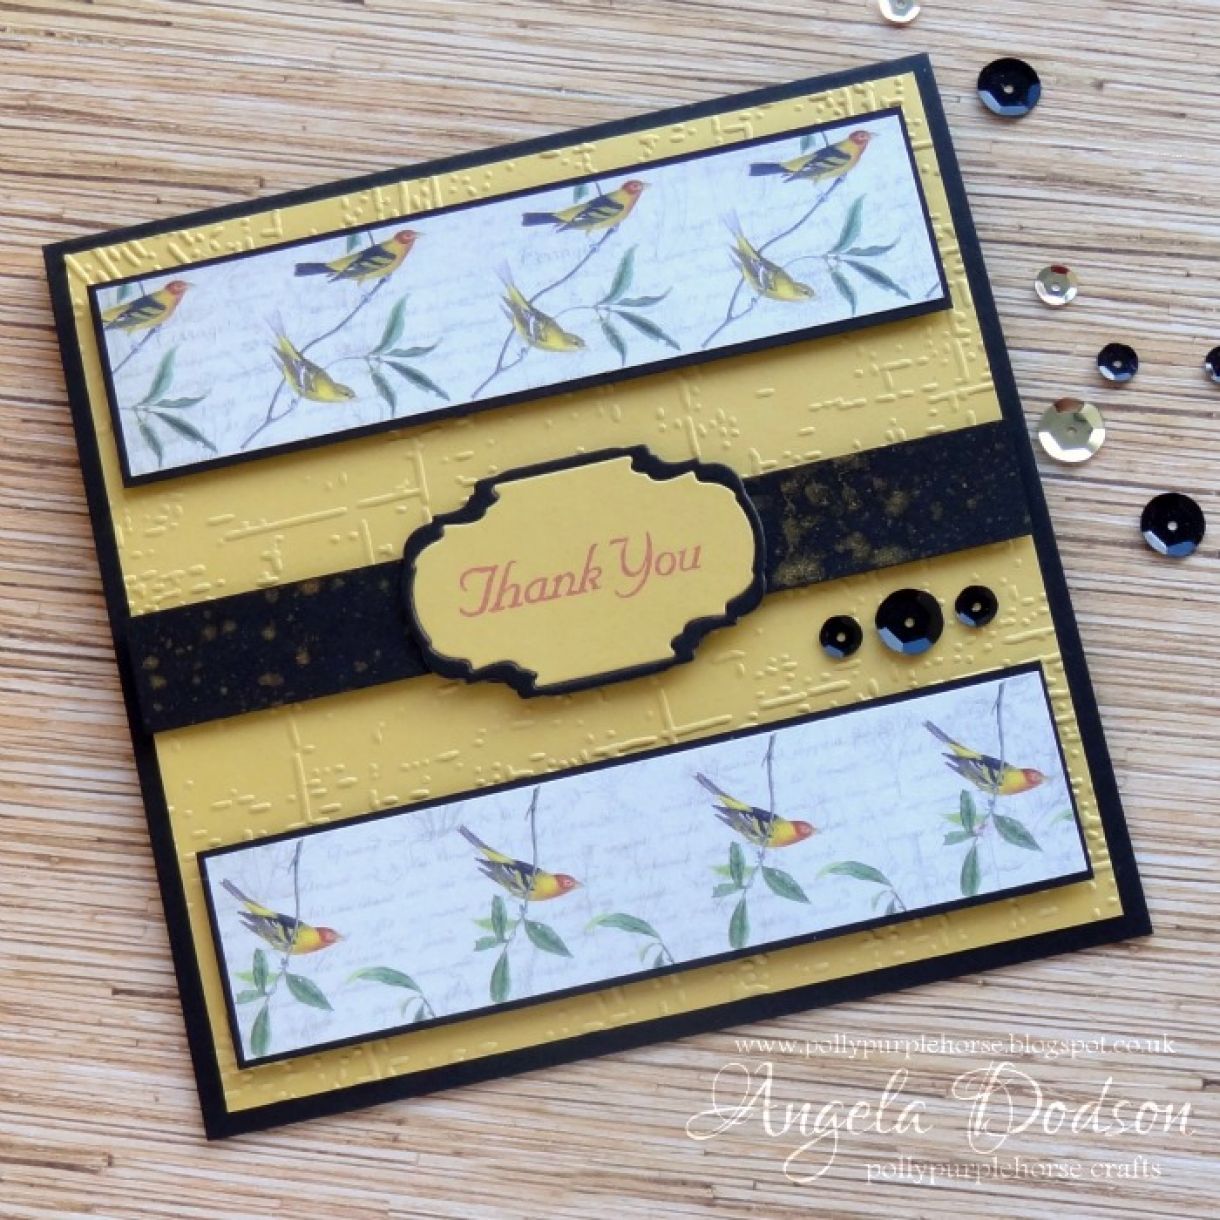
Hello, it’s Angela here with a new blog post for 2016. It's that time of year when we may be sending 'Thank You' cards to family and friends, so using this week's special offer 'Mustard Yellow' cardstock, I created this little ‘Thank You’ card design as follows:

Score and fold a sheet of A4 PMD Black card in half then trim down to create a square card blank. I cut mine to measure approx. 5 ¾”.
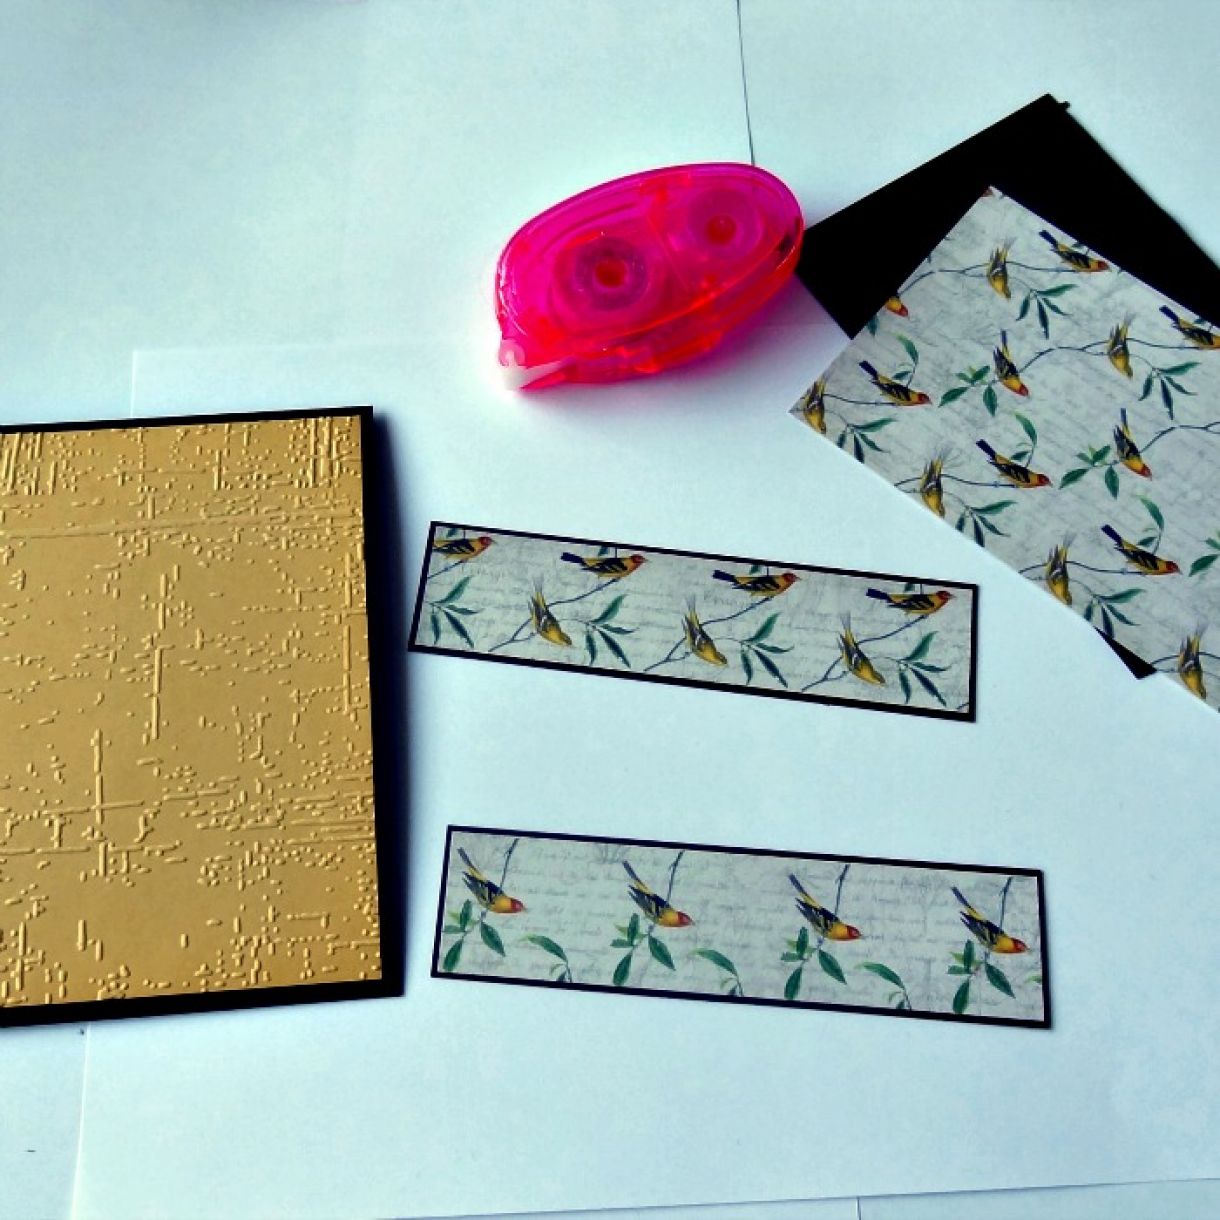
Cut a square of PMD Mustard Yellow card to measure approx. 5 ½” square and emboss using the ‘distress’ effect embossing folder through your die cutter.
Position black card blank in ‘tent’ position (with fold along the top) Adhere the embossed panel centrally onto card front using double sided tape.
Cut 2 strips of pattern paper approx. 1 ¼” deep by just over 5” wide. Mat the pattern papers onto PMD black card to leave a small equal border showing all around on both strips.
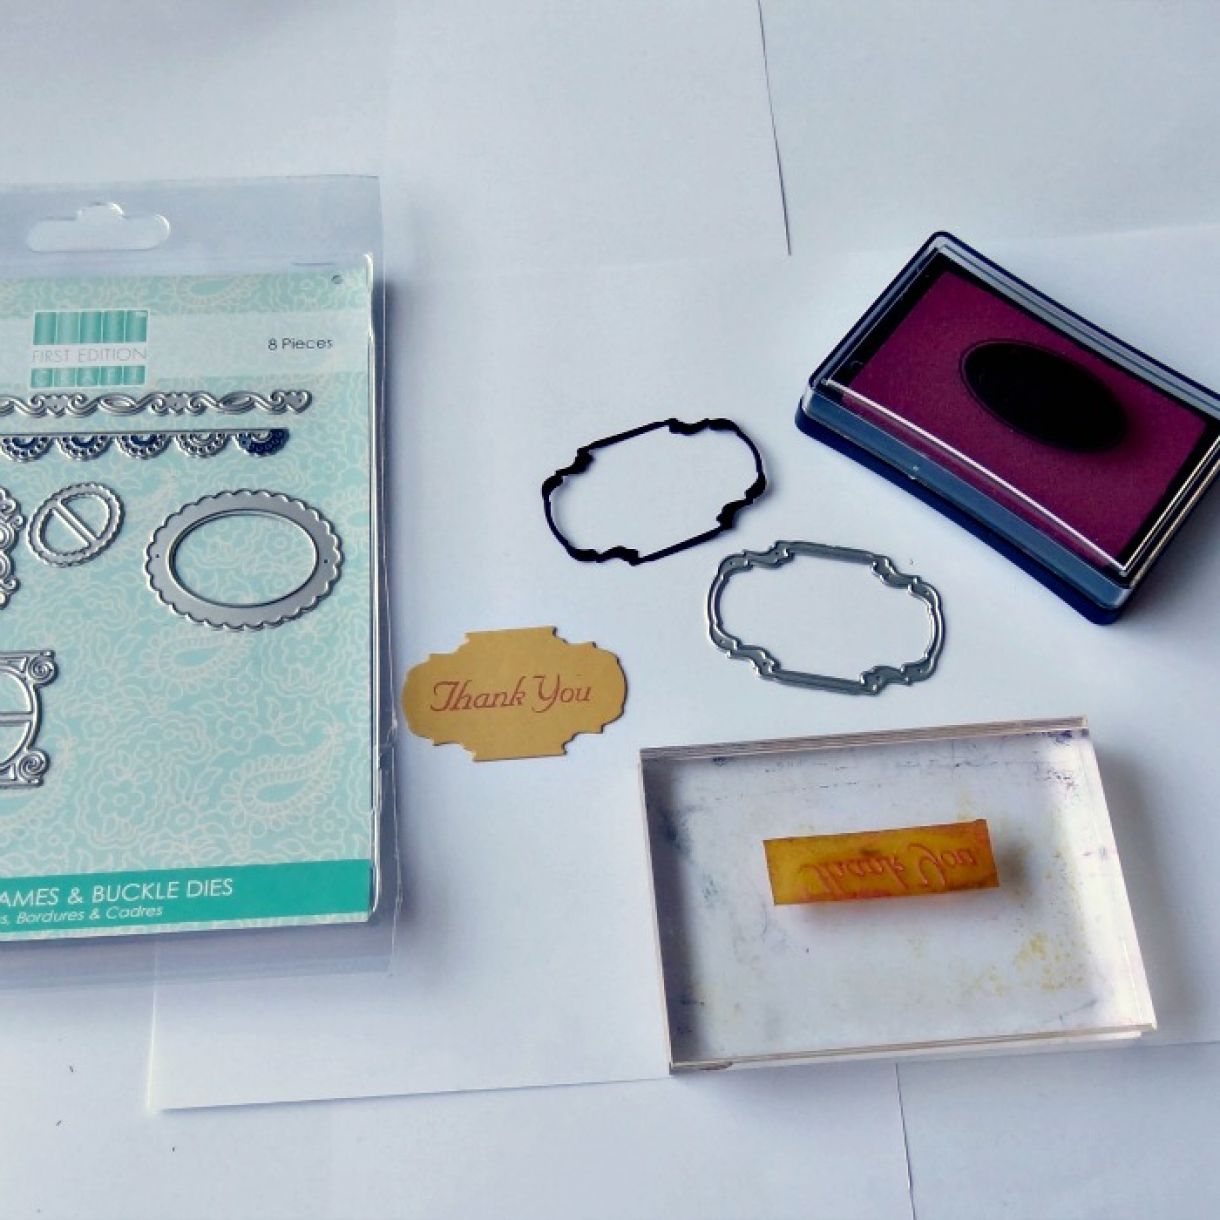
Using a red-brown ink and the sentiment stamp, stamp ‘Thank You’ onto PMD Mustard Yellow card. When ink is dry carefully position a frame die over it and run through your die cutter (tip: I use a little low tack washi tape to hold dies in place).
Cut the same frame die again using PMD black card, you will see that there are 2 parts to each die cut frame set, use the thin black outer piece to frame the stamped piece, use a little strip of card and / or tape on the back to hold them in place.
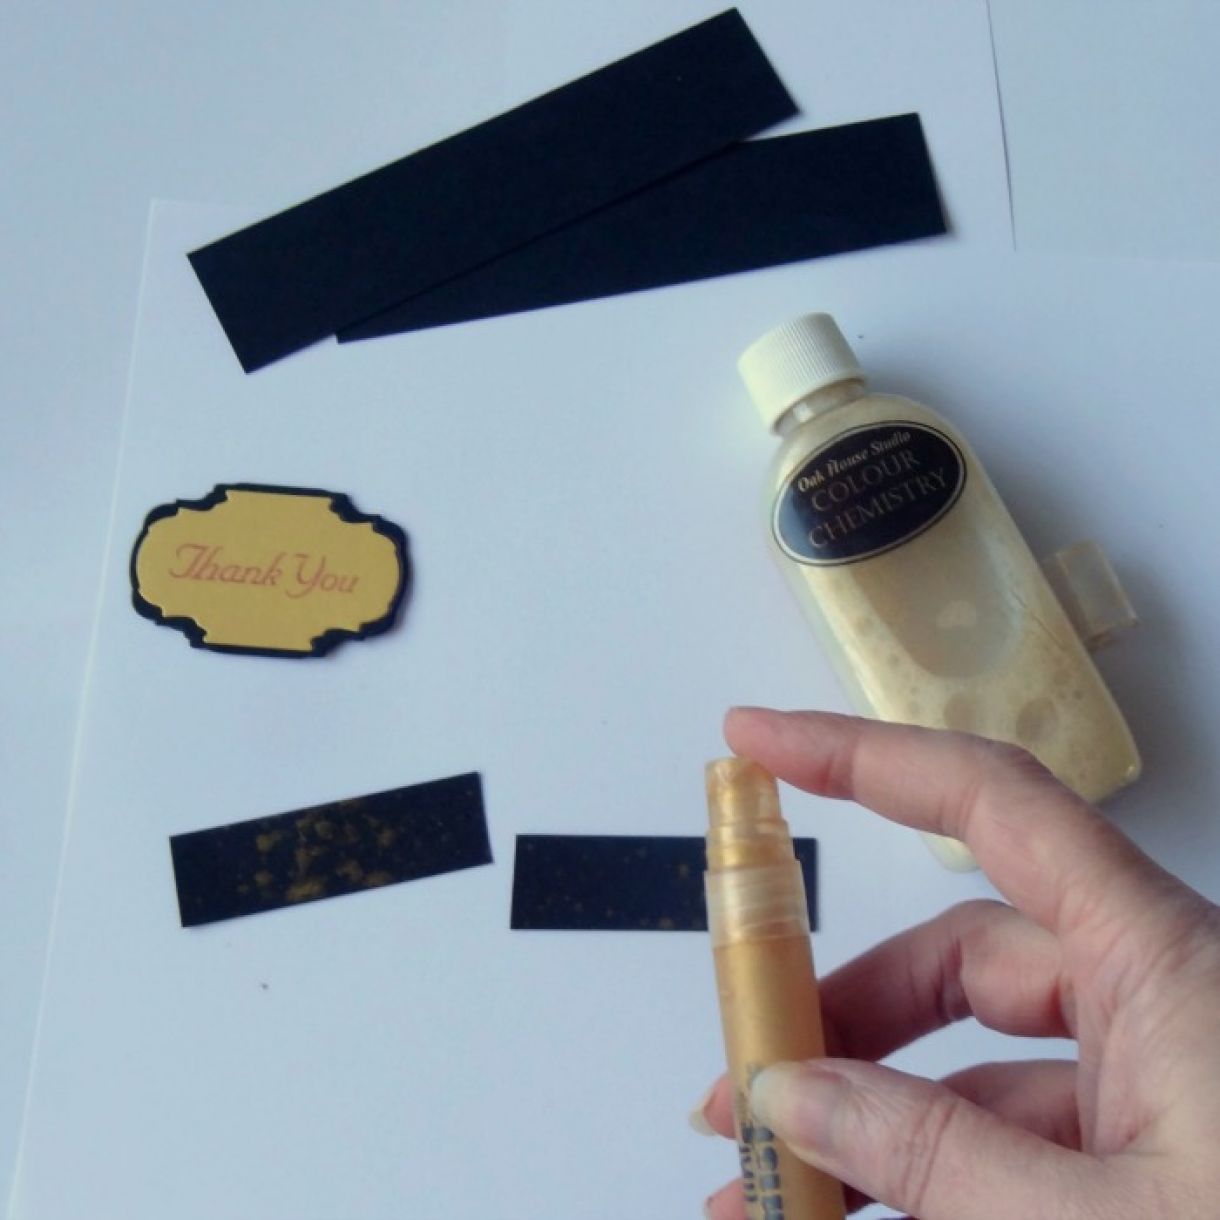
Cut a ¾ “deep strip of PMD black card to fit across the mustard embossed panel. (I was using up scraps so mine is shown as 2 pieces). (Optional) Spray with gold ink and leave to dry. (you can mix your own spray using a gold ink and water into a mister bottle and giving it a shake before using)
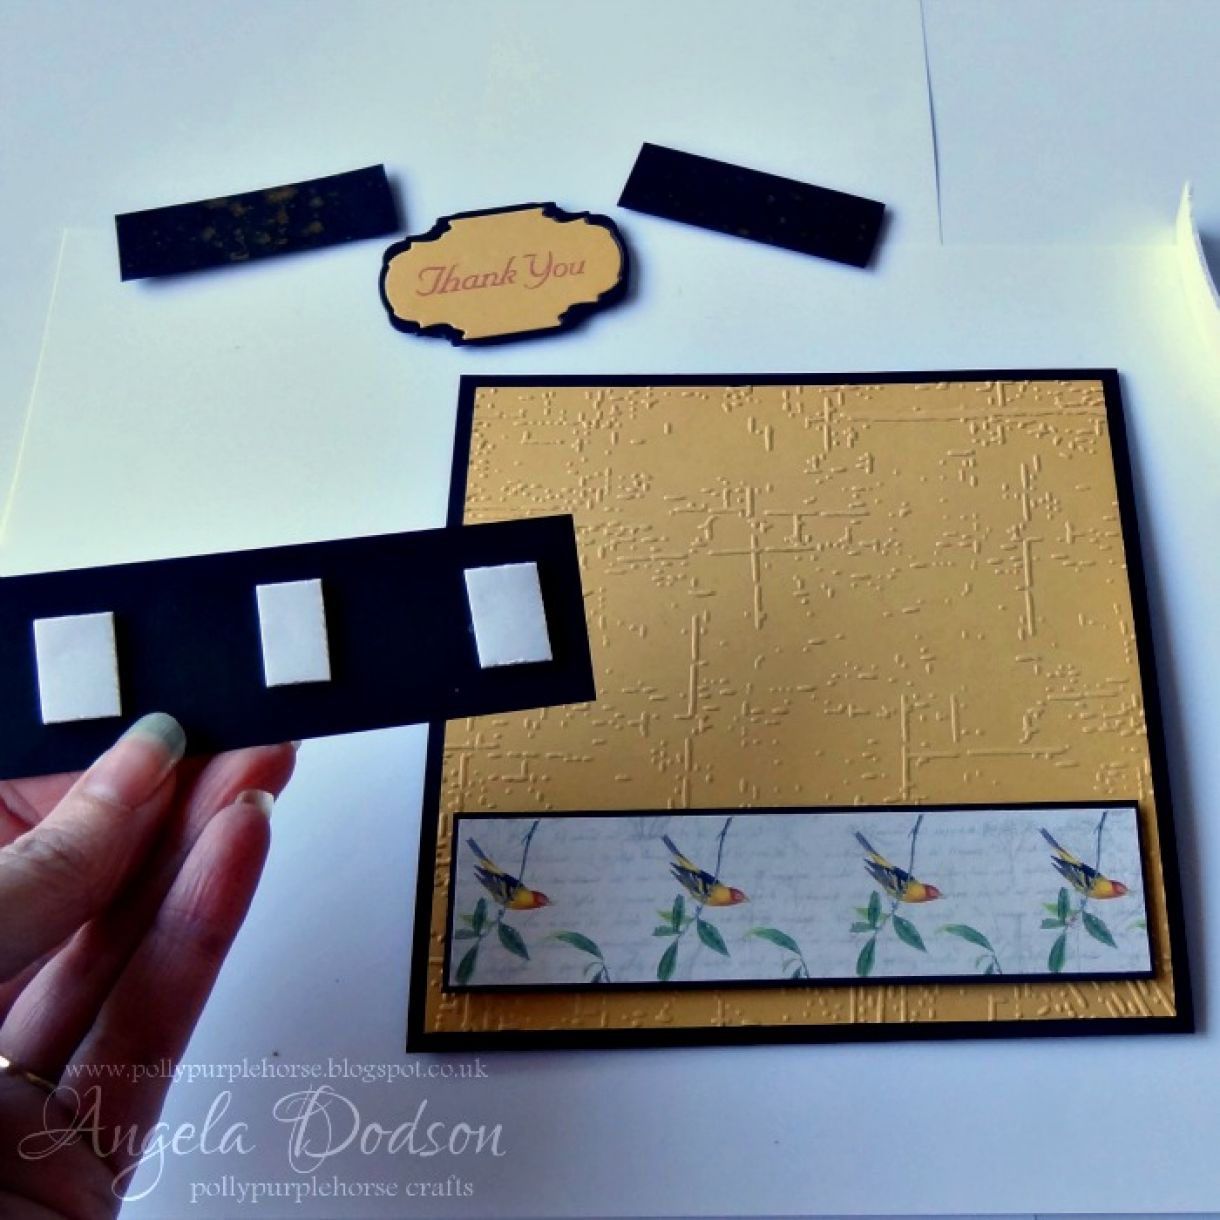
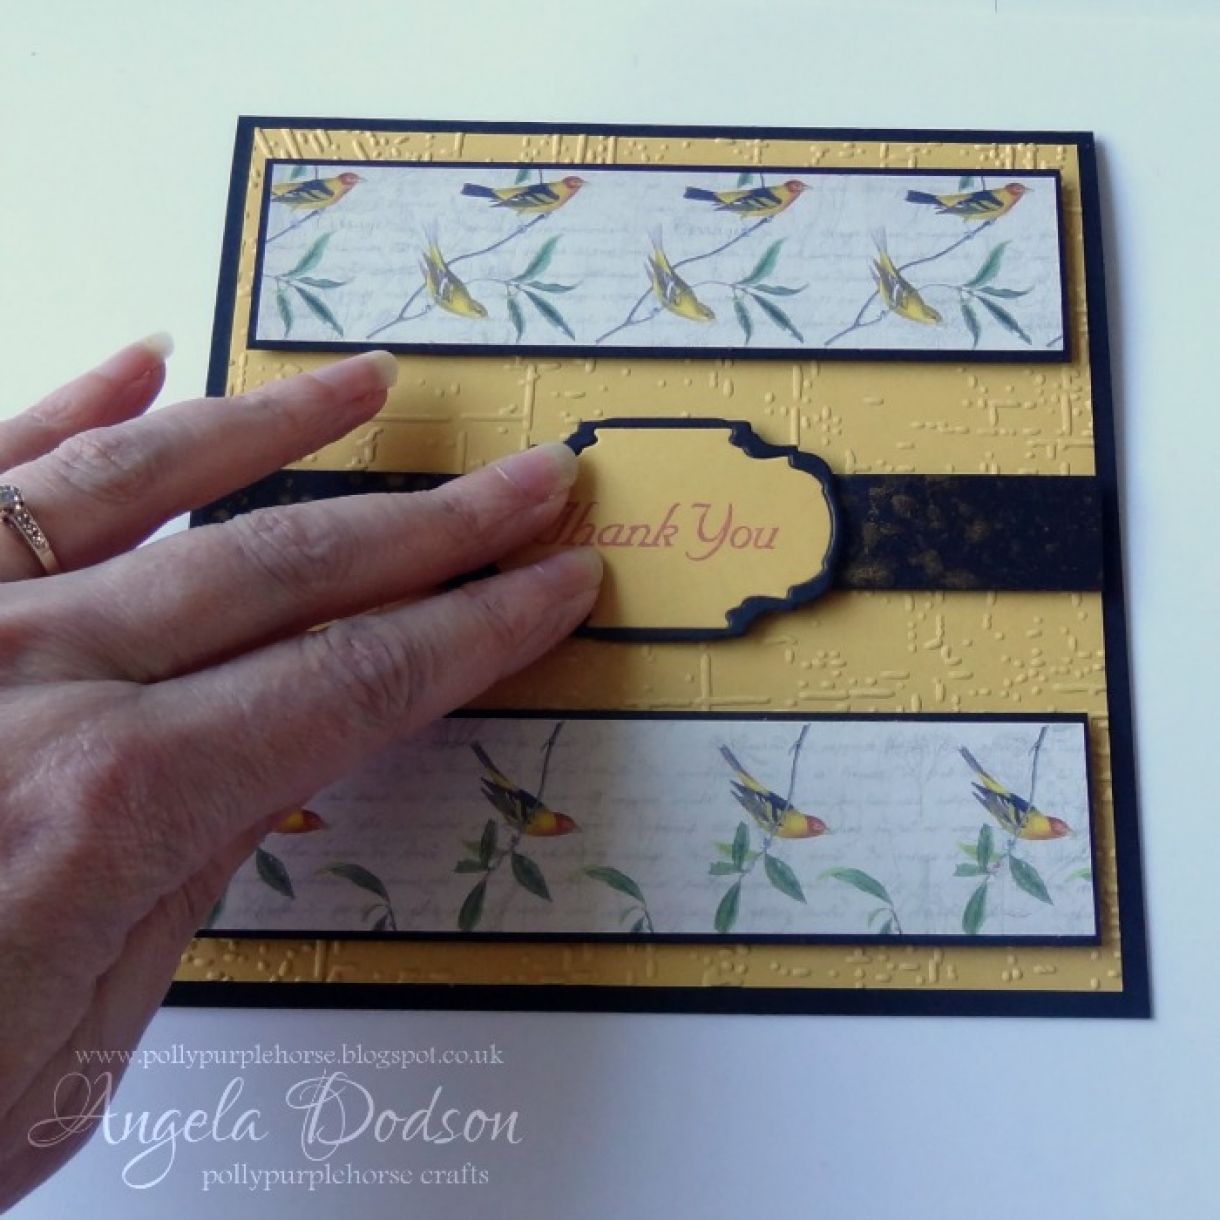
Assemble card as follows: add 3D foam pads or tape to back of paper pattern panels and position bottom one first, then add top panel so that it is equally spaced and lines up with bottom panel.
Add 3D foam pads to black gold sprayed card strip and position across the centre of the card between the patterned panels. Add sentiment to centre using 3D foam to give height.
To finish add black sequins to right of sentiment. I used 2 small and 1 large black sequin and glued in place using cosmic shimmer clear drying glue.
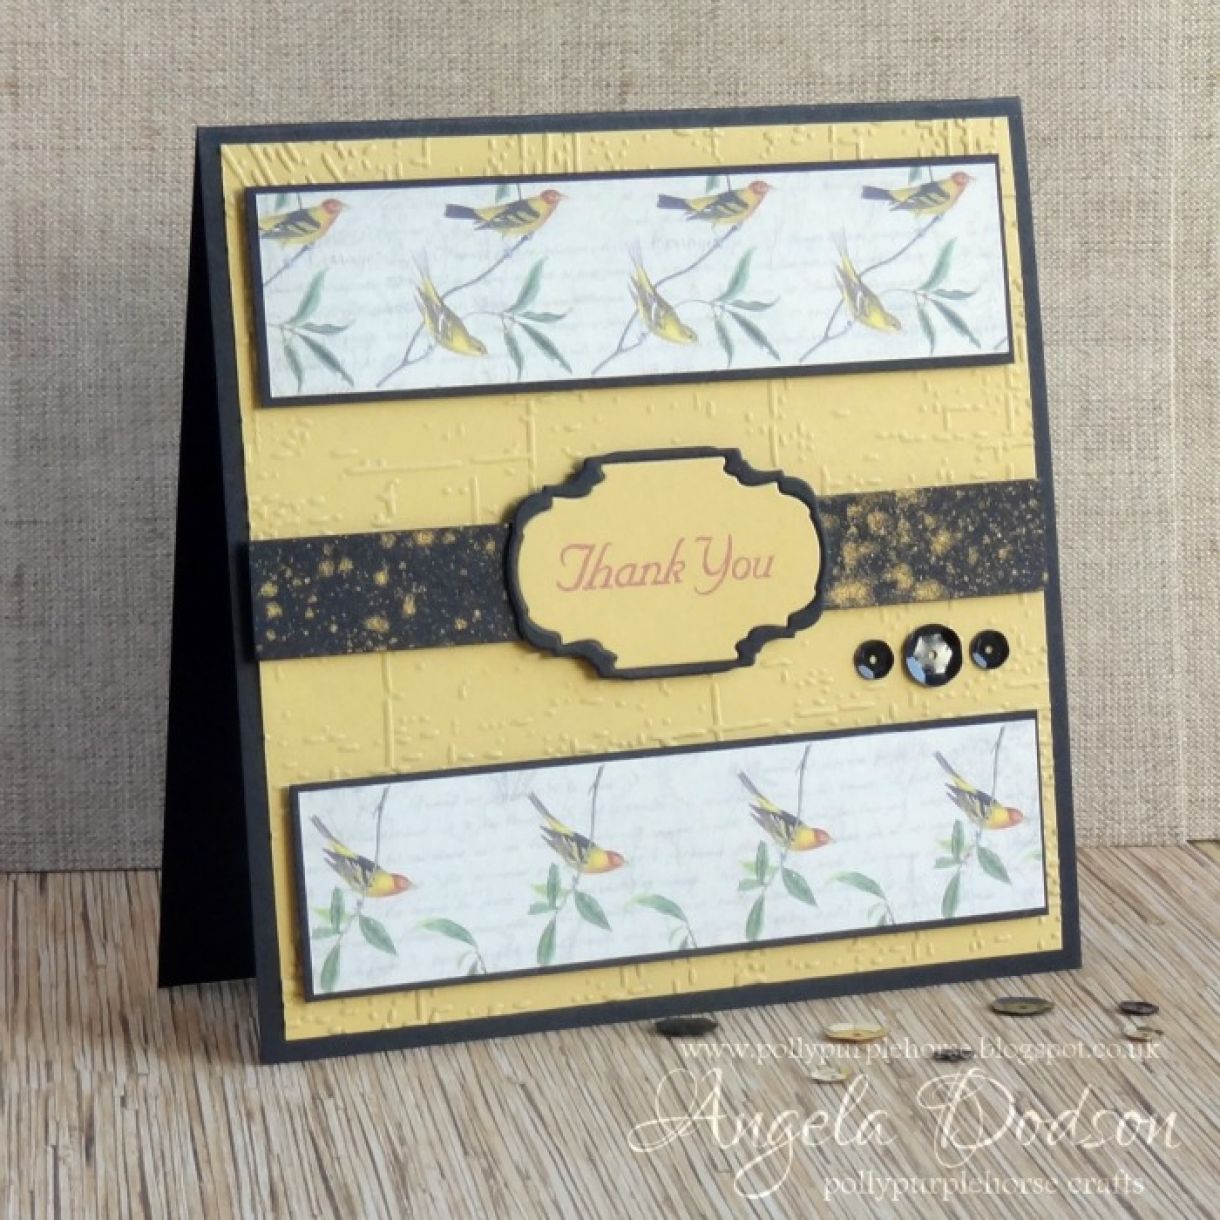
This is a simple card layout and of course you could add different sentiments to the centre to suit other occasions. It also makes use of any pretty paper scraps you may have laying around. The pretty bird paper strips were left over from other projects and way too pretty to discard, they worked well with the PMD Mustard Yellow and Black cardstocks and the addition of height and embossed texture added to the effect.
Materials Used:
Mustard Yellow Offer Card – PMD
Distress Embossing Folder – Textures by Crafters Companion
Botanical Notes 6x6 paper pad – First Edition
Borders, Frames & Buckle Die Set – First Edition
Thank You sentiment stamp – Oak House Studio
Black sequins
Double Sided Tape, 3D Foam Pads (or Tape) Cosmic Shimmer clear drying glue


2 thoughts on “Thank You Card Tutorial”
Jan
04th January 2016 at 11:21 p.m.
Jan
04th January 2016 at 11:11 p.m.