‘Lovely’ Floral Card – Step By Step Tutorial
0
Posted on 24th April 2016 by Angela Dodson
Filed under Card Making Ideas, All Papercraft Tutorials, Projects And Cards By Type
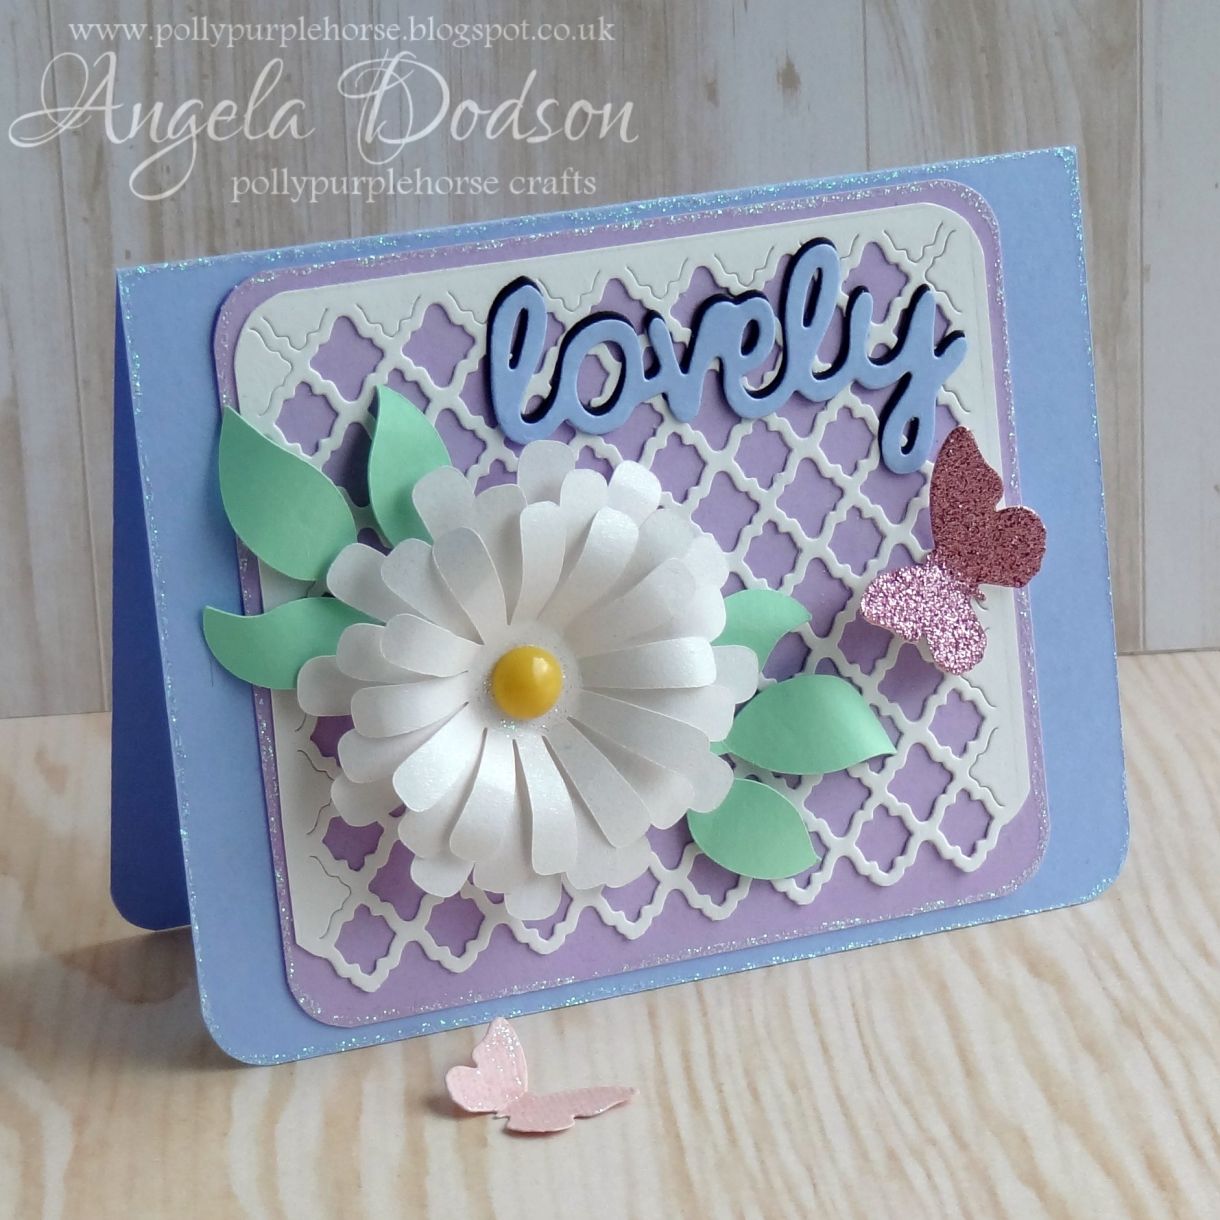
Hello It’s Angela again with another Step By Step Tutorial for you. This week the PMD Design Team are working on the theme of ‘Floral’ and I have a little card design to share featuring a layered Daisy.
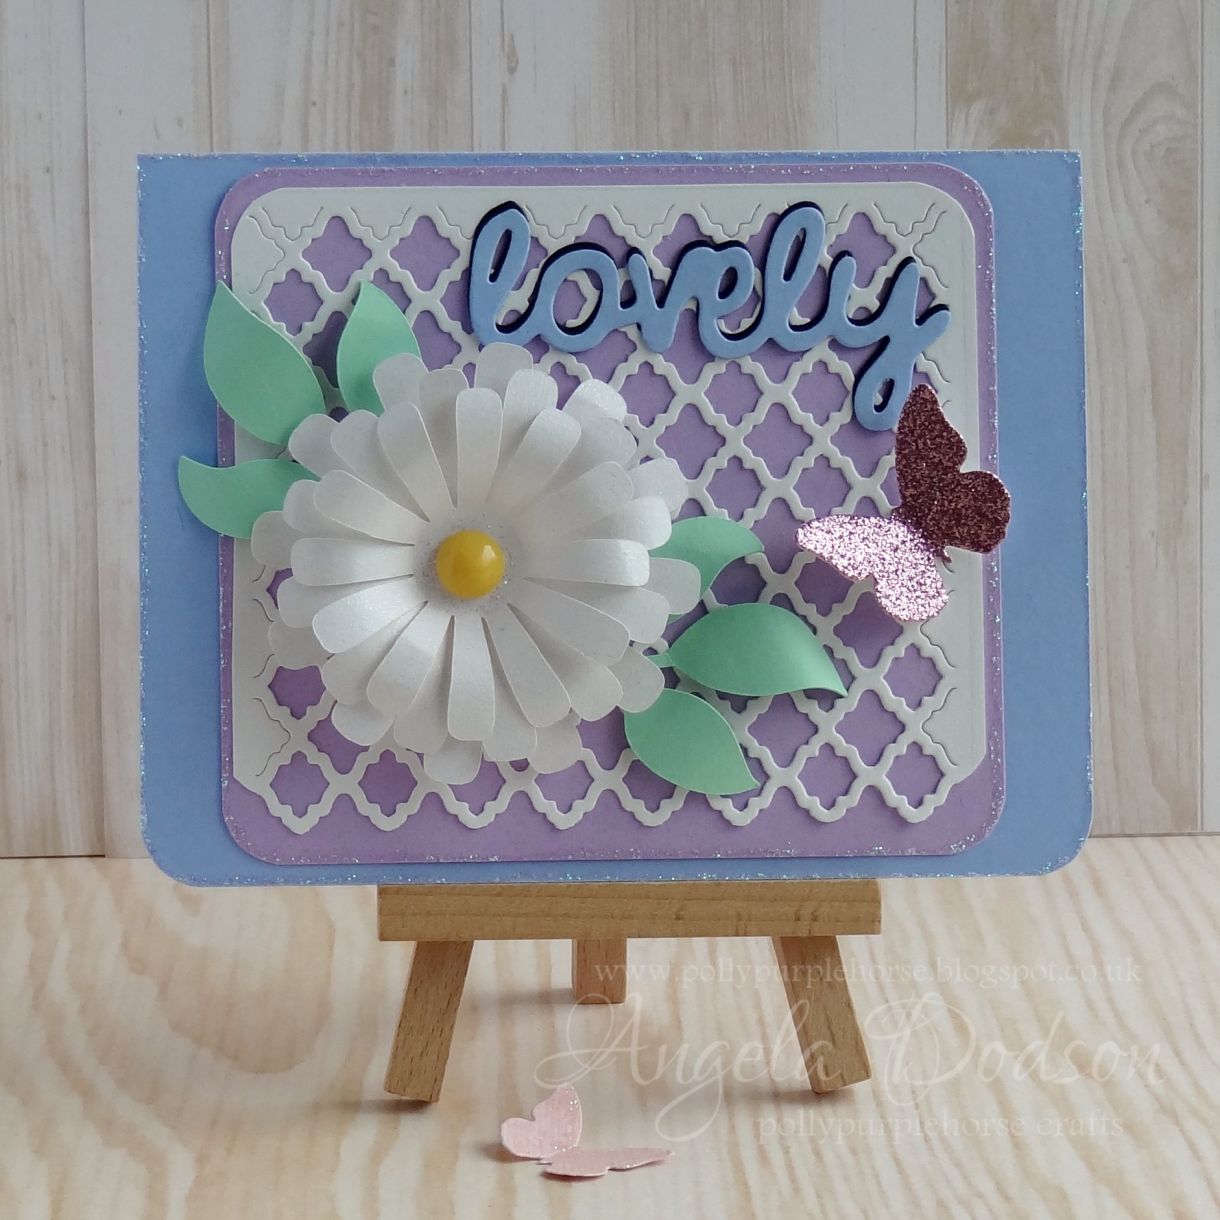
Most crafters have flower dies and sentiments in their stash, along with background dies or embossing folders, so although I used my Cricut Explore (link at end of post) to cut the Daisy flower, it is easy to layer up any of your flower dies or use a flower template or even ready-made paper flowers for a floral make.
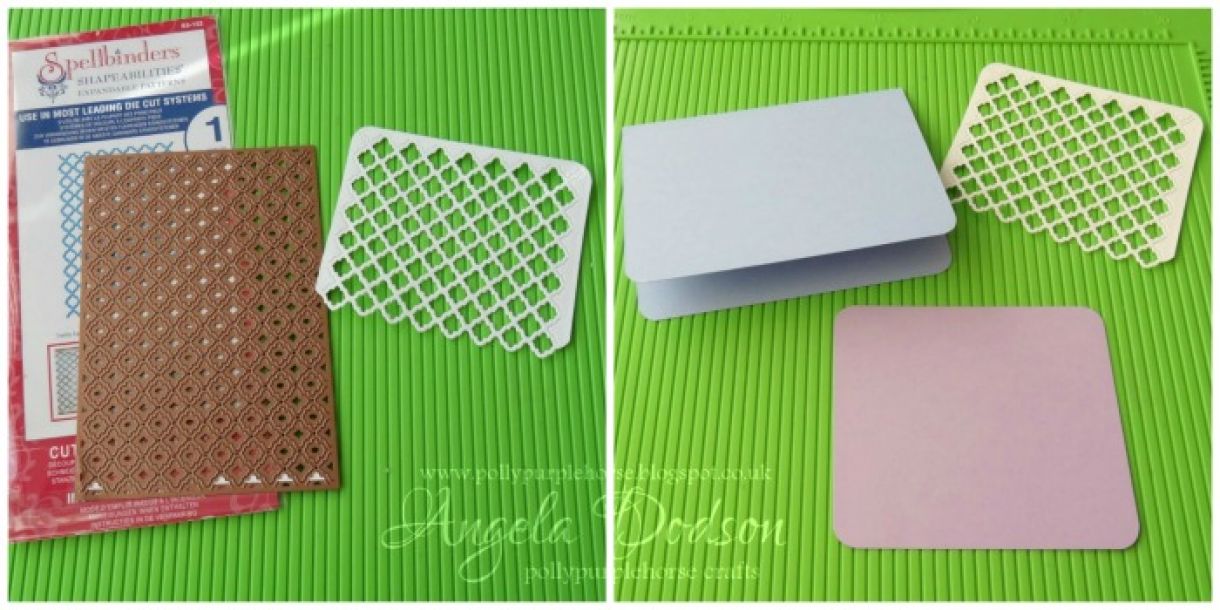
Die cut a trellis style design from Papermilldirect White Pearlised cardstock using a Spellbinders die. (You could use an embossing folder if you prefer). I didn’t need all the piece and so trimmed it down to less than 4” using the pattern as a guide to leave a fancy edge.
The card base is cut from PMD Marine Blue and measures approx. 5 ½” x 4 ¼” and I have rounded the bottom corners. I also cut a panel of PMD New Lilac card to measure approx. 4 ½” x 4” and rounded all 4 corners.
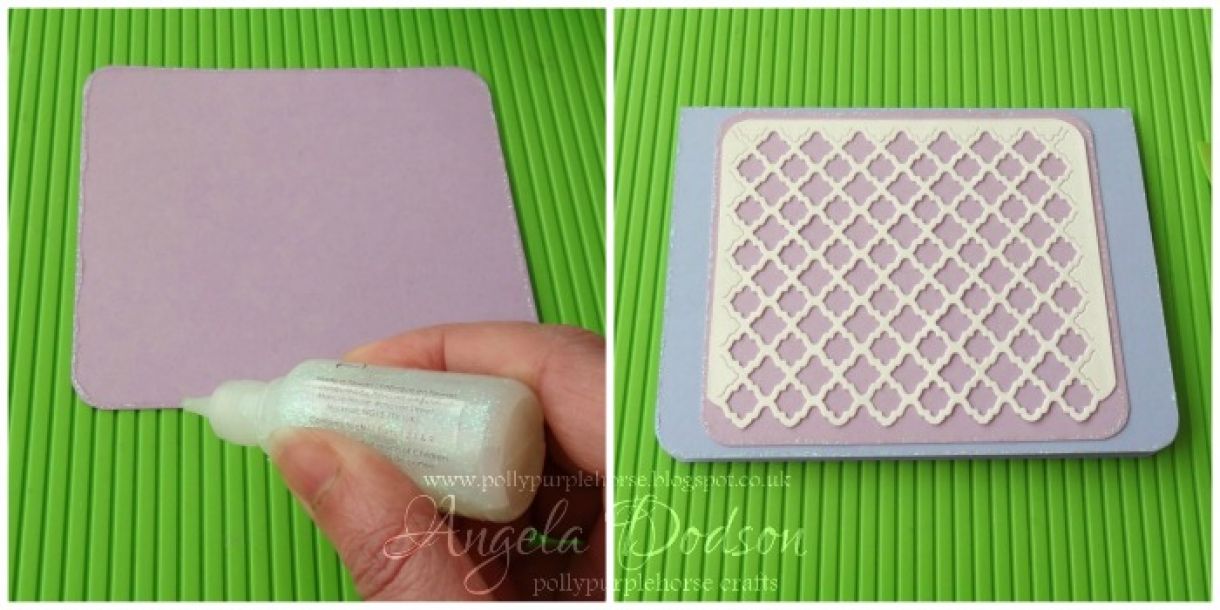
Glitter glue was used to edge the front of the card base and also the New Lilac panel to add a little sparkle.
The Trellis die cut panel was then adhered to the lilac panel using a clear drying acylic glue and then the whole panel was mounted onto the card front using double sided tape.
Cut the flower layers, I used 3 layers to create a daisy style flower using Papermilldirect White Pearlised paper, layering the flower with 3D foam in the centre of each layer. Shape the petals and then glue the flower to the card front, adding some glitter glue in the centre and a yellow enamel adhesive dot.
Cut leaves from PMD Spring Green card and shape to give dimension. Add a little 3D foam pad to the back of each leaf and glue the stem by tucking under the flower, the 3D foam pads will hold the leaves in place.
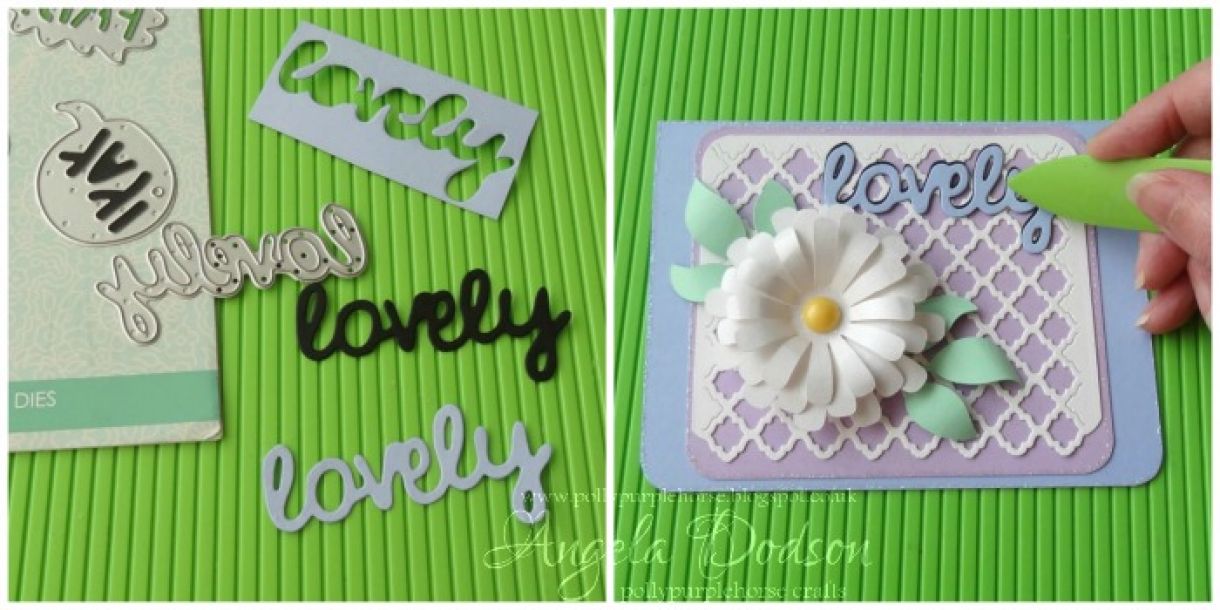
Die cut your sentiment in PMD Black card and PMD Marine Blue Card. I have used the word ‘Lovely’ from a First Edition die set. Layer the sentiments up using a clear drying glue, offsetting the Marine Blue one so that the black gives a shadow effect.
Glue the sentiment in place on the card front and smooth down using a bone folder or crease tool to ensure it is adhered onto the trellis work.
To finish add a little butterfly embellishment.
Using the Papermilldirect Pearlised card and paper adds a lovely sheen to your makes and I especially like the paper for diecutting flowers as it gives a delicate look that can be easily shaped yet retains a lot of strength. It also is a dream to cut on Cricut Explore where it cuts very cleanly.
Materials Used:
Marine Blue, New Lilac, Spring Green, Black coloured cardstocks – Papermilldirect
Ultra White Pearlised Paper, Ultra White Pearlised Card – Papermilldirect
‘Fancy lattice’ Shapeabilities #S5-152 - Spellbinders
‘Modern Sentiments’ #FEDIE038 – First Edition
Adhesives: D/S Tape, 3D Foam Pads, Cosmic Shimmer Glue
Glitter Glue, Adhesive Enamel Dot


Nobody has commented yet
Be the first to comment on this article by using the form below.