A Spring Card -Step by Step Tutorial
4
Posted on 25th February 2017 by Angela Dodson
Filed under Card Making Ideas, All Papercraft Tutorials, Seasonal Crafts, Seasonal Crafts, Seasonal Crafts, Seasonal Crafts, Seasonal Crafts, Seasonal Crafts, Seasonal Crafts, Seasonal Crafts, Seasonal Crafts, Mothers Day Crafts, Easter Craft Ideas
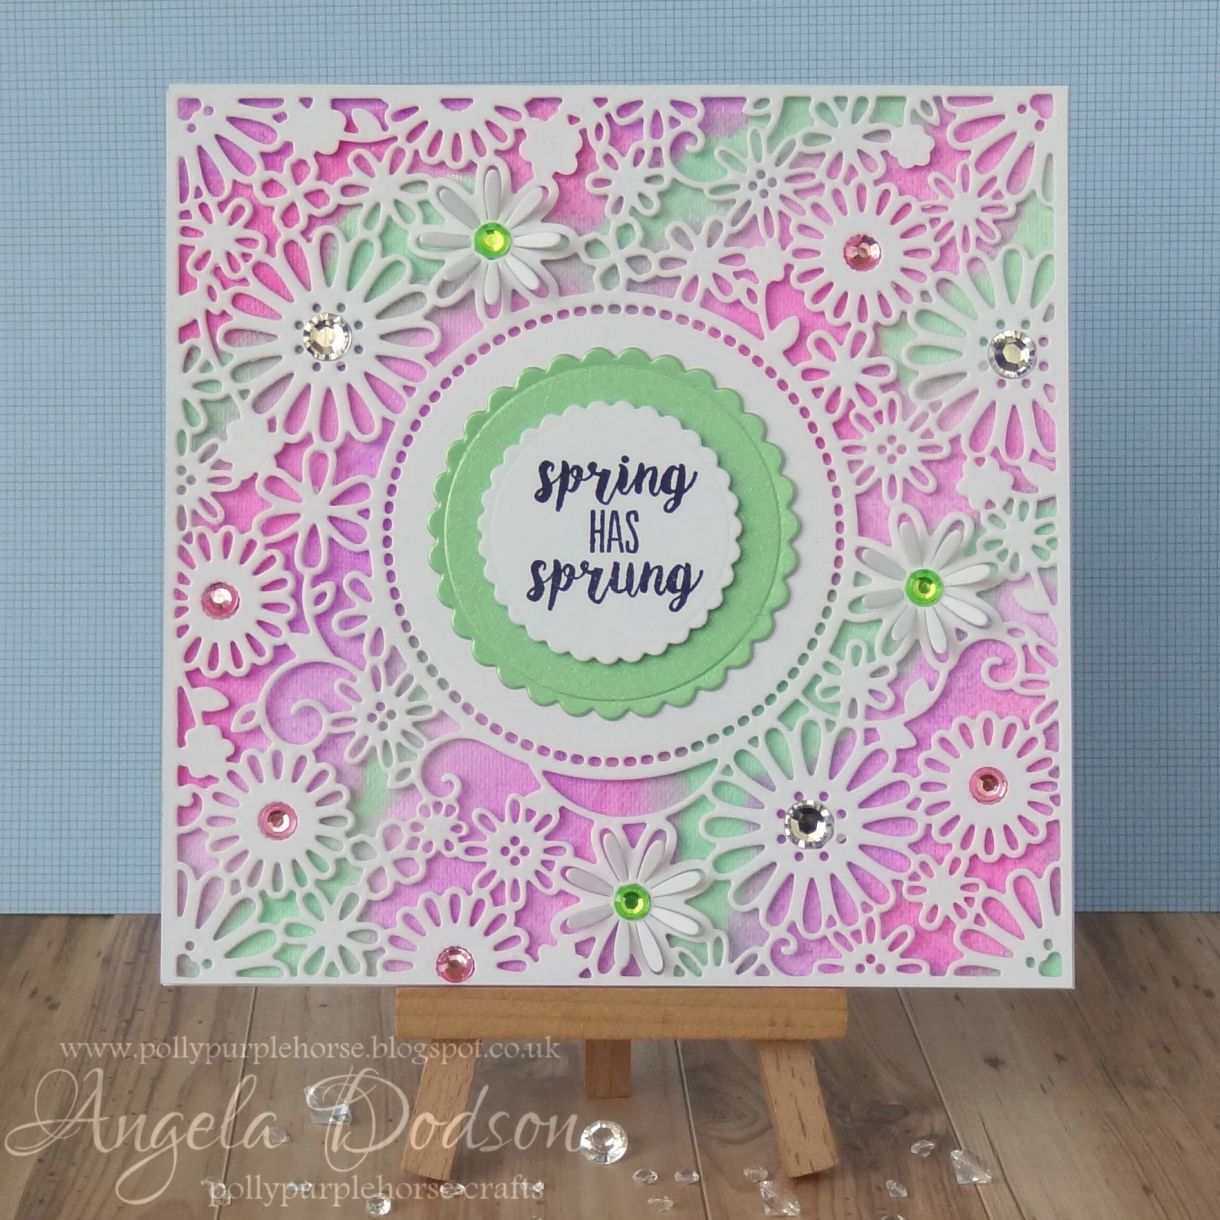
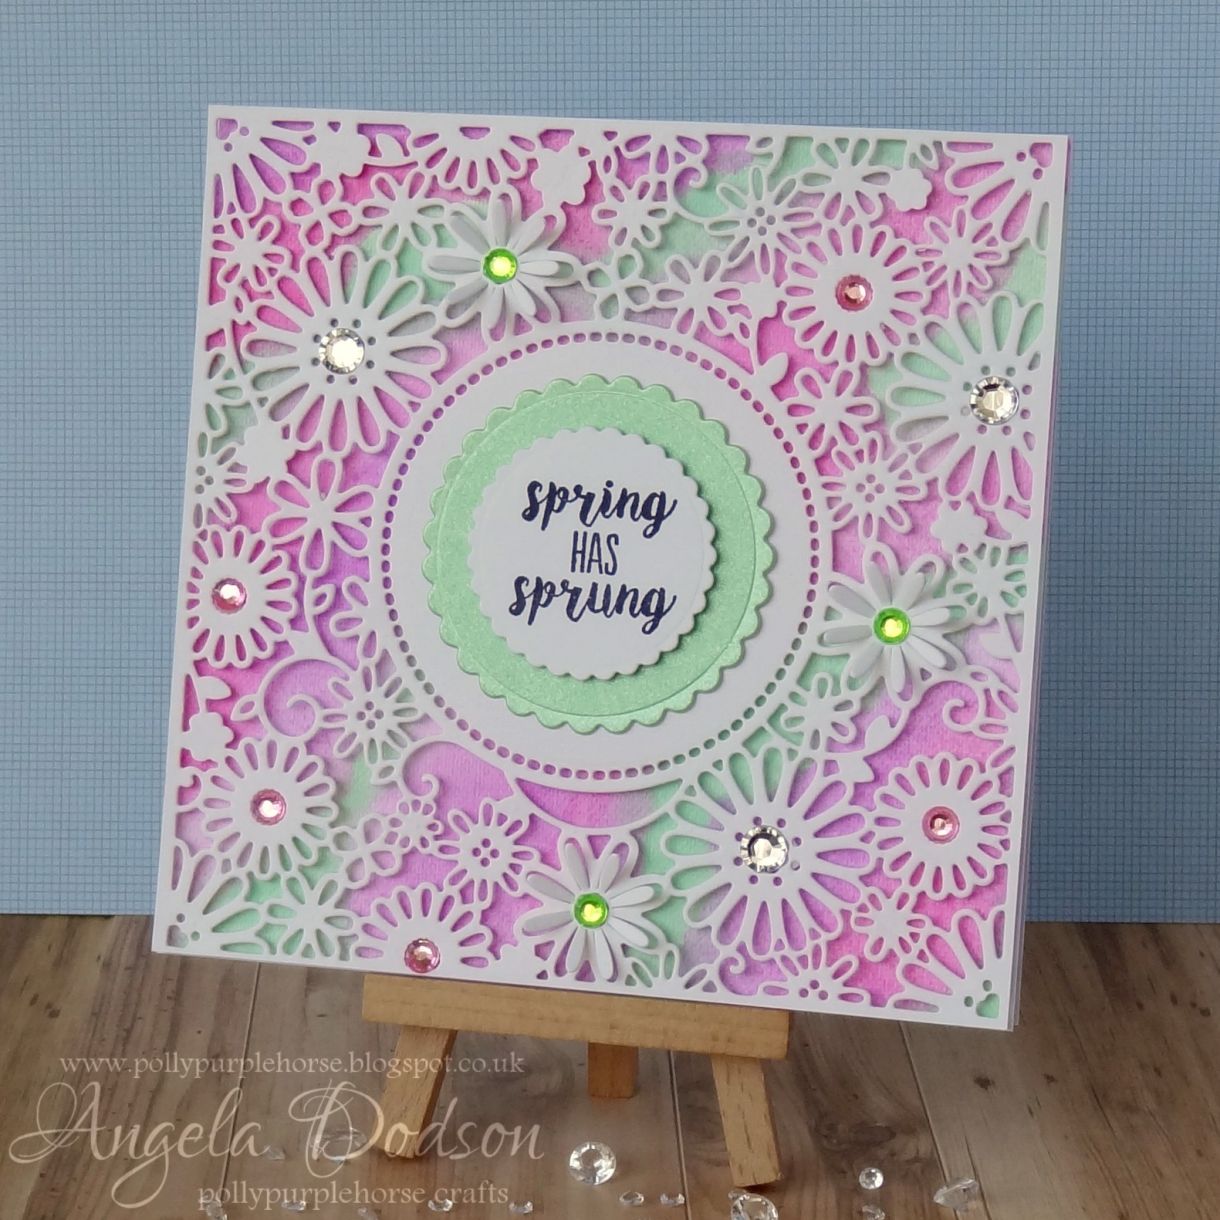
Hello, it’s Angela here to share a new step-by-step with you, this time a Spring card to tie in with the brand new ‘Hello Spring’ craft challenge from Papermilldirect! My favourite Spring colours are pretty pinks, lilacs and bright spring greens and so I’ve chosen these colours alongside white card to make them pop.
Step By Step:
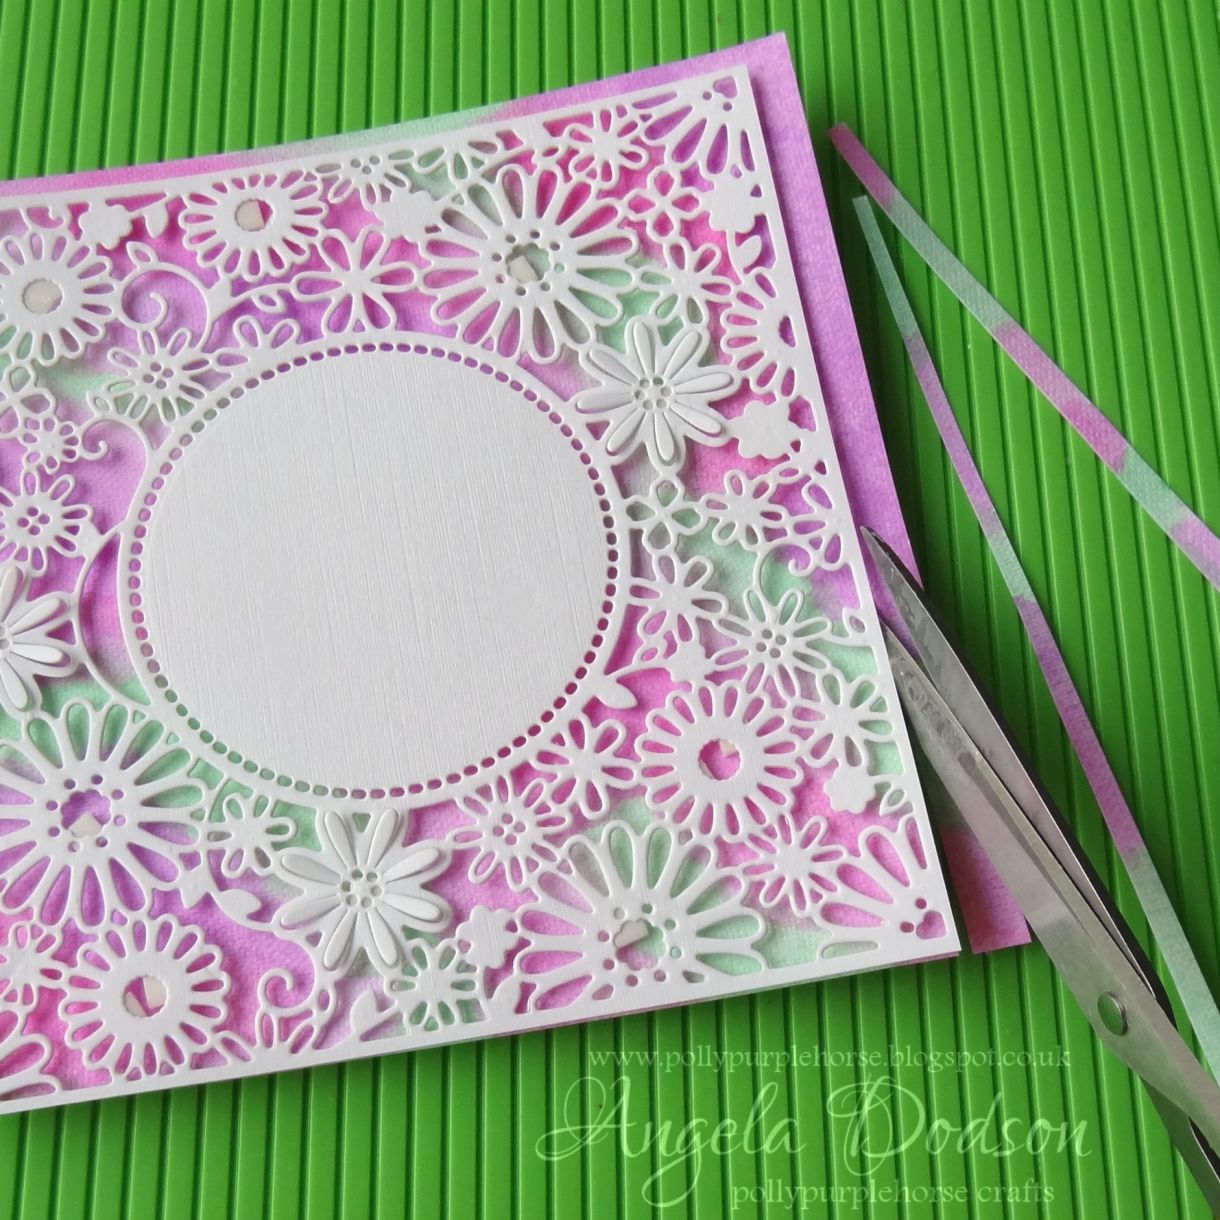
Start by cutting the ‘flowers’ create a card die from Papermilldirect white card, I am using PMD White Linen as I love the texture. Remove all the waste bits of card and set panel aside for later. (I like to cut the white card first before I get inky fingers!)

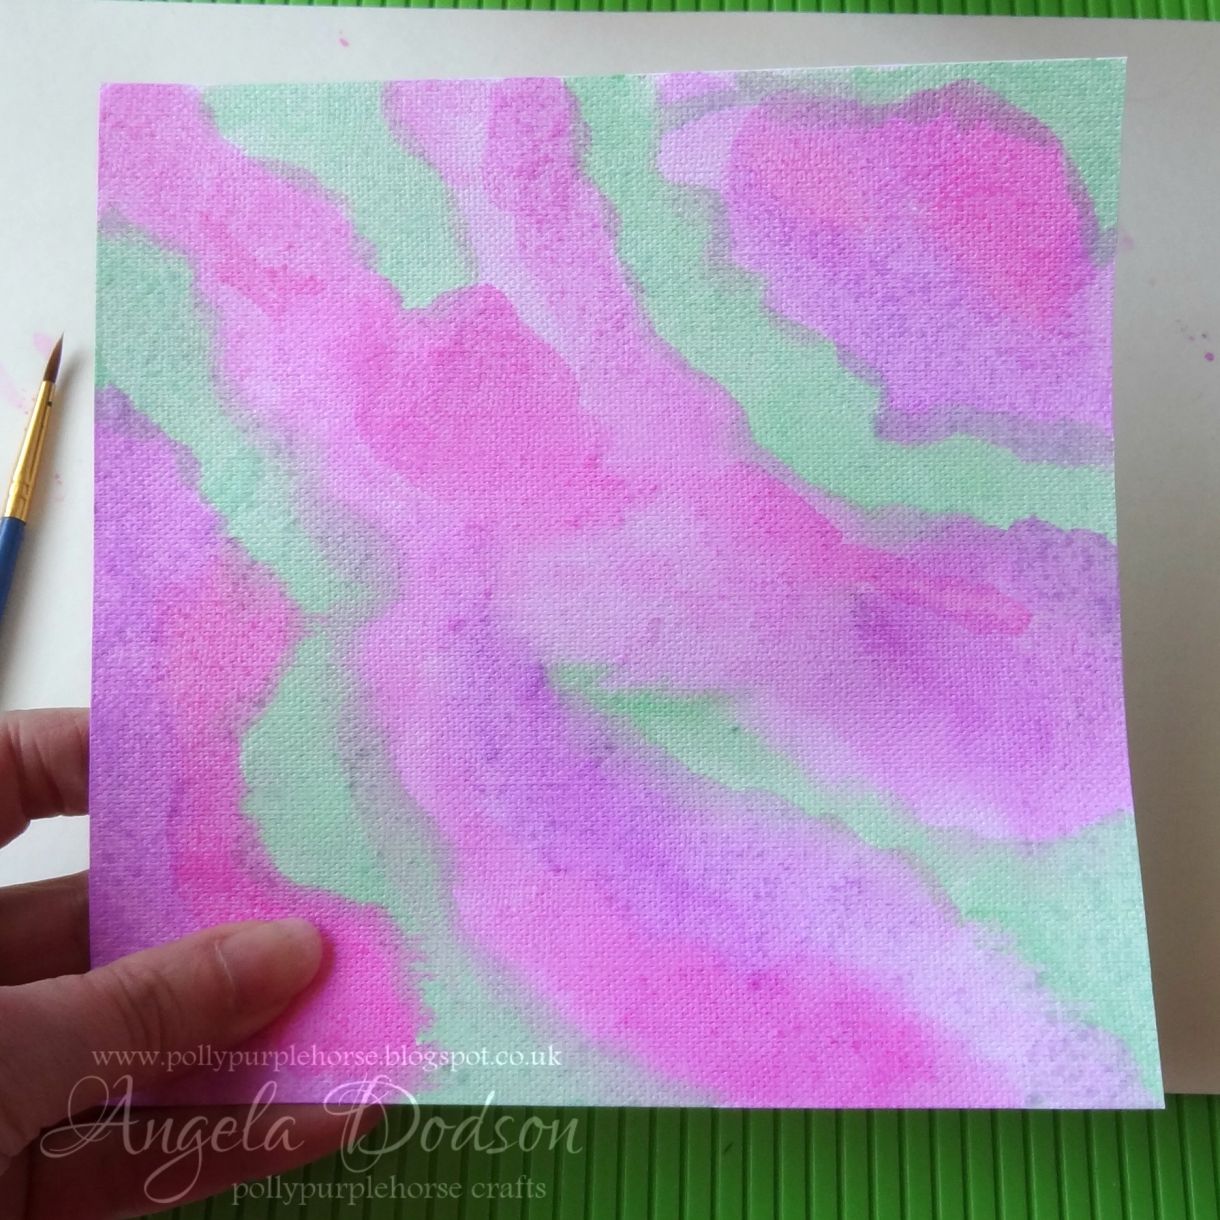
Take a piece of PMD white card a bit bigger than the die cut panel, (As I am using watercolour inks I’ve chosen PMD White Hopsack card) Add random swashes of ink using water brushes to cover the panel. I am using Oak House Studio Colour Chemistry Inks in Paris Pink, French Lavender, and Bramley Apple colours. Leave the panel to dry naturally, or use a heat gun for speed.
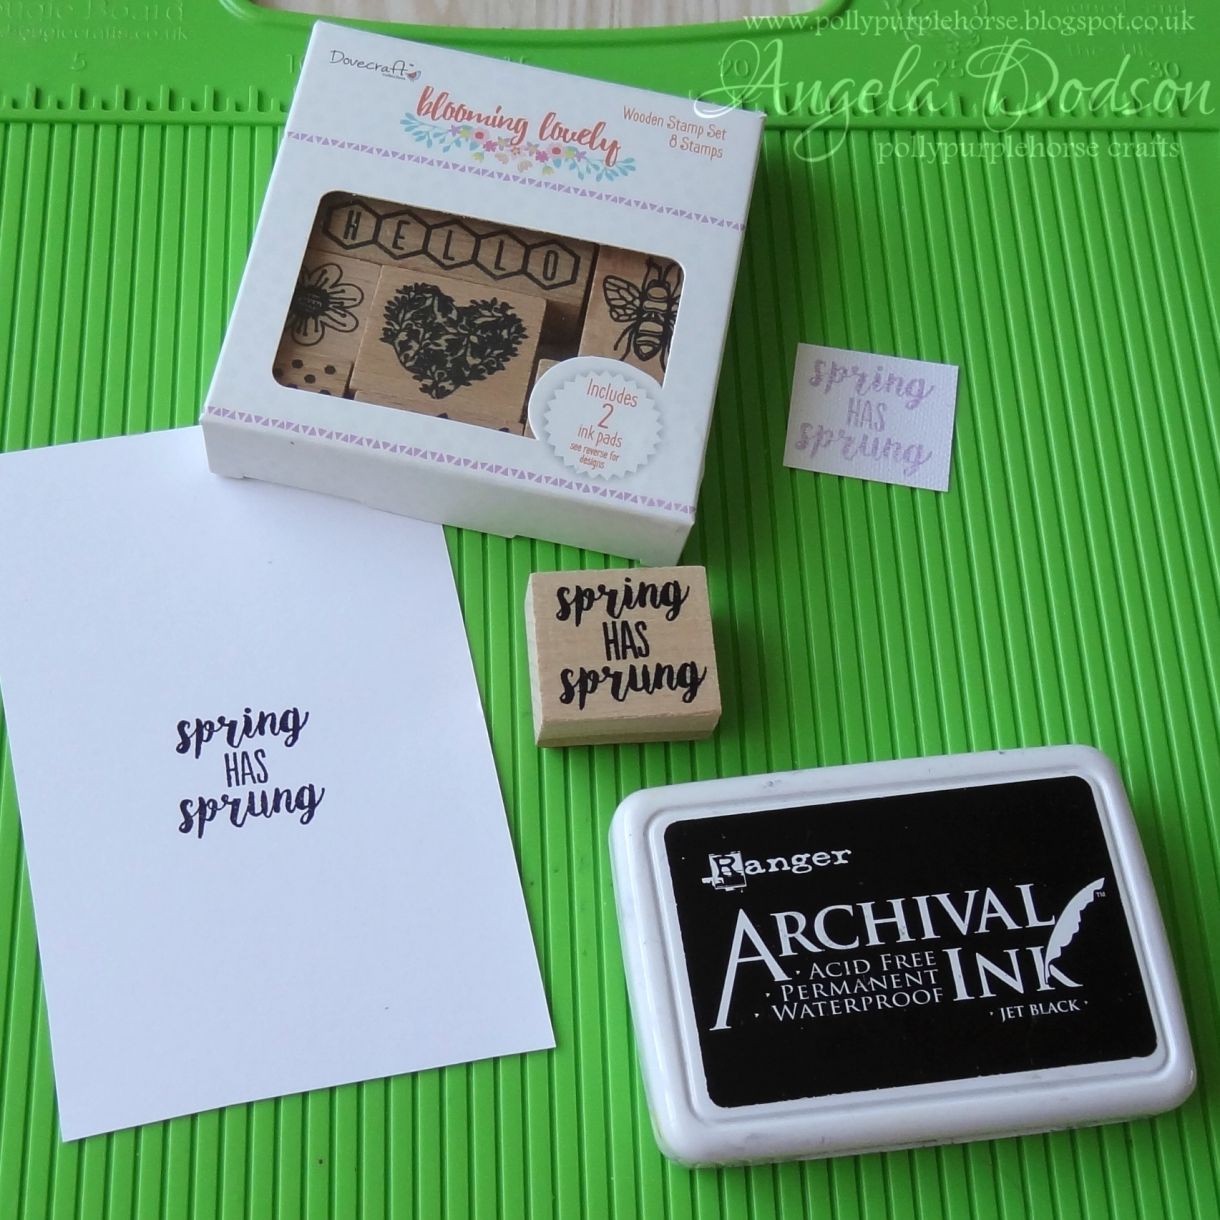
Stamp the sentiment ‘Spring has Sprung’ in black Archival ink onto PMD white card, I’m using the back of a piece of PMD White Linen card.
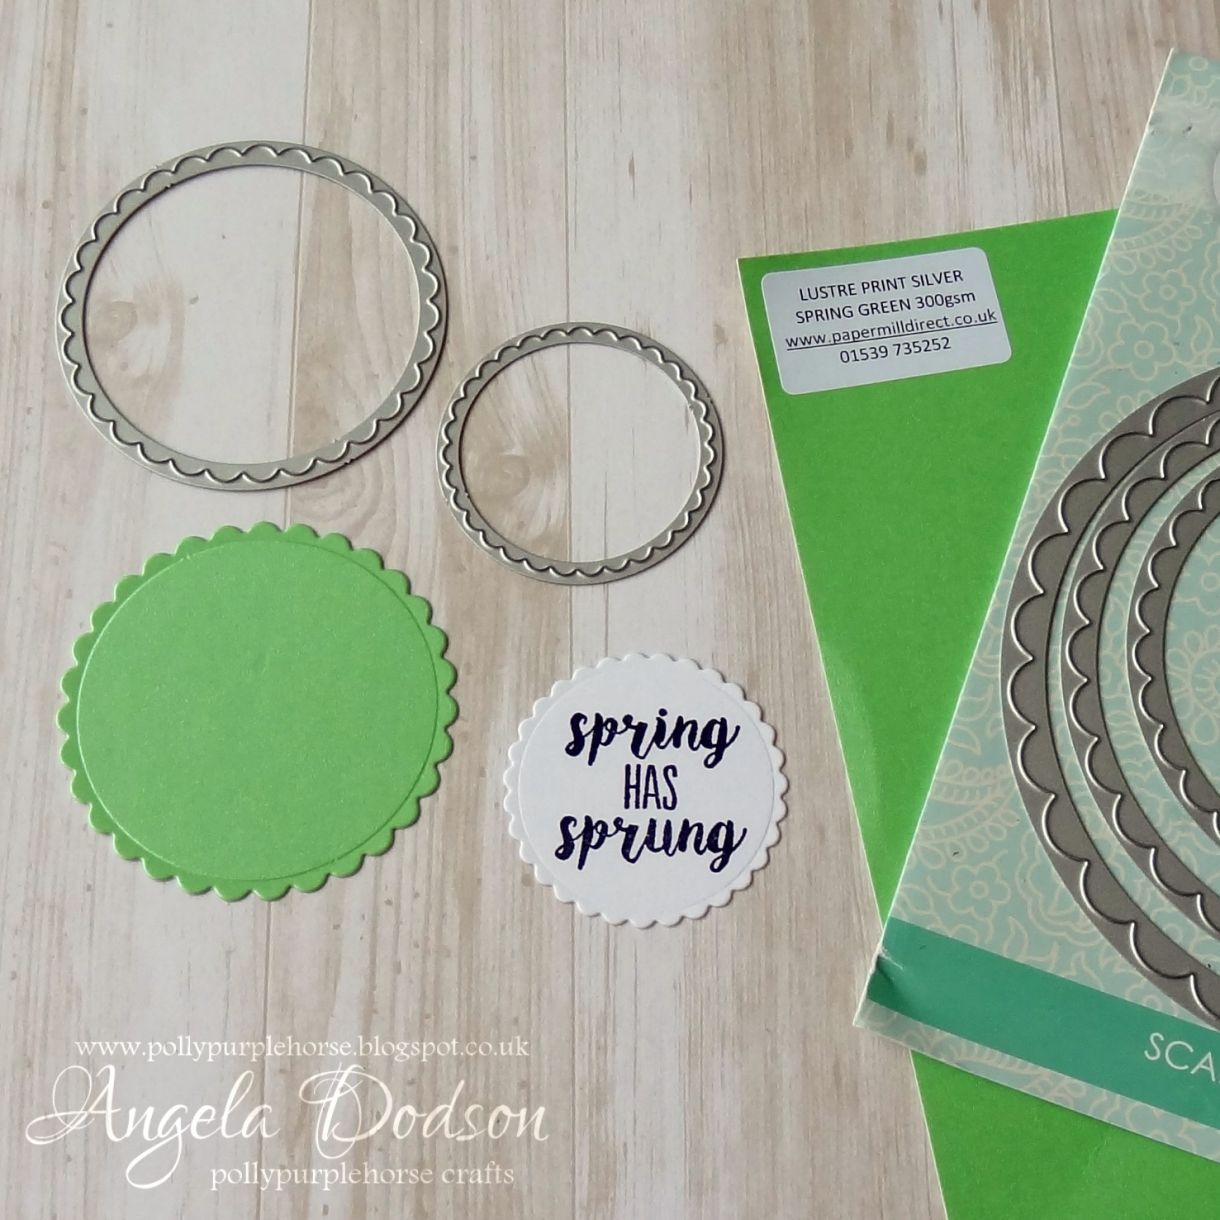
Use nesting circle dies to cut out the sentiment, then cut the next size up circle from PMD Spring Green Lustre Print Silver card which is a nice match for the ink.
Take die cut panel and place against (dried) inked background, decide where to place it and trim background panel to size of die cut panel.
Create a card base by scoring & folding PMD white card and trimming down to create an approx. 15cm square card base. (Either adhere background panel now to card front or wait and add the matted panel to card front when it's already layered).
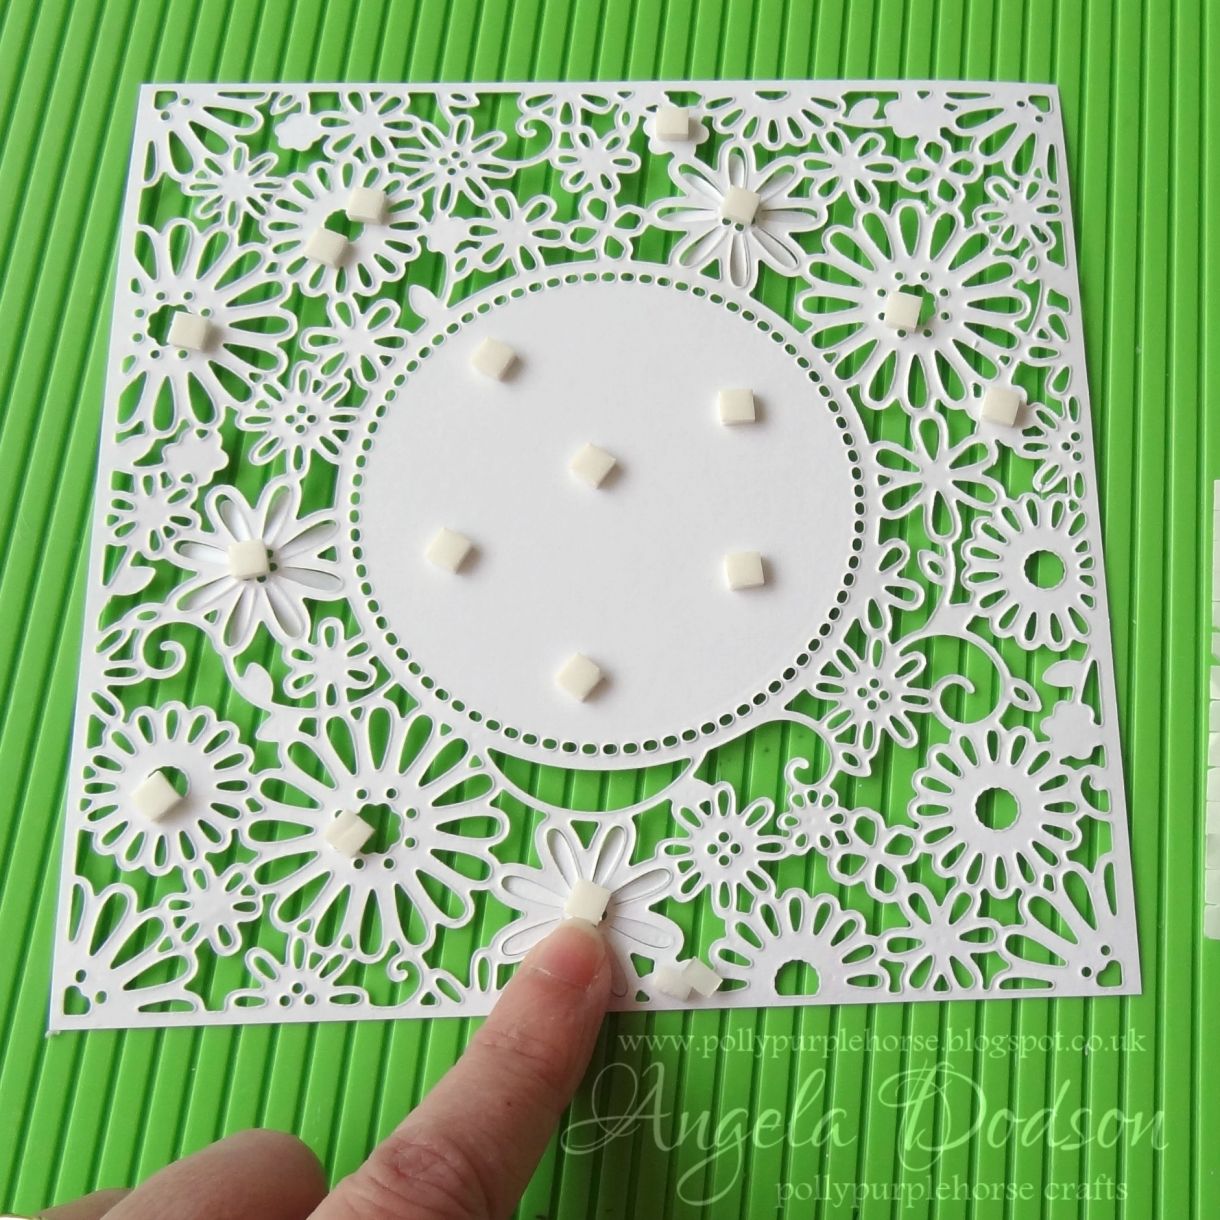
Add 3D foam pads to back of die cut panel, you can place them behind the big flowers too as these will be hidden by gems later.
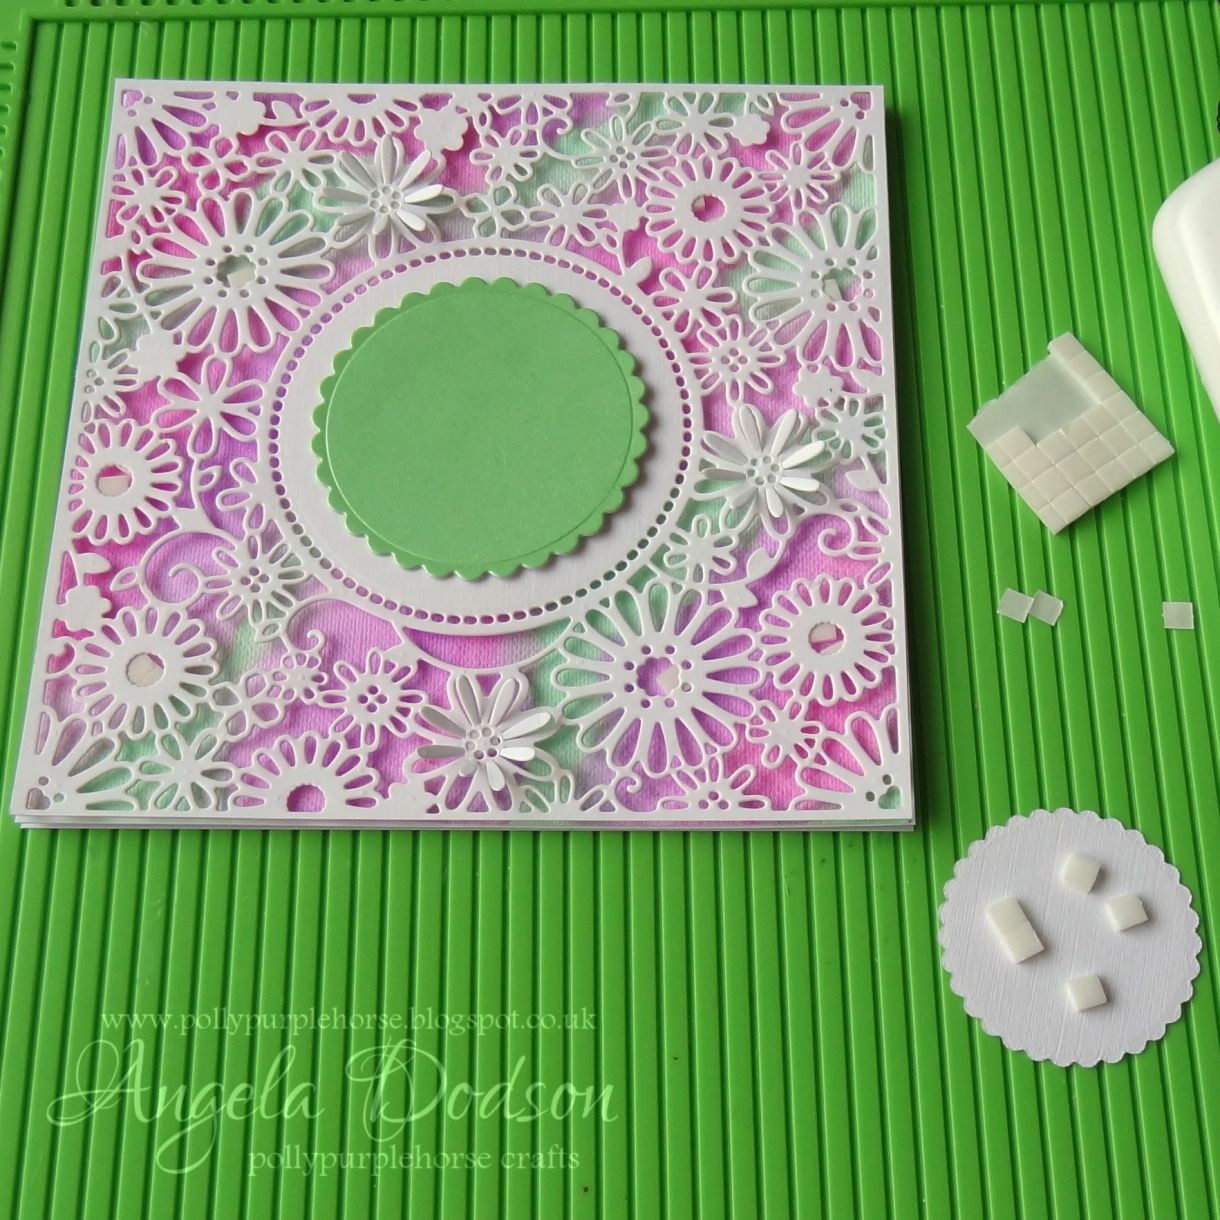
Carefully place die cut panel onto inked background panel so it lines up before pressing firmly down to secure the foam pads.Glue Spring Green die cut circle into the centre and add the sentiment circle on top using 3D foam pads to give height.
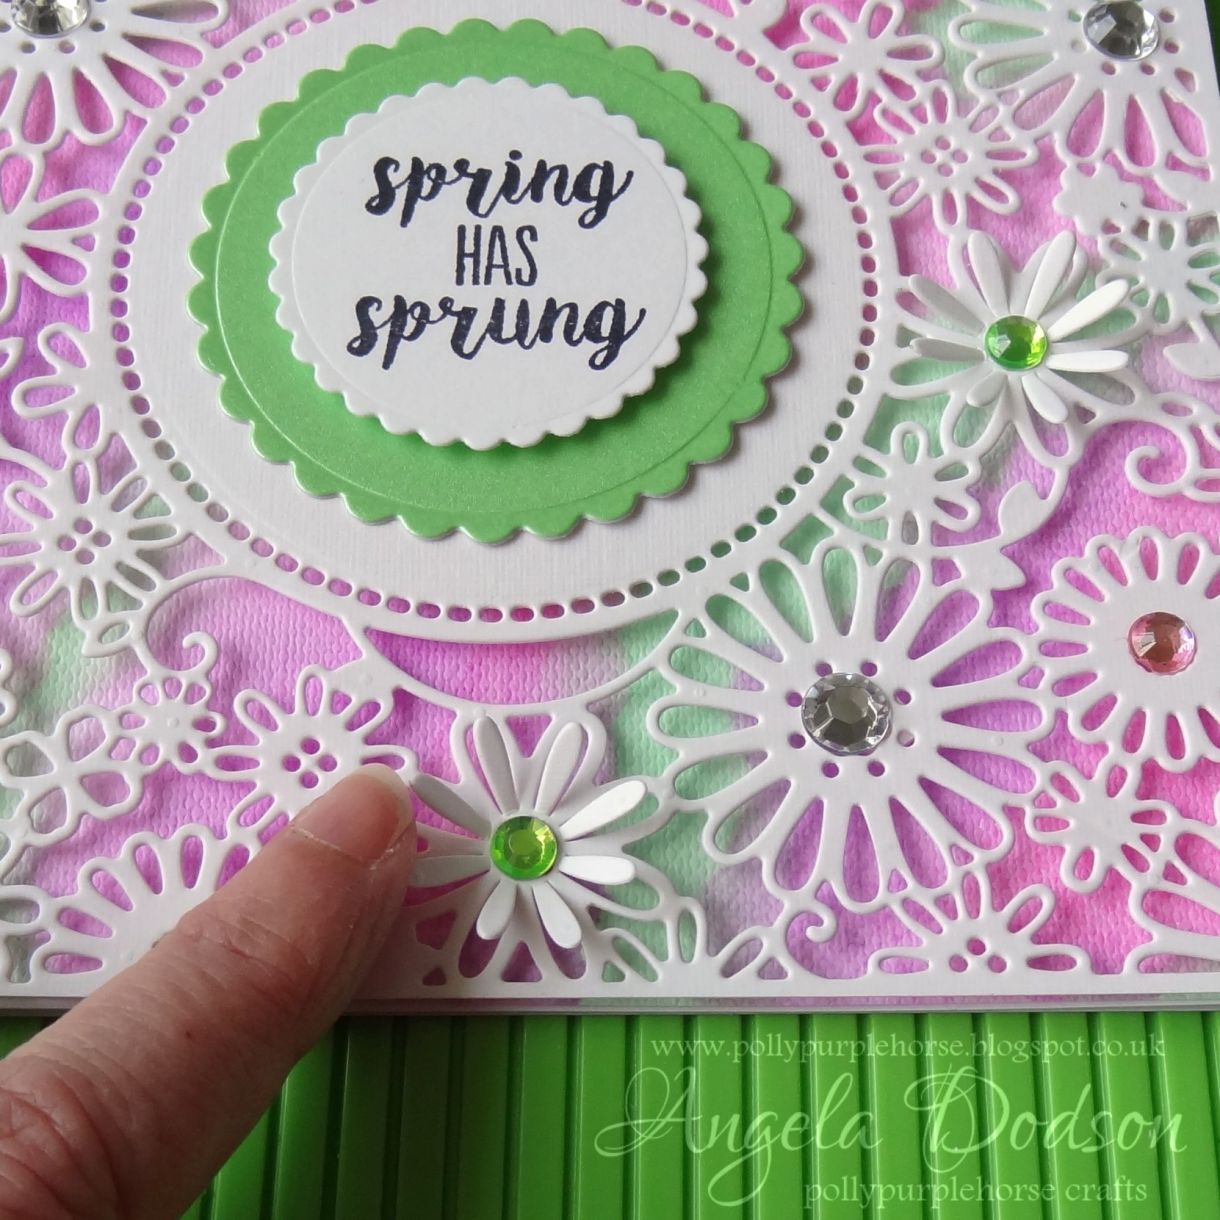
To finish, add adhesive gems to flower centres in clear, light pink and light green colours. There are also 3 large flowers on the die cut panel that have petals that can be lifted and prised outwards to create extra interest.
This card would work equally well using a different set of Spring Colours, perhaps lemons and blues? Don't forget to share your makes over on the facebook page or why not enter a spring card or papercraft project in the new' Hello Spring' craft challenge?
Angela
Materials Used:
White Linen Card - Papermilldirect
Value White Card 300gsm - Papermilldirect
White Hopsack Card 255gsm - Papermilldirect
Spring Green Lustre Print Silver 300gsm - Papermilldirect
Watercolour Inks: Paris Pink, French Lavender, Bramley Apple – Oak House Studio
Dies: Craft a Card 6x6 Flowers die, Scalloped Circle Dies - First Edition
Stamp: from Blooming Lovely set – Dovecraft
Ink: Jet Black Archival Inkpad - Ranger
Adhesives: D/S Tape, 3D Foam pads, Clear Drying Glue
Embellishments: Adhesive Gems in Clear, light pink, light green – Dovecraft


4 thoughts on “A Spring Card -Step by Step Tutorial”
Angela Dodson
04th March 2017 at 12:16 p.m.
Angela Dodson
04th March 2017 at 12:13 p.m.
Margaret Naine
28th February 2017 at 5:37 p.m.
Donna Joy
28th February 2017 at 12:30 a.m.