Handmade paper rose tutorial
0
Posted on 7th March 2017 by STACEY BONE
Filed under All Papercraft Tutorials, Seasonal Crafts, Valentines Day Crafts, Mothers Day Crafts, Projects And Cards By Type, Wedding Stationery

Hi everyone,
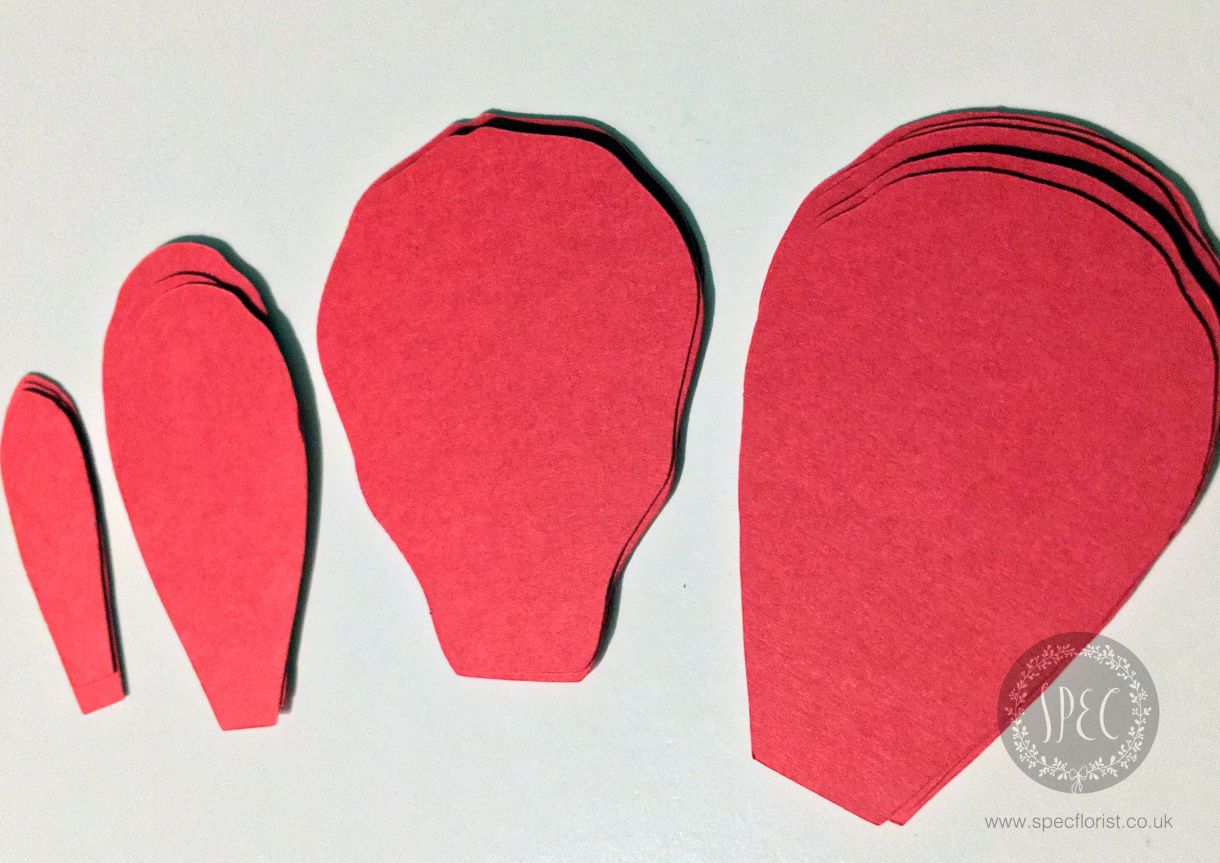
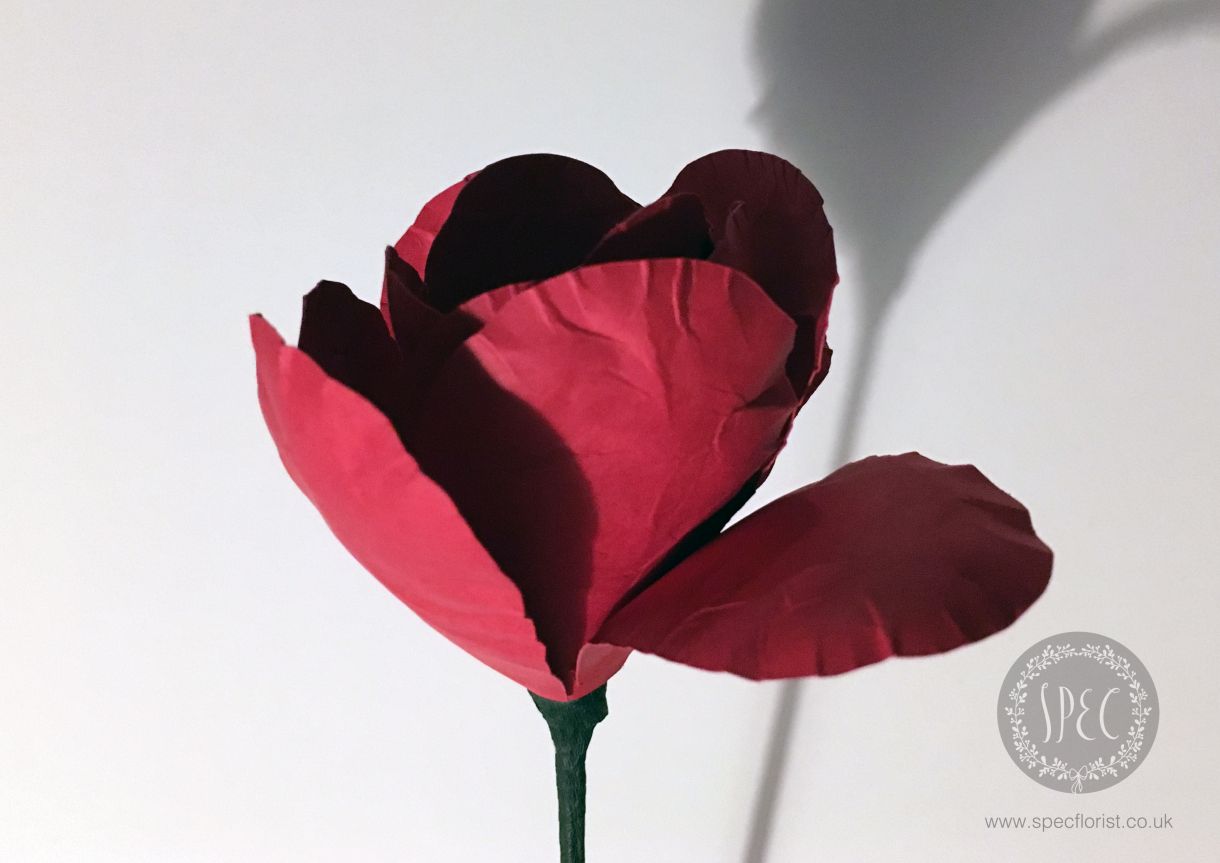
The big day is fast approaching and we’ve decided to add the giving of a rose to our wedding vows. A rose is considered to be a symbol of love and a single rose has always meant one thing, “I love you”. Being the flower crafter that I am I thought it would be a great feature to add to our wedding and like all the flowers for our wedding, the roses will be made from paper. I thought I’d share with all you lovely people the crafting behind one of the roses. I’ve chosen to create a large rose so my petals are not your standard size.
The materials used to create the roses:
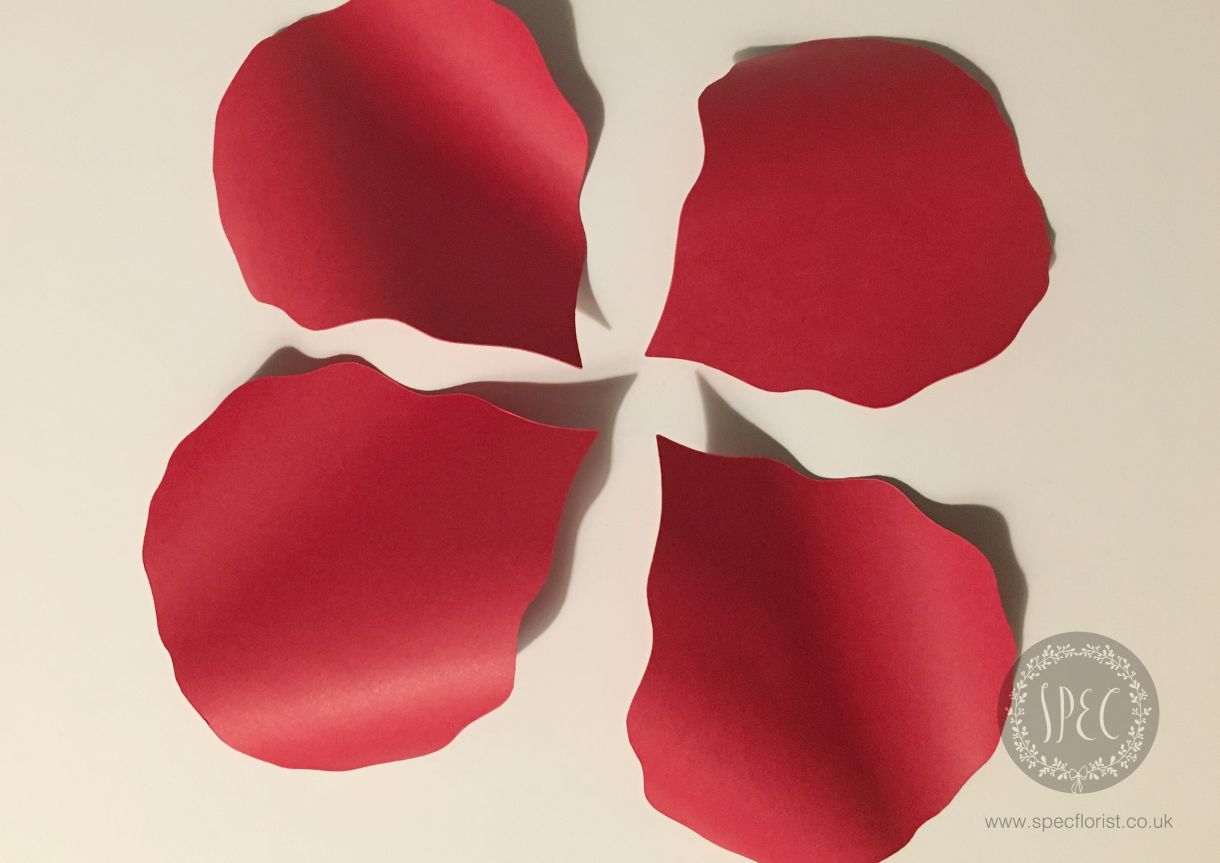
- Intensive Red Plain Card 160gsm
- Floral wire
- Floral tape
- Glue gun
- Embossing tools
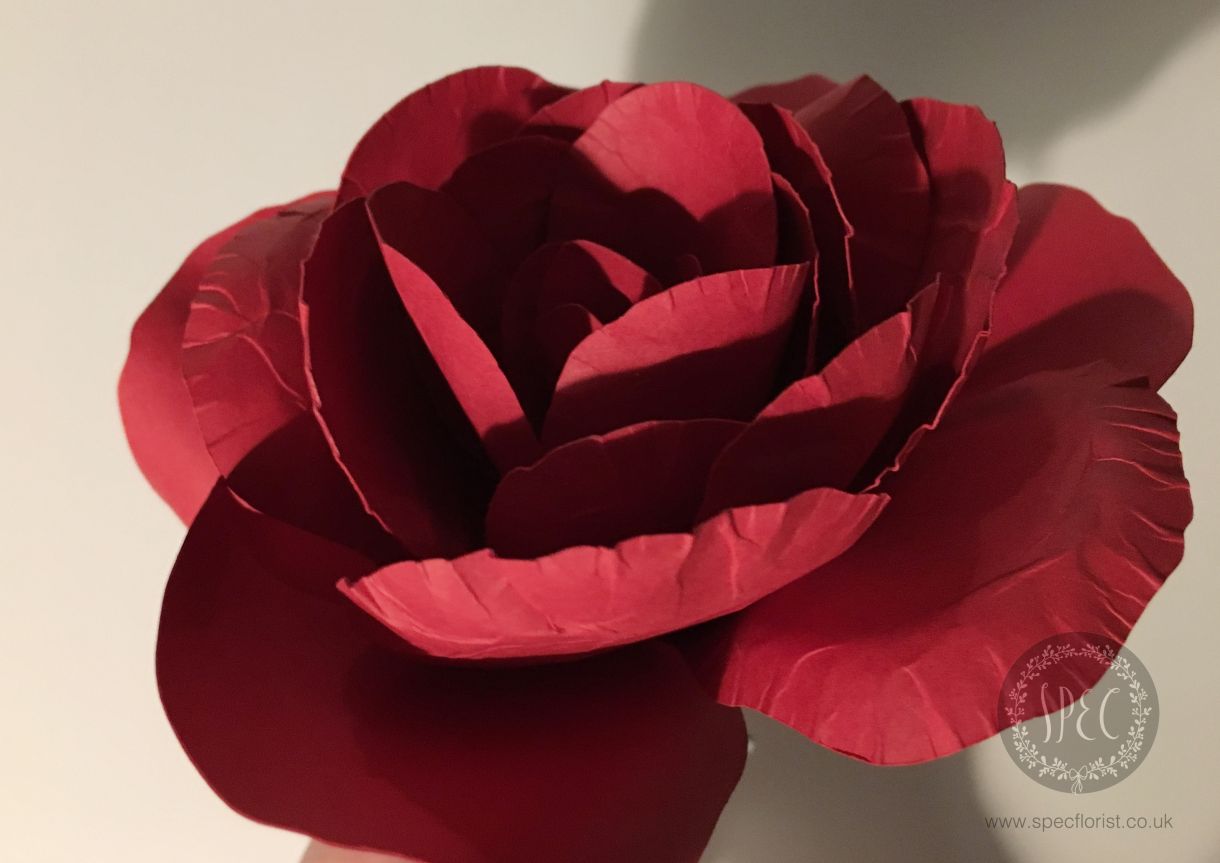
All my petals were cut using my Cricut machine. I used several sizes and shapes to create the roses, which you can see in the photograph.
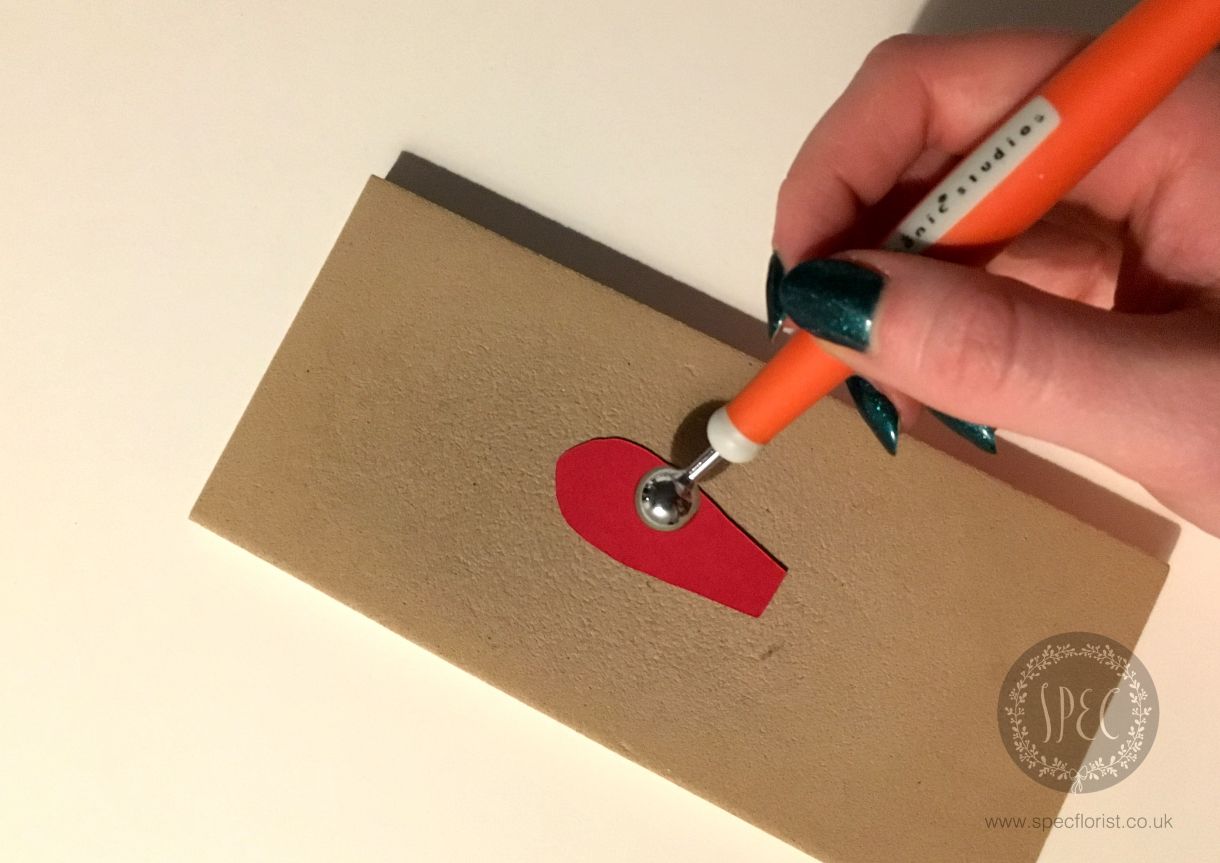
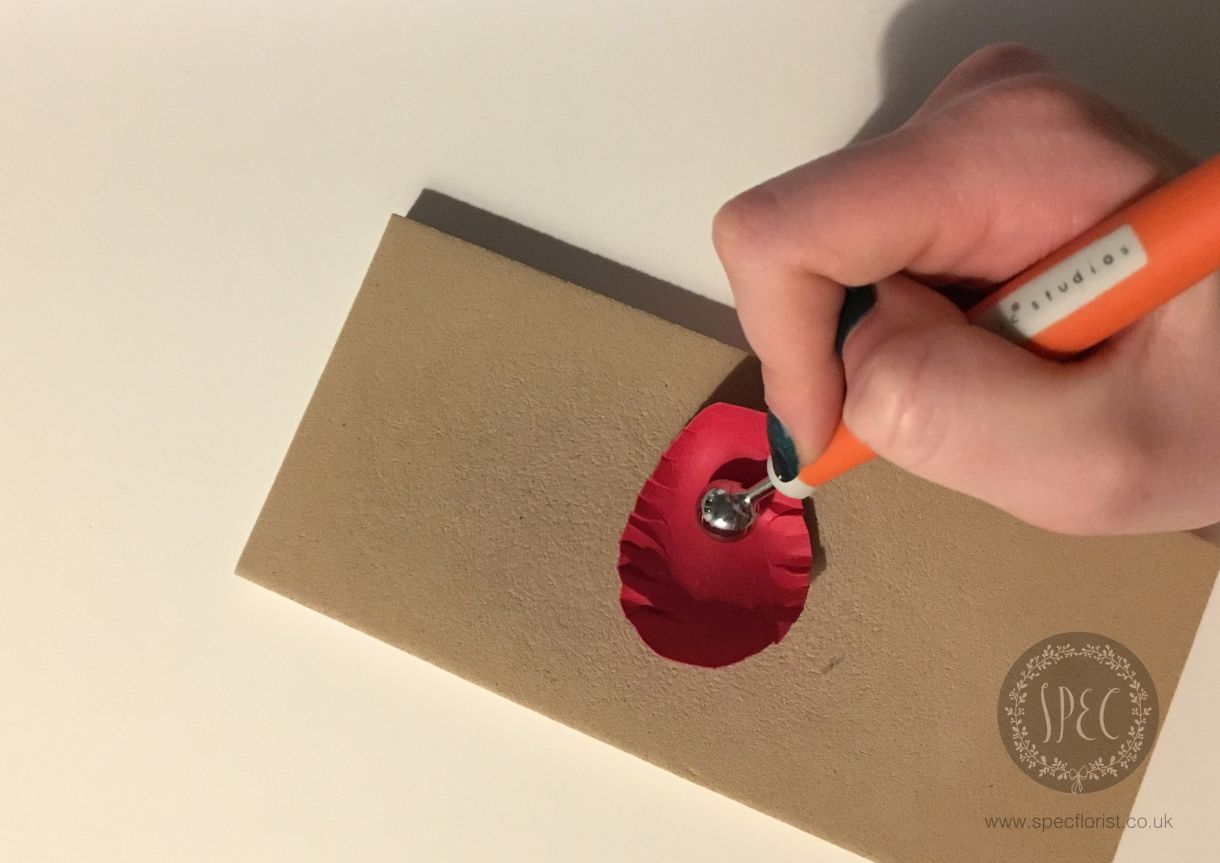
Before I began assembling the petals I first used my floral crafters embossing tool kit to add texture and shape to each petal. It’s a great little kit at a very reasonable price and a must have in your craft box. The full name of the product is Tonic Studio Floral Petal Crafters Tool Kit. I bought mine for roughly £10. The red card worked lovely with the embossing tools, you can see the texture it created in the photographs. I use Papermilldirect’s papers/cards a lot with my embossing tools and get great outcomes every time, even with the heavier weights.
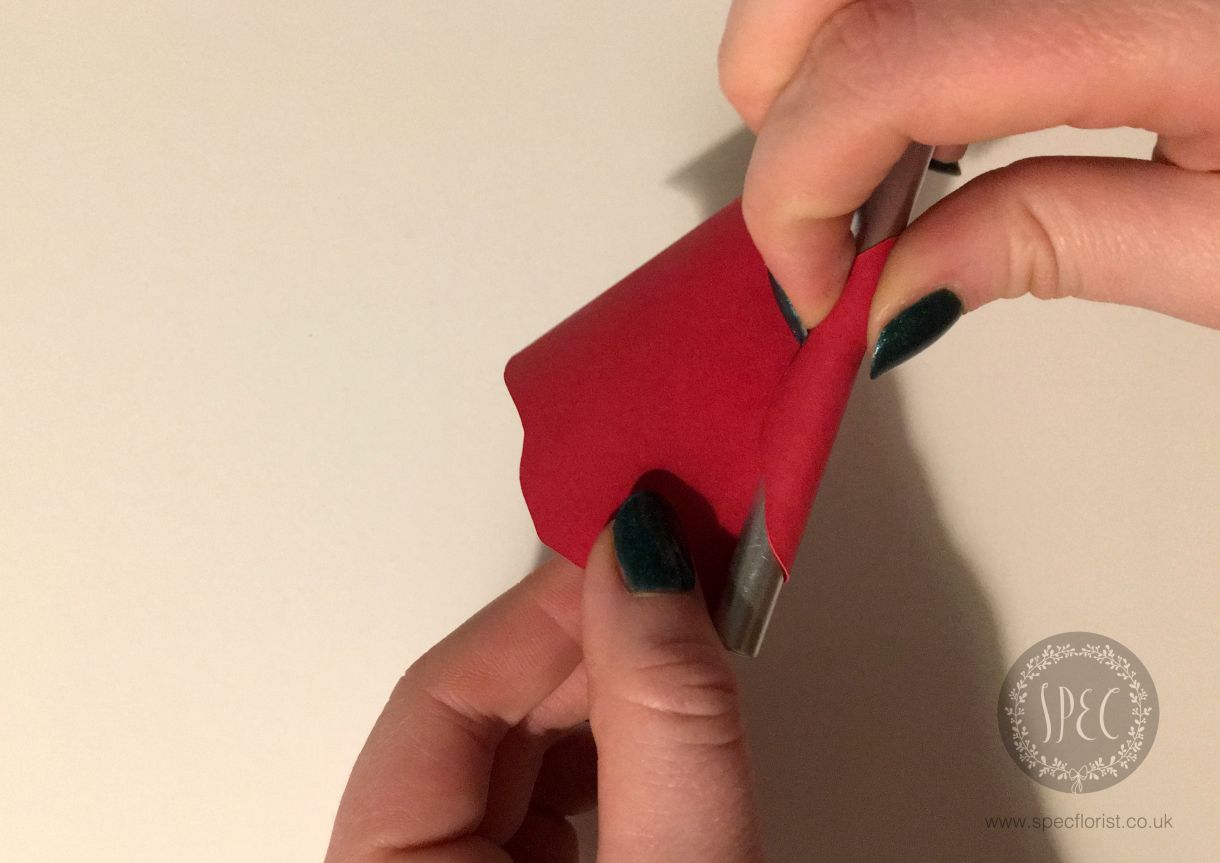
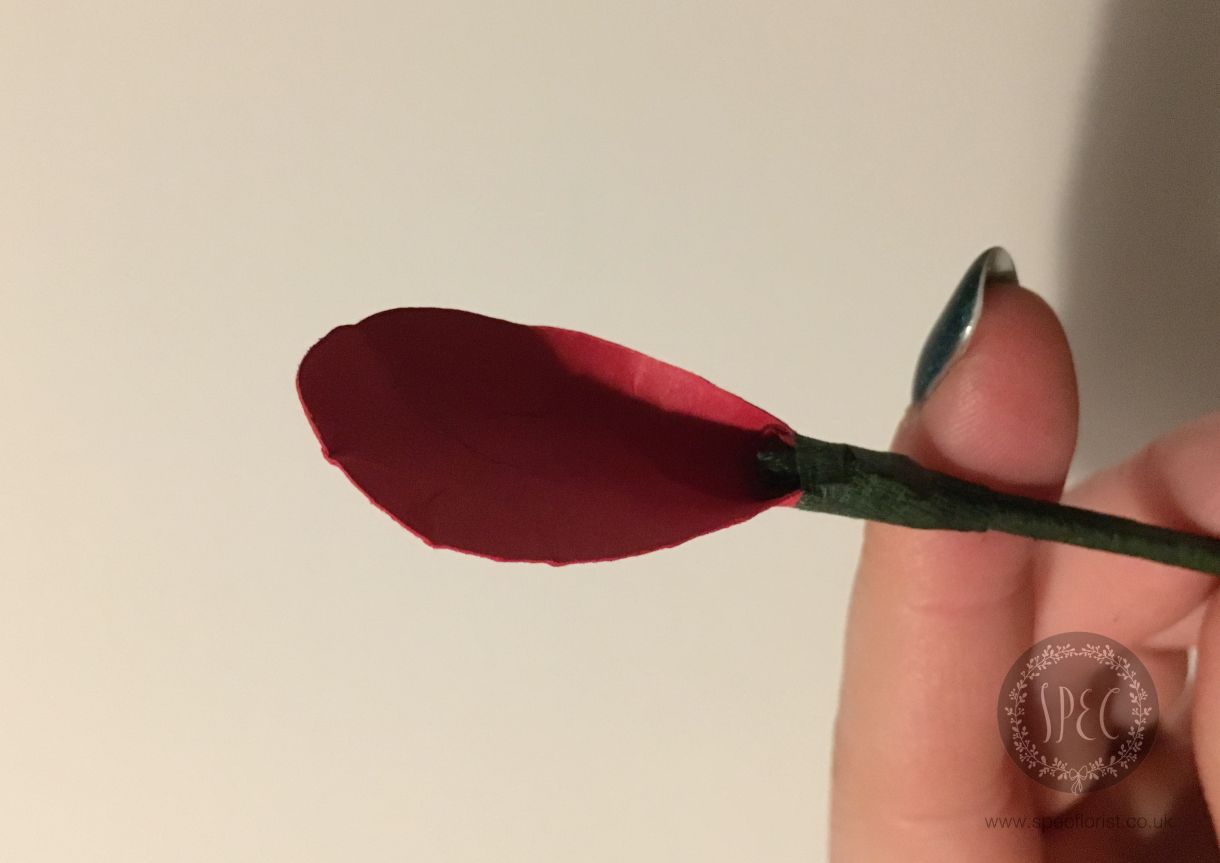
Some of the larger petals I curled the edges with a smooth object – I normally use my scalpel blade to do this, but please do remove your blade before you start.
Once all the petals are curled and shaped the assembling can start. I used five floral wires to make my stem and wrapped them with floral tape.

Using the smallest petals, I began building up the centre of the flower.
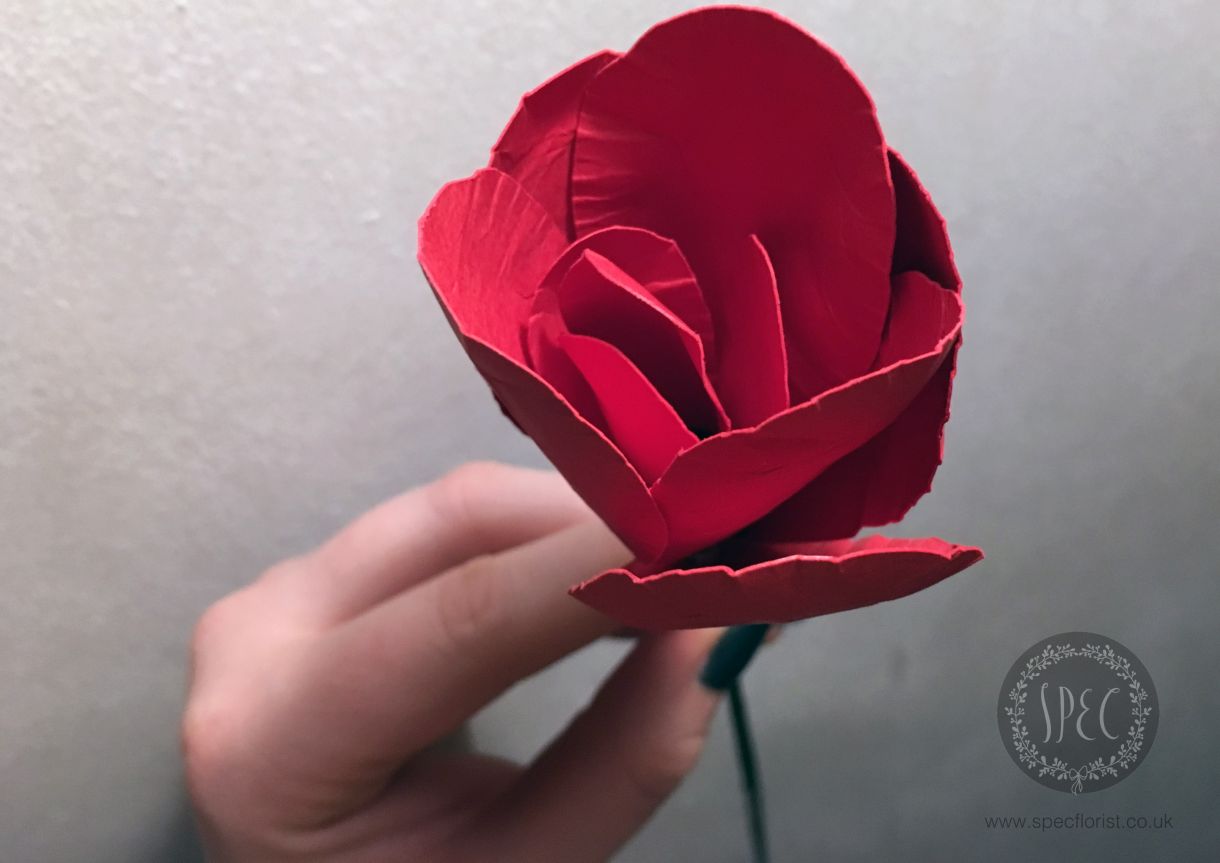
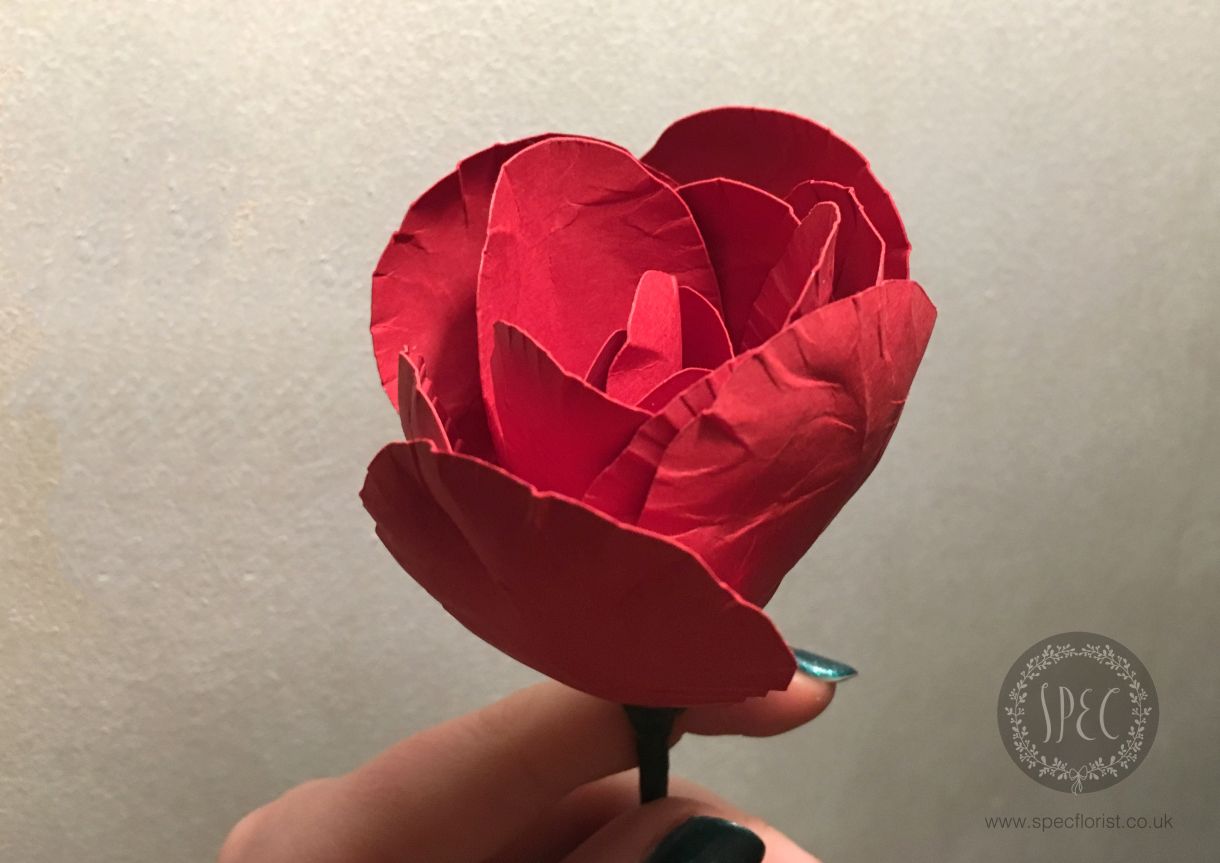
There is no exact set amount of petals you will need to create a rose. I found that I used more for one rose than I did the other. If one side looked uneven I added a couple extra layers. Freestyling is best! I kept adding layers of petals and increasing the size as I went.
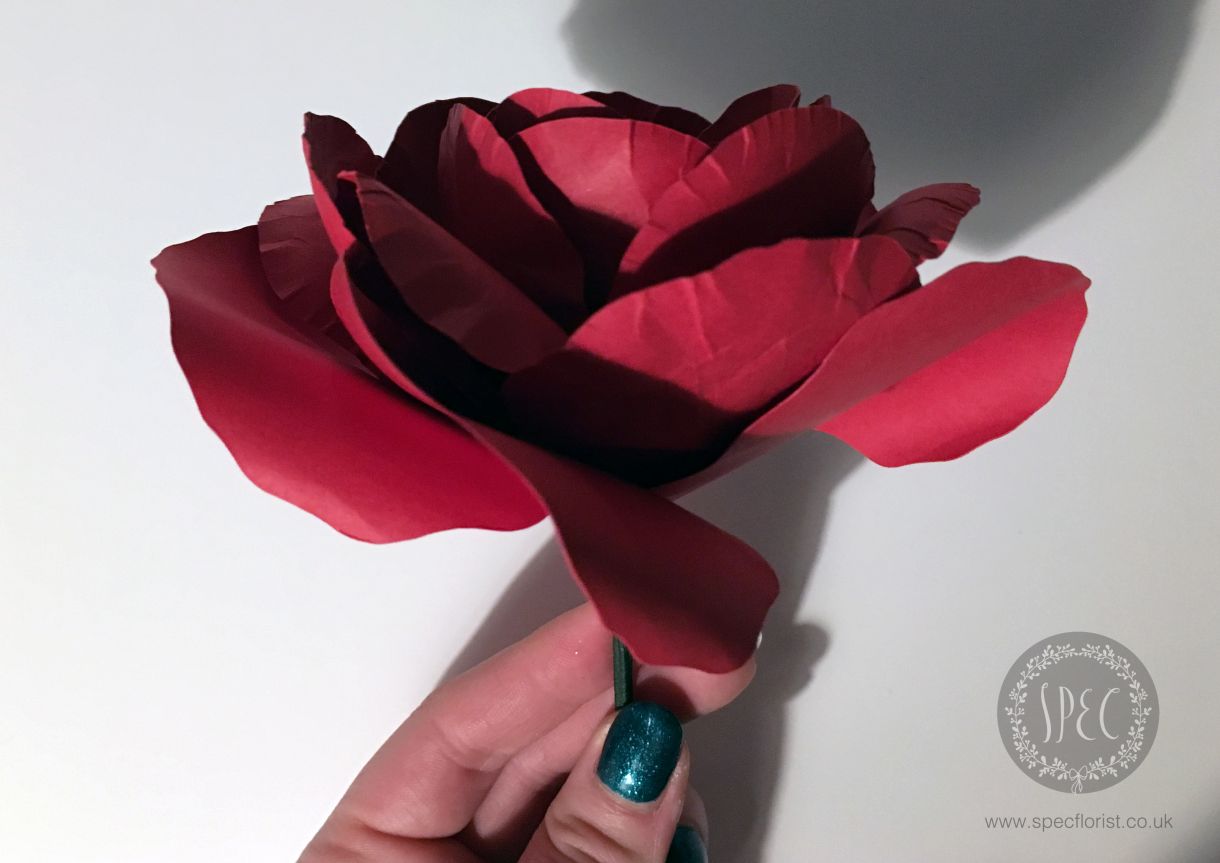
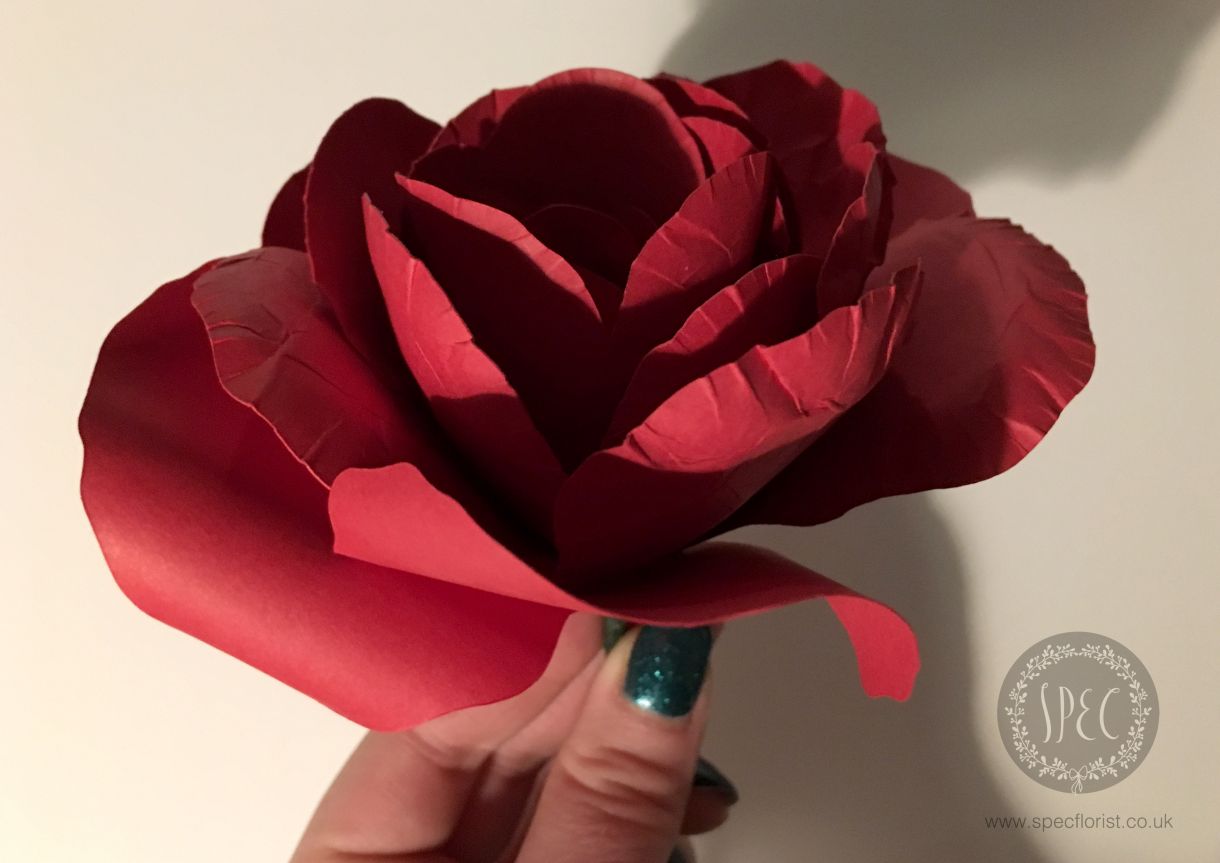
You may find you need to add a little extra curling to the finished piece; I did, especially to the outer petals. Tip for curling, I normally curl the left hand side in the opposite direction to the right hand side of the petal to create lovely curves.
Happy flower crafting everyone! Please do share your creations with us; I’d love to see your floral pieces.
Stacey


Nobody has commented yet
Be the first to comment on this article by using the form below.