Christmas Gift Box with Sparkle Print Card
1
Posted on 9th November 2016 by Angela Dodson
Filed under All Papercraft Tutorials, Seasonal Crafts, Projects And Cards By Type, Design Team
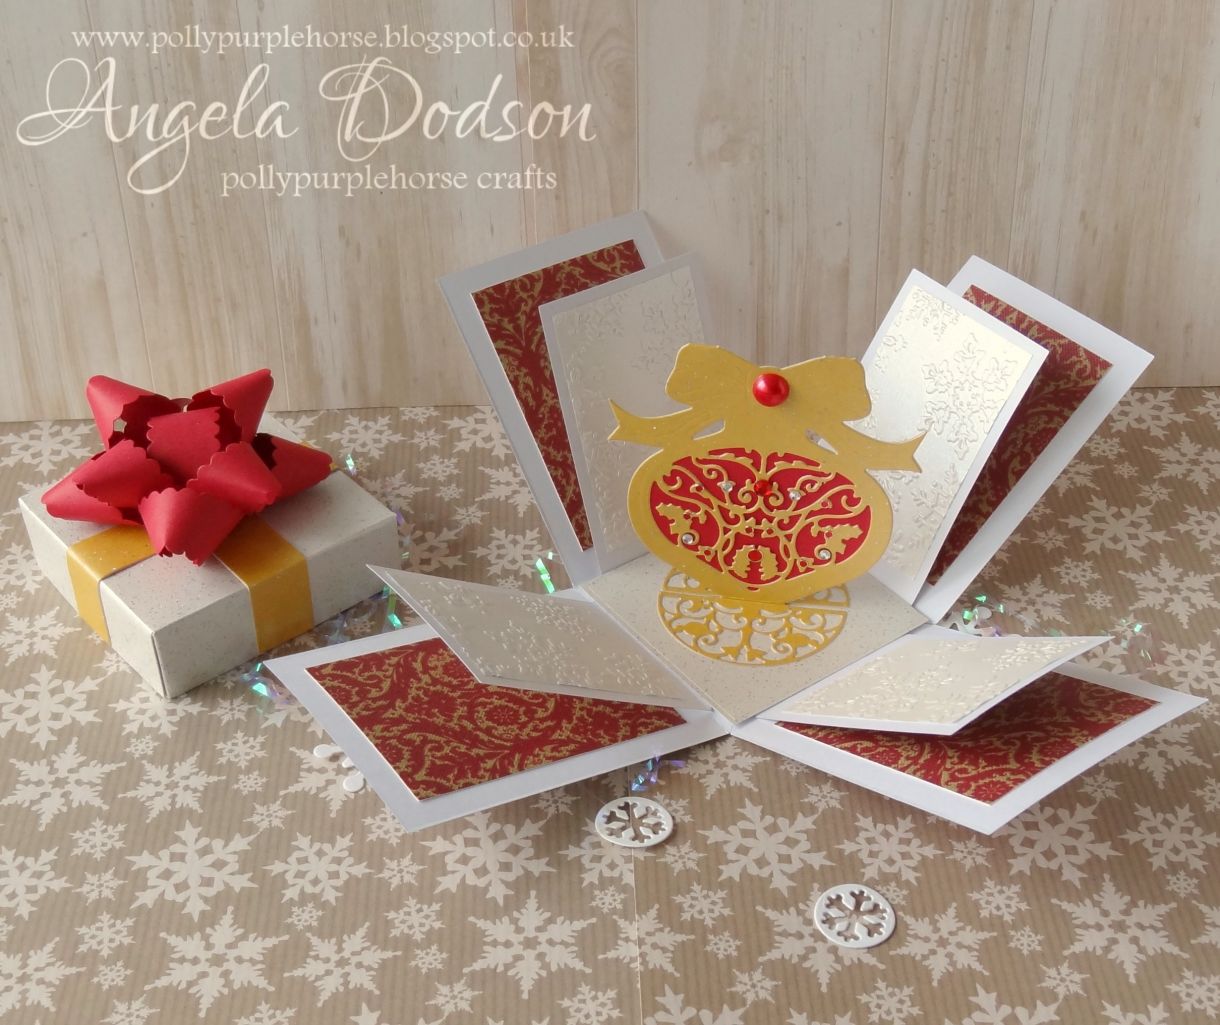
Hello it’s Angela here to share a Christmas gift box design with you. This week I am working with some of the gorgeous Sparkle Print cardstocks from Papermilldirect and using them to test out a new die cutting machine and some new die sets that I recently received.
I have also made a little video to show the box opening
Step by step:
Using Papermilldirect Sparkle Print Orchid card, die cut the following elements from the Gift Box Die set:
1 x lid
2 x Base
4 x large sides
4 x small sides
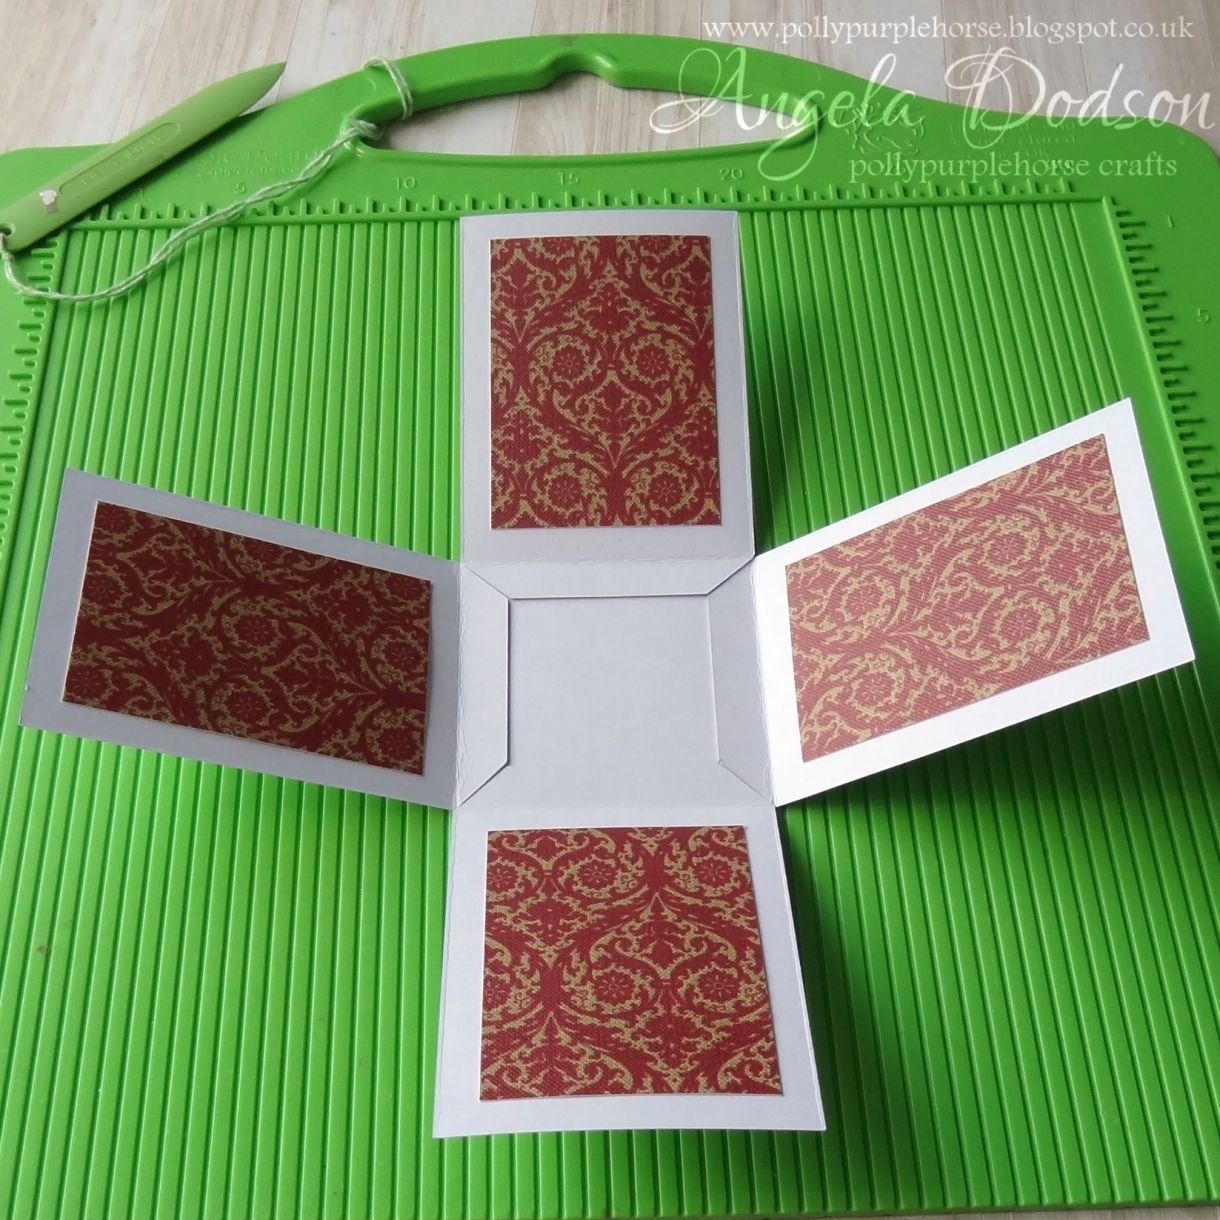
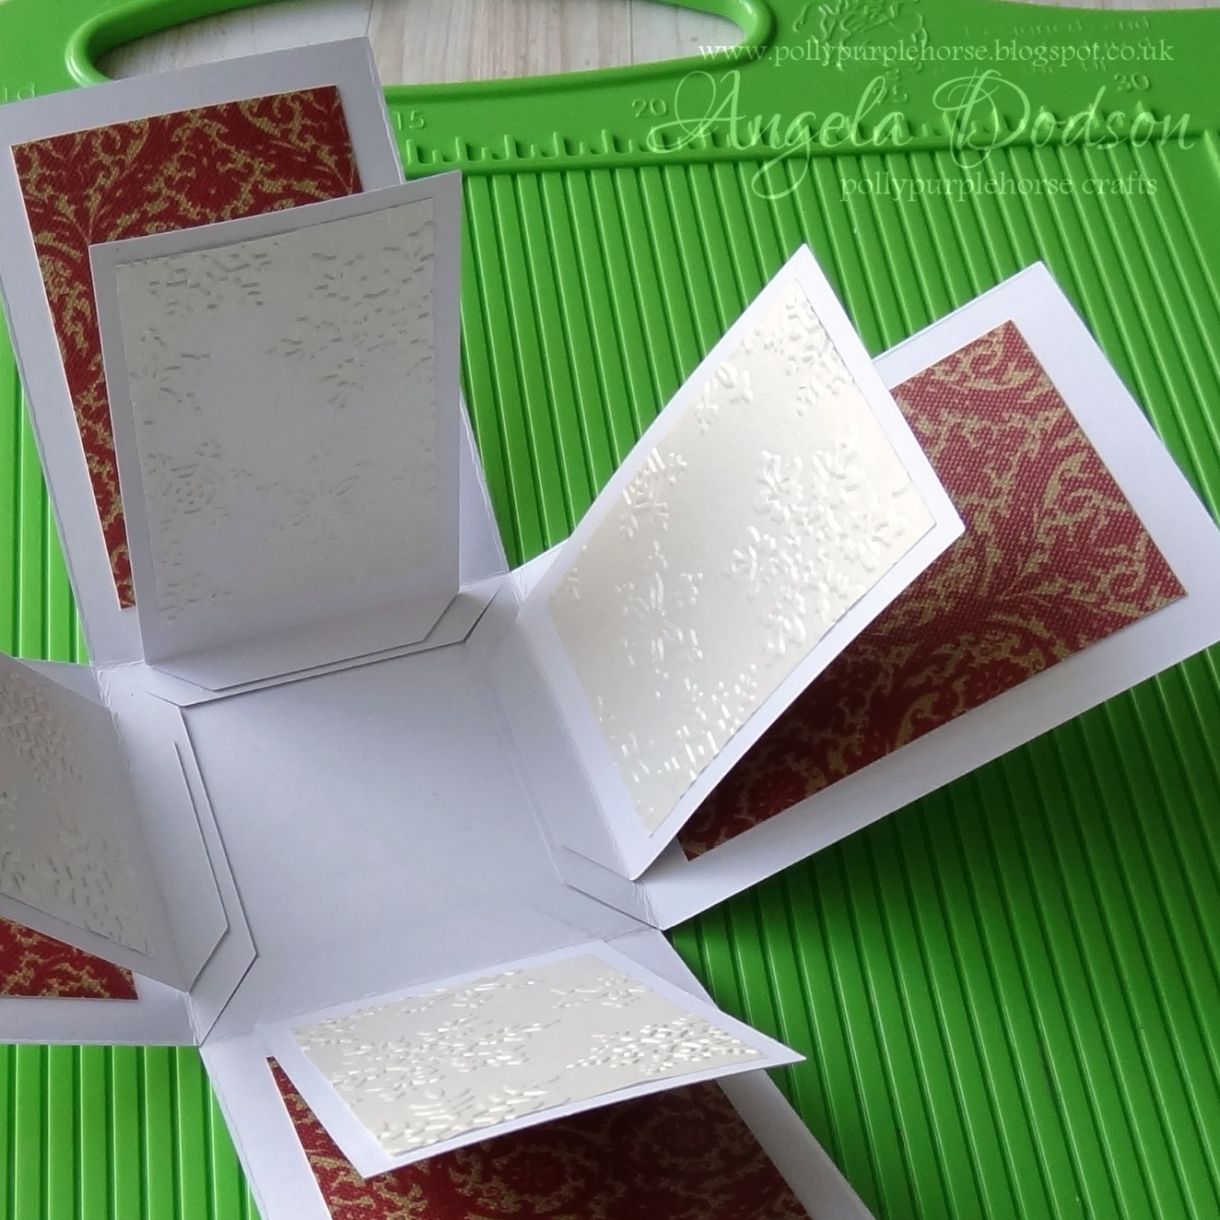
Fold along the score lines, then take 1 base and adhere the 4 large sides using strong d/s tape along the tabs. You can decorate the panels first to make it easier. I have cut 4 rectangles of pattern paper in red & gold design.
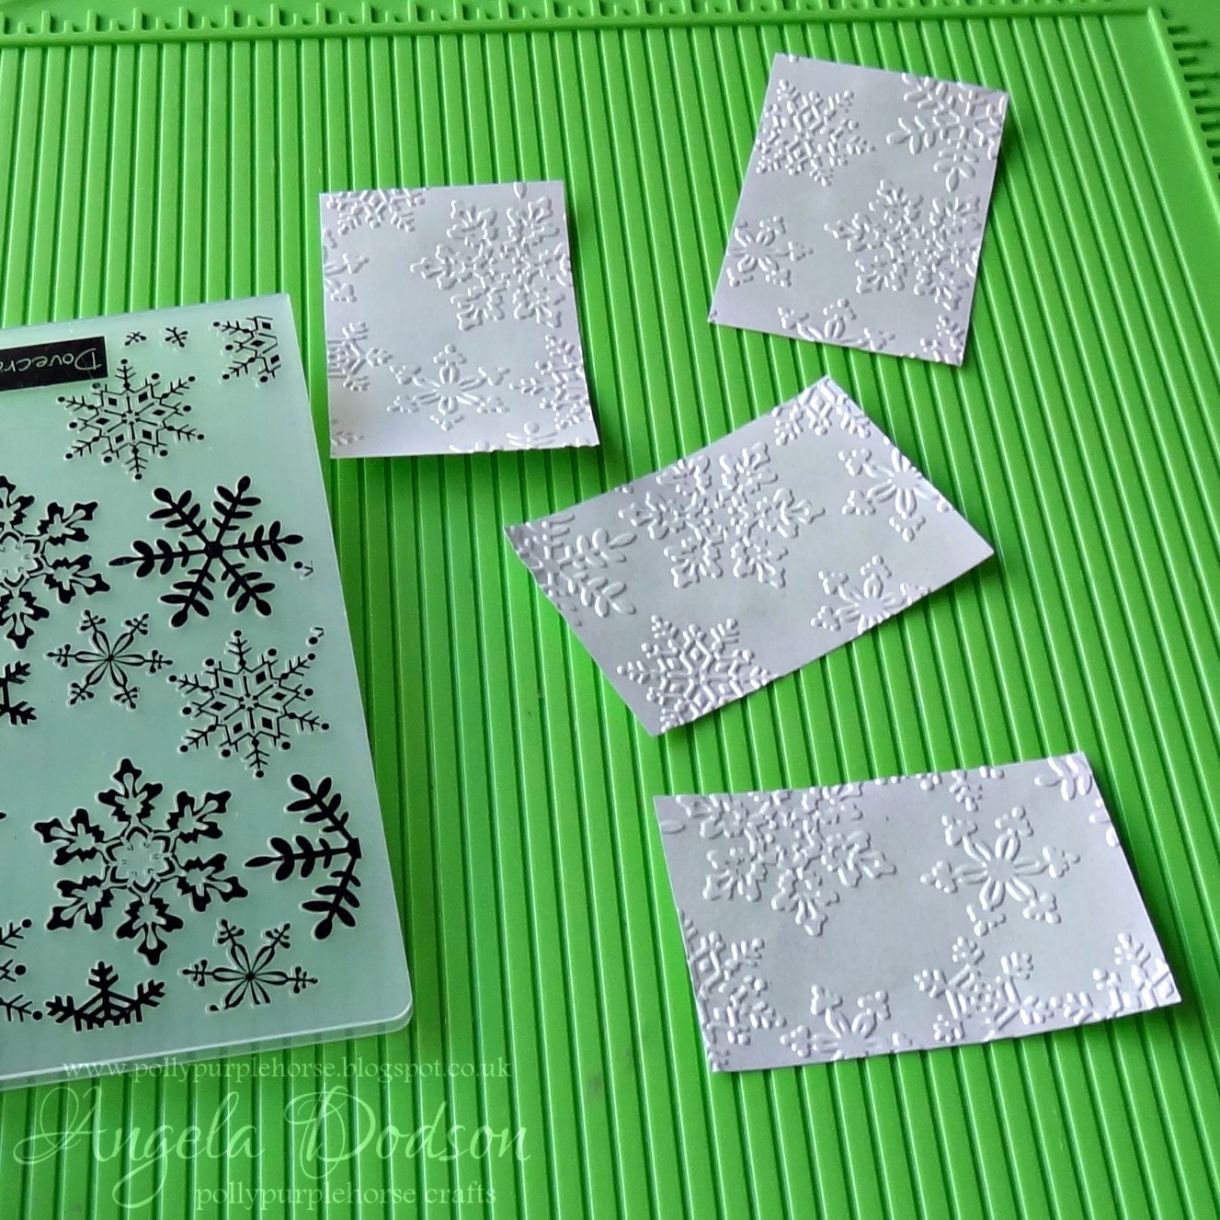
Then take the 4 smaller sides and adhere them on top of the larger side tabs ensuring the score line lines up. I’m keeping the sparkle side to the outside and have decorated the smaller panels using Papermilldirect one sided white pearlised paper 90gsm which I have embossed with a snowflake embossing folder. All panels have been adhered using d/s tape.
Decorate outer front box panels using the decorative die included in the Gift Box die set, cut 4 shapes from Papermilldirect Sparkle Print Xmas Red and adhere 1 to each panel using a clear drying glue.
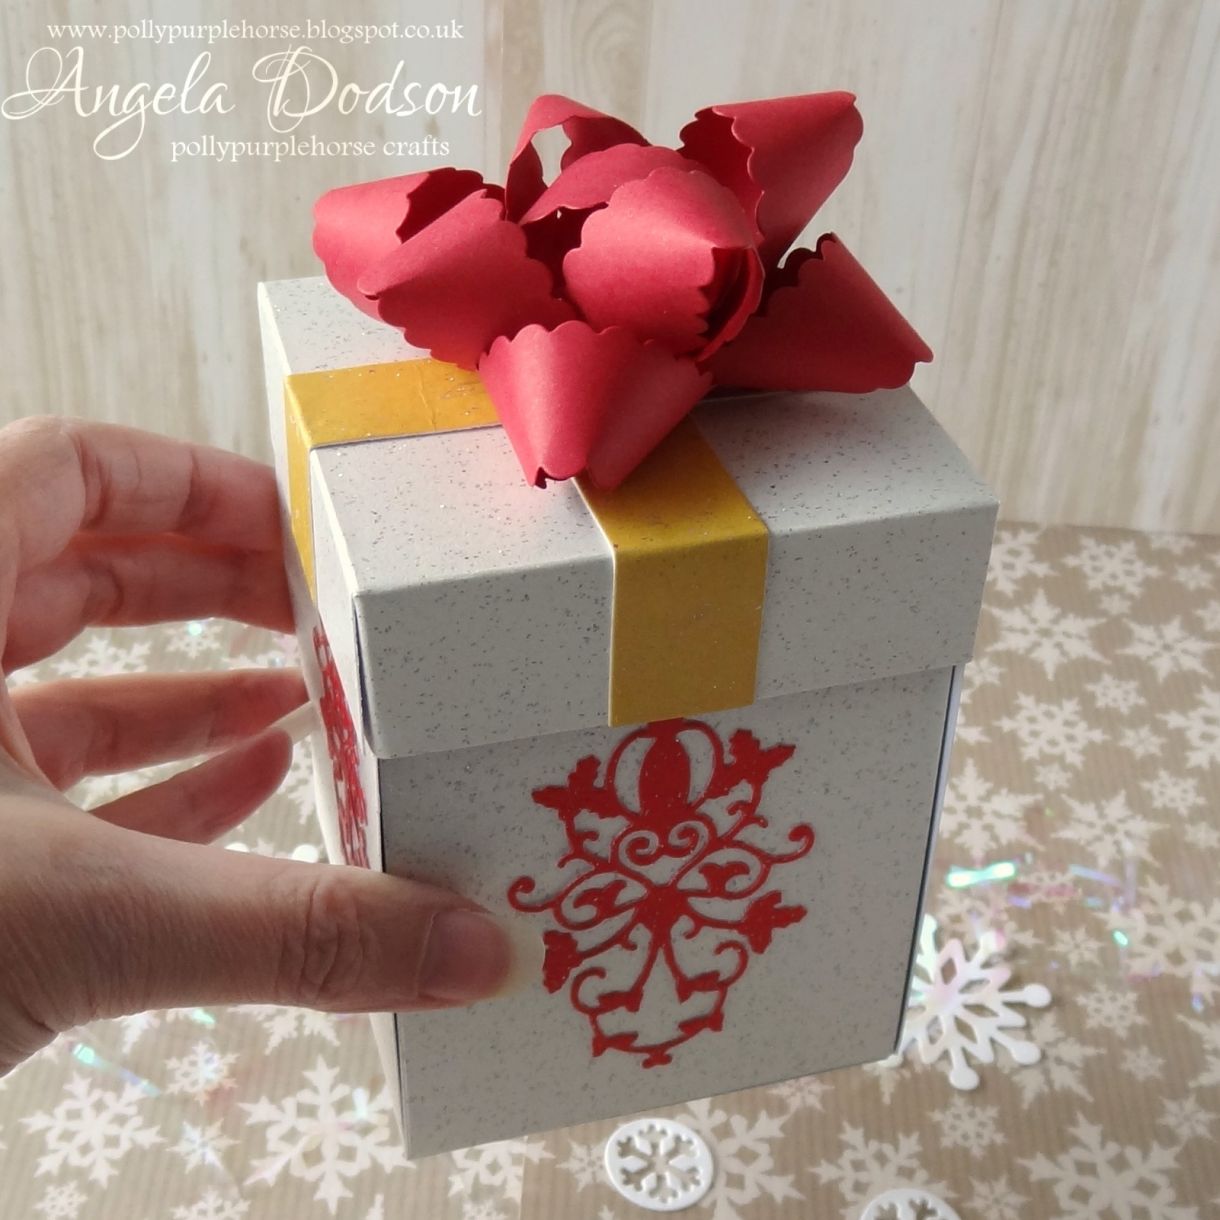
Fold tabs on box lid piece and join using strong d/s tape. Die cut (Gift Bow templates) or cut strips of PMD Sparkle Print Amber card and glue to box lid to create a ribbon effect.
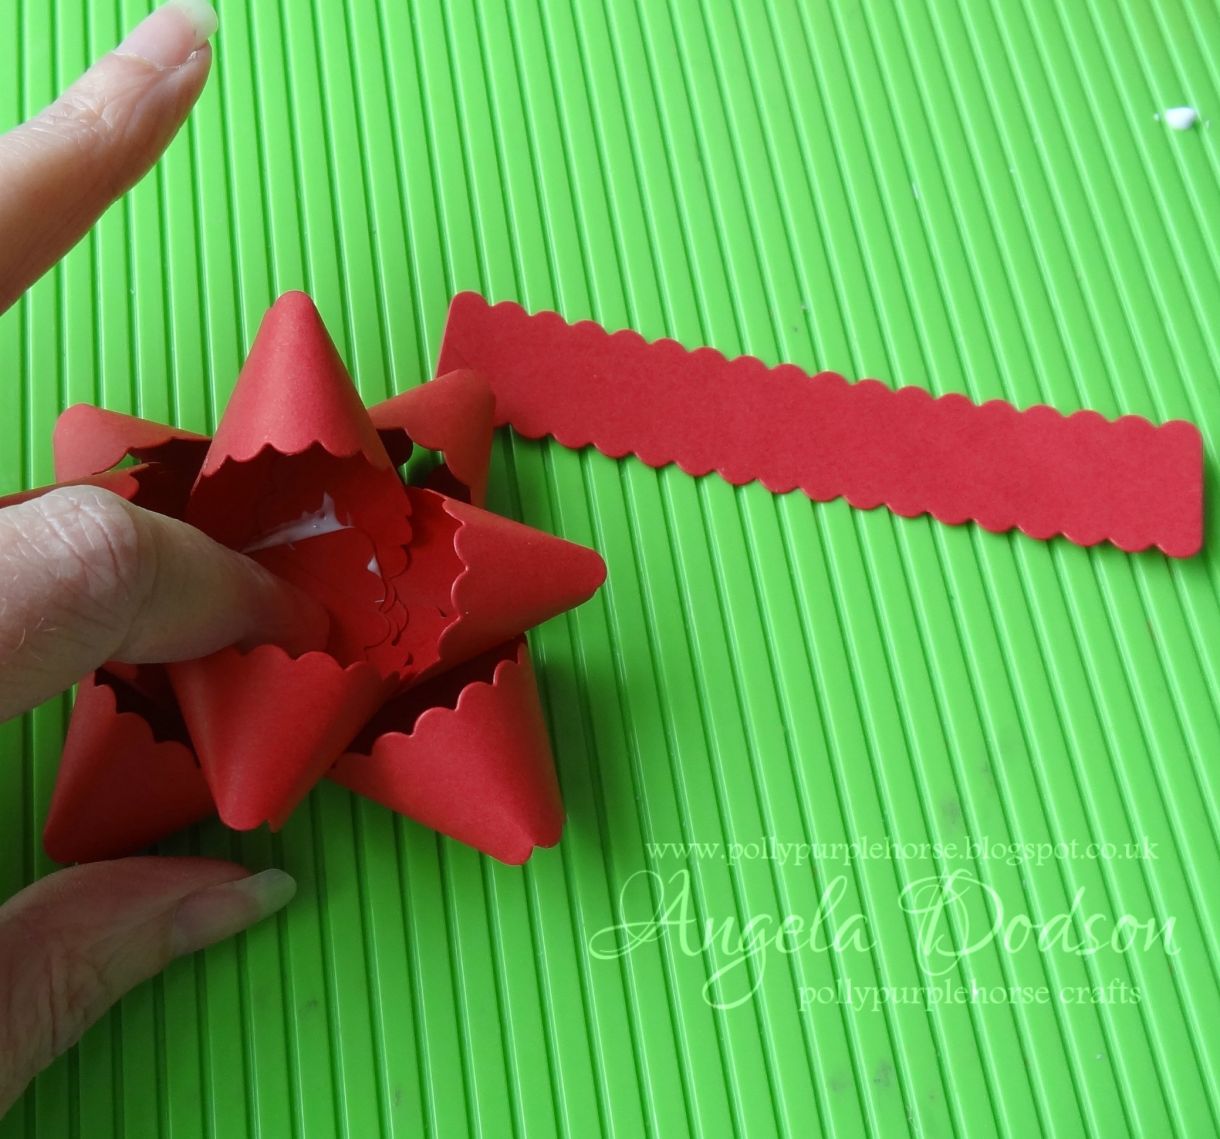
Using the scallop ribbon die from the Gift Box Templates, cut 9 lengths from PMD Intensive Red 120gsm. Fold each length into a loop and build up to create a ribbon bow by gluing the loops together. Finally glue competed bow centrally to gift box lid.
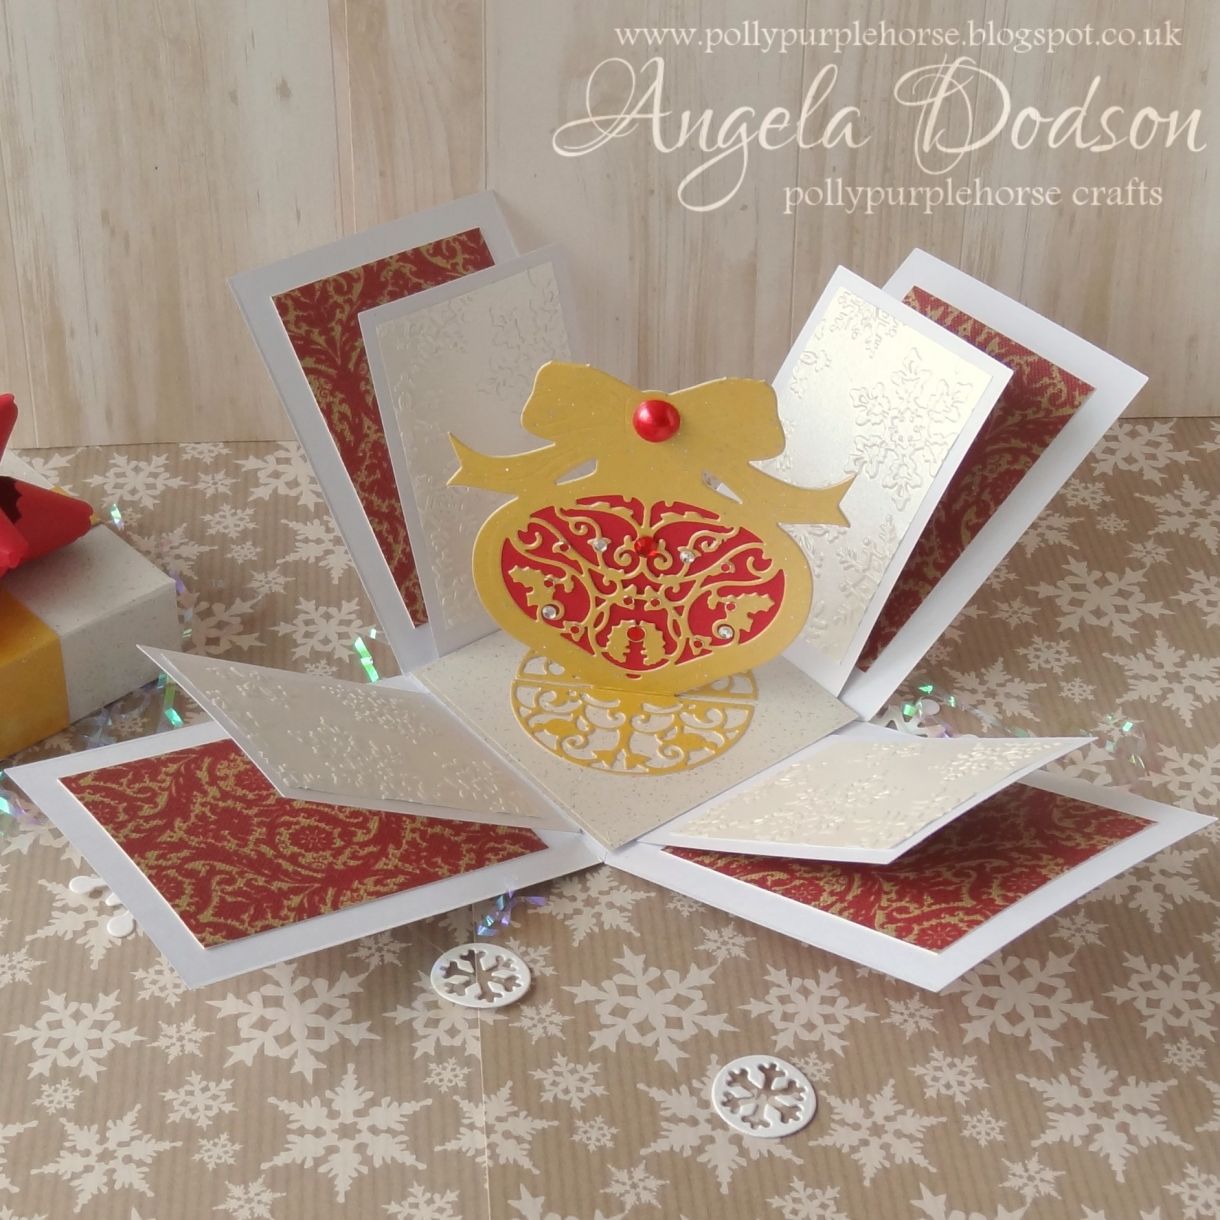
Create a centre piece for your gift box, I am using the Pop Up template which resembles a bauble. I have cut this from PMD Sparkle Print Amber and used Intensive red in the centre before gluing the bauble shaped sides together, so the red shows through at both sides. Fold the base sections at the score line and glue onto the remaining square base, carefully positioning it diagonally, using a clear drying glue. Adhere base inside box onto the bottom to cover the tabs, I have used a combination of strong d/s tape and glue to ensure a good adhesion.
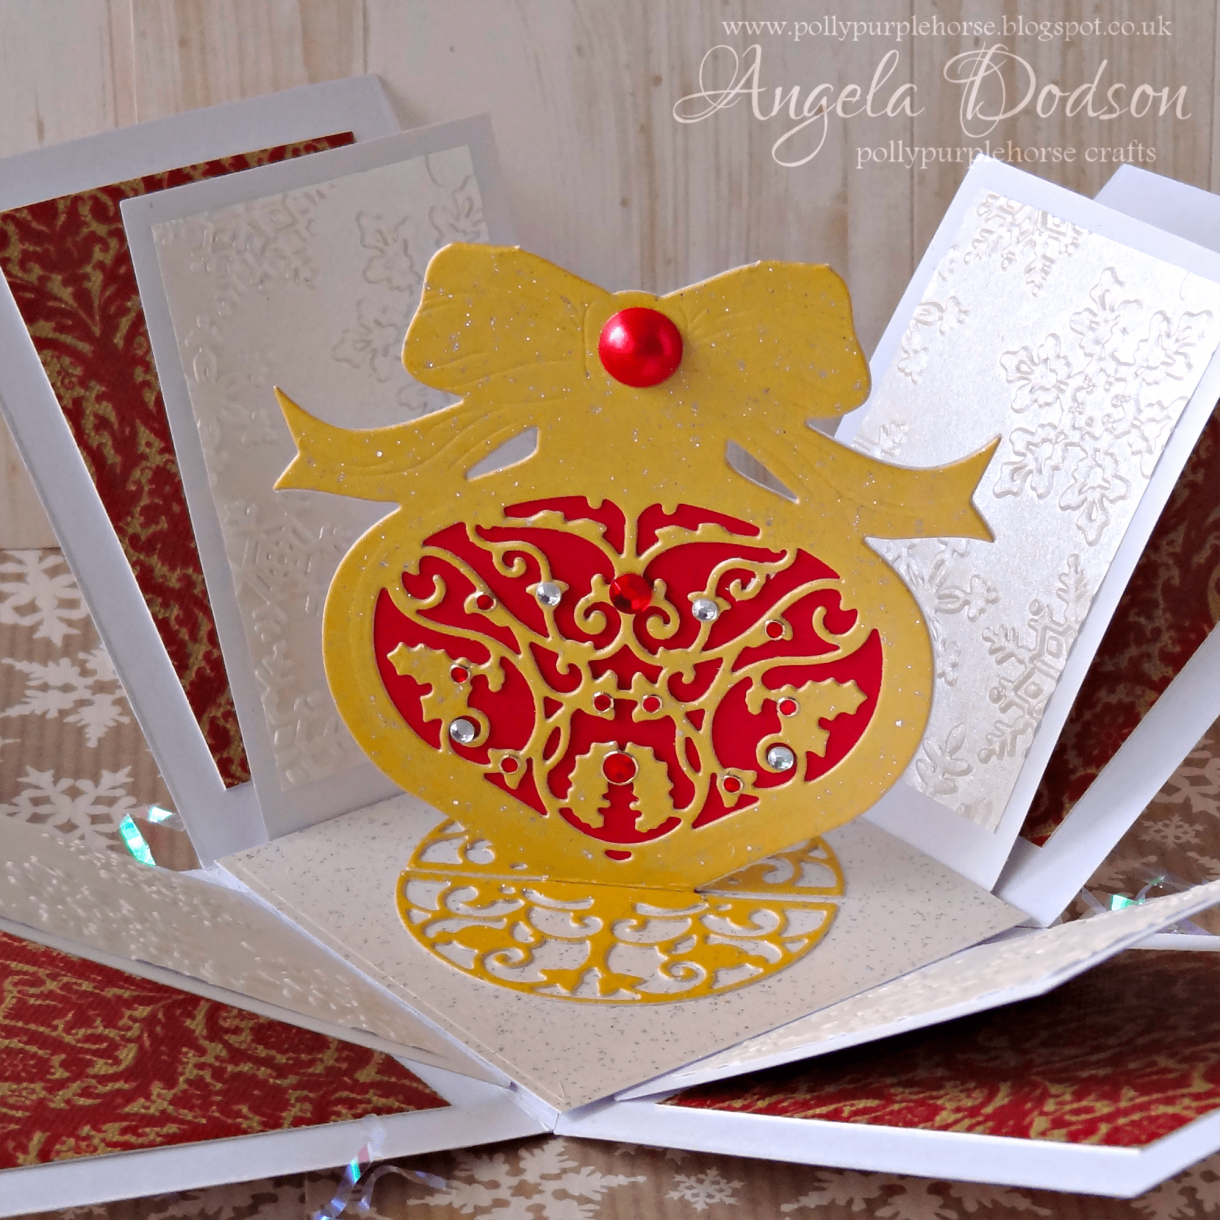
Decorate the bauble, both sides, using adhesive gems, pearls, stickers in red and clear. (You may prefer to do this before gluing to the base)
Fold up the box sides and pop the lid on, you now have a fun gift box with a surprise inside.
I am pleased to report that my new machine and dies LOVE the new cardstocks! My new machine is a Big Blue and is my first electric powered die cutter, I found the following plate combination worked perfectly with the Couture dies. Starting from the bottom I used: Platform D, magnetic sheet, die with cutting edge upwards, PMD Cardstock, Platform A, Platform B, Platform A (all these came with the machine) and I kept with this combination for all the card and paper used in this project.
Materials Used:
Sparkle Print Orchid – 300gsm – Papermilldirect
Sparkle Print Amber – 300gsm – Papermilldirect
Sparkle Print Xmas Red – 300gsm – Papermilldirect
One Sided White Pearlised paper – 90gsm – Papermilldirect
Intensive Red – 120gsm – Papermilldirect
Couture Gift of Christmas Collection – Gift Box Templates #18590
Couture Gift of Christmas Collection – Pop up Template #18592
Couture Gift of Christmas Collection – Gift Bow Templates #18591
Krafty Christmas ‘Snowflakes’ embossing folder – Dovecraft
Adhesives: D/S Tape, Clear Drying Glue
Adhesive gems, pearls, stickers in red and clear


1 thought on “Christmas Gift Box with Sparkle Print Card”
Jan Marshall
09th November 2016 at 2:53 p.m.