Simple Spring Watercolour Wash Card - Step By Step Tutorial
2
Posted on 6th April 2017 by Angela Dodson
Filed under
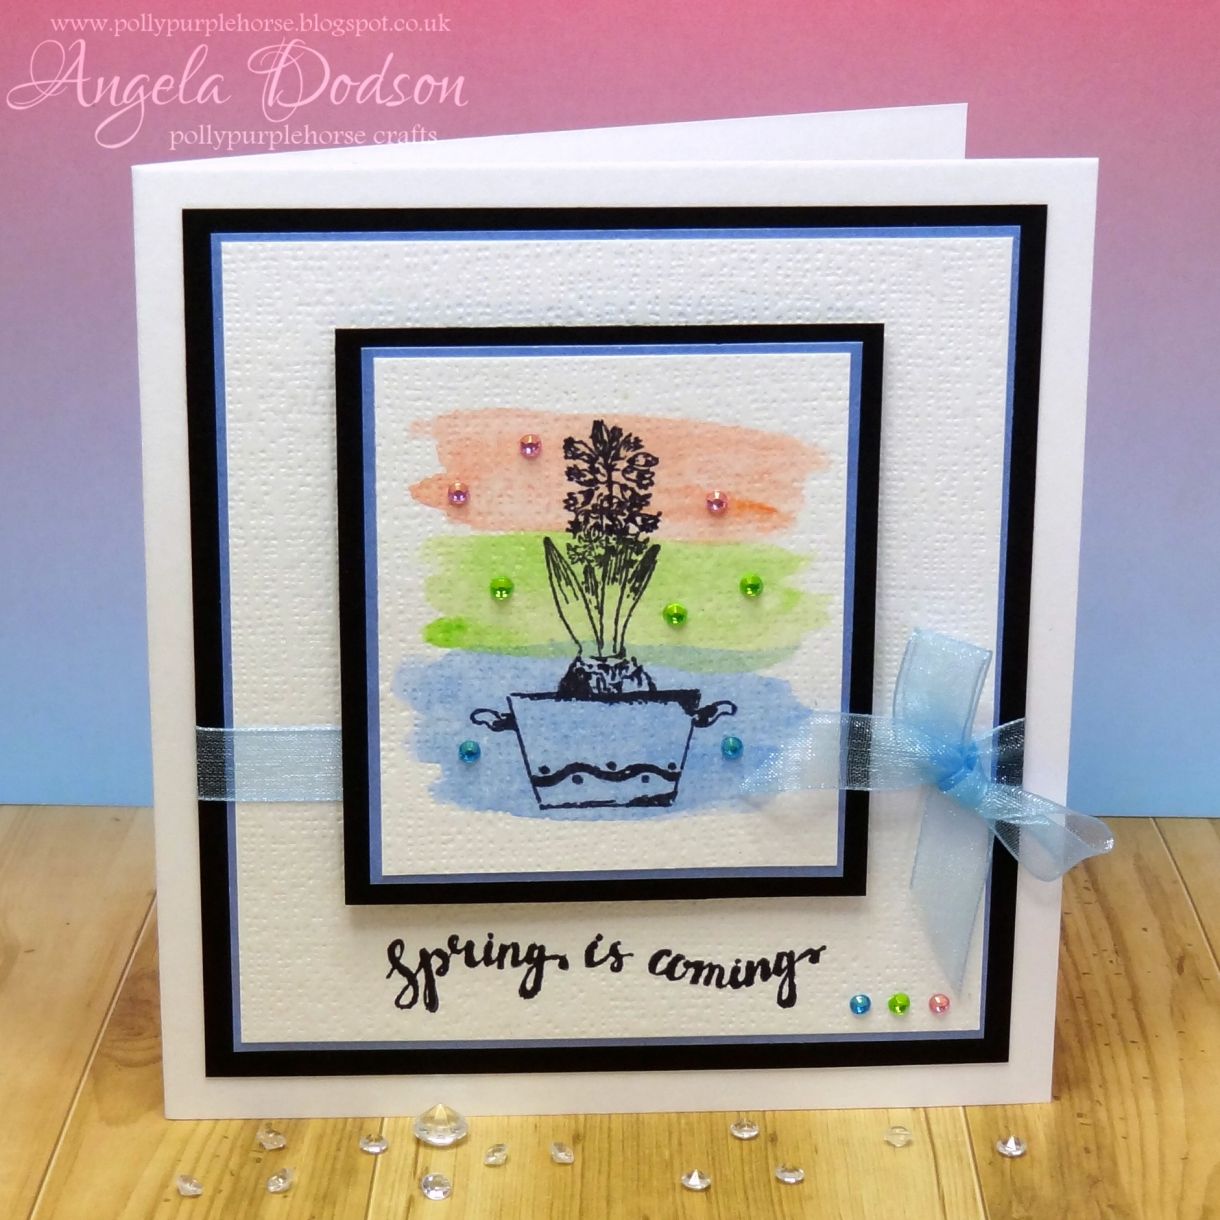
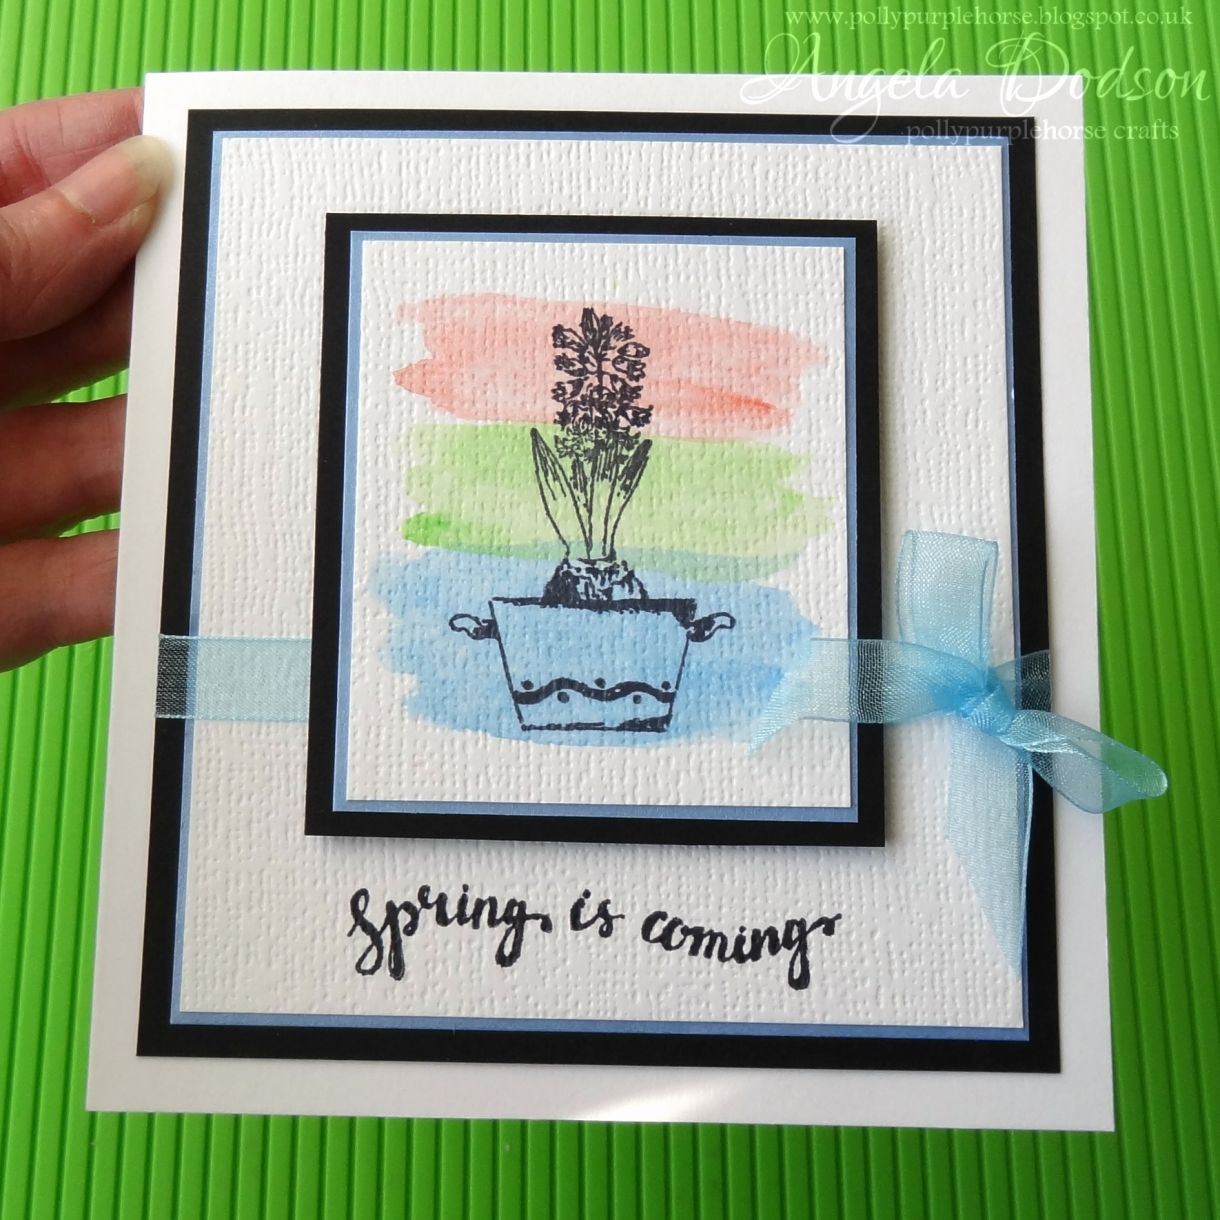
Hello it’s Angela back to share another watercolour card with you. This is the 2nd card created with a stamp set free with the current issue of Making Cards Magazine (April 2017), Derwent Watercolour Pencils, and that lovely PMD White Hemp textured cardstock. This is a really simple watercolour technique, just 3 strips of colour swooshed over the stamped image.
Step By Step:
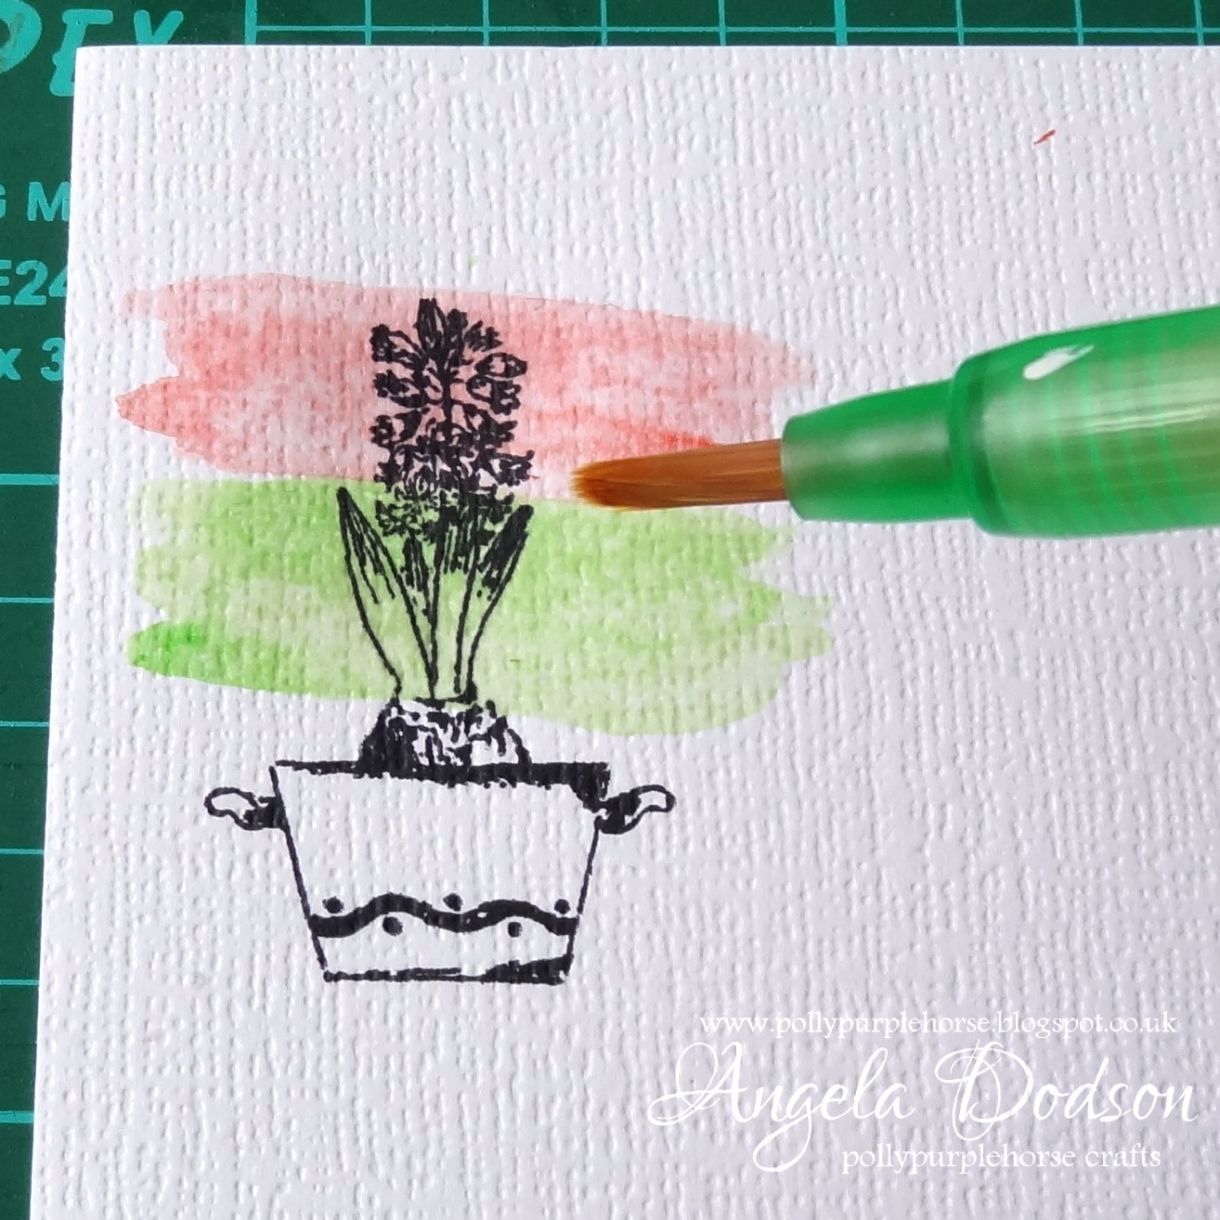
Stamp a plant and a pot using black Archival ink onto Papermilldirect White Hemp card. Using a water brush take colour from a Derwent watercolour pencil by either working the wet brush onto the end of the pencil or by scribbling the pencil onto a craft sheet or acrylic block, adding water and colour until happy with depth of colour. Apply the colour in long ‘swooshes’ of the water brush across the stamped image. Starting from the top apply #14 Deep Vermillion across flowers, then apply #47 Grass Green across leaves, finally adding #32 Spectrum Blue across the pot area.
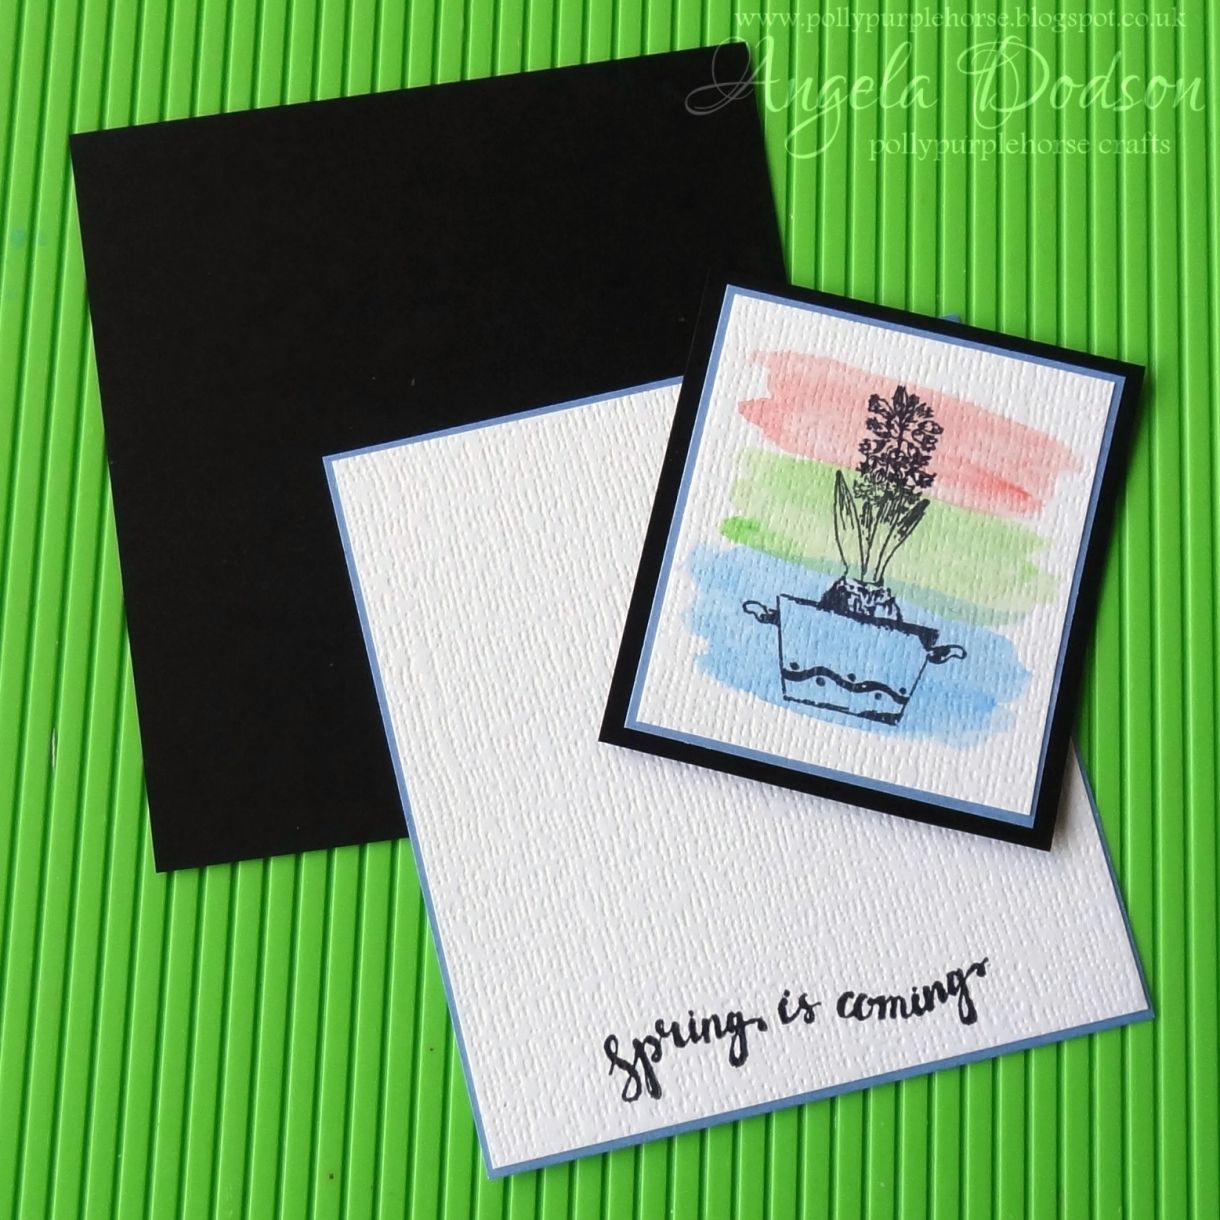
When watercolour is dry, trim image down and mat onto Papermilldirect Lustre Print Silver ‘Maya Blue’ 100gsm using d/s tape and a little glue. Mat again onto PMD black card.

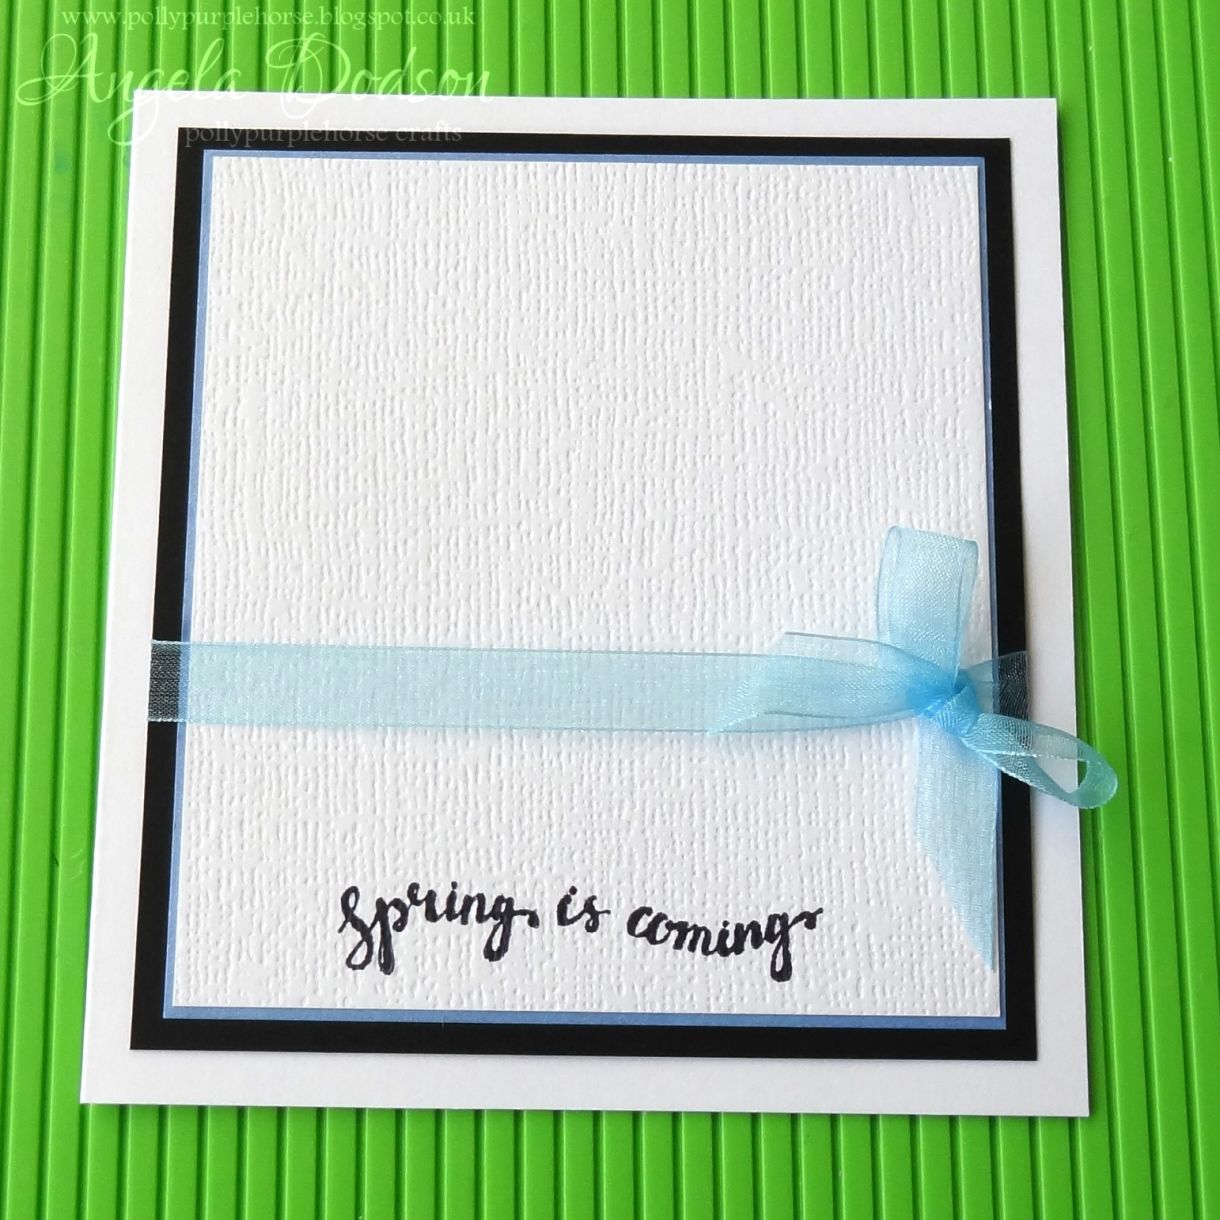
Cut a piece of PMD White Hemp card approx. 10.5cm x 11.5cm. Stamp the sentiment across the bottom of the 10.5cm edge using black Archival ink. Mat onto PMD Lustre Print Silver Maya Blue and then again on to PMD black card as before.
Score and fold a sheet of PMD white card, then trim down to create a card base approx. 12.5 cm x 13.5cm. Wrap blue organza ribbon around sentiment panel and adhere the ends on the back with d/s tape. Add a bow, then add panel to card front using d/s tape and glue.
Mount water coloured panel onto card front using 3D foam pads to give height
To finish, add small adhesive stones in pale pink, pale green, and pale blue to the corresponding coloured ‘swooshes’ of watercolour.
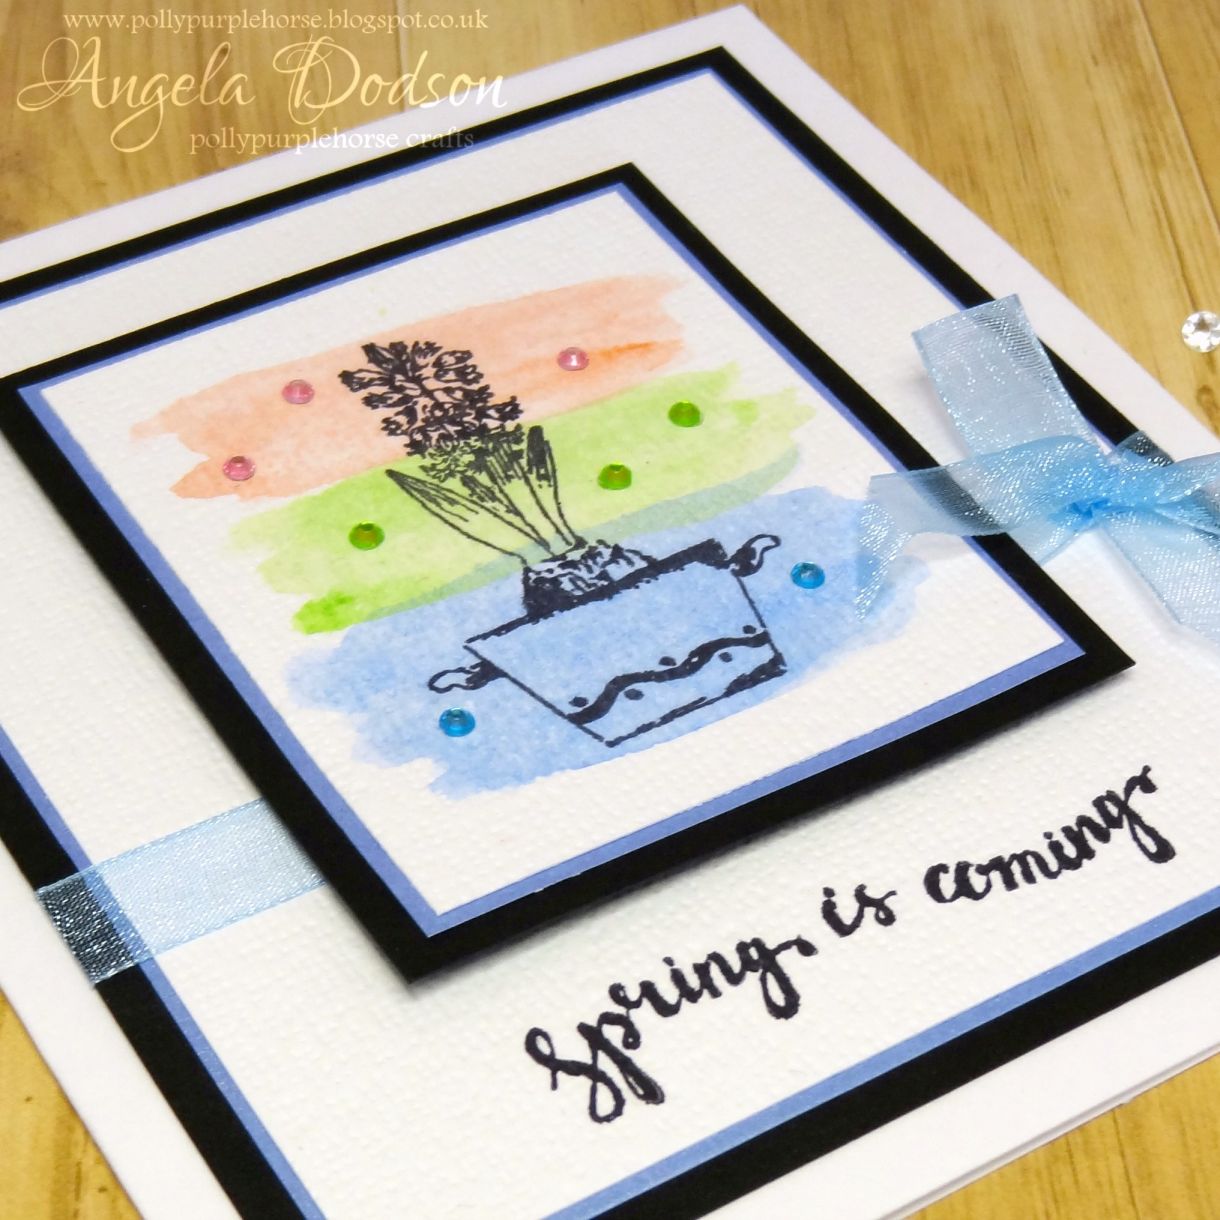
This is a really easy way to add colour to simple stamped images, it’s fun to experiment with different pops of colour. Matting and layering the panels using blue and black helps to draw the eye into the centre and using gems to emphasise the colour bands adds extra interest. Angela x
Material Used:
White Hemp 255gsm – Papermilldirect
Lustre Print Silver ‘Maya Blue’ 100gsm - Papermilldirect
Plain White Card – Papermilldirect
Black Smooth Card – Papermilldirect
Derwent Watercolour Pencils – 12 set - Papermilldirect
Spring Stamp Set – Free with April 2017 issue of Making Cards Magazine
Black Archival Ink Pad
Pale Blue Organza Ribbon
Small Adhesive Gems – pale pink, pale green, pale blue
Adhesives: d/s tape, clear drying glue, 3D foam squares


2 thoughts on “Simple Spring Watercolour Wash Card - Step By Step Tutorial”
Christina Gray
04th May 2017 at 3:37 p.m.
Learning Subconscious Mind
11th April 2017 at 3:22 p.m.