Mini Christmas Luminary
1
Posted on 25th October 2015 by Nicole Mullen
Filed under
Hi All,
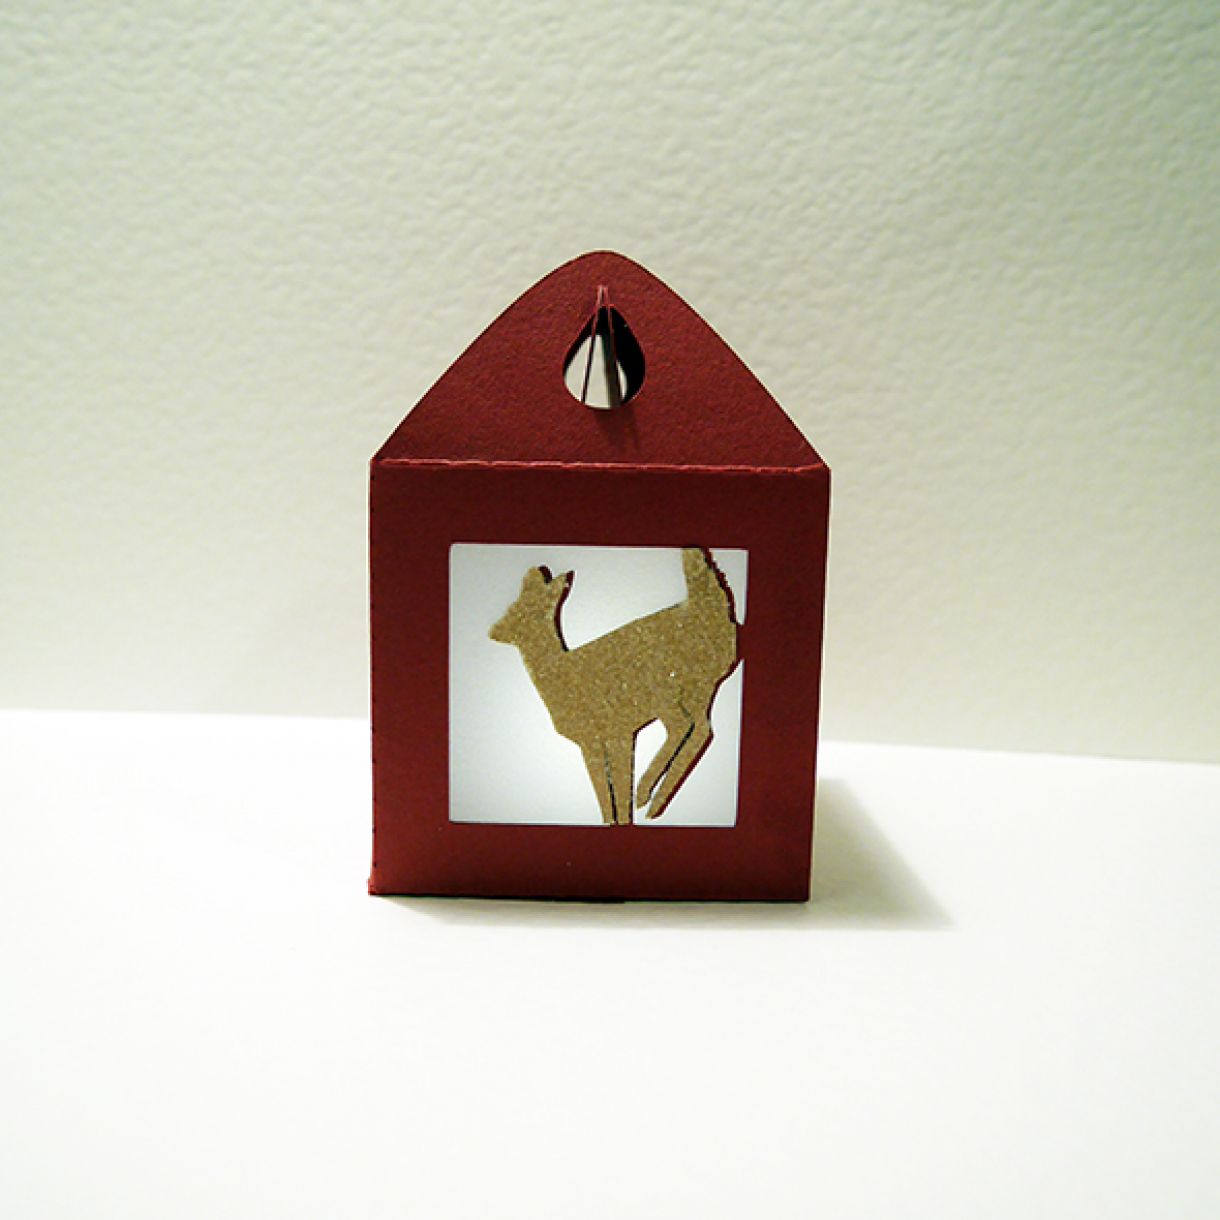
Nicole here toady sharing a cute little Christmas Luminary made using the beautiful Papermilldirect cardstock. Materials used:
- Christmas Red Card
- Buff card
- Giltter
- Glue
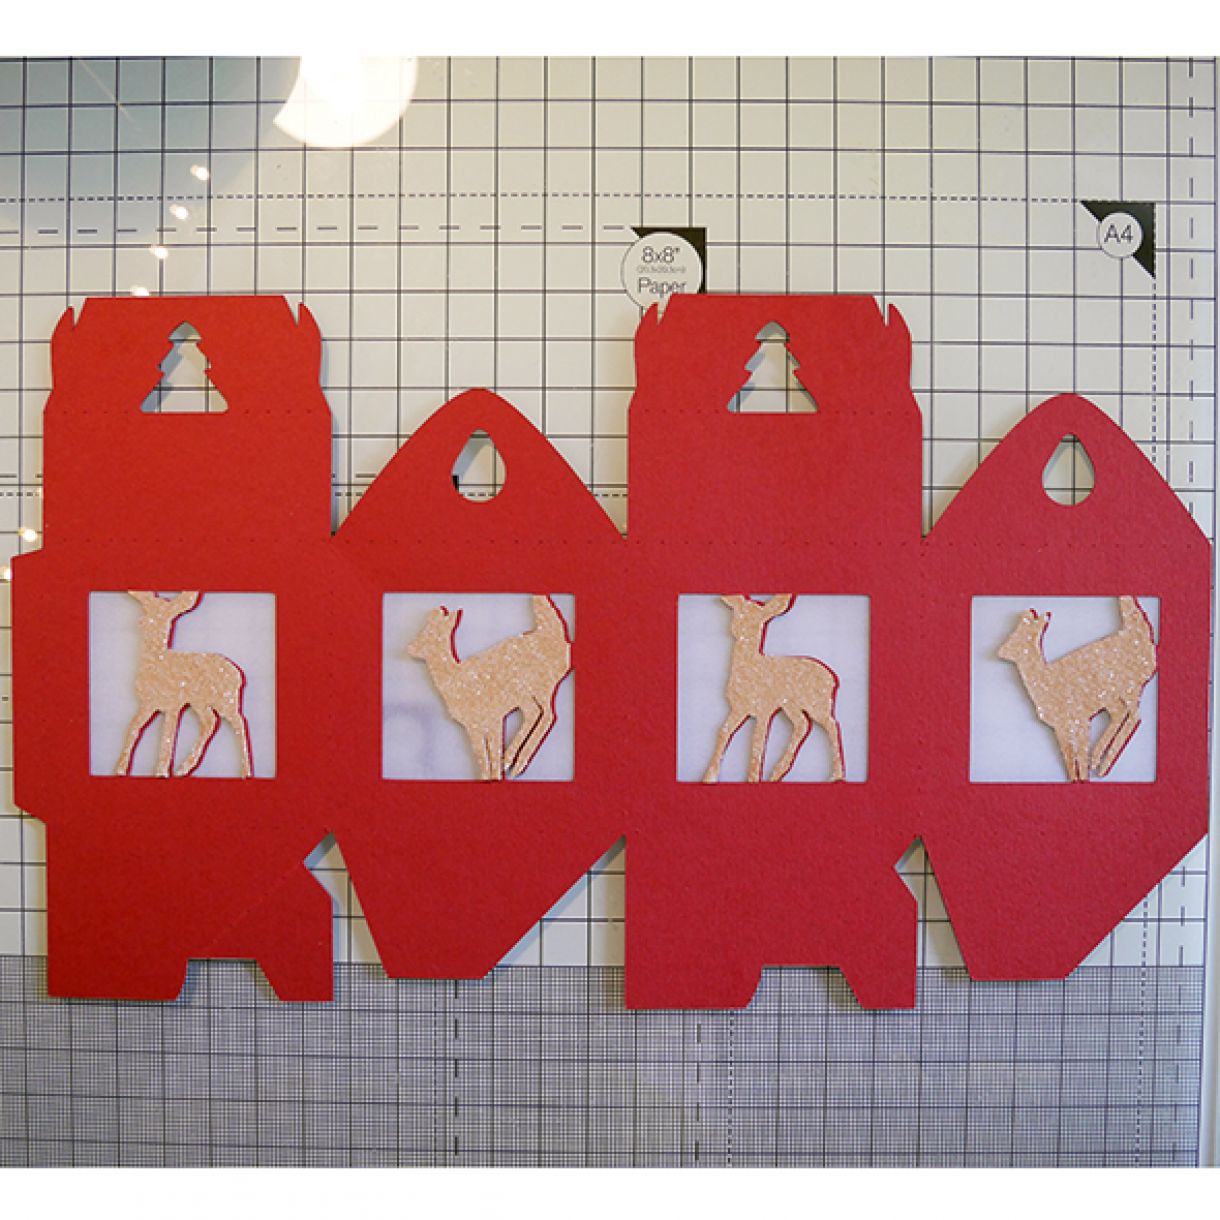
- Oh Deer treat box cut file from the Silhouette design store, available here
I cut the box from the Christmas Red card. This card cuts so beautifully on the Silhouett machine.
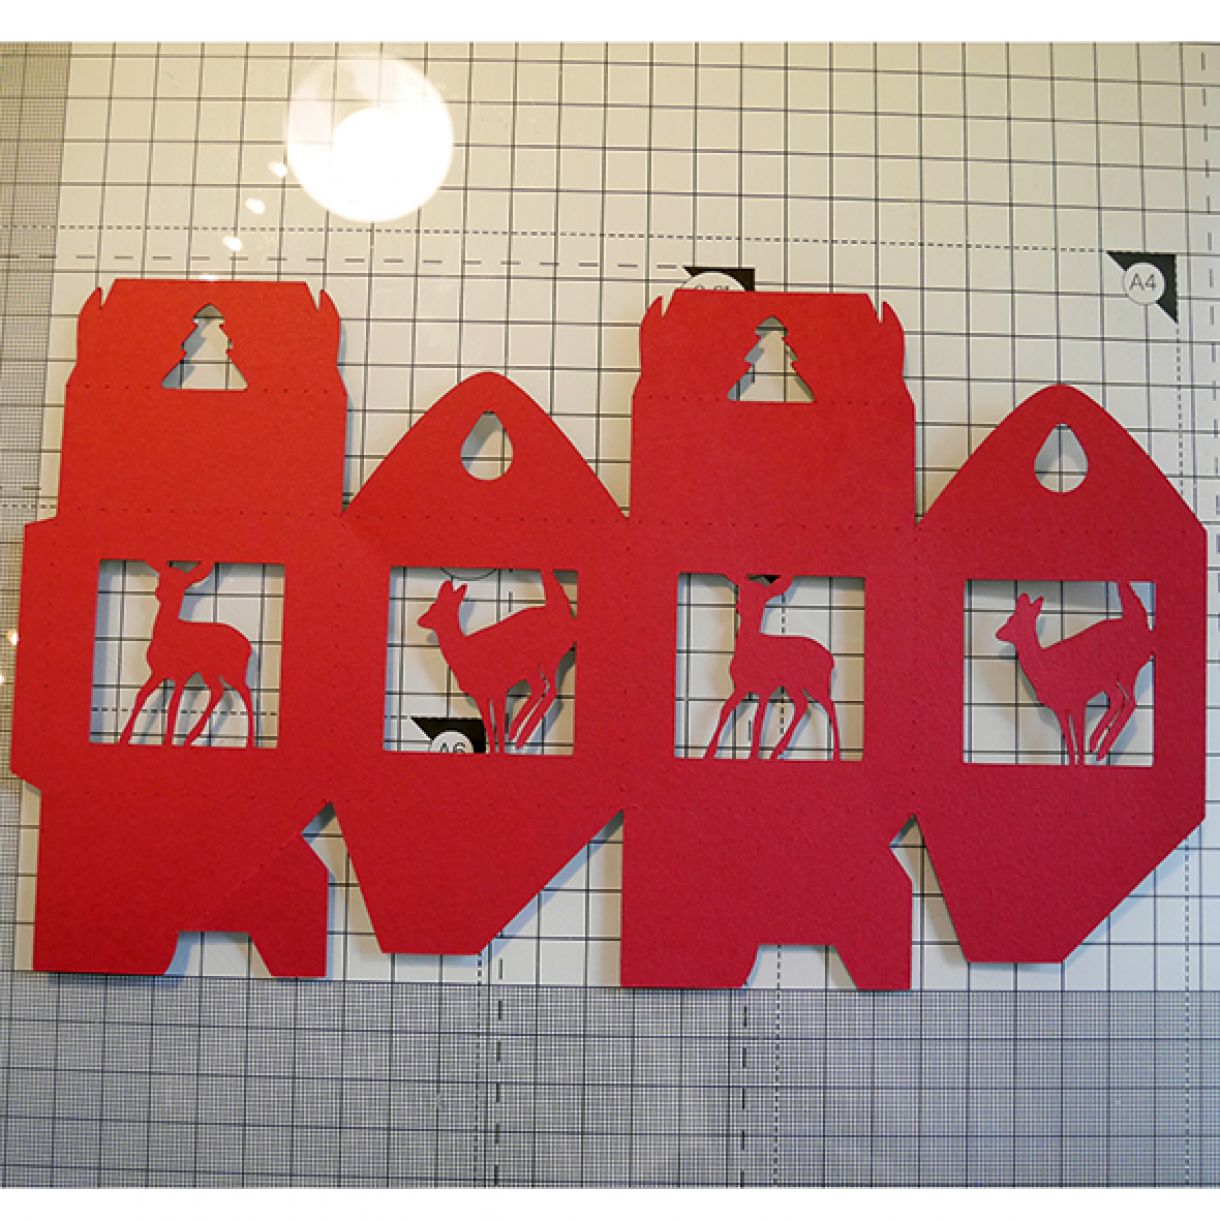
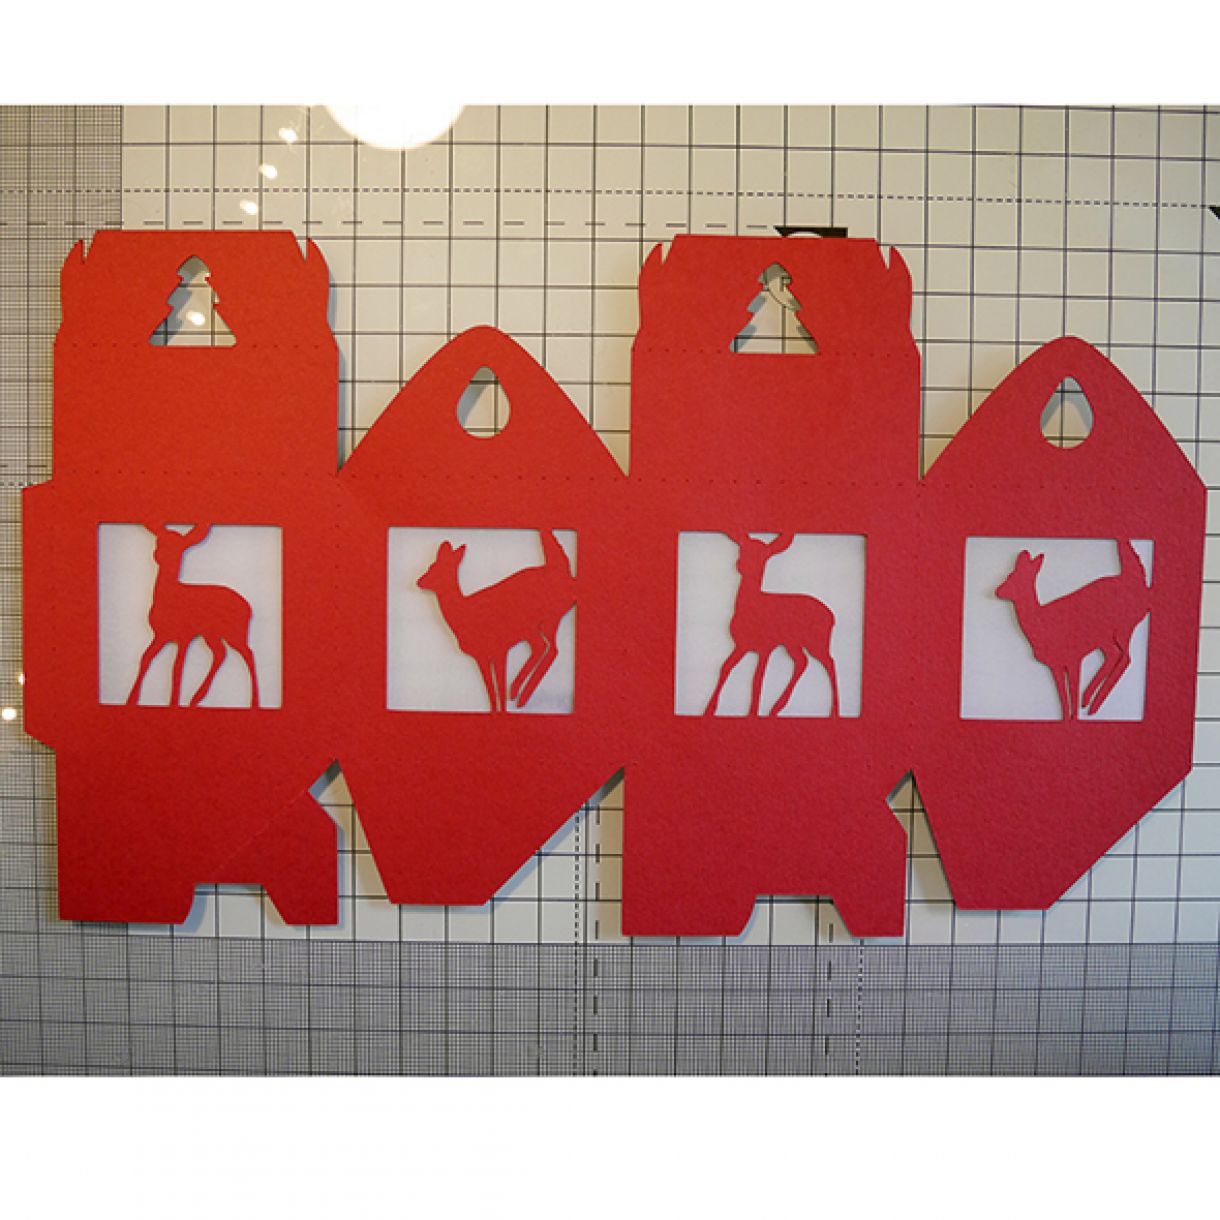
I cut velum squares to put in behind the deer to create windows to turn the treat box into a luminary. I stuck these down on the back side of the box. You can see this below.
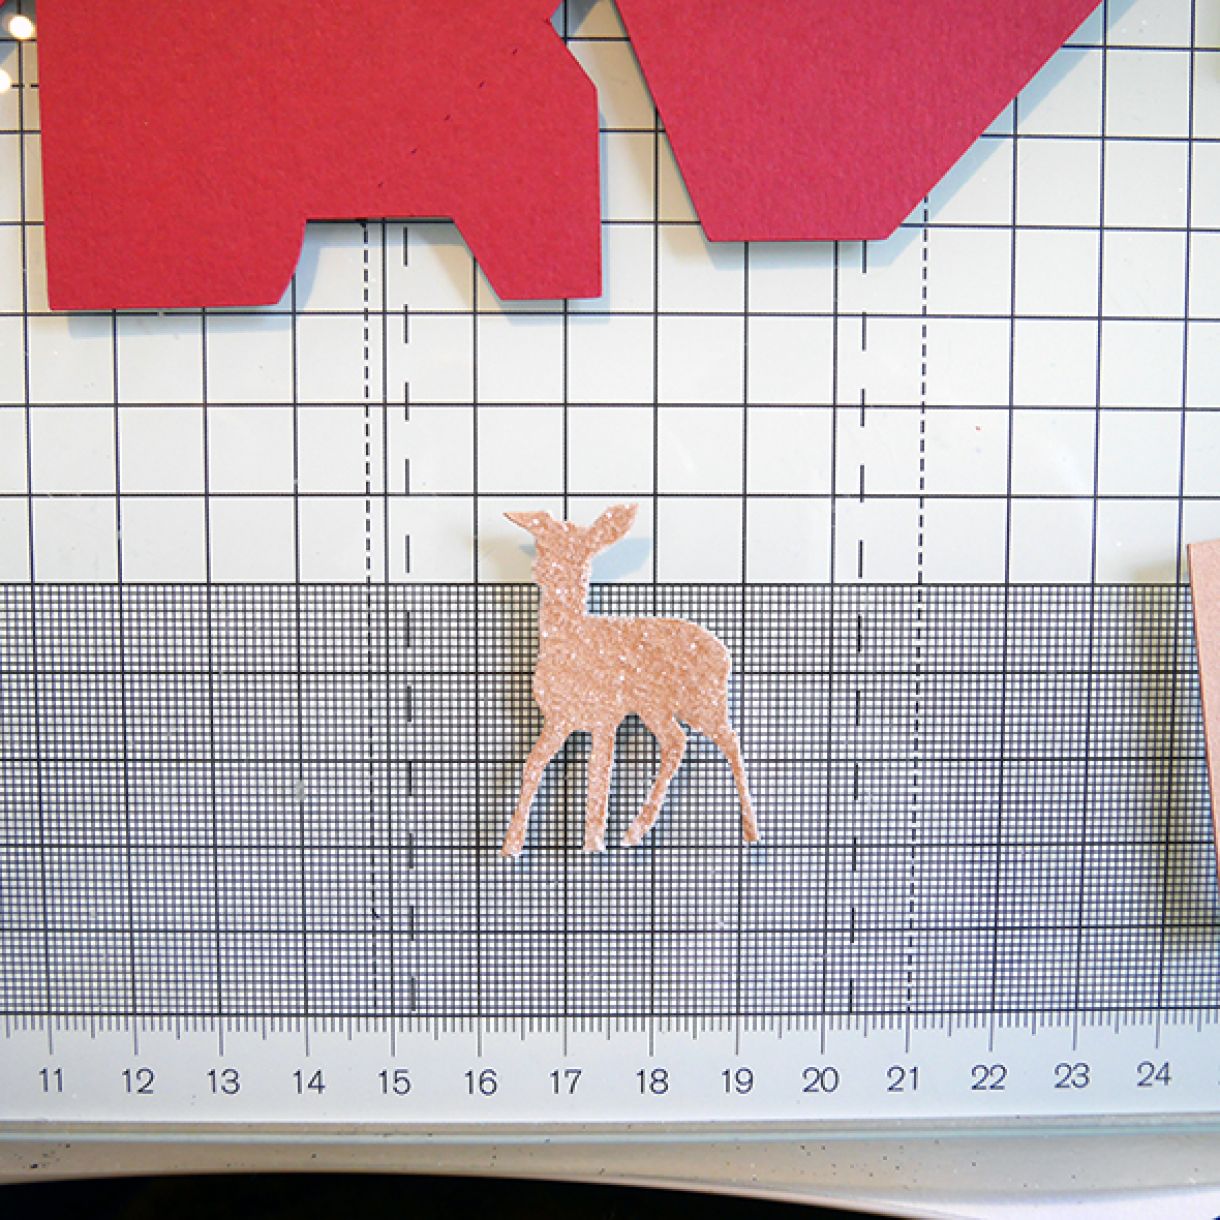
I cut the deer out again from the Buff card and added glitter on the top of them to give some sparkle.
I adhered these glittered deer over the top of the red deer on the box. I slightly off set them so that they looked like thay had a bit of a shadow and it gave more dimension to them.
I then folded up the box and adhered it together and it was done! I put a battery opperated tea light into it. You have to make sure to only use a battery opperated light in these! You can use this as some cute decor on a table, or as cute place settings or even as little gifts.


1 thought on “Mini Christmas Luminary”
Angela Dodson
27th October 2015 at 4:56 p.m.