Make a fun Halloween Party Invitation – A Simple Tutorial
0
Posted on 22nd September 2014 by Angela Dodson
Filed under
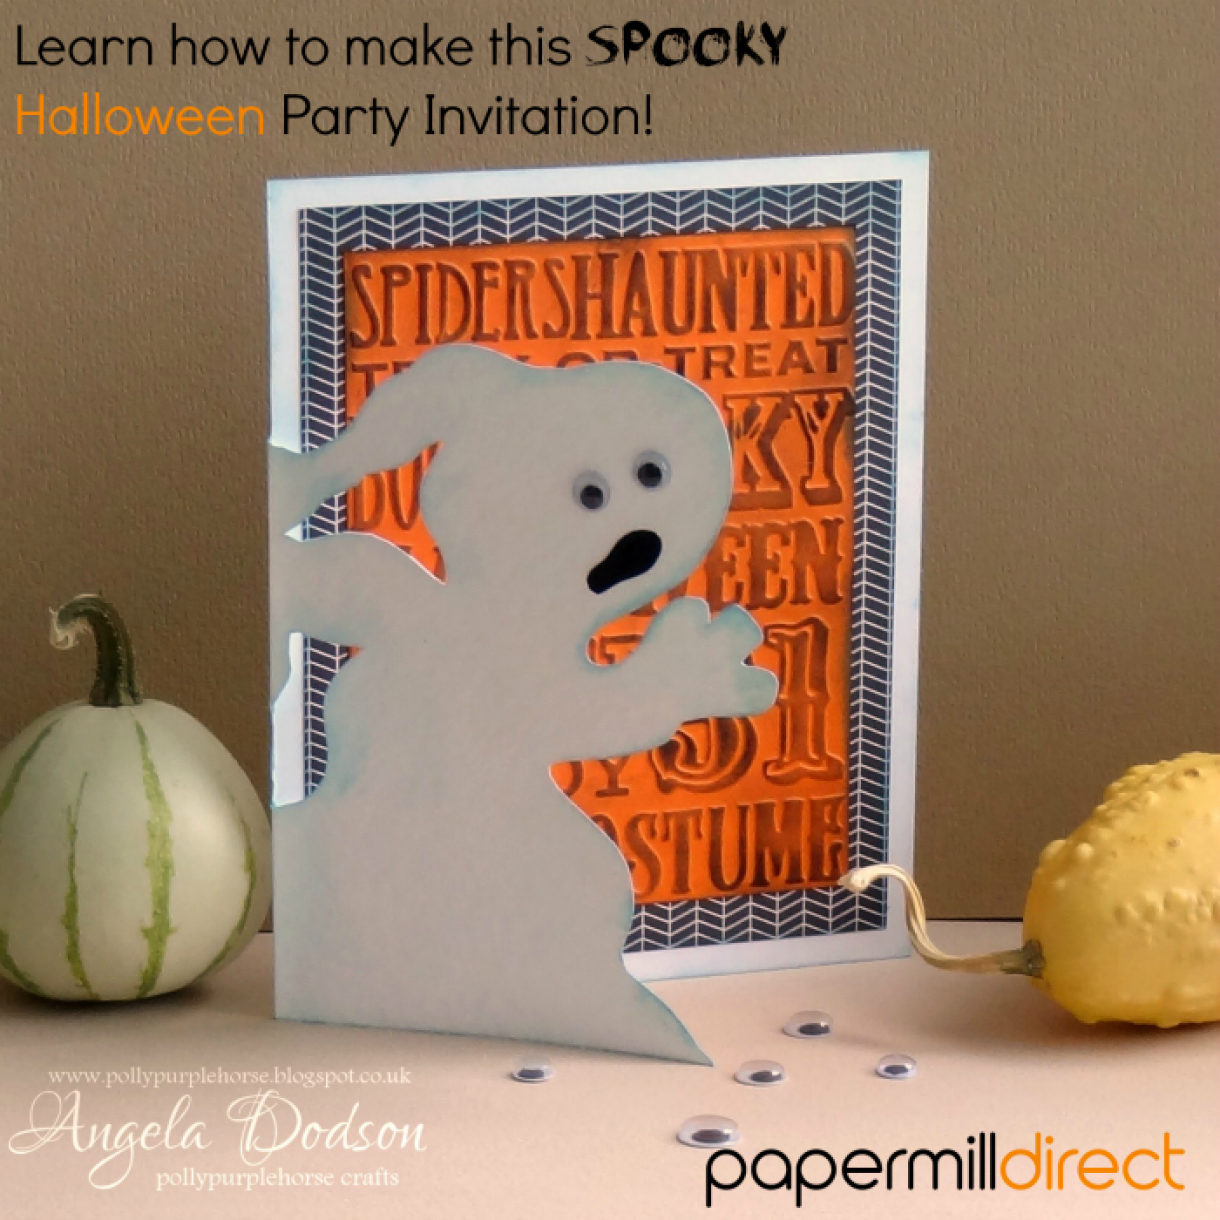
This is a fun and easy Halloween card or spooky party invitation to make and you can of course create any type of character on the front panel. I think Ghosts are easiest as there is really no right or wrong way to draw them, so you can just ‘go for it’. (A materials list is provided at the end of the post) Papermilldirect currently has a special offer on Orange and Black A4 card for your Halloween crafts, take a look to see what you can save.
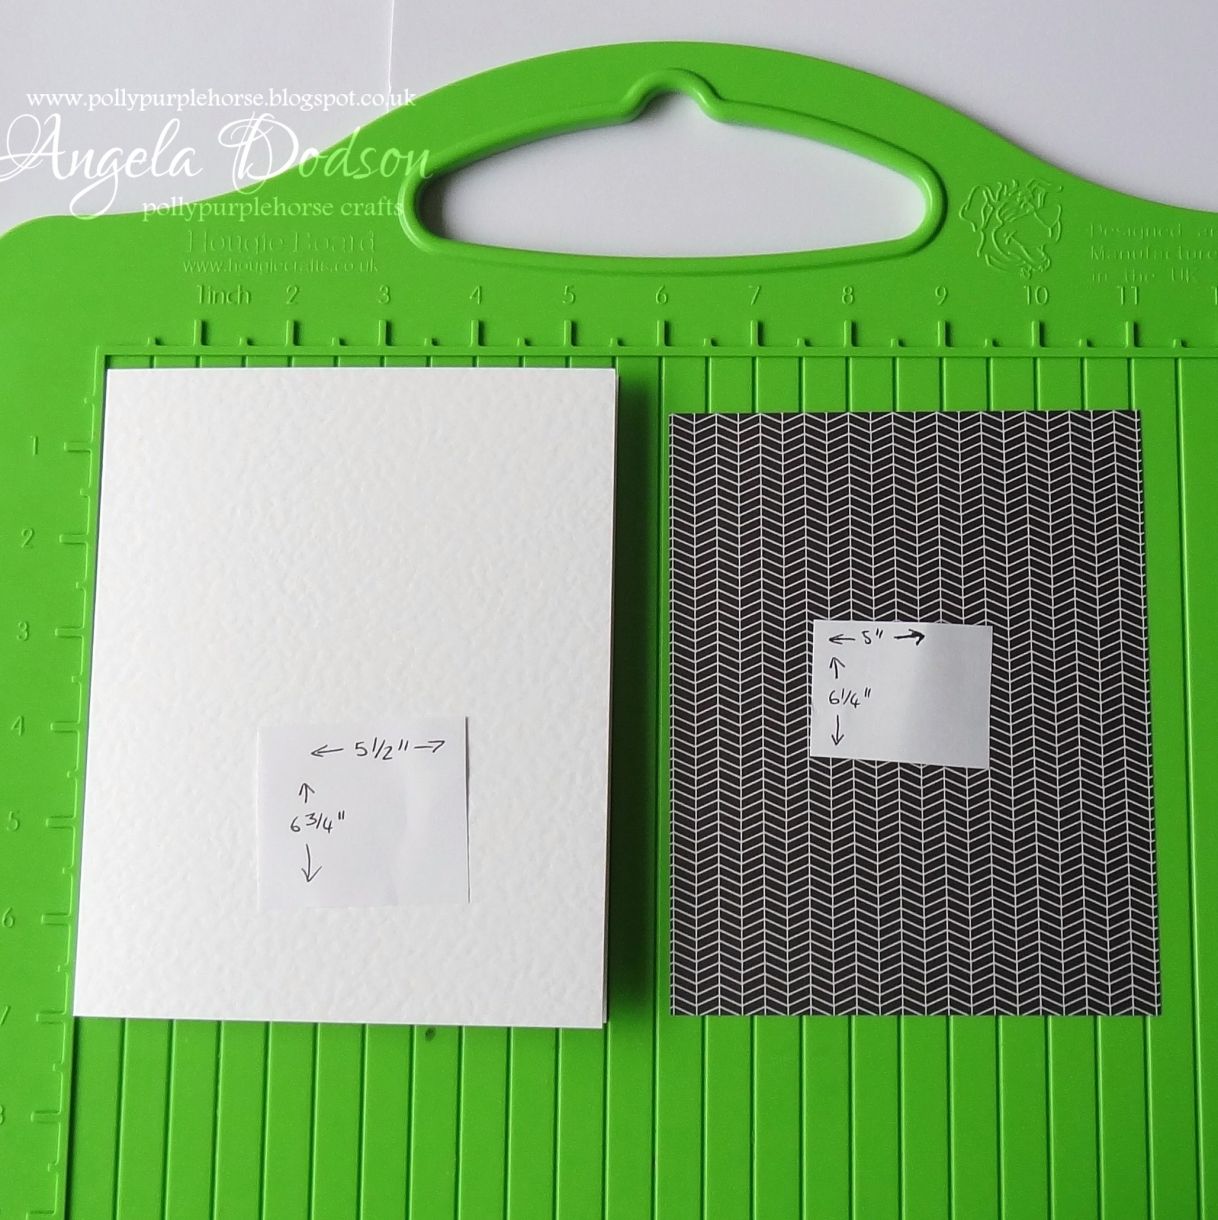
First take an A4 sheet of papermill White Hammered card stock. I chose the hammered as it is a great way to give texture to your ghost .
Fold your card in half and then cut down to create a card blank that measures approx. 5 ½ x 6 ¾” as shown in Pic 1.
Take a piece of your patterned paper and cut this to measure approx. 5” x 6 ¼” also shown in pic 1.
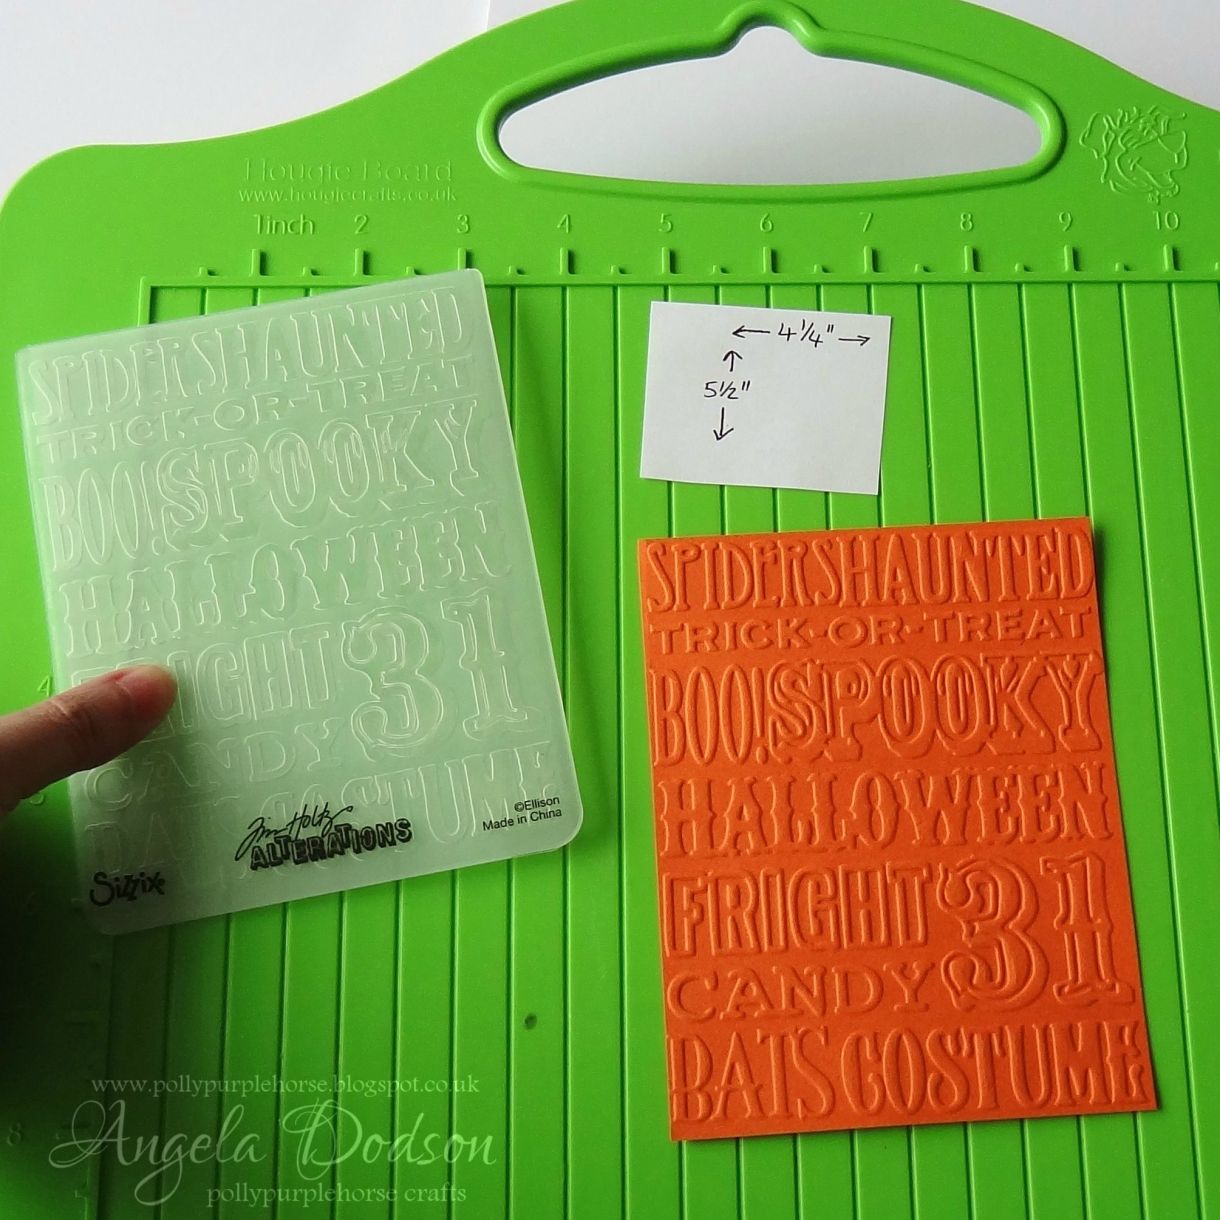
If you have an embossing folder with a Halloween design or even just an interesting background that will suit the theme, then run it through your manual die cutter with a piece of papermill ‘Bright Orange’ card, then trim down to approx. 4 ¼” x 5 1/2” (if you don’t have embossing folders or machine, then simply use patterned paper) Pic 2.
Use distress inks to swipe across the embossed card, I’ve chosen ‘Black Soot’ as it seems fitting for Halloween and also matches with the patterned paper I have chosen. I also used some of the ink around the edges of the panel too. (If you have an ink blending mat or craft sheet then it is best to use it when inking to protect your surfaces, unfortunately mine hid itself hence I'm using copy paper in the pics) When inked, then leave the panel to dry, as the distress inks are water based and we don’t want any colour transfer onto the white card. Pic 3

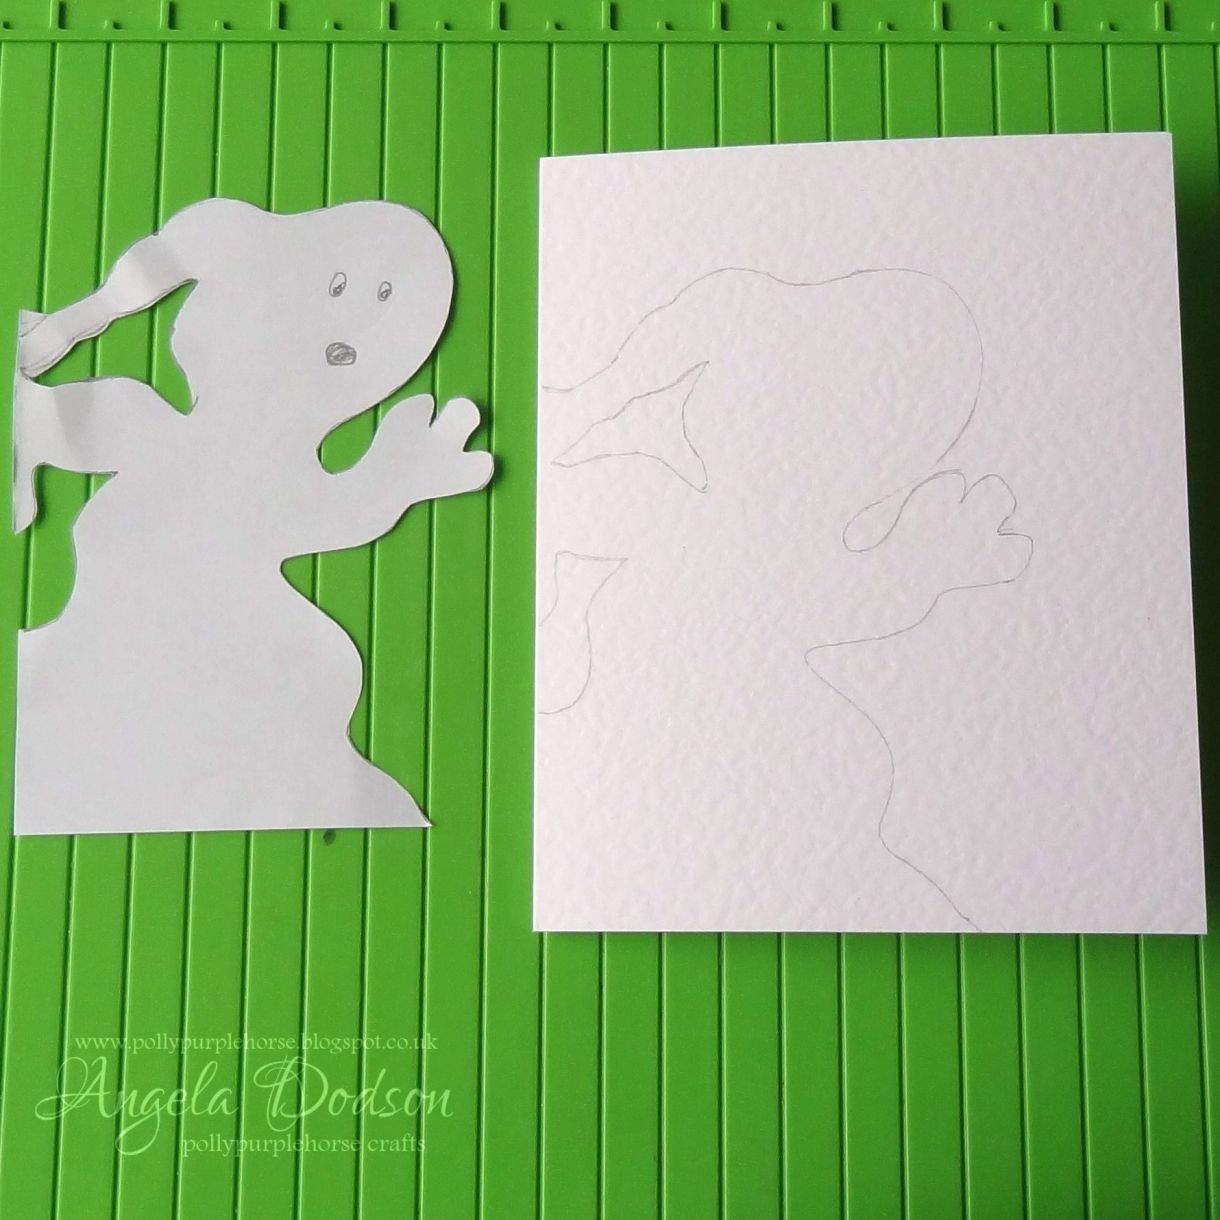
Next job is the fun part; you get to draw your Ghostie!! Now I’m not very good at drawing but thankfully ghosts seem quite forgiving. I practiced drawing on a scrap piece of paper until I was happy with the image, It doesn’t have to be anything too involved, just create a basic ghost outline. The most important thing to consider is how it will form the front panel of your card. You really need to ensure that the ghost will connect with the folded side of your card front and go along the bottom of your card (by approx 3 1/2") to support itself. If you take a look at the pic you can see how it needs to be connecting to keep it sturdy enough to support the card. Once you are happy with your sketched template, cut it out and position it so it touches the fold of the card at the left hand side and lines up with the bottom. Then carefully trace around your template and you have your image all ready to cut away. You can always rub it out and try again if you are not happy with it at this point. Pic 4
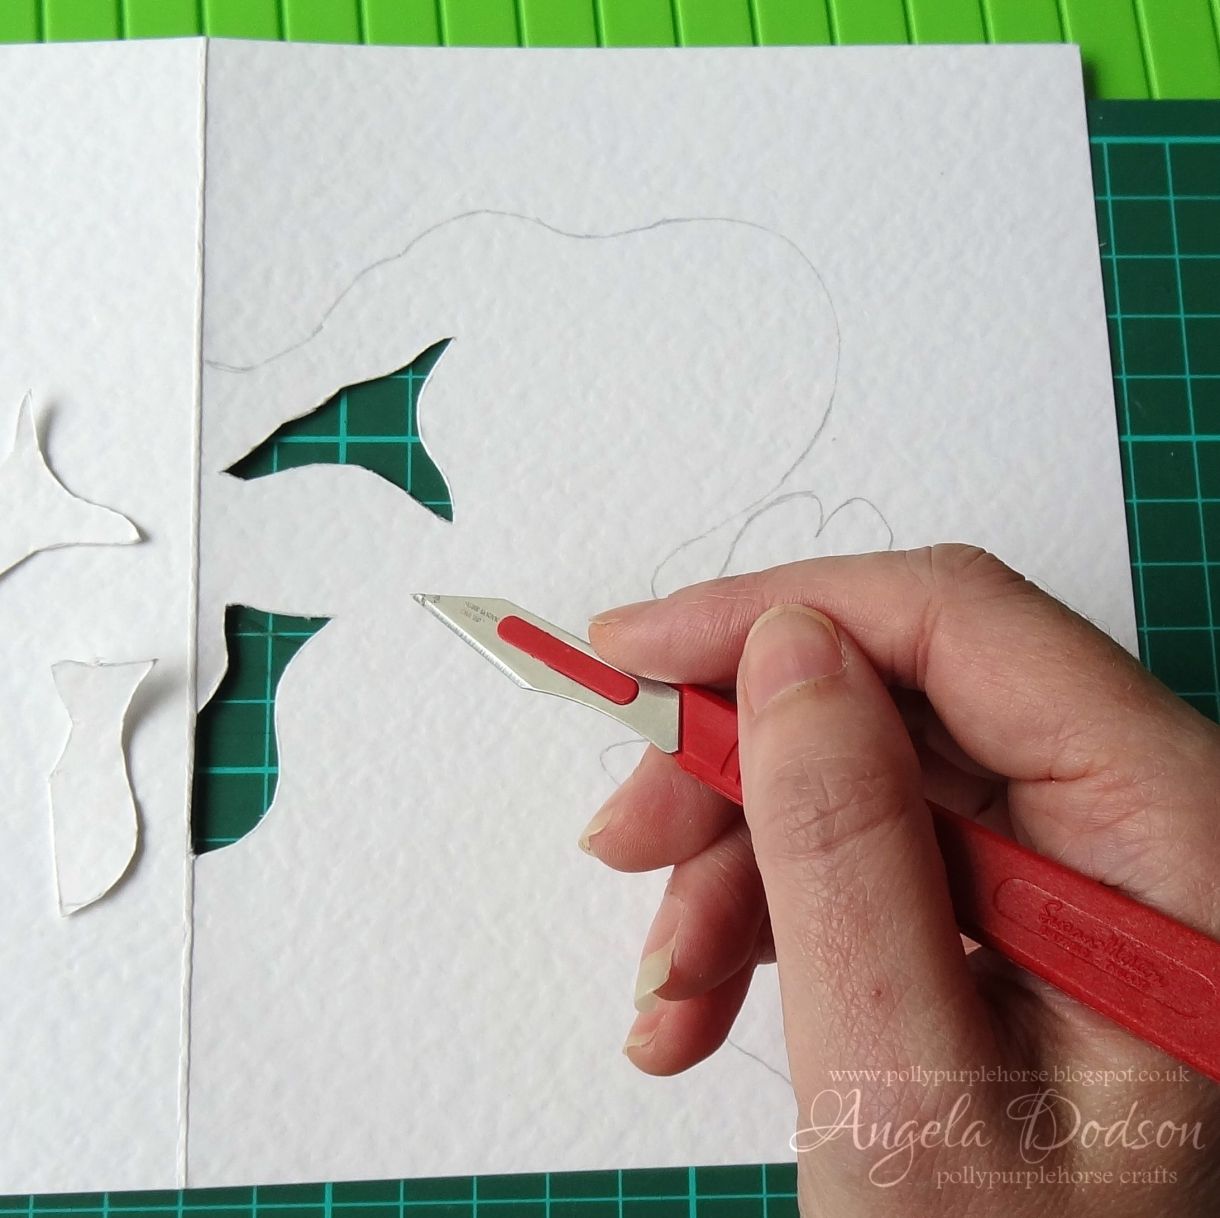
Next is the cutting, (remember to unfold your card so that you are only cutting the front panel) if you have created an image like mine with some ‘island’ pieces to cut out, then I find it easier to cut these out first. You will probably need to use a sharp craft knife and a self-healing mat for these small areas, please take care when using a craft knife and if making this card with your children, this is the part a grown up needs to do. Pic 5
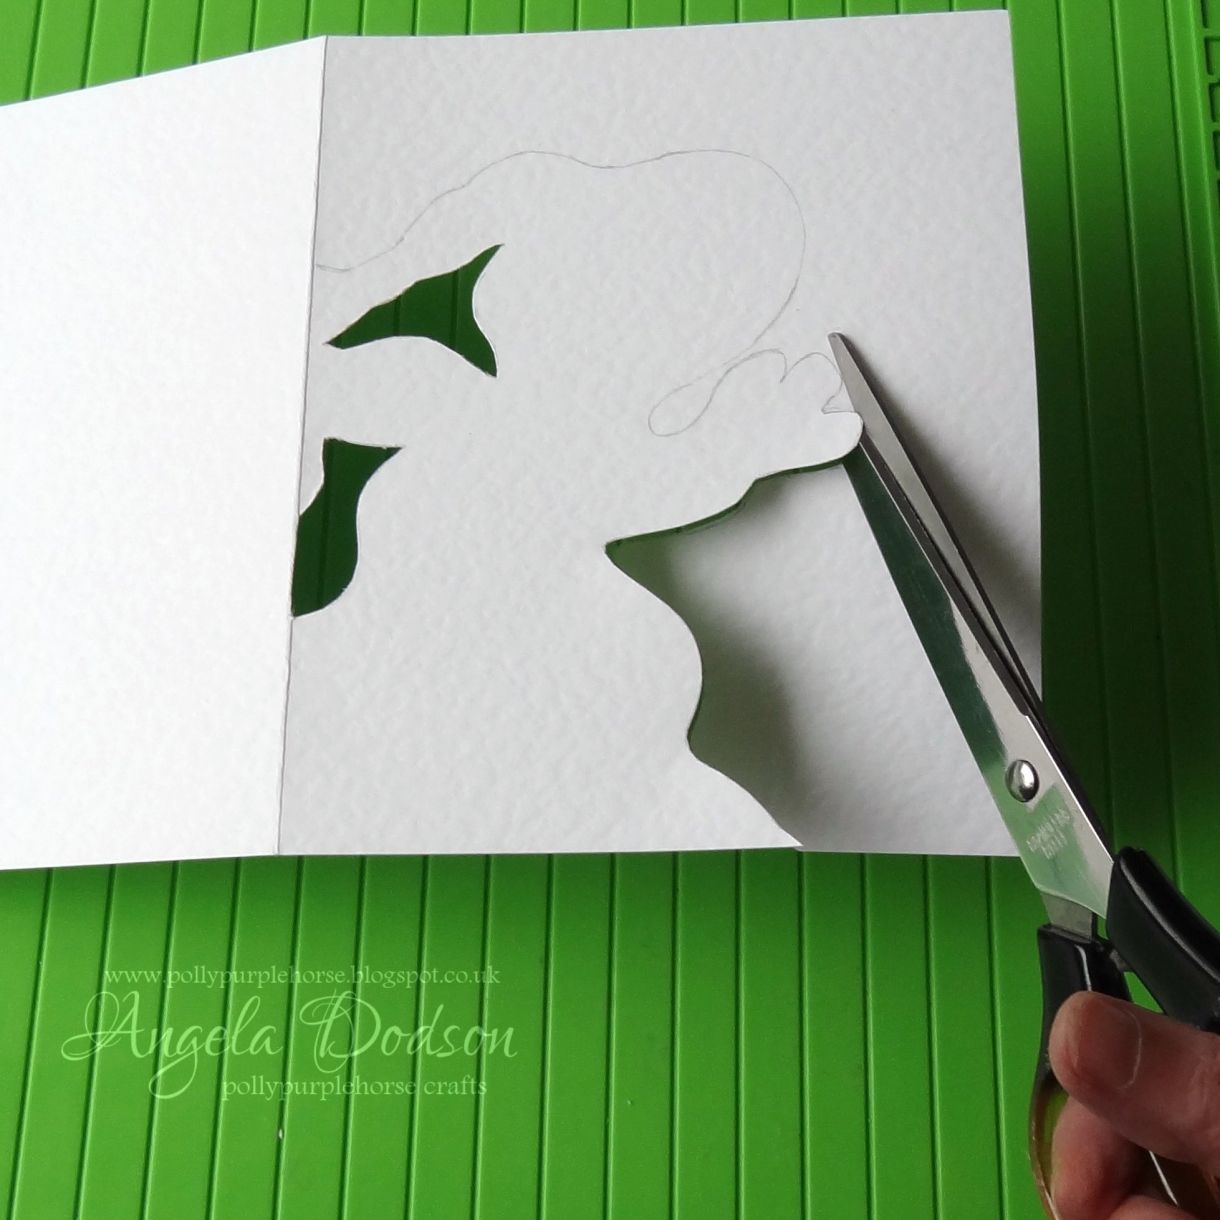
Okay so you have removed the small parts and now you can either continue with your craft knife or use scissors as I have done to carry on cutting out the ghost character. After cutting, just erase any pencil lines still showing on your card front. Pic 6
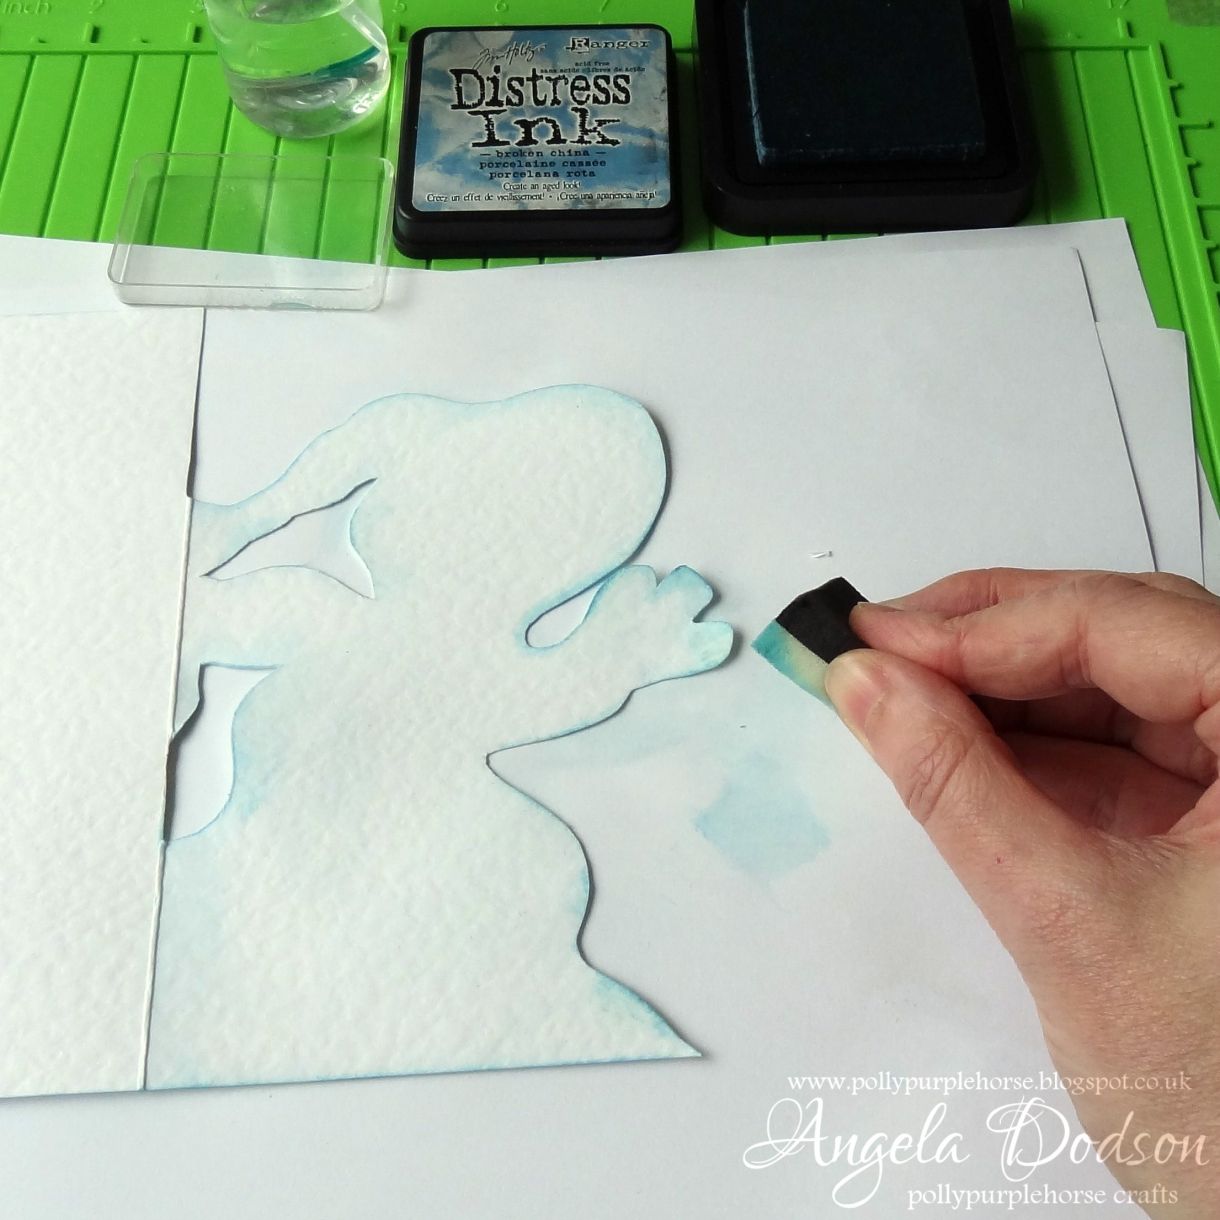
You can give a little definition to your ghost character by using distress ink around the edges. I used ‘Broken China’ which is a blue colour. You can water down the colour by patting a little of the ink onto a mat or dish and then spritzing it with water. I used a piece of cut n’ dry foam to ink around my ghost and also swiped some of the watered down colour across the ghost too, as the card has the hammered textured it adds extra effect to the design.
Whilst you have the blue ink handy you may wish to edge the patterned paper and also the rest of the edges of your card. Pic 7
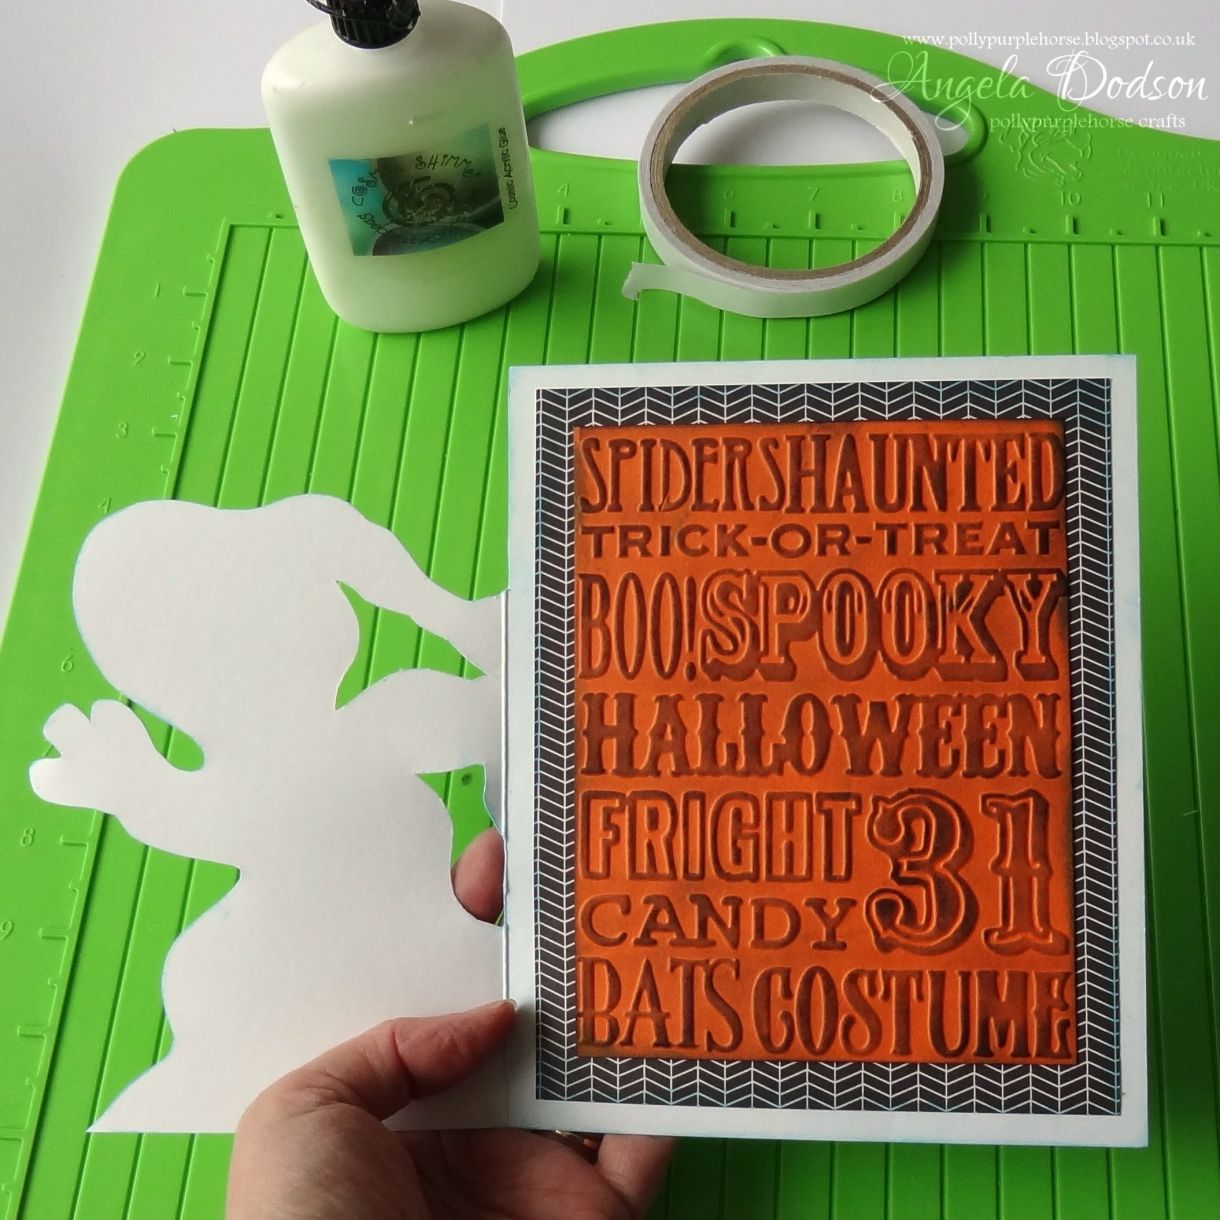
Next is to assemble the inner panels. Take you patterned paper (5” x 6 ¼”) and stick centrally to inside panel of card. (I used double sided tape) Now you can attach the embossed orange panel. As this piece has embossing it is easier to stick in place using a wet glue. (I used Cosmic Shimmer glue). Pic 8
Ok now the ghost needs a face!! Googly eyes are great for this but if you haven’t any they are easy to cut from card. To create the mouth, cut a small piece of black card, it’s fun to experiment and see what different expressions you can achieve simply by altering the shape of the black mouth. Pic 9
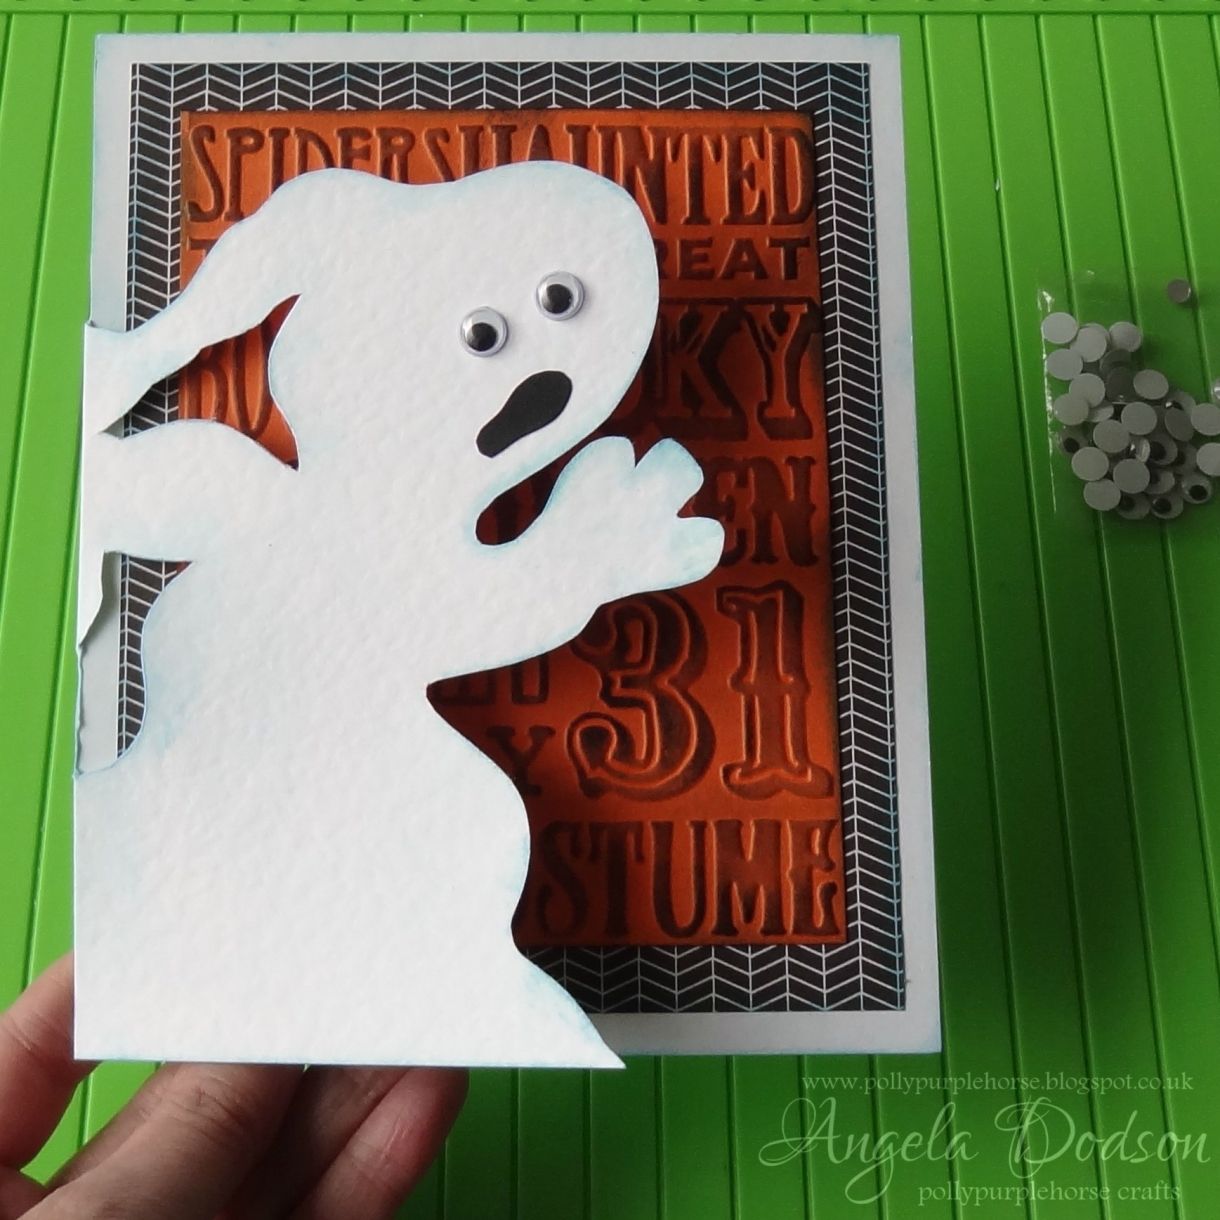
And there you have it, a cute ghost themed Halloween card. Pic 10
You can write your message on the back if using as a greeting card, or just stand it up and use as a Halloween display piece. Why not experiment with other character shapes? A bat card could be fun too, using black card as the base. I would love to see what designs you come up with.
Materials List:
‘White Card Hammered’ – papermill direct
‘Bright Orange’ Card – papermill direct
Tim Holtz Distress Inks in ‘Black Soot’ & ‘Broken China’
(optional) Tim Holtz ‘Halloween Background & Borders’ embossing folders set - Sizzix
Patterned paper ‘Back to Basics Monochrome’ – Dovecraft
Googly eyes, scraps of black card
Adhesives, pencil, scissors, craft knife, die cutting / embossing machine (optional)


Nobody has commented yet
Be the first to comment on this article by using the form below.